www.amulethotkey.com
DXM Quick Start Guide (Single-slot form factor) v1.1 March 2018
QS-MHC4-0003
®
Quick Start Guide
single-slot mezzanine form factor
Remote Workstation Graphics Card for Dell 14G M-series blade servers
DXM
©2018 Amulet Hotkey Ltd. All rights reserved. Information in this document is subject to change. No part of this document may be reproduced through any means including (but not limited
to) electronic or mechanical, without express written permission from Amulet Hotkey Ltd. Amulet Hotkey Ltd may have patents, patent applications, trademarks or copyrights or other
intellectual property rights covering subject matter in this document. PC-over-IP, PCoIP and the PCoIP logo are registered trademarks of Teradici Corp. Amulet Hotkey and ‘solutions you can
bank on’ are registered trademarks of Amulet Hotkey Ltd. Other product names and company names listed within this document may be trademarks of their respective owners. Amulet
Hotkey products are designed and built in the UK.
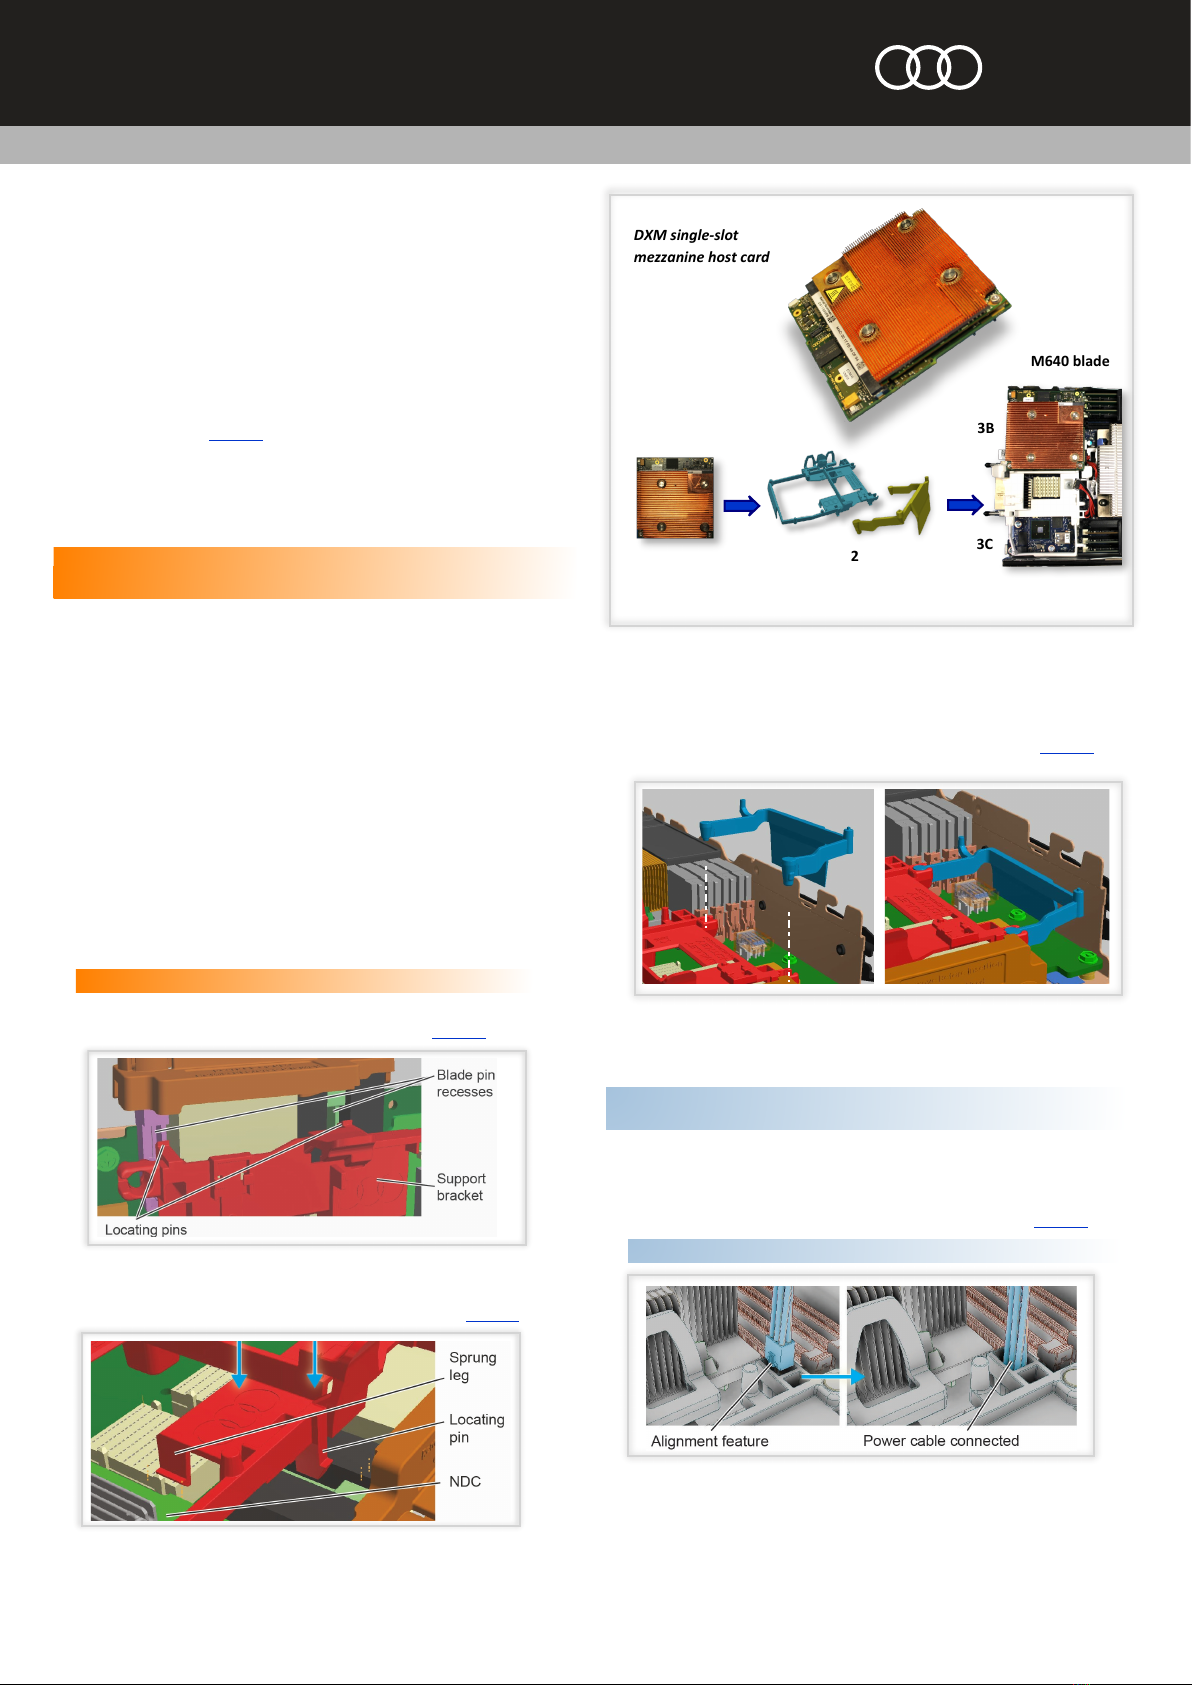
Install the DXM into the mezzanine support bracket
Important!IfyouwillinstallasecondDXMforOctalconfiguration,seethe
sectionOctalconfiguration(optional)first.
1. Align the DXM for mezzanine slot B or C on the mezzanine support bracket.
2. Carefully install the DXM.
Important!Donotpushdownontheheatsinkorthepowerconnectors.
Thiswilldamagethecircuitryortheconnectors.SeeFigure 7.
Figure 8:Installthemezzanineboardsupportclip
Install a second single-slot DXM card (optional)
1. If installing dual PCoIP mezzanine host cards, repeat steps in Connect the
power cable, Install the DXM into the mezzanine support bracket and Install
the mezzanine board support clip to install the second DXM.
Octal configuration (optional)
1. Firmly attach both mezzanine cards to the interconnect PCB as you install.
2. Make sure you align the connectors on the underside of each mezz card to
the corresponding connectors at each end of the interconnect PCB.
Tip: Use a small-bladed screwdriver or similar to press upwards on the
underside of the interconnect PCB.
Important! This connection creates an intentional network loop between the
interfaces on the host cards. You must use Spanning Tree (STP) to put one
interface into blocking mode. Contact Technical Support for guidance.
WARNING
To reduce the risk of fire or electric shock:
-do not disassemble the unit;
-make sure the unit is powered off before you remove
or install components;
-do not expose this appliance to rain and moisture;
-do not expose the appliance to dripping or splashing;
-do not place objects filled with liquids on or near the
appliance.
CAUTION
-Apart from those mentioned in this guide, there are no
user serviceable parts inside.
-Install in accordance with these instructions.
-Do not install near significant sources of heat.
-Ensure the product is properly earthed.
-Only use attachments and accessories approved by
Amulet Hotkey.
-Clean the product only with a dry cloth.
Technical Support
More DXM product documentation and downloads including the dual-slot
Quick Start Guide available here
http://resources.amulethotkey.com/resources
Refer all servicing to qualified personnel.
For further information on this product, for other contact details, or for
If you need to remove the DXM
Be careful to avoid contact between the chip located at the edge of the DXM
and the wall of the blade chassis if removing or replacing the card as this can
cause damage to the chip.
You must take care if removing the DXM card from the blade chassis.
1. Hold the card by the sides. Disconnect the flat power cable.
2. Keep the card level and lift out slowly and carefully.
Power up the blade
1. Close the blade.
2. Push the blade into the chassis and power up.
Set up the DXM
1. See our TechNote for details of the latest approved driver and software
versions.
2. Contact Technical Support for details on how to configure the DXM after
installation.
Auxiliary Power Connectors
Figure 7:PositionofthepowerconnectorsontheMXM
3. Make sure the card sits level on the mezzanine support bracket.
4. Make sure the cable is routed through the cable management feature.
Install the mezzanine board support clip
1. Install the mezzanine board support clip on the edge of the blade chassis.
See Figure 8.
Note:InstallthecliponthenearsidetotheslotwheretheDXMisinstalled.