Amwell Minima Manual

Fixing Instructions
Minima
Delivery Note Number:

Cleaning & Maintenance
Cleaning Laminate Components:
Always start by trying the gentlest method of cleaning. If a stain persists, work through the following steps,
repeating each step several times if the stain seems to be disappearing.
Step 1: For routine cleaning, use a damp cloth or sponge and a mild soap or detergent. Rinse the panels and
dry on completion.
Step 2: For dif
Step 3: If stubborn stains persist, use a non-scratch cleaner scrubbing lightly with a soft bristled brush for 10
to 20 seconds.
Step 4: If a stain persists, apply undiluted household bleach, let it stand for no longer then 2 minutes, and
rinse thoroughly with warm water. DO NOT expose the laminate surface to household bleach for prolonged
periods of time, as this may lead to permanent discolouration.
Step 5: If the surface has been discoloured through long expose to industrial grime, clean carefully with a
cream cleaner containing a mild abrasive.
DO: Always rinse thoroughly after cleaning (residue from cleaning solutions is the single greatest cause of
damage to laminate surfaces).
DO: Wipe up spills immediately, and rinse thoroughly.
DO NOT: use acidic or abrasive cleaners, expose the laminate to household bleach for prolonged periods of
Cleaning Ironmongery:
Powder Coated products should be cleaned at no more than three month intervals. Detergent diluted with
warm water should be used. A soft cloth, natural sponge or a soft bristle brush may be used. Abrasive
materials should be avoided. White spirit may be used to remove oil or grease deposits, but strong solvents
must be avoided. The coated items must be thoroughly rinsed following the use of detergents.
Metallic surfaces should be cleaned as detailed for powder coating. Care should be taken in order avoid
scratching the metallic surface.
Maintenance of Ironmongery
Cubicle locks and hinges should be wiped clean. A moderate amount of silicone type lubricant (such as
WD40) should be applied periodically to all moving parts, with any excess promptly removed. Excess use of
lubricants may attract dust, which will increase the wear rate of moving parts. It is imperative that the
as required.
General Comments:
In order to avoid water marks/ lime scale build up, standing water should be removed from horizontal
surfaces. Any water that has splashed onto a panel edge should be removed immediately.
Minima Page 2

Recommendations for 12.5mm Solid Grade Laminate
Machining
• The machining of Compact laminate should be done using tungsten carbide tipped blade/ cutters or metal
cutting tools.
Cutting
• In order to obtain a clean cut, we suggest the use of carbide tipped saw blades with trapezoidal and as
many teeth as possible or a jigsaw with a metal cutting blade. However, alternating teeth can be equally
suitable, but the cut will not be as clean.
• Best r
Precision Cutting
y, sawing the
panel slightly oversize and then re-cutting the edge to the precise measurement using a tungsten carbide
tipped router cutter of the required pr
Grooving
• Compact can be grooved using a saw blade or router cutter with tungsten carbide tips.
• The depth of the groove must not exceed 1/3 of the Compact thickness.
Drilling
• Carbide bits with 3 prongs give best results (helicoidal bits) and can be used in preference to high-speed
steel drills.
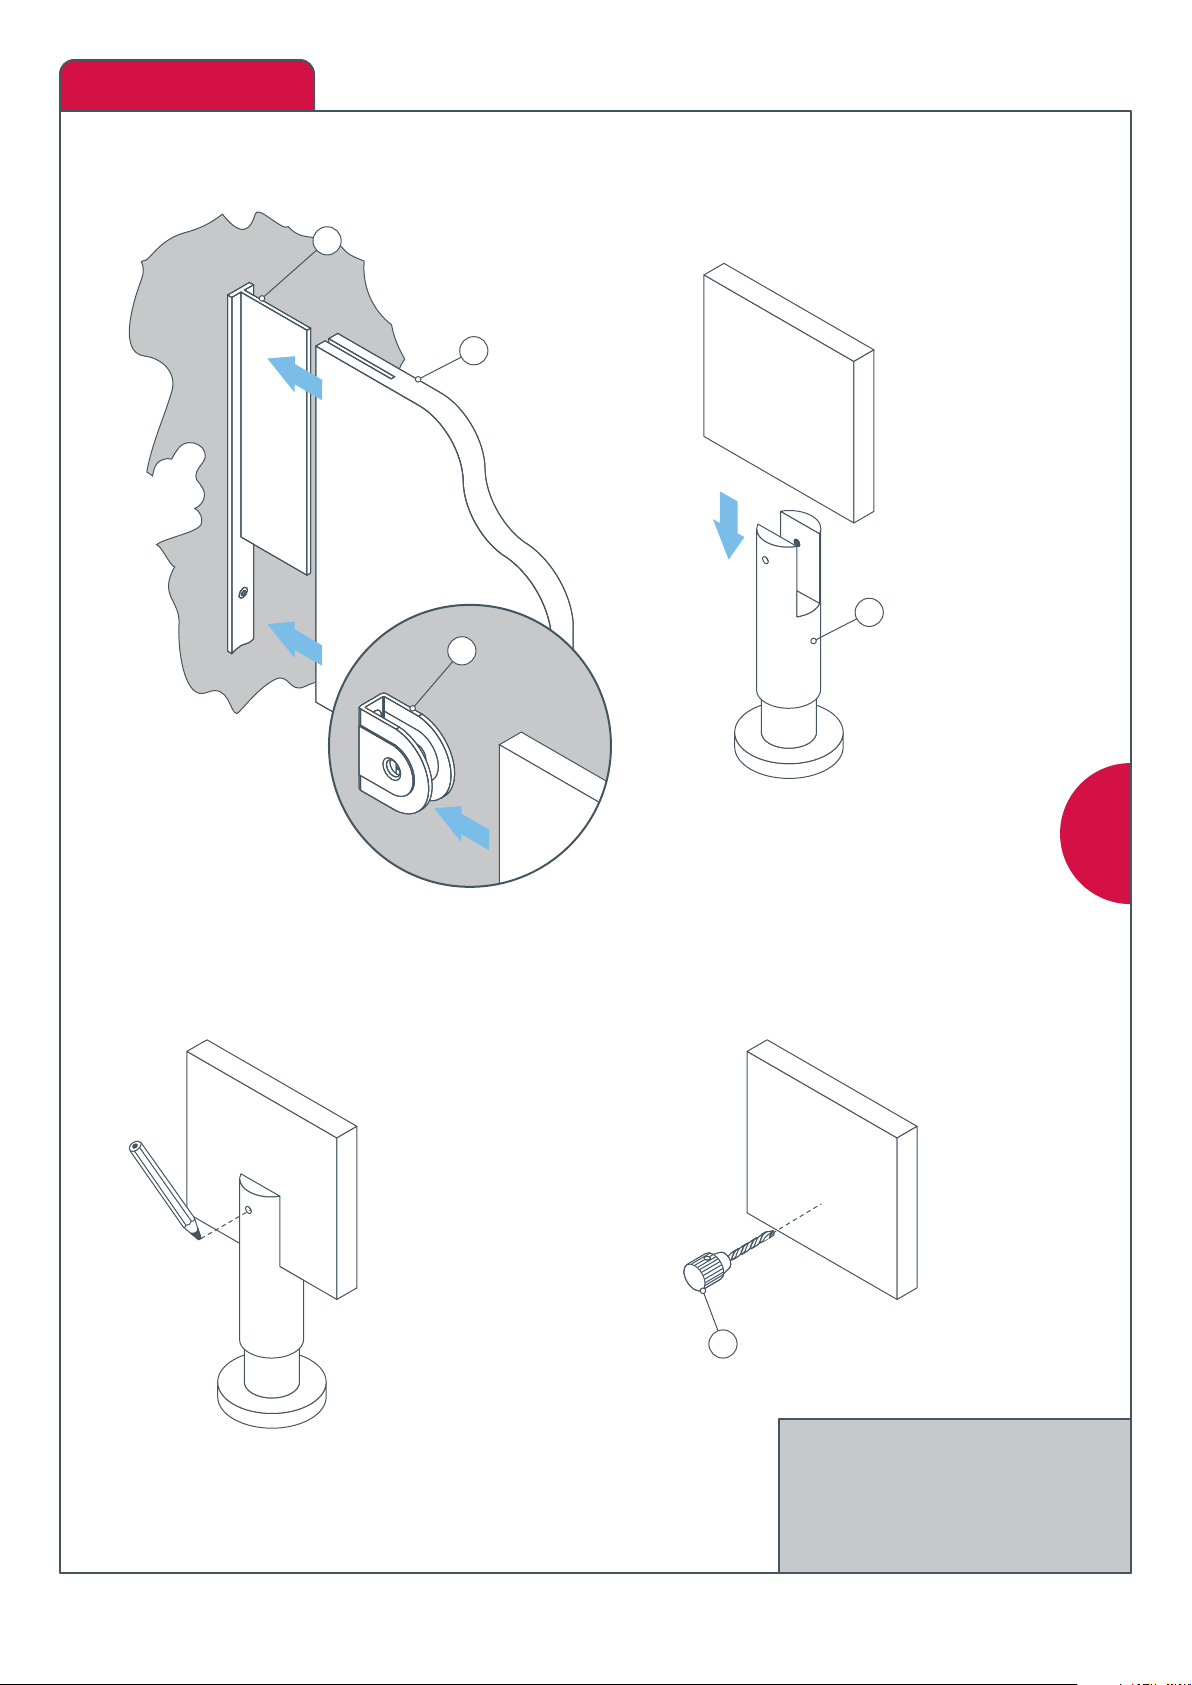
• Holes can be drilled through part of the thickness or through the whole. In the case of stopped holes, a
minimum thickness of 1.5mm to 2mm of the laminate must remain (i.e. maximum depth of hole = 11mm). A
minimum of 1mm of space must remain between the tenon, screw tip or insert and the bottom of the hole
(otherwise ther
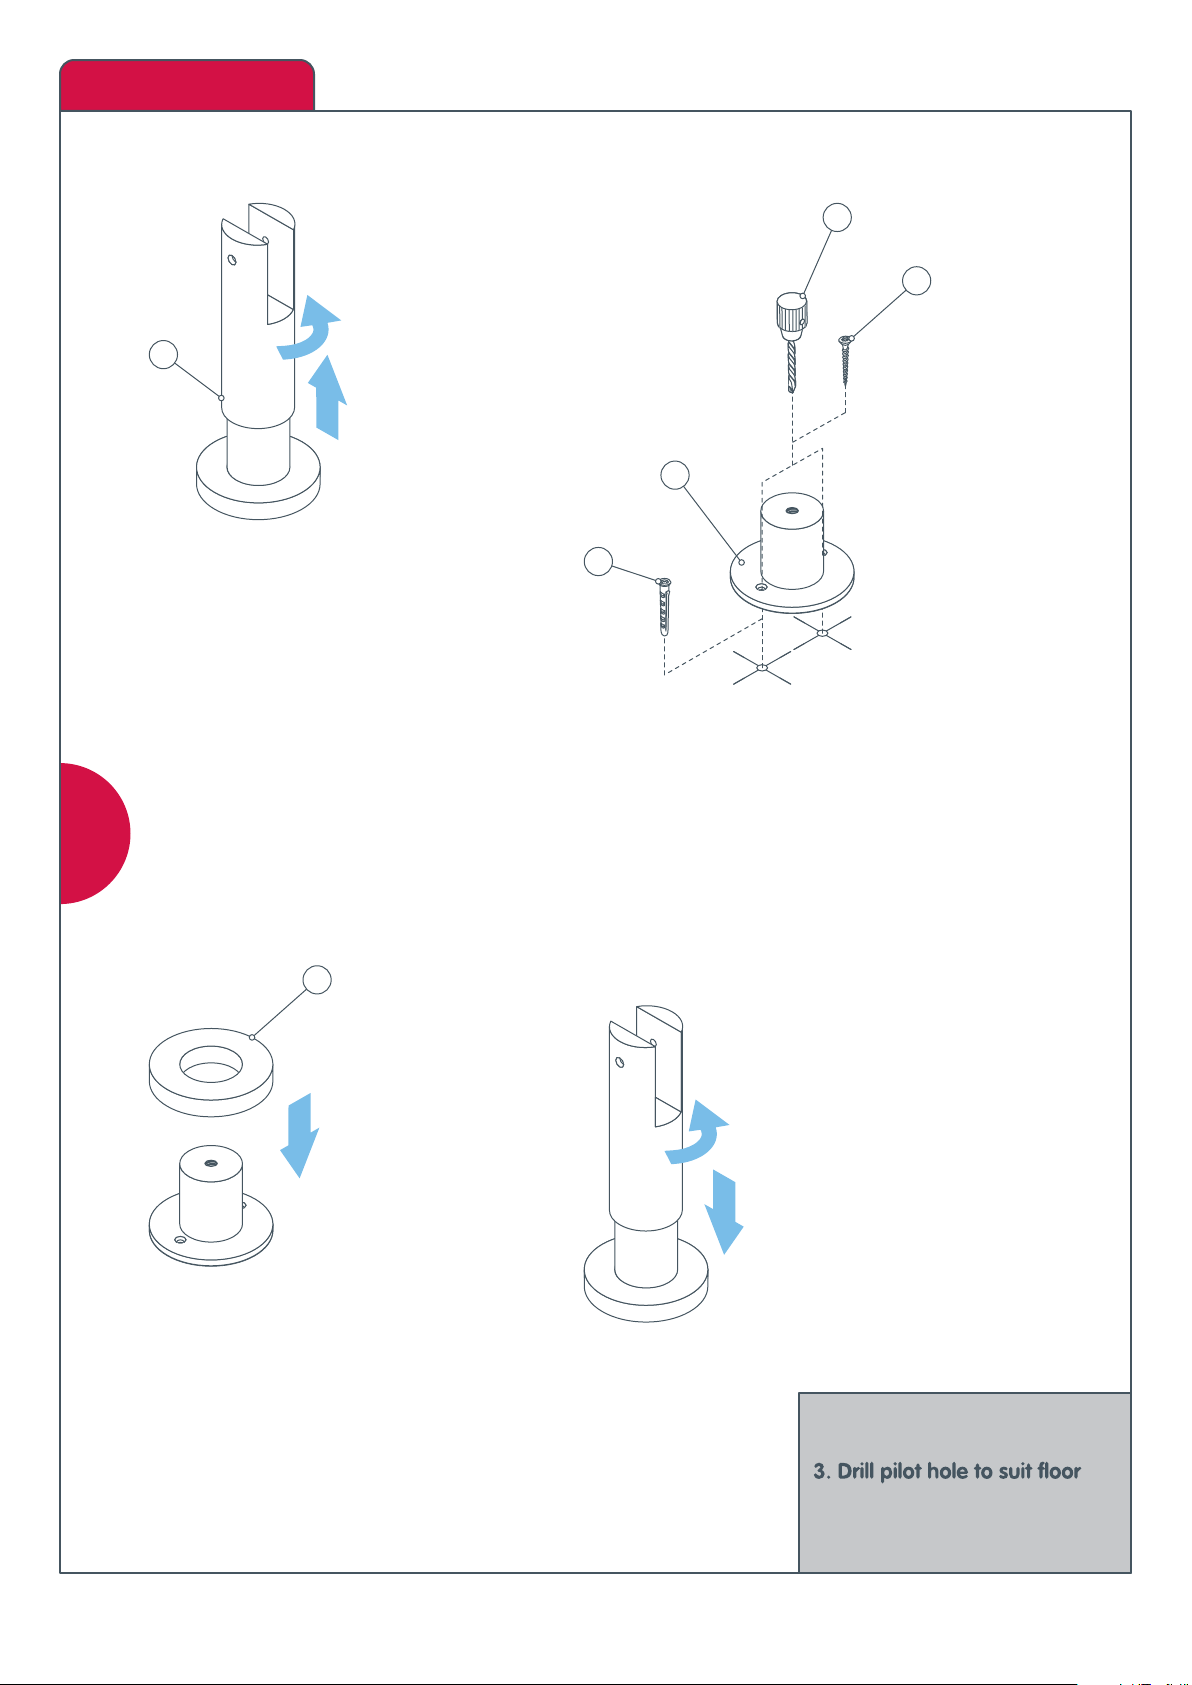
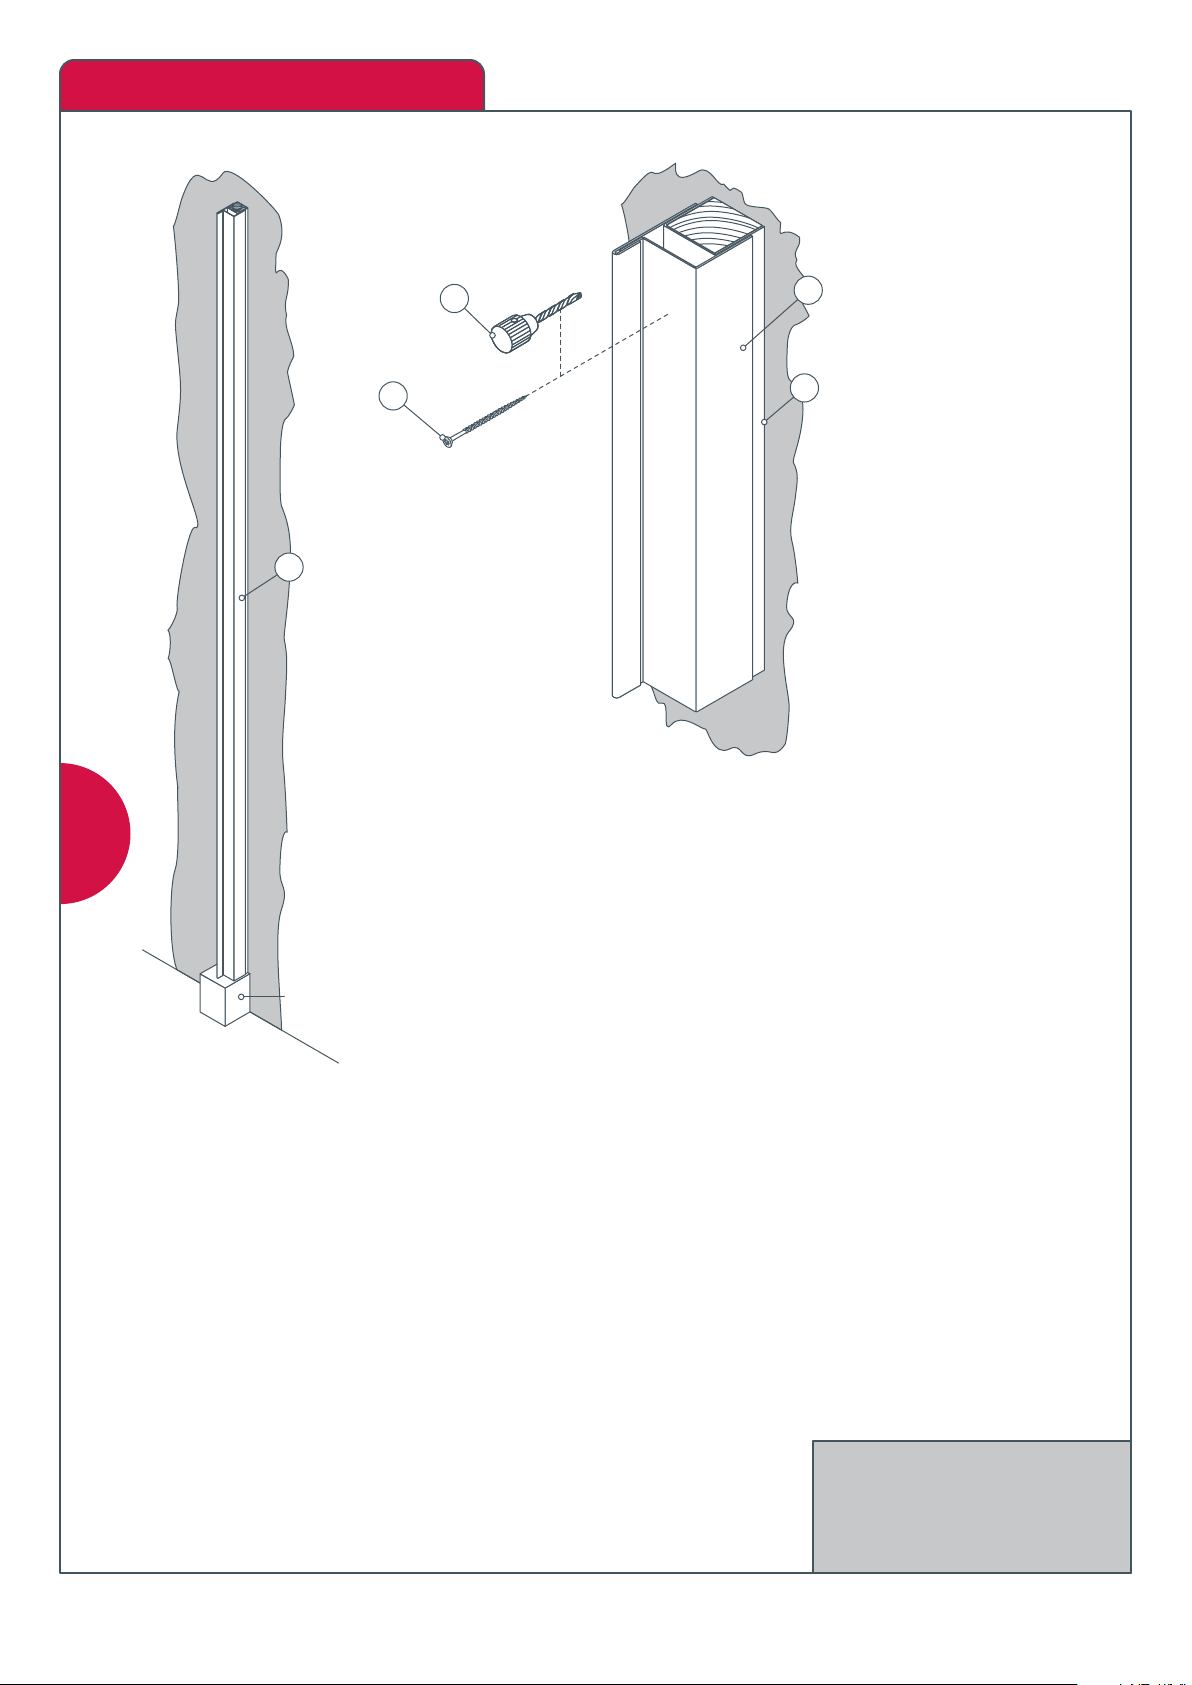
• Pilot hole diameters for self tapping screws are: 3.5mm - No.6 screw; 3.5mm - No.8 screw; 4.5mm - No.10
screw; 5mm - No.12 screw.
Cut-Outs
• Square Cut-outs:- Drill the four corners with at least a 10mm diameter hole and, starting from one of the
holes, use a jigsaw with a metal cutting blade, cutting in straight lines, join the holes and square into the
cor re removed to avoid injury.
• Oval or Circular Cut-outs:- For example, cutting a basin hole into a vanity top. Drill a single 10mm diameter
hole and, starting from the hole, cut according to template using a jigsaw with a metal cutting blade. Finish
re removed to avoid injury.
Resizing and re-edging pr
• We would recommend that you cut the panel as previously described and trim to size using a ‘TREND’ Sunk
th a 300 grit sand paper.
• Polish as described below.
Finishing edges
• In order to eliminate machine-cutting imperfections created at the edges of the Compact, sand with a 300
• To obtain darker edges, rub the edge with a cloth soaked in linseed oil or wax. Leave to dry for 30 minutes
and wipe off. Sharp edges must be smoothed to avoid injury.
Minima Page 3

Typical Cubicle Layout
Minima Page 4

1
Minima Page 5
T-Section to Wall Fixing Details (HPL Only)
1. T-Section
2. Drill to suit wall type
3. No. 8 x 2” csk screws
i)
ii)
Please note: Ensure walls are
level prior to installation
100mm
Please note: Ensure walls are
level prior to installation
600mm
600mm
600mm
200mm
Channel Bracket to Wall Fixing Details (SGL Only)
1. Channel bracket
2. Drill to suit wall type
3. No. 8 x 2” csk screws
i)
ii)
1
3
2
1
3
2

2
Pedestal Fixing Details
1. Pedestal body
2. Pedestal base
4. Rawl plug
5. 50mm x 5mm csk screw
6. Cover rose
i) ii)
iii) iv)
Minima Page 6
5
3
2
4
1
6

3
Partition Fixing Details
1. T-section
2. Partition
3. Channel bracket
4. Pedestal body
5. Drill 4.5mm dia. through hole
i) ii)
iii) iv)
Minima Page 7
2
1
3
F
o
r
S
G
L
P
a
r
t
i
t
i
o
n
s
:
i)
4
Inside face
of partition
Inside face
of partition
5

3
Partition Fixing Details (Continued)
v)
vi)
6. Drill 5mm dia. holes 13mm deep (to line up with holes in t-section)
7. M5 x 12mm snake eye screws
8. Drill 8mm dia. through holes
9. M6 x 14mm csk socket stainless steel screw
10. Multirol barrel
11. T-nut screw
12. Allen key
Minima Page 8
Inside face
of partition
6
7
F
o
r
S
G
L
P
a
r
t
i
t
i
o
n
s
:
8
9
10
v)
Inside face
of partition
11
12

4
Intermediate/Return End Pilaster Fixing Details
1. Intermediate/return end pilaster
2. T-section
3. Drill 3mm dia. through hole
4. No. 8 x 1” csk screws
5. Channel bracket
6. Partition
7. Drill 4.5mm dia. holes 13mm deep
(to line up with holes in T-section)
8. M5 x 12mm snake eye screws
9. Drill 8mm dia. through holes
10. M6 x 14mm csk socket stainless steel screw
11. Multirol barrel
i) ii)
Minima Page 9
1
2
3
4
6
iii)
7
8
F
o
r
S
G
L
P
a
r
t
i
t
i
o
n
s
:
iii)
11 9
10
F
o
r
S
G
L
P
a
r
t
i
t
i
o
n
s
:
i)
5
F
o
r
S
G
L
P
a
r
t
i
t
i
o
n
s
:
ii)

Minima Page 10
5
Wall End Pilaster Extrusion Fixing Details
1. Wall end pilaster block
2. Wall end pilaster extrusion
3. Drill to suit wall type
4. No.10 x 3” screws
i) ii)
2
1
3
4
1
A = 100mm
support block
(supplied by others)
A

Minima Page 11
6
1. Headrail
2. Circular Saw
3. Pilaster
4. Partition
5. Drill 4mm dia. hole into pilaster wooden insert
6. No. 10 x 75mm round head screw
Headrail Fixing Details
i)
ii) iii)
Please note:
If possible always ensure
that cut end is positioned
against wall
A
A = Cut length to suit
A
1
2
4
3
5
6

Minima Page 12
7
HPL Hinge Fixing Details
1. Door
2. Hinge top
3. Drill 2mm dia. pilot holes
4. No.8 x 1” csk screws
i)
ii)
Fig B. Outward Opening Door Hinge
Fig A. Inward Opening Door Hinge
Please Note: Left & Right
Hinge Variant
Please Note: Left & Right
Hinge Variant
For Inward Opening Doors:
For Outward Opening Doors:
1
3
4
2
5
3

Minima Page 13
7
i)
i)
3
2
1ii)
4
5
For Inward Opening Doors:
Fix hinge to inside face of door
For Outward Opening Doors:
Fix hinge to outside face of door
SGL Hinge Fixing Details
1. Door
2. Hinge top
3. Drill 5mm dia. holes
4. M5 x 10mm snake eye screws
8
Door Fixing Details
1. Pilaster
2. Partition
3. Hinge body
4. Drill 3mm dia. holes
5. No.8 x 2” csk screws
6. Hinge top
7. HPL/SGL door
1
2
3
5
4
i) 6
7

Minima Page 14
IMPORTANT NOTE:
Red indicator must be
lined up with bolt
locked position
9
Indicator Bolt Fixing Details
1. Back base plate
2. Indicator turning thread
3. Front base plate
4. Screws
5. Back cover plate
6. Front cover plate
7. Indicator bolt
8. Grub screw
9. Allen key
A. Grub screw
B. Indicator bolt
C. Back cover plate
D. Back base plate
E. Indicator turning thread
F. Front base plate
G. Screws
H. Front cover plate
A
B
C
DE
F
G
H
Indicator Bolt Assembly
6
5
Outside face
of door
ii) iv)iii)
i)
Outside face
of door
2
1
3
4
Inside face
of door
7
Inside face
of door
8
9

10
Inward/Outward Opening Door Keep Fixing Details (Intermediate Pilaster Clapping)
1. Inward opening door pilaster
2. Assembled indicator bolt
3. Keep for intermediate pilasters
4. Partition
5. Outward opening door pilaster
6. Drill dia. 3mm pilot holes
7a. 19mm torx head screws (HPL only)
7b. 12mm torx head screws (SGL only)
i)
ii)
Minima Page 15
INWARD OPENING
DOOR
Inside face
of door
1
3
4
2
OUTWARD OPENING
DOOR
Inside face
of door
5
3
4
2
6
7

Minima Page 16
11
Inward/Outward Opening Door Keep Fixing Details (Wall End Pilaster Clapping)
1. Wall end pilaster
2. Keep for wall end pilasters
3. Assembled indicator bolt
4. Drill 2.5mm dia. hole
5. No.8 x 1” csk screw
i)
Inside face
of door
ii)
Front View
1
2
3
Inside face
of door
4
5

Minima Page 17
In-Line Cubicle Variation
12

12
Minima Page 18
i) ii)
iii)
1. Wall end t-section
2. Wall end channel bracket
3. Drill to suit wall type
4. No. 8 x 2” csk screws
5. Intermediate pilaster
6. Intermediate t-section
7. Intermediate channel bracket
8. Drill 3mm dia. pilot hole
9. No. 8 x 1” csk screws
10. In-line partition
11. Pedestal
1
4
3
F
o
r
S
G
L
P
a
r
t
i
t
i
o
n
s
:
i) 2
4
3
6 5
8
9
F
o
r
S
G
L
P
a
r
t
i
t
i
o
n
s
:
ii)
7
9
8
11
10
In-Line Cubicle Variation (Continued)

In-Line Cubicle Variation (Continued)
Minima Page 19
iv)
vi)
v)
1. In-line partition
2. Drill 5mm dia. holes 13mm deep
(to line up with holes in T-section)
3. M5 x 12mm snake eye screws
4. Drill 8mm dia. through holes
5. M6 x 14mm csk socket stainless steel screw
6. Multirol barrel
7. Intermediate pilaster
8. T-section
9. Channel bracket
Inside face
of partition
2
3
F
o
r
S
G
L
P
a
r
t
i
t
i
o
n
s
:
4
5
6
iv)
1
1
7
8
F
o
r
S
G
L
P
a
r
t
i
t
i
o
n
s
:
v)
9
2
3
F
o
r
S
G
L
P
a
r
t
i
t
i
o
n
s
:
vi)
64
5
12

629-24-04
Amwell Systems Ltd
Buntingford Business Park
Baldock Road
Buntingford
Herts
SG9 9ER
England
T +44 (0)1763 276200
F +44 (0)1763 276222
contact@amwell-systems.com
www.amwell-systems.com
Table of contents
Popular Bathroom Fixture manuals by other brands

Hans Grohe
Hans Grohe Rainfinity 130 3jet 26865 7 Series Instructions for use/assembly instructions

Porcelanosa
Porcelanosa Noken Tono 100234994 N351780038 manual

Hans Grohe
Hans Grohe Raindance Select S 240 2jet 27129 Series Instructions for use/assembly instructions

Kohler
Kohler Components 77984T-9E installation instructions

Axor
Axor 42870XXX Assembly instructions

newform
newform X-STEEL 316 69671EX instructions

Bossini
Bossini OKI Floor L00818 installation instructions

DUSBAD
DUSBAD Vital 1 Series Assembly instructions

Moen
Moen CHARMANT Series manual

Bradley
Bradley Aerada 1200 Series Installation

Franke
Franke AQUATIMER A3000 Installation and operating instructions

Hansa
Hansa Colourshower 5824 Mounting and operating instructions