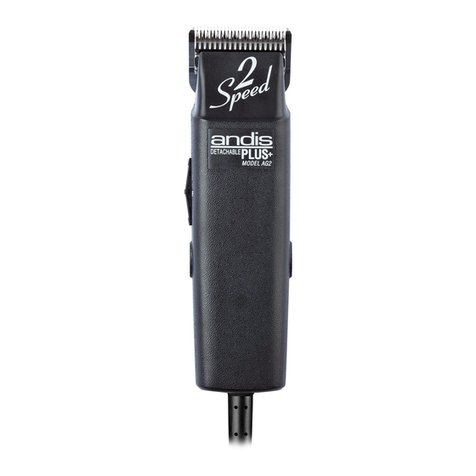
Andis DBLC-2 Quick reference guide

USE & CARE INSTRUCTIONS
DBLC-2
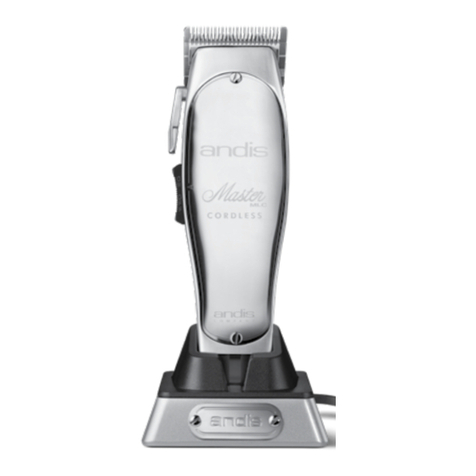
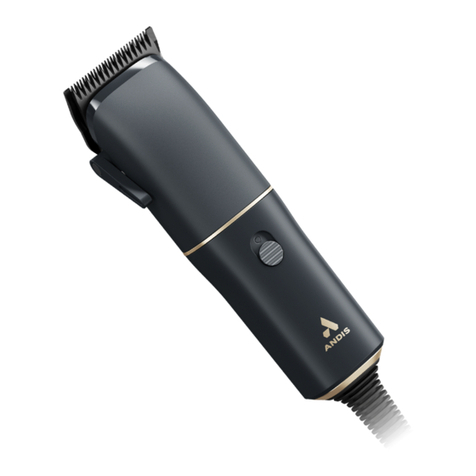
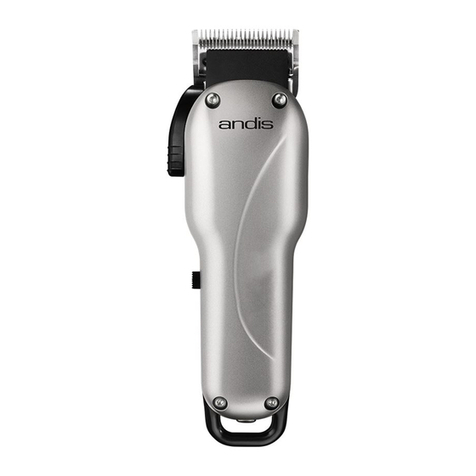
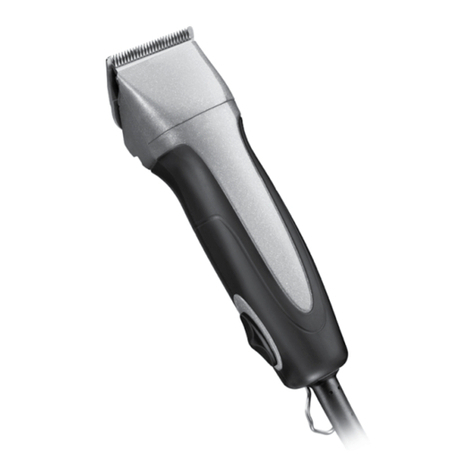
Item pictured may differ from actual product
El artículo ilustrado puede diferir del producto real
Il est possible que l’article sur la photo soit différent du produit réel

2
Please read the following instructions before using your new Andis clipper.
Give it the care that a ne, precision built instrument deserves and it will give
you years of service.
IMPORTANT SAFEGUARDS
When using an electrical appliance, basic precautions should
always be followed, including the following: Read all
instructions before using the Andis clipper.
DANGER: To reduce the risk of electric shock:
1. Do not reach for an appliance that has fallen into water.
Unplug immediately.
2. Do not use while bathing or in a shower.
3. Do not place or store appliance where it can fall or be pulled
into a tub or sink. Do not place in or drop into water or other
liquid.
4. Except when charging, always unplug this appliance after use.
5. Unplug this appliance before cleaning, removing or
assembling parts.
WARNING: To reduce the risk of burns, fire,
electric shock, or injury to persons:
1. An appliance should never be left unattended when plugged in.
2. This appliance is not intended for use by persons (including
children) with reduced physical, sensory or mental
capabilities, or lack of experience and knowledge, unless they
have been given supervision or instruction concerning use of
the appliance by a person responsible for their safety.
3. Children should be supervised to ensure that they do not
play with the appliance.
ENGLISH

3
4. Use this appliance only for its intended use as described in
this manual. Do not use attachments not recommended by
Andis.
5. Never operate this appliance if it has a damaged cord or
plug, if it is not working properly, if it has been dropped or
damaged, or dropped into water. Return the appliance to an
Andis authorized service station for examination and repair.
6. Keep the cord away from heated surfaces.
7. Never drop or insert any object into any opening.
8. Do not use outdoors or operate where aerosol (spray)
products are being used or where oxygen is being
administered.
9. Do not use this appliance with a damaged or broken blade or
comb, as injury to the skin may occur.
10. To disconnect turn control to OFF then remove plug from
outlet.
11. Plug charger directly into an AC outlet. Do not use an
extension cord.
12. Use of a charger not sold by Andis may result in risk of fire,
electric shock, or injury to person.
13. Do not disassemble charger. Incorrect reassembly may result
in a risk of electric shock or fire. When repair is required,
send or take it to an Andis authorized service station.
14. The battery in this clipper is designed to provide maximum
trouble-free life. However, like all batteries, it will eventually
wear out. Do not attempt to replace battery. When repair or
replacement is required, send or take it to an Andis
authorized service station.
15. Batteries can be harmful to the environment if disposed of
improperly. Many communities offer recycling or battery
collection. Contact your local government about disposal
practices in your area.

4
16. WARNING: Never touch both terminals on clipper with
metal objects and/or body parts, as short circuit may
result. Keep away from children. Failure to comply with
these warnings could result in fire or serious injury.
17. This appliance is intended for trimming purposes only.
18. WARNING: For the purposes of recharging the battery,
only use the detachable supply unit provided with
this appliance.
SAVE THESE INSTRUCTIONS
THIS PRODUCT INTENDED FOR HOUSEHOLD USE
OPERATING INSTRUCTIONS
- The battery must be removed from the appliance before it is recycled.
- The battery is to be recycled as a lithium-ion battery.
UNIVERSAL AC/DC POWER ADAPTER
1. Remove the wall adapter and charger from the carton.
2. Note the charger comes standard with a universal AC voltage wall adapter.
3. Connect the power cord to the back of the charger and then insert the transformer
into an AC outlet.
CHARGING UNIT
To charge, plug wall adapter into 100-240V, 50/60 cycle AC electrical outlet or as
noted on the unit. Make sure the proper input plug is attached to the wall adapter.
Plug power cord directly into back of charging stand.The battery pack may be
charged while on the clipper or separately.To charge the battery pack while in the
unit, place clipper into the pocket on the charging stand. NOTE: the clipper should
be charged with the switch in the OFF position.To charge the battery pack separately,
remove the battery pack by pressing the tab on the back of the battery (FigureA),
sliding the battery out and placing in the pocket on the charger (Figure C).
Before using your clipper for the first time, make sure the battery has been fully
charged. Note that it is normal for the clipper and wall adapter to feel warm to
the touch when charging.This is especially true if the battery has been deeply

5
F
OIL
J
H
K
NM
CORRECT
O
REMOVE
REPLACE
LI
D
CLIPPER INDICATOR LIGHT
(SPEED AND CHARGE LEVEL)
P
INCORRECT
G
C
STAND
CHARGING
INDICATOR
LIGHT
POCKET
A
TAB
E
CHARGE
LEVEL
BUTTON
CHARGE LEVEL
INDICATOR
LIGHT
CLIPPER
INDICATOR
LIGHT
SLIDING SPEED
ADJUSTMENT
BUTTON
POWER
SWITCH
B
discharged as indicated by the clipper indicator light turning red (Figure B) while the
clipper is running.The clipper should be charged with the switch in the OFF position.
To start clipper, move power switch to ON position.To stop clipper, move power
switch back to original position (Figure B).
STAND CHARGING INDICATOR LIGHTS
When the battery is charging,the stand charging indicator light will turn red.The
stand charging indicator light will turn green when the clipper is fully charged
(Figure C).Under normal operation the indicator lights on the clipper will always be
dark when the unit is in the charger stand.

6
Note that the clipper or battery can be removed at any time during the charging cycle
without harming the clipper or battery.
CLIPPER INDICATOR LIGHTS (SPEED AND CHARGE LEVEL)
When the clipper is running, a green clipper indicator light means the battery has a
strong charge (Figure B). The light will turn yellow as the battery starts to run down,
indicating the battery has only a partial charge remaining.When the light turns
red, the battery may not hold enough charge to complete a large clipping job, and
should be recharged as soon as possible.If the clipper powers OFF, move the power
switch to the OFF position and place battery or clipper in the charging stand.
Automatically powering off protects the lithium-ion battery and is not a malfunction.
The clipper will resume normal operation when it is recharged.
Your clipper is equipped with five cutting speeds.The speeds are adjusted using the
speed adjustment button on the front of the unit (Figure B).To start your clipper,
move the power switch to the ON position.To increase your blade speed,slide the
button toward the blade of the clipper.To decrease your blade speed, slide the
button away from the blade of the clipper.You will see on the LED display that when
you change the speed, the LED’s adjust accordingly (Figure D).To shut your clipper
OFF, move the power switch to the OFF position.The unit will power ON in the last
speed setting you were in when you turned the unit OFF.
NOTE: If charging stand indicator light is flashing,dirt or debris may have collected
on the charging contacts of the clipper, battery pack and/or the charging base,
prohibiting proper electrical connection.To clean these contacts,use a soft, dry cloth
to wipe them clean.The charging stand indicator light will turn off if the battery is too
hot to charge.When the battery has cooled,normal charging will resume.
Clipper Indicator Light Charging Stand Indicator Light
Clipper in Charging Stand
Fully Charged Green
Charging Red
Clipper in Use
Full Charge Green
Medium Charge Yellow
Low Charge Red

7
BATTERY INDICATOR LIGHTS (CHARGE LEVEL)
When the battery is not in the clipper, press and release the charge level button
on the bottom of the battery pack (Figure E) to see the charge level indicator light.
A green light means there is sufficient charge.A red light means there is medium to
low charge (less than 15 minutes).No light means the battery requires immediate
charging.
REPLACING THE BATTERY PACK
To remove the battery pack from the clipper,press the tab on the back of the battery
pack and slide the battery out (Figure A).To replace the battery pack, slide the battery
into the clipper.
USER MAINTENANCE
The internal mechanism of your motor clipper has been permanently lubricated by
the factory. Other than the recommended maintenance described in this manual,
no other maintenance should be performed, except by Andis Company, or an Andis
authorized service station. To find an Andis authorized service station near
you log on to andis.com or contact our customer service department at
1-800-558-9441.
REMOVING BLADE SET
To remove blade set, first make sure your clipper motor is switched off, then push
down on blade with one or both thumbs (Figure F) and slide blade off blade hinge
(Figure G).If your blade hinge should snap closed and is flush with the clipper,use a
small standard screwdriver to pry the tongue of the hinge out (Figure H).NOTE: Hair
may accumulate in the front cavity of the housing under the blade. If this happens,
you can clean out the hair by brushing out the cavity with a small brush or an old
toothbrush while the blade is off the clipper.
REPLACING OR CHANGING BLADE SET
To replace or change your blade set, slide the blade bracket onto the hinge of the
clipper (Figure G),and with the clipper turned “ON”, push the blade towards the
clipper to lock into position.

8
BLADE TEMPERATURE
Due to the high speed nature of Andis clippers, please check for blade heat often,
especially on close cutting blades.If blades are too hot, dip the blades only into
Andis Blade Care Plus or applyAndis Cool Care Plus and then Andis Clipper Oil. If
you have a detachable blade unit, you can change your blade in order to maintain a
comfortable temperature; using multiple blades of the same size is popular among
groomers.
CARE AND SERVICING OF YOUR ANDIS CLIPPER BLADES
Blades should be oiled before, during, and after each use.If your clipper blades leave
streaks or slow down,it’s a sure sign blades need oil. The clipper should be held in
the position shown in Figure I to prevent oil from getting into the motor.Place a
few drops of Andis Clipper Oil on the front and side of the cutter blades (Figure J).
Wipe excess oil off blades with a soft dry cloth.Spray lubricants contain insufficient
oil for good lubrication, but are an excellent clipper blade coolant.Discontinue use
of broken or nicked blades to prevent injury.You can clean the excess hair from
your blades by using a small brush or worn out toothbrush.To clean the blades we
suggest to immerse the blades only into a shallow pan of Andis Blade Care Plus,
while the clipper is running.Any excess hair and dirt that has accumulated between
the blades should come out.After cleaning, turn your clipper off and dry blades with
a soft,dry cloth and start clipping again.
If upon cleaning your blades you find that the blades will still not cut, there may
be a few fine pieces of hair trapped between the upper and lower blade. If this
happens, you will need to snap the blade off the clipper.Proceed to slide the upper
blade to one side, without loosening the tension spring or moving the upper blade
completely out from under the tension spring (See Figure Kfor position of blade).
Wipe the surface between the blades clean with a dry cloth, then place a drop of
clipper oil where the upper and lower blades meet and also in the guide slot of the
tension spring (Figure K).Now slide the upper blade to the opposite side of the
lower blade and repeat this process.After completing this procedure,slide the upper
blade, centering it over the lower blade.Handle or store your Andis clipper with the
blades down so excess oil will not run into the clipper case.

9
CHANGING THE BLADE DRIVE ASSEMBLY
If your clipper blades no longer cut properly (be sure to try more than one blade,
since the blade currently being used may be dull), it could be that your blade drive
assembly needs replacement.
To change the blade drive assembly:
1. Remove blade set (Figure G).
2. Remove drive cap by grabbing both sides at top and sliding off (Figure L).
3. Remove blade drive mounting screws (Figure M).
4. NOTE: Before removing blade drive assembly, note the way it is positioned (this
will help you in reassembly).Remove blade drive assembly (Figure N).
5. Drive bearing should be at its lowest position (See Figure O for correct position of
drive bearing), if not, move it with your finger to lowest position (See Figure P for
incorrect position of drive bearing).
6. Put on new drive assembly, align screw holes and press down (Figure N).
7. Reassemble blade drive by mounting screws (Figure M).
8. Replace drive cap by sliding back on clipper into position (Figure L).
9. Replace blade (Figure G).
USE GUIDELINES FOR LITHIUM-ION BATTERIES
1.The lithium-ion battery included with your clipper does not develop a “memory
effect” like a nickel-metal hydride (NiMH),or nickel cadmium (NiCd) battery.You
can return the clipper to the charger at any time for a full charge,or even use
the battery before a charge cycle is complete.Like most rechargeable batteries,
lithium-ion batteries perform best when used frequently.
2. For maximum battery life, store the clipper in a partially discharged condition
if the unit will be unused for several months. To discharge the battery, run the
clipper just until the yellow light turns ON.
3.Avoid locating the clipper near heat vents,radiators, or in direct sunlight.
Optimum charging will result where the temperature is stable. Sudden increases
in temperature can result in the battery receiving less than a full charge.
4. Many factors influence lithium-ion battery life. Abattery that has received heavy
use or is more than a year old may not give the same run-time performance as a
new battery pack.
5. New lithium-ion batteries,unused for a period of time, may not accept a full charge.
This is normal and does not indicate a problem with the battery or charger.The
battery will accept a full charge after several cycles of clipper use and recharging.
6. Disconnect the charger or the clipper from the AC outlet if extended periods of
non-use are anticipated.

10
SAFETY RULES FOR CHARGER AND BATTERY PACK
1. Do not insert metallic objects into the battery pocket of the charger base.
2. Do not expose the charger to excessively dirty locations. If the charger pocket
becomes clogged with dust or hair,unplug the charger and gently remove hair or
other debris with a soft brush or vacuum cleaner.
3.To clean external parts of the charger,use a soft brush or damp cloth. Do not use
harsh abrasives, detergents, or solvents.
4. Do not use the charger designed for the Andis DBLC-2 clipper to attempt to charge
any other battery.
5.The battery contains an overload protection feature.In extreme cases,overload
protection may cause the battery to enter into a safety mode,protecting the clipper
circuitry. The battery will reset once the situation has been corrected and the unit
has been cycled on and off.Do not attempt to power any product other than the
Andis DBLC-2 clipper with this lithium-ion battery.
6. For maximum battery life, do not store clipper or charger under 50°F or over 104°F.
7. Do not expose the charger or clipper to excessively damp conditions.
8.Take care not to drop the charger or the clipper. Do not attempt to use a damaged
charger.
CARE AND SERVICING OF THE ELECTRICAL SYSTEM
Your clipper,battery and charger are an integrated electrical system. Good electrical
contact must be maintained for the motor to deliver full power and lithium-ion
battery to charge properly. Limited or erratic performance caused by dirt or age can
be corrected in the majority of cases.
BATTERY DISPOSAL
The product you have purchased contains a rechargeable battery.The battery is
recyclable.At the end of its useful life, under various state and local laws, it may be
illegal to dispose of this battery into the municipal waste stream. Check with your local
solid waste officials for details in your area for recycling options or proper disposal.
BLADE & CLIPPER REPAIR SERVICE
When the blades of your Andis clipper become dull after repeated use,it is advised
to purchase a new set of blades available through your Andis supplier or through an
Andis authorized service station. Some blade sets can be resharpened - contact
Andis Company for information on resharpening.If you wish your clipper to be
serviced as well, it should be carefully packed and mailed either Parcel Post Insured,
or U.P.S. to anyAndis authorized service station.To contact Andis directly, please
call our Customer Support Team at 1-800-558-9441 or email us at

11
CAUTION: Never handle yourAndis clipper while you are operating a water
faucet and never hold your clipper under a water faucet or in water.There is
danger of electrical shock and damage to your clipper. ANDIS COMPANY will
not be responsible in case of injury due to this carelessness.
MANUFACTURER’S 12 MONTH LIMITED WARRANTY
This Andis product is warranted against defective material or workmanship for 12 months from the date of purchase. All express
and implied warranties arising out of and applicable to the product by virtue of State law shall also be limited to 12 months from
the date of purchase. Any Andis product determined by Andis to be defective in material or workmanship during the warranty
period will be repaired or replaced, at Andis’ sole discretion, without cost to the consumer for parts and labor. To qualify for
this limited warranty, the defective product must be returned via parcel post insured or U.P.S., with proof of purchase to Andis,
1800 Renaissance Blvd.,Sturtevant, WI 53177 USA.Please include a letter describing the nature of the problem.
Due to foreign matter sometimes found in hair and for other reasons, clipper blades or the resharpening of blades are not
subject to this limited warranty. Andis will not be responsible for the replacement, cost of repairs, or alterations made to its
products by any other person, agency or company. Except as stated above, Andis does not provide and expressly disclaims any
implied warranty of merchantability or tness for a particular purpose, or any other warranty of any kind whatsoever. Under no
circumstances will Andis be responsible for incidental or consequential damages of any type, or for any liability arising out of the
use of unauthorized attachments. Some states may not allow exclusion or limitation of incidental or consequential damages, so
this limitation or exclusion may not apply to you.
Date Purchased ___________________________ Model__________________________________________
To nd an Andis Authorized Service Station near you log on to andis.com
or contact our customer service department: 1-800-558-9441
WARNING:
NO WARRANTYIF PURCHASED FROM UNAUTHORIZED SELLERS OF ANDIS PRODUCTS
To ensure you are receiving an authentic, safe, quality product,you must purchase Andis products only through authorized sellers.
Log on to andis.com or contact our customer service department at 1-800-558-9441 (U.S.) to review a list of our authorized
sellers. These sellers are approved or certied by our company. If you do not purchase through one of these companies, we cannot
assure the authenticity or condition of any Andis products, nor can we offer our warranty and related services for any products
purchased from an unauthorized seller. Any such warranty is void and any warranty claim made for a product purchased from
an unauthorized seller will be denied. Any sale or use by these unauthorized sellers of our products, and the marketing images,
logos, trademarks and copyrighted material on our products, is also unauthorized.

12
Lea las instrucciones siguientes antes de utilizar su nueva máquina de acabado
Andis. Trátela como se merece un instrumento delicado y de precisión, y le dará
servicio durante muchos años.
PRECAUCIONES IMPORTANTES
Al usar un aparato eléctrico, siempre deben seguirse ciertas
precauciones básicas, que incluyen la siguiente: Lea todas las
instrucciones antes de usar la máquina de corte Andis.
PELIGRO:Para reducir el riesgo de descarga
eléctrica:
1. Si un aparato se ha caído al agua, no trate de sacarlo.
Desenchúfelo inmediatamente.
2. No lo utilice al ducharse o al bañarse en una bañera.
3. No coloque ni guarde el aparato donde pueda caerse en una
bañera o un lavabo, o ser halado dentro de éstos. No lo
coloque ni lo deje caer en agua u otro líquido.
4. Siempre desenchufe este aparato del tomacorriente eléctrico
inmediatamente después de usarlo.
5. Desenchufe este aparato antes de limpiar, desmontar o
montar las piezas.
ADVERTENCIA: Para reducir el riesgo de
quemaduras, incendio, descarga eléctrica o lesiones a las
personas:
1. Un aparato nunca debe dejarse desatendido mientras está
enchufado.
2. Este aparato eléctrico no debe ser usado por personas
(incluyendo niños) con limitada capacidad física, sensorial o
mental, o que no tengan experiencia o conocimientos, a
ESPAÑOL

13
menos que alguna persona responsable de su seguridad los
supervise o les haya dado instrucciones con respecto al uso
del aparato.
3. Es necesario supervisar a los niños para asegurarse de que
no jueguen con el aparato eléctrico.
4. Utilice este aparato exclusivamente para su uso propuesto, tal
como se describe en este manual. No utilice accesorios no
recomendados por Andis.
5. Nunca opere este aparato si su cable eléctrico o enchufe está
dañado, si no funciona correctamente o si se ha dejado caer,
si se ha dañado o si se ha caído en el agua. Devuelva el
aparato a un centro de servicio autorizado de Andis para su
revisión y reparación.
6. Mantenga el cable lejos de superficies calientes.
7. Nunca deje caer el aparato ni inserte ningún objeto en
ninguna de sus aberturas.
8. No lo utilice al aire libre, ni lo opere donde se estén usando
productos en aerosol (nebulizados) o donde se esté
administrando oxígeno.
9. No utilice este aparato con una cuchilla o peine dañado o
roto, ya que se podrían ocasionar lesiones en la piel.
10. Para desconectar, coloque el control en la posición de
apagado y luego desconecte el enchufe del tomacorriente.
11. Enchufe el cargador directamente a una toma de corriente
alterna. No utilice un cable de extensión.
12. El uso de un cargador no vendido por el fabricante puede
implicar riesgo de incendio, descarga eléctrica o lesiones
personales.
13. No desmonte el cargador. El montaje incorrecto puede
causar descargas eléctricas o incendios. Si es necesario
realizar tareas de reparación, envíe o lleve el aparato a un
centro de servicio técnico autorizado de Andis.

14
14. Las baterías de esta máquina de corte han sido diseñadas
para proporcionar una vida útil máxima sin problemas. Sin
embargo, como sucede con todas las baterías, con el tiempo
se agotan. No intente reemplazar la batería. Cuando sea
necesario realizar tareas de reparación o reemplazo, envíe o
lleve el aparato a un centro de servicio técnico autorizado de
Andis.
15. Cuando las baterías no se eliminan correctamente, pueden
producir efectos nocivos en el medio ambiente. Muchas
comunidades cuentan con sistemas de recogida y reciclado
de baterías. Póngase en contacto con las autoridades locales
para recibir información sobre cómo proceder con la
eliminación de estos residuos en su zona.
16. ADVERTENCIA: No tocar nunca los terminales del
aparato con objetos metálicos ni partes del cuerpo, ya
que puede provocar un cortocircuito. Mantenga fuera
del alcance de los niños. El incumplimiento de estas
advertencias, puede causar incendios o lesiones
graves.
17. Este aparato está concebido exclusivamente para propósito
de realizar recortes de acabado.
18. ADVERTENCIA: Para los propósitos de volver a cargar
la batería, utilice únicamente la unidad de suministro
desmontable provista con este aparato.
CONSERVE ESTAS INSTRUCCIONES
ESTE PRODUCTO ESTÁ DISEÑADO PARA USO DOMÉSTICO

15
INSTRUCCIONES DE USO
- Se debe sacar la batería del aparato antes de reciclarla.
- La batería debe reciclarse como una batería de iones de litio.
ADAPTADOR ELÉCTRICO UNIVERSAL DE CA/CC
1. Retire el adaptador de pared y el cargador de la caja.
2. Observe que el cargador viene de manera estándar con un adaptador de pared
universal para tensión de CA.
3. Conecte el cable eléctrico en la parte posterior del cargador y,a continuación,
introduzca el transformador en un tomacorriente de CA.
INDICADOR
LUMINOSO
DE LA MÁQUINA
DE CORTE
BOTÓN
DESLIZANTE DE
AJUSTE DE LA
VELOCIDAD
INTERRUPTOR
ELÉCTRICO
F
ACEITE
J
H
K
NM
CORRECTO
O
RETIRAR
REEMPLAZAR
LI
D
INDICADOR LUMINOSO DE LA
MÁQUINA DE CORTE
(VELOCIDAD Y NIVEL DE CARGA)
P
INCORRECTO
G
C
INDICADOR
LUMINOSO
DE CARGA
A
PESTAÑA
E
BOTÓN
DE NIVEL
DE
CARGA
LUZ
INDICADORA
DE NIVEL DE
CARGA
B
CAVIDAD

16
UNIDAD DE CARGA
Para cargar,enchufe el adaptador de pared en una toma de corriente alterna de
100-240 V, 50/60 ciclos o como se indica en la unidad.Asegúrese de que el enchufe
de entrada correcto quede conectado al adaptador de pared.Enchufe el cable
eléctrico directamente a la parte posterior del soporte de carga.La batería puede
cargarse mientras está en la máquina de corte o por separado.Para cargar la batería
mientras está en la unidad, coloque la máquina de corte en la cavidad sobre el
soporte de carga. NOTA: La máquina de corte debe cargarse con el interruptor en
posición de apagado.Para cargar la batería por separado,quítela presionando en
la pestaña de la parte posterior de la batería (FiguraA); a continuación,deslice la
batería para quitarla y colóquela en la cavidad del cargador (Figura C).
Antes del primer uso,asegúrese de que la batería se haya cargado por completo.
Es normal que la máquina de corte y el adaptador de pared se calienten durante el
proceso de carga.Este calentamiento se produce especialmente cuando la batería
del aparato se ha descargado casi por completo como indica la luz roja (Figura B)
mientras que se encuentra en funcionamiento.La máquina de corte debe cargarse
con el interruptor en posición de apagado.
Para encender la máquina de corte, coloque el interruptor en la posición de
encendido.Para detener la máquina de corte, coloque el interruptor de nuevo en la
posición original (Figura B).
LUCES INDICADORAS DE CARGA DEL SOPORTE
Cuando la batería se está cargando,la luz indicadora de carga del soporte se
iluminará en color rojo.La luz indicadora de carga del soporte se iluminará en
color verde cuando la máquina de corte esté completamente cargada (Figura C). En
condiciones normales de uso,las luces indicadoras de la máquina de corte estarán
siempre apagadas cuando la unidad se encuentre en el soporte de carga.
Tenga en cuenta que es posible quitar la máquina de corte o la batería del soporte
en cualquier momento durante el ciclo de carga,sin dañar el aparato o la batería.
INDICADORES LUMINOSOS DE LA MÁQUINA DE CORTE
(VELOCIDAD Y NIVEL DE CARGA)
Cuando la máquina de corte se encuentra en funcionamiento,el indicador luminoso
de color verde significa que la carga de la batería es alta (Figura B). El indicador
cambiará a amarillo cuando la batería comience a agotarse, indicando que la carga

17
Indicador luminoso
de la máquina de corte Indicador luminoso del
soporte de carga
Máquina de corte en el soporte de carga
Carga completa Verde
En carga Rojo
Máquina de corte en uso
Carga completa Verde
Carga media Amarillo
Carga baja Rojo
es parcial. Cuando el indicador se vuelve de color rojo,significa que la batería no
cuenta con suficiente carga para cortar durante demasiado tiempo y que debe
cargarse lo antes posible. Si la máquina se apaga, mueva el interruptor eléctrico a
la posición de apagado y coloque la batería o la máquina de corte en el soporte de
carga.
El apagado automático protege la batería de iones de litio y no se trata de una
avería. La máquina de corte funcionará con normalidad una vez que se haya cargado.
La máquina de corte está dotada de cinco velocidades de corte. La velocidad se
ajusta utilizando el botón de ajuste de velocidad en la parte frontal de la unidad
(Figura B).Para encender la máquina de corte,coloque el interruptor en la
posición de encendido.Para aumentar la velocidad de la cuchilla, deslice el botón
en dirección a la cuchilla de la máquina de corte. Para disminuir la velocidad de
la cuchilla, deslice el botón en sentido contrario a la cuchilla de la máquina de
corte. Cuando cambia la velocidad,los indicadores LED se ajustan de manera
correspondiente (Figura D).Para apagar la máquina de corte,coloque el interruptor
en la posición de apagado.Cuando encienda la unidad, la velocidad de corte será la
última utilizada en la anterior sesión.
NOTA: Si la luz indicadora del soporte de carga está parpadeando,es posible que
se haya acumulado suciedad o residuos en los contactos de carga de la máquina de
corte, en la batería y/o en la base de carga, impidiendo de este modo una correcta
conexión eléctrica. Para limpiar estos contactos, utilice un paño suave y seco.El
indicador luminoso del soporte de carga se apagará si la batería está demasiado
caliente para cargar. Cuando la batería se haya enfriado,se reanudará la carga
normal.

18
LUCES INDICADORAS DE LA BATERÍA (NIVEL DE CARGA)
Cuando la batería no se encuentra en la máquina de corte, presione y suelte el
botón de nivel de carga en la parte inferior de la batería (Figura E) para ver la luz
indicadora de nivel de carga.Una luz verde significa que tiene suficiente carga.Una
luz roja significa que tiene una carga media a baja (menos de 15 minutos).Si no se
enciende ninguna luz, esto significa que es necesario cargar la batería de inmediato.
REEMPLAZO DE LA BATERÍA
Para quitar la batería de la máquina de corte, presione la pestaña en la parte
posterior de la batería y deslícela hacia fuera (Figura A). Para reemplazar la batería,
deslice la batería para instalarla en la máquina de corte.
MANTENIMIENTO POR EL USUARIO
El mecanismo interno de su máquina de corte a motor ha sido lubricado de manera
permanente en la fábrica. No debe realizarse ningún tipo de mantenimiento que
no fuera el mantenimiento recomendado en este manual,salvo por Andis Company
o por un centro de servicio autorizado de Andis.Para encontrar un centro de
Servicio Autorizado cercano a su localidad, visite andis.com o póngase en
contacto con nuestro departamento de servicio al cliente: 1-800-558-9441.
DESMONTAJE DELJUEGO DE CUCHILLAS
Para desmontar el juego de cuchillas, asegúrese primero de que el motor de la
máquina de corte esté apagado y luego empuje la cuchilla hacia abajo con uno
o ambos pulgares (Figura F) y deslice la cuchilla para quitarla de la bisagra de
la cuchilla (Figura G).Si la bisagra de la cuchilla se cierra automáticamente para
quedar a ras con la máquina de corte, use un pequeño destornillador estándar
para quitar la lengüeta de la bisagra (Figura H). NOTA: Es posible que se acumule
pelo en la cavidad frontal de la caja, debajo de la cuchilla. En caso de ocurrir esto,
puede eliminar el pelo cepillando la cavidad con un cepillo pequeño o un cepillo de
dientes usado mientras la cuchilla está desmontada de la máquina de corte.
REEMPLAZO O CAMBIO DEL JUEGO DE CUCHILLAS
Para reemplazar o cambiar el juego de cuchillas, deslice el soporte de la cuchilla
sobre la bisagra de la máquina de corte (Figura G) y con la máquina de corte
encendida, empuje la cuchilla hacia la máquina de corte para bloquearla en posición.

19
TEMPERATURA DE LA CUCHILLA
Debido a la naturaleza de alta velocidad de las máquinas de corte de Andis,verifique
la temperatura de la cuchilla con frecuencia,especialmente en el caso de cuchillas
de corte al ras. Si las cuchillas están demasiado calientes, remoje las cuchillas
únicamente en Andis Blade Care Plus o aplique Andis Cool Care Plus y luego el
aceite Andis para máquinas de corte.Si tiene una unidad con cuchilla desmontable,
puede cambiar la cuchilla para mantener una temperatura confortable; utilizar varias
cuchillas del mismo tamaño es un método popular entre los estilistas profesionales.
CUIDADO Y MANTENIMIENTO DE LAS CUCHILLAS DE SU
MÁQUINA DE CORTE
Debe lubricar las cuchillas antes, durante y después de cada uso. Si las cuchillas de
su máquina de corte dejan líneas o reducen su velocidad,significa que requieren de
lubricación. La máquina de corte debe mantenerse en la posición que se muestra
en la Figura I para impedir que el aceite ingrese en el motor.Al lubricar las cuchillas,
ponga unas cuantas gotas de aceite para máquinas de corte marca Andis en la parte
frontal y lateral de las cuchillas (Figura J). Limpie el exceso de aceite en las cuchillas
un paño seco seca y suave. Los lubricantes en aerosol no contienen suficiente aceite
para lubricar correctamente,pero son excelentes para enfriar la máquina de corte.
Para evitar lesiones, no utilice el aparato con cuchillas rotas o melladas.Puede
limpiar el exceso de pelo en las cuchillas con un cepillo pequeño o un cepillo de
dientes viejo.Para limpiar las cuchillas le sugerimos sumergir sólo las cuchillas en
un poco de Andis Blade Care Plus, mientras la máquina de corte esté funcionando.
Así debe poder eliminar cualquier exceso de pelo o de suciedad que se haya
acumulado entre las cuchillas. Después de limpiar las cuchillas, apague la máquina
de corte y seque las cuchillas con un paño suave y seco.
Si al limpiar las cuchillas encuentra que las mismas siguen sin cortar,es posible que
hayan quedado algunos restos finos de pelo atrapados entre la cuchilla superior
e inferior.Si esto ocurre, necesitará desmontar la cuchilla de la máquina de corte.
Proceda a deslizar la cuchilla superior hacia un lado, sin aflojar el resorte de tensión
ni mover la cuchilla superior completamente fuera de su posición debajo del resorte
de tensión (consulte la Figura K para conocer la posición de la cuchilla). Limpie la
superficie entre las cuchillas con un paño limpio y seco,y luego coloque una gota de
aceite para máquinas de corte en el punto de encuentro entre las cuchillas superior e
inferior,y la ranura de guía del resorte de tensión (Figura K).A continuación, deslice
la cuchilla superior al lado opuesto de la cuchilla inferior y repita este proceso.
Después de completar este procedimiento,deslice la cuchilla superior, centrándola
sobre la cuchilla inferior.Cuelgue o almacene la máquina de corte Andis con las
cuchillas hacia abajo de modo que el aceite sobrante no se introduzca en la carcasa
de la máquina de corte.

20
CAMBIO DEL CONJUNTO DE ACCIONAMIENTO DE LAS
CUCHILLAS
Si las cuchillas de la máquina de corte ya no cortan correctamente (asegúrese de
probar más de una cuchilla, dado que es posible que la cuchilla que se estuviera
usando actualmente haya perdido el filo), podría ser necesario reemplazar el
conjunto de accionamiento de la cuchilla.
Para cambiar el conjunto de accionamiento de las cuchillas:
1. Desmonte el conjunto de cuchillas (Figura G).
2. Desmonte la tapa del accionamiento (Figura L).
3. Desmonte los tornillos de montaje del accionamiento de las cuchillas (Figura M).
4. NOTA: Antes de desmontar el conjunto de accionamiento de las cuchillas,observe
la manera en que esté colocado (esto le ayudará al volver a armarlo).Desmonte el
conjunto de accionamiento de las cuchillas (Figura N).
5. El cojinete de accionamiento debe encontrarse en su posición más baja (consulte
la Figura O para conocer la posición correcta del cojinete de accionamiento); de no
ser así, muévalo con el dedo hasta la posición más baja (consulte la Figura P para
conocer la posición incorrecta del cojinete de accionamiento).
6. Coloque el nuevo conjunto de accionamiento, alinee los orificios de los tornillos y
presione hacia abajo (Figura N).
7.Vuelva a armar el accionamiento de las cuchillas montando los tornillos
correspondientes (Figura M).
8. Reemplace la tapa del accionamiento (Figura L).
9. Reemplace la cuchilla (Figura G).
SIGA LAS RECOMENDACIONES PARA BATERÍAS DE IONES DE LITIO
1. La batería de iones de litio que se incluye en su máquina de corte no desarrolla
un “efecto memoria” como las baterías de hidruro metálico y níquel (NiMH) o las
baterías de níquel-cadmio (NiCd). Puede volver a colocar la máquina de corte en el
cargador en cualquier momento para obtener una carga completa o incluso usar
la batería antes de que se complete el ciclo de carga.Al igual que la mayoría de
las baterías recargables,las baterías de iones de litio tienen un mejor rendimiento
cuando se usan con frecuencia.
2. Para una vida útil máxima de la batería, mantenga el aparato parcialmente
cargado en caso de no usar la unidad durante varios meses.Para descargar la
batería, encienda la máquina de corte hasta que el indicador se ilumine en color
amarillo.
3. Evite colocar la máquina de corte cerca de rendijas de calefacción, radiadores o
bajo la luz directa del sol. En condiciones de temperatura estable,se producirá
Other manuals for DBLC-2
2
Table of contents
Languages:
Other Andis Commercial Food Equipment manuals
Popular Commercial Food Equipment manuals by other brands

Cres Cor
Cres Cor H-339-135-BK Series Operation and maintenace manual

Diamond
Diamond AL1TB/H2-R2 Installation, Operating and Maintenance Instruction

Henny Penny
Henny Penny HC-4 Service manual

Belshaw Brothers
Belshaw Brothers TZ6 Operator's Manual and Technical Supplement

CRIOCABIN
CRIOCABIN ESPRIT instruction manual

ISA
ISA MY18 manual