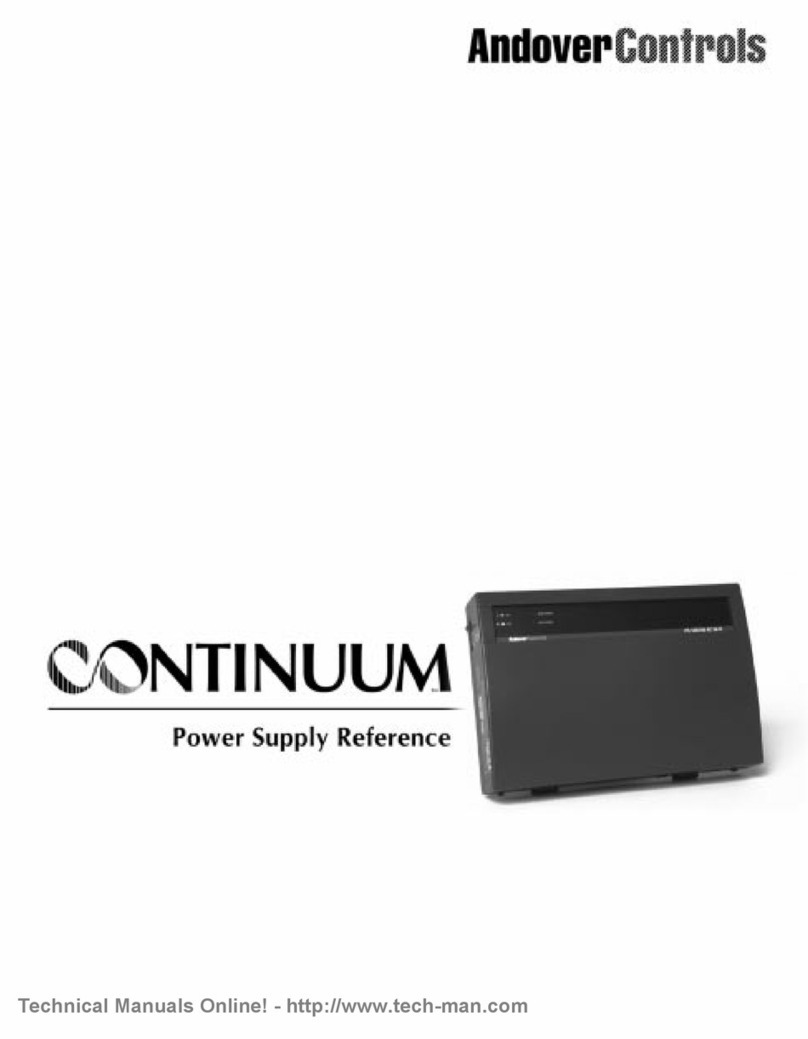
Andover Controls CONTINUUM User manual

SENSOR

Andover Controls Corporation
2001, Andover Controls Corporation
All Rights Reserved
No part of this publication may be reproduced, read or stored in a retrieval
system, or transmitted, in any form or by any means, electronic, mechanical,
photocopying, recording, or otherwise, without prior written permission of
Andover Controls Corporation.
Produced in the United States of America.
Infinity is a trademark of Andover Controls Corporation. All other trademarks
are the property of their respective owners.
Continuum Power Supply Reference, Version: E June, 2001
Andover Controls part number: 30-3001-702
The information in this book is furnished for informational purposes only, is
subject to change without notice, and should not be construed as a commitment
by Andover Controls Corporation. Andover Controls Corporation, assumes no
liability for any errors or inaccuracies that may appear in this document.
Related Documents
Continuum CPU Reference, 30-3001-703
Continuum I/O System Reference, 30-3001-499
Continuum Display Module Reference, 30-3001-711
Andover Controls Corporation
300 Brickstone Square
Andover, MA 01810
(978) 470-0555
fax: (978) 470-0946

Continuum Power Supply Reference
Radio Interference
This equipment has been tested and found to comply with the limits for a Class A
digital device, pursuant to Part 15 of the FCC Rules. These limits are designed to
provide reasonable protection against harmful interference when the equipment is
operated in a commercial environment. This equipment generates, uses, and can
radiate radio frequency energy and, if not installed and used in accordance with
the instructions in this manual, may cause harmful interference to radio
communications. Operation of this equipment in a residential area is likely to
cause harmful interference in which case the user will be required to correct the
interference at his own expense.
Note
This digital apparatus does not exceed the Class A limits for radio noise emissions
from digital apparatus set out in the Radio Interference Regulations of the
Canadian Department of Communications.
Avis
Le présent appareil numérique n’émet pas de bruits radioélectriques dépassant les
limites applicables aux appareils numériques de la class A prescrites dans le
Règlement sur le brouillage radioélectrique édicté par le ministère des
Communications du Canada.
European Declarations
Long Period Stress

Andover Controls Corporation

Continuum Power Supply Reference
Contents
Introduction...................................................................... 1
Power Module Characteristics........................................ 2
Special System Characteristics...................................... 3
Smoke Control Operation (UL 864).........................................3
Access Control Operation (UL 294) ........................................3
Burglar Alarm Operation (UL 1076) ........................................3
Mechanical Installation.................................................... 4
Input Power Connection.................................................. 7
UPS Connections........................................................... 11
External Power Indicator Connections ........................ 12
Output Power Connection............................................. 13
PS 120/240 AC 50(U), AC 85(U) Output Connections .................14
PS 120/240 AC 50(U) , AC 85(U) Auxiliary Power Connection ...15
Converting PS 120/240 AC 50-U, AC 85-U Into an Auxiliary
Supply ..........................................................................................16
PS 120/240 AC 25 Output Connection ........................................18
Operation........................................................................ 19
Troubleshooting............................................................. 20

Andover Controls Corporation

Continuum Power Supply Reference
1
TCX 865
Power Supplies
This manual describes the installation, care and use of the Continuum power supply
modules.
The Continuum power supply modules are part of the Andover Controls
Continuum
Ethernet-based intelligent building system. The
Continuum
system allows you to cost-
effectively mix and match DIN rail-mounted CPU, power supply, and various
combinations of I/O modules and user interfaces to meet your control and monitoring
needs. The power supplies offered include an impressive array of features.
Along with the standard 120/240 VAC modules, some models reduce or eliminate the
impact of power failure through a built-in battery back-up system with integral charger.
Another allows – 48VDC power based industries such as telecommunications to provide
uninterrupted power to critical environmental monitoring and control equipment using
their own battery-backed power systems.
Each module includes provision for an optional AC power indicator LED. This option is
ideal if you mount your
Continuum
system within a larger control panel or enclosure and
wish to verify power to the system from a separate location.
The power supply modules feature a sleek, lightweight casing designed for natural
convection cooling. Quick-release fasteners, built-into the back of the module, are
provided for DIN rail mountingno tools required. These fasteners also snap into a
locked position that features integral reinforced holes for panel mounting in non-DIN
situations.

2
Andover Controls Corporation
Power Module Characteristics
The following table lists the features included in the Continuum Power Supply Modules:
Model Input Voltage Power Output Features
PS 120/240 AC 50* 120-240 VAC 50 W
PS 120/240 AC 50-U* †120-240 VAC 35 W UPS
PS 120/240 AC 85* 120-240 VAC 85 W
PS 120/240 AC 85-U* †120-240 VAC 70 W UPS
PS –48 DC 50* -48 VDC 50 W DC Input
PS 120/240 AC 25 120-240 VAC 5V @25 W
PS 120/240 AC 50-U, PS 120/240 AC 85-U
These Continuum power modules provide 35 and 70 Watts (respectively) of power
for the CPU and I/O modules. They contain features that reduce or eliminate the
impact of power failure. An external 24 VDC battery source may be connected to
provide un-interruptible power. A built-in battery charger assures the battery is
charged at all times. This circuitry consumes 15 Watts of the initial power available.
Using standard rechargeable lead acid batteries, this unit provides full UPS operation
including all I/O modules for up to 60 minutes at 35 watts power consumption; full
operation of the CPU module only (including modem and network interface) with no
I/O power for 4 hours; or backup of DRAM and real-time clock only for 72 hours
duration. These backup modes are selected and controlled through Andover Controls
Plain English
®programming language.
PS 120/240 AC 50, PS 120/240 AC 85
These power supplies are non-UPS versions of the above listed modules. They
supply a full 50 and 85 Watts (respectively) of power and can also be used as
auxiliary power sources to power additional I/O modules directly, extending the
capabilities of a typical
Continuum
system, even to remote locations.
PS –48 DC 50
This model accepts a –48 VDC input voltage that allows industries such as
telecommunications to provide uninterrupted power to critical environmental
monitoring and control equipment using their own battery-backed power systems.
PS 120/240 AC 25
This power supply provides a +5VDC output at 25 Watts of power and is used as a
external power source to power third party devices and sensors.
* These units are listed for use in UL 294 applications. †These units are listed for UL 1076

Continuum Power Supply Reference
3
Special System Characteristics
Smoke Control Operation (UL 864)
Power Supplies available through Andover Controls that are listed with UL for Smoke
Control applications and the options pertaining to smoke control operation are the
following:
Model Input Voltage Power Output Features
PS 120/240 AC 50 120-240 VAC 50 W
PS 120/240 AC 50-U 120-240 VAC 35 W UPS
PS 120/240 AC 25 120-240 VAC 5V @25 W
Access Control Operation (UL 294)
Power Supplies available through Andover Controls that are listed with UL for Access
Control applications are the following:
Model Input Voltage Power Output Features
PS 120/240 AC 50 120-240 VAC 50 W
PS 120/240 AC 50-U 120-240 VAC 35 W UPS
PS 120/240 AC 85 120-240 VAC 85 W
PS 120/240 AC 85-U 120-240 VAC 70 W UPS
PS -48 DC 50 - 48 VDC 50 W
Burglar Alarm Operation (UL 1076)
Power Supplies available through Andover Controls that are listed with UL for Burglar
Alarm applications are the following:
Model Input Voltage Power Output Features
PS 120/240 AC 50-U 120-240 VAC 35 W UPS
PS 120/240 AC 85-U 120-240 VAC 70 W UPS

4
Andover Controls Corporation
Mechanical Installation
Note to the installer:
This device must be properly installed to suit it's intended application.
European Installations:
These power supplies are listed as Class 1 devices intended for installation in
an IP2 enclosure. The Continuum Enclosure is an IP2 enclosure.
ATTENTION: Disconnect from supply before removing!
The power supply modules can be mounted to a standard DIN rail or be directly
mounted to a panel using screws. Hardware facilitating both mounting methods is
included as an integral part of the case design.
On the back of each module are molded DIN rail guide fingers. The design allows the
module to easily hook onto and slide along a standard DIN rail.
Special clamps are provided on the case that allow you to lock the module in place,
once it is in position.

Continuum Power Supply Reference
5
Once the module is in the desired position, it is locked to the rail by pushing the
bottom clamps inward. After the bottom is secure, press the top clamp inward to
complete the operation.
These clamps, when extended, provide an alternative method of mounting to the DIN
rail. You can mount the module directly to a panel using the reinforced mounting
holes provided on each of the clamps.

6
Andover Controls Corporation
Overall Dimensions
The overall dimensions of the power supply unit are as shown:
9.0 ''
(228.7 mm)
6.70''
(170.2 mm)
2.50 ''
(63.5 mm)

Continuum Power Supply Reference
7
Input Power Connection
AC Power Connection
(AC 50, AC 85, AC 50-U, AC 85-U, PS 120/240 AC 25)
All the PS 120/240 power supply modules are powered by an external AC source.
This source is connected via three screw terminals located inside the cover at the
bottom of the unit as shown below. The module should receive power from its own
independent, 120-240 VAC, 50 or 60 Hz, 100 VA, unswitched circuit.
In order to access the connector you must remove the plastic cover from the case.
Press both cover removal tabs inward simultaneously:
Do not apply excessive force when connecting the AC wires to the
terminals. Be careful not to twist the wire bundle after it is
connected. This connector cannot be used as a strain relief!
Bottom of Case
Press These Tabs
Pull Cover Upward
with Tabs Depressed
GND
(green)
HOT
(Black)
NEUTRAL
(white)
AC
POWER
GND
(See next page)

8
Andover Controls Corporation
The AC connection consists of both terminals (Hot and Neutral) from the power-line
and a third wire tied to a common Earth ground.
• High voltage AC Power wiring should be routed to the conduit opening nearest
the AC power terminals.
• Do not bundle or route AC Power wiring with low voltage input or output wiring.
• Be absolutely certain that your USA installation complies with all aspects of the
National Electric Code, NFPA 70. Be
especially
sure that your system is properly
grounded.
Warning
Make sure that AC power is
not
applied to the power cable while you are
wiring the module, or you could receive an electrical shock that is life-
threatening.
Connecting Grounds
The power supply must be connected to true Earth ground. When used in an
enclosure, be sure to connect the enclosure to Earth ground as well. The Continuum
enclosure includes a special Chassis Ground stud that can be found at the lower left
bottom of the inside as shown below. Connect your grounds at that point.
Connect incoming power line Ground
And Power Supply Ground to this point.

Continuum Power Supply Reference
9
Building Ground Requirements
Be sure that all equipment from Andover Controls is grounded to true Earth ground.
True Earth ground protects the equipment from transients and other power surges in
the area. We cannot guarantee that the controller system will operate as documented
without a properly grounded installation.
An example of a sub-standard ground is a galvanized steel cold water pipe. As the
pipe corrodes, it does not act as a true ground. The corrosion acts as an insulator,
raising the potential of the pipe with respect to the ground.
When lightning strikes in the area of the installation, it drastically changes the
potential of the Earth. Since properly grounded Andover Controls units respond to
changes in potential more rapidly than poorly grounded electrical systems, a poorly
grounded building tries to reach ground through the Andover Controls system. The
surge of current can destroy electronic components on the controller board. Surges
of much lower potential than lightning also impact the reliability of the equipment.
Inspecting the Ground
Be sure to have your grounds inspected before you begin the installation process to
be sure your municipality follows the National Electrical Code.
Many municipalities
do not follow the code and often have substandard electrical grounds.
Check your ground as follows:
Inspect the building power distribution panel for Earth-ground termination. If the
ground termination is any of the following, it is not adequate and must be corrected:
• Does not exist.
• Is connected to a corroded or galvanized pipe.
• Is connected using a small gauge wire (less than 14 AWG).
Be sure your Andover Controls cabinet is connected to the ground with a copper
conductor that terminates at the distribution panel.
Lightning Protection
Metal oxide varistors are built into the power supply to protect against power line
transients.

10
Andover Controls Corporation
Earth
Ground
VIN
(+)
VIN
( )
48VDC
System
GND
(See page 7)
DC Input Power Connection (PS –48 DC 50)
The PS –48 DC 50 power supply module is powered by an external 2 Amp -48VDC
Nominal Input voltage -15% / +10% UL listed source. This source is connected via
three screw terminals located at the bottom of the unit as shown below.
ATTENTION: For all applications, the external power source must be listed for
to UL1481.
In order to access the connector you must remove the plastic cover from the case.
Press both cover removal tabs inward simultaneously:
Press These Tabs
Pull Cover Upward
with Tabs Depressed

Continuum Power Supply Reference
11
UPS Connections
The following information pertains to the AC 50-U and AC 85-U models only.
Backup Battery Connection
The PS 120/240 AC 50-U and AC 85-U power supplies include provisions for
connecting an external lead-acid battery supply to power the system in the event of a
main AC power failure.
An external 24 Volt battery pack may be sized to provide the hold-up time specified
by system requirements. Using standard 12V or 24V batteries, (120 to 160 W•Hr),
the built-in UPS circuitry provides a backup time of 60 minutes @ 35 Watts power
consumption. The integral 15 Watt battery charger has a worst case charging time of
48 hours with two (2) 12V, 7.0 Ahr batteries.
For UL 1076 applications, two 12 VDC 40Ahr batteries insures a supply that will
power approximately 5 hours of back-up operation. For more information, obtain the
Continuum UL 1076 Burglar Alarm System Guide 30-3001-800.
To protect the batteries, the battery cutoff circuitry will activate at 20.4 volts.
The external battery pack connects to the module through a two-position screw
terminal connector. Replacement of the external battery for maintenance purposes
may be performed while the unit is AC powered without interruption of service.
Connect the battery pack as follows:
Bottom of Case
BAT
(+) BAT
( )
24VDC
Battery
Supply
12V
Battery
(+)
12V
Battery
( )
(+)
( )

12
Andover Controls Corporation
External Power Indicator Connection
All Continuum power supply modules include a connector for an external LED power-
on indicator. The signal from this connector is active when the power supply is turned
on and receiving input power (AC or DC).
Connection is via a two pin removable female Molex connector # 14-56-7022 (not
supplied). Wire the external LED as follows:
An optional cable assembly is available. Andover Controls part number 01-0010-422
is a 2 foot (60 cm) cable that includes the LED and connector.
Bottom of Case
LED
(+)
LED
( )
External
LED

Continuum Power Supply Reference
13
5
4
3
2
1
Output Power Connection
The power output connector is a five pin male assembly that is designed to easily
insert directly into the left side (input) connector of any CPU or I/O module. The
signals within that connector are as follows:
PIN Function
5 +VDC
4 VDC Return
3 No Connection
2 Low Battery *
1 AC Power *
* Only on PS 120/240 AC 50-U and AC 85-U
All the Continuum power supply modules (except the AC 25 model) generate a +24
VDC source for all other modules in the system. The PS 120/240 AC 25 power
supply generates +5 VDC. This power source is located on pins 4 and 5.
The UPS versions of these supplies include two power status signals on pins 1 and
2. Their function is as follows:
AC Power is a logic signal that is intended to communicate to an attached CPU
module that AC power is available. When AC is interrupted and the power supply
has switched to UPS battery mode, this signal presents a logic low to the CPU. The
CPU can use this signal to start an orderly system shutdown. For more information
on the use of this signal refer to the Continuum CPU Reference #30-3001-703.
Low Battery is a logic signal that is intended to communicate to an attached CPU
module that the voltage of the battery has dropped below 22 Volts. When the
power supply is in UPS battery mode, this signal presents a logic high to the CPU.
Should the battery voltage drop, this signal switches to a logic low. The CPU uses
this signal to start an orderly system shutdown. For more information on the use of
this signal refer to the Continuum CPU Reference #30-3001-703.

14
Andover Controls Corporation
Output Connections
PS 120/240 AC 50(U), AC 85(U), -48 DC 50
The PS 120/240 AC-50(U), AC 85(U) and –48 DC 50 power supply modules directly
connect to others without the use of cables through a system of built-in plugs and
jacks. All modules except the power supply include two complementary module inter-
connectors.
The power supply becomes the first module feeding the CPU. All other modules are
then connected to the CPU.
Important: When powering a CPU, the power supply connects directly to the
left side of the CPU. Do not place any I/O modules between the power supply
and the CPU.
Creating a system is as simple as physically plugging the modules together into a
stack.
In vertical extended systems, I/O modules may be located above or below other
modules. In this case, cable assemblies bridge the I/O modules together.
Power Suppl
y
CPU I/O I/O
Power Suppl
y
CPU I/O I/O
Power Suppl
y
CPU
Table of contents
Other Andover Controls Power Supply manuals