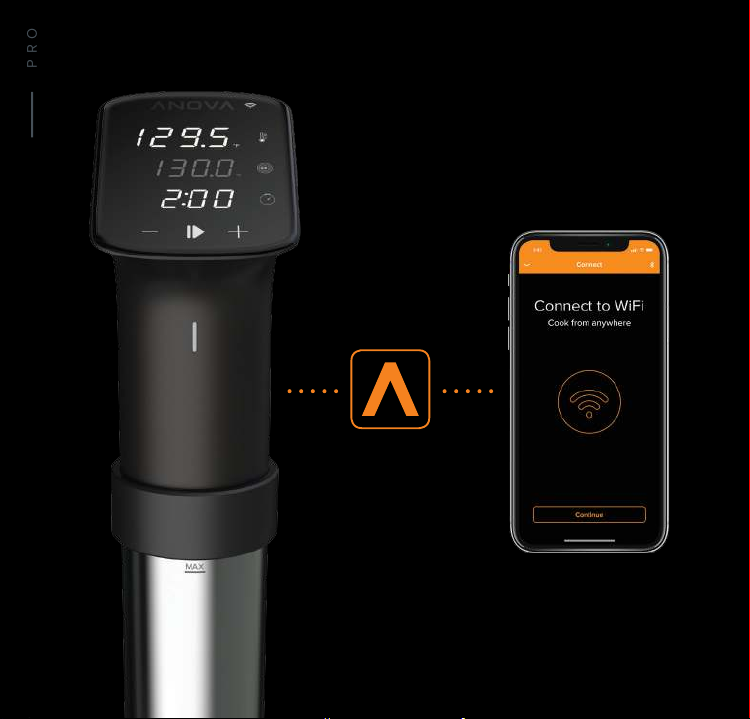
using the touch screen interface
• Set or change desired temperature by pressing
the Target Temperature button followed by the
+/- buttons
• Set or change cooking time by pressing the
Timer button followed by the +/- buttons
• Press the Start button to begin cooking. Cooking
can begin with or without setting a Timer
using the mobile app
• Choose an existing guide, recipe, or one of your
own saved recipes within the Anova Culinary App
• Press Start on the app recipe to begin cooking
SETTING UP
COOK WITH PRO
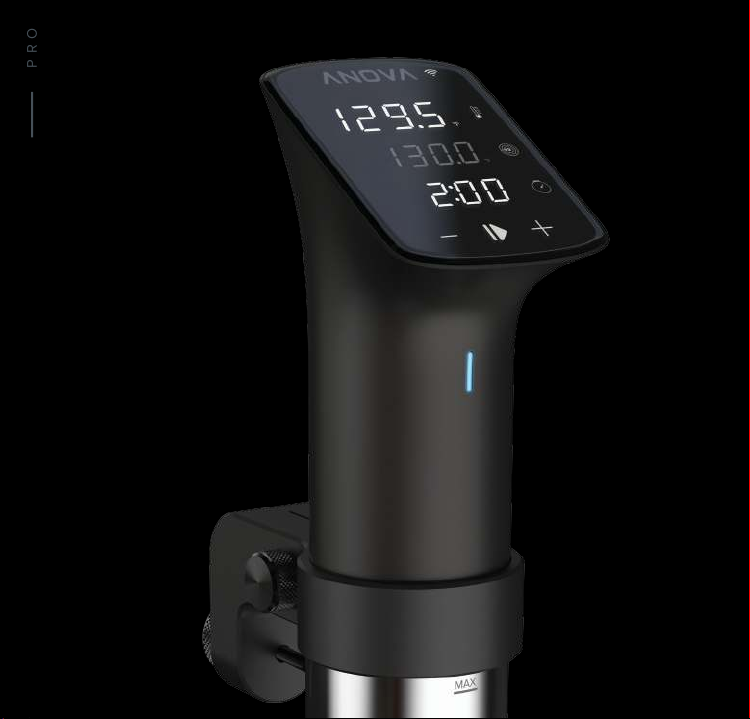
wi-fi connection
The Wi-Fi icon will appear lit
when Anova Pro is connected
to a Wi-Fi network.
change units of temperature
Toggle between Fahrenheit and
Celsius by pressing and holding
the Current Temperature button
for 3 seconds.
led indicator modes
The light on the front of the
device indicates the status of
the cooker with dierent colors:
White: idle
Pulsing Blue: preheating
Solid Blue: cooking
Red: low water or error
Current Temperature
Wi-Fi Connection
Target Temperature
Set Time/Temp
Start/Stop
Timer