Anova TC102 Instruction Manual

Instructions and user manual
TC102
Milasur, SL.
Rúa Eduardo Pondal, nº 23 - Pol. Ind. Sigüeiro
15688 - Oroso - A Coruña 981 696465 www.millasur.com
EN

2
ANOVA wishes to congratulate you for choosing one of our products
and guarantees the assistance and cooperation that has always
distinguished our brand over time.
This machine is designed to last for many years and to be of great use if
used in accordance with the instructions contained in the user manual. We
therefore recommend that you read this instruction manual carefully and
follow all our recommendations.
For more information or doubts, you can contact us through our web
supports such as www.anova.es.
INFORMATION ABOUT THIS MANUAL
Pay attention to the information provided in this manual and on the
machine for your safety and that of others.
•This manual contains instructions for use and maintenance.
•Take this manual with you when you go to work with the machine.
•The contents are correct at the time of printing.
•The rights to make changes at any time are reserved without affecting
our legal responsibilities.
•This manual is considered an integral part of the product and must
remain with it in case of loan or resale.
•Ask your dealer for a new manual in case of loss or damage.
READ THIS MANUAL CAREFULLY BEFORE USING THE MACHINE
To ensure that your machine provides the best results, please read the
usage and safety regulations carefully before using it.
OTHER WARNINGS:
Incorrect use could cause damage to the machine or other objects.
The adaptation of the machine to new technical requirements could cause
differences between the content of this manual and the purchased product.
Read and follow all instructions in this manual. Failure to follow these
instructions could result in serious personal injury.

3
CONTENT
1. SAFETY INDICATIONS
2. IDENTIFICATION OF PARTIES
3. ASSEMBLY
4. CONTROLS AND ACCESSORIES
5. INSTRUCTIONS FOR USE
6. MAINTENANCE
7. TECHNICAL DATA
8. WARRANTY
9. ENVIRONMENT
10. EXPLODING
11. EC DECLARATION
This manual has been written to help you become familiar with the machine and use it safely and
efficiently. Keep in mind that it is an integral part of the machine, so keep it handy for future
reference and always pass it on to the end user using the machine.
This new ride-on mower has been designed and built in accordance with current standards, and is
safe and reliable if used to cut and collect grass following the instructions given in this manual
(proper use). If you use the machine in any other way or ignore the instructions for use,
maintenance and repair, it will be considered as "improper use". In that case, the warranty is
automatically voided and the manufacturer is not responsible for damage or injury to itself or others.
You may find minor differences between your machine and the descriptions contained in this manual
due to later updates and adjustments. Modifications to the machine may be made without notice and
without obligation to update the manual, although essential safety and function features will remain
unchanged. In case of doubt, do not hesitate to contact your dealer.

4
1. SAFETY INDICATIONS
Some paragraphs in the manual that contain important safety and operating information are highlighted
in the following ways:
WARNING or IMPORTANTThese provide details or more information on what has already
been said, in order to prevent damage to the machine.
CAVEATFailure to comply will carry the risk of injury to oneself or others.
DANGER Compliance with the instruction carries the risk of serious injury or death to yourself
or others.
NOTE
Positions on the machine, such as "front", "rear", "left" or "right" hand side, are referred to relative to the
direction of travel.
1.2 GENERAL SAFETY REGULATIONS
DANGER: Please read carefully before using the machine.
GET FAMILIAR WITH THE MACHINE
1) Read the instructions carefully. Become familiar with the controls and the proper use of the
equipment.
2) Never allow children or people who are not familiar with these instructions to use the machine. Local
regulations may restrict the age of the user.
3) Never mow when there are people, especially children or pets near or in the work area itself.
4) Please note that the operator or user is responsible for any accidents or hazards that occur to other
people or their property.
5) Do not carry passengers on the machine.
6) All drivers should seek and obtain professional and practical instruction. Such instruction should
emphasize:
- the need for attention and concentration when working with mounted machines;

5
- the fact that you cannot use the brake to regain control of a machine that is sliding down a slope. The
main reasons for loss of control are:
•insufficient wheel grip;
•speeding;
•inadequate braking;
•the type of machine is not suitable for its task;
•ignorance of the effect of terrain conditions, especially slopes;
•incorrect hitch and load distribution.
WORK PREPARATION
1) While mowing, always wear sturdy shoes and long pants. Do not operate the equipment barefoot or
with open sandals.
2) Thoroughly inspect the area where the equipment is to be used and remove all objects that can be
ejected from the machine.
3) DANGER! Gasoline is highly flammable:- store fuel in containers specifically designed for this
purpose;- refuel only outdoors and do not smoke while refueling;- add fuel before starting the engine.
Never remove the fuel tank cap or add gasoline while the engine is running or when the engine is hot -
if you spill gasoline, do not start the engine and move the machine away from the spill area. Do not
create any source of ignition until gasoline vapors have evaporated;
- Replace and securely tighten all fuel tank and container caps.
4) Replace faulty exhaust vents.
5) Before use, always inspect the machine to verify that the blades, blade bolts and cutting deck are not
worn or damaged. Replace worn or damaged blades and bolts as a whole to preserve the balance of
the cutting system.
6) On multi-blade machines, remember that the rotation of one blade can cause other blades to rotate
at the same time
WORKING WITH THE MACHINE
1) Do not start the engine in a confined space where dangerous carbon monoxide fumes can
accumulate.
2) Cut only in daylight or good artificial light.
3) Before starting engine, disengage blades and shift tractor to neutral.
4) Do not use the machine on slopes of more than 10° (17%)
5) Remember that there is no such thing as a "safe" slope. Working on sloped grass surfaces requires
special care. To protect against overturning:- Do not stop or start suddenly when going up or
down;- Engage the drive slowly and always keep the machine running, especially when going
downhill;- Machine speeds should be kept low on slopes and in tight turns;
- Be alert for drops and potholes and other hidden hazards on the surface; - Never cut downhill.
6) Take care when pulling loads/trailers or using heavy equipment:- use only approved drawbar hitch
points on the machine;
- limit loads to those you can safely control; maximum load 200kg
- do not turn sharply. Be careful when changing direction - use counterweights or wheel weights
whenever indicated in the instruction manual.

6
7) Disable the cutting system before crossing surfaces other than grass.
8) Never use the machine with the guards/covers damaged, or without the guard in place.
9) Do not change engine control settings or exceed engine speed (rpm). Running the engine at
excessive speed can increase the risk of personal injury.
10) Before leaving the driver's seat:- deactivate the blades and lower the accessories;- place the
machine in neutral gear and apply the parking brake;- stop the engine and remove the ignition key.
11) Deactivate the blades, stop the engine and remove the ignition key:- before cleaning blockages in
the grass outlet or unclogging the collector channel;- before cleaning, checking or repairing the
machine;- after hitting an object weird. Inspect the machine for damage and make all repairs before
restarting and using the machine again - if the machine starts to vibrate abnormally (check the causes
immediately).
12) Deactivate the blades and cutting system for transport or when not in use.
13) Stop the engine and deactivate the blades:- before refueling;- before removing the grass catcher.
14) Reduce throttle when starting engine. If the engine is equipped with a fuel cock, turn off the fuel
cock when you have finished mowing.
MAINTENANCE AND STORAGE
1) Keep all nuts, bolts and screws tight to ensure the equipment works properly and safely.
2) Never store the equipment with gasoline in the tank inside a building where fumes emanate. It may
be hit by an open flame or spark and cause a fire.
3) Allow the motor to cool down before storing it in any box or packaging.
4) To reduce the risk of fire, keep the engine, exhaust, battery compartment, and gasoline storage area
free of grass, leaves, or excessive grease.
5) Check grass catcher frequently for wear or damage.
6) Replace worn or damaged parts for safety reasons.
7) If the fuel tank has to be drained, this should be done outdoors and in a clear area.
8) On multi-blade machines, remember that the rotation of one blade can cause others to rotate at the
same time.
9) When the machine is stored or left unattended, lower the mower deck to the ground.
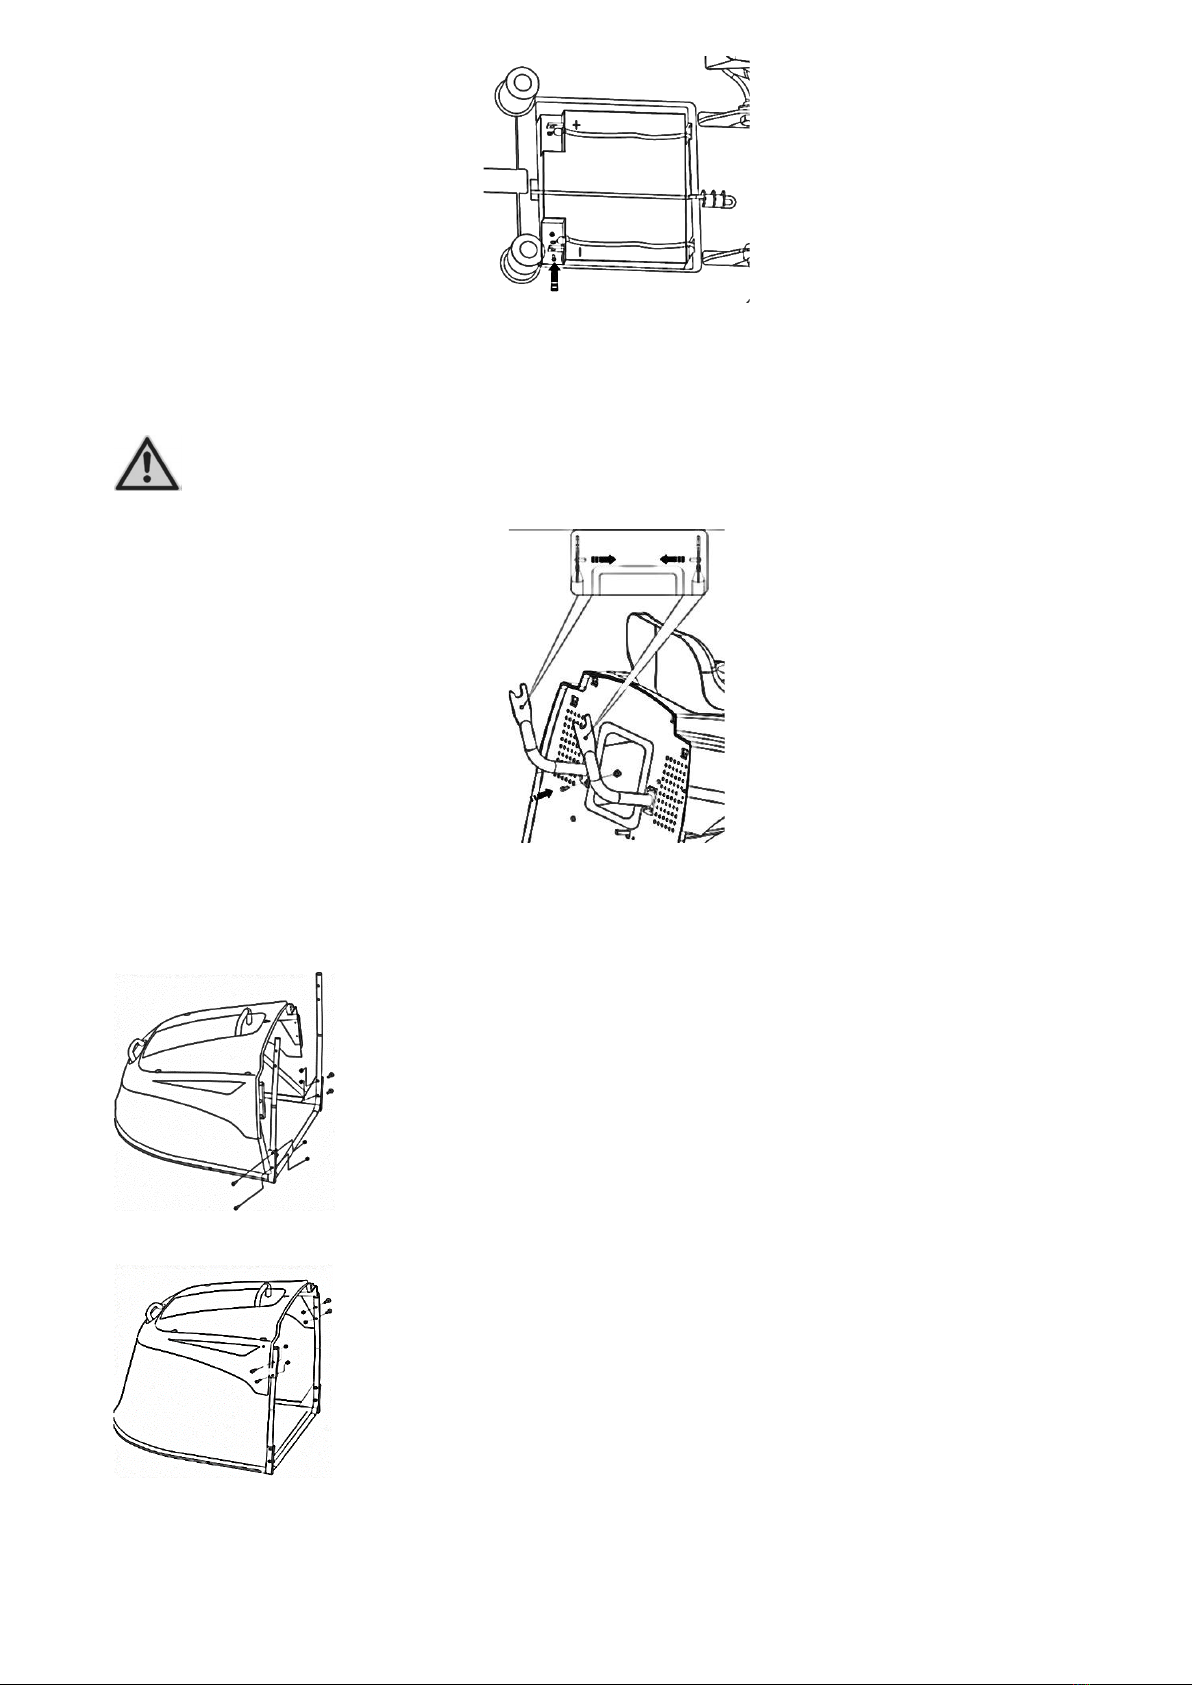
SECURITY LABELS
Your machine must be used with care. This is why picture labels have been
placed on the machine, to remind you of the main precautions to be taken while working and handling
the machine. These labels must be considered an integral part of the machine and must be replaced if
damaged. If a label becomes detached or illegible, contact your dealer for a replacement. Its meaning
is explained below.
1. Warning: Please read the instructions before using this machine.
2. Warning: Turn off the ignition key and read the instructions before carrying out any repair or
maintenance work.
3 Danger! Ejected Objects: Do not use without stone guard or grass catcher in place.

7
4 Danger! Ejected Objects: Keep bystanders away.
5 Danger! Risk of machine tipping over: Do not use this machine on slopes steeper than 10°.
6 Danger! Cuts and Injuries – Make sure children are kept away from the machine at all times when the
engine is running.
7 Danger of cuts. Moving blades. Do not put your hands or feet near or under the cutting deck opening.
2. IDENTIFICATION OF PARTS
2.1 IDENTIFICATION OF THE MACHINE
The label located near the battery casing has the essential data of each machine.
1.Acoustic power level according to directive 2000/14/EC.
2. Weight in kg3. Serial number4. Year of manufacture5. Cutting
width and motor power.6. Engine speed in rpm (if indicated)7.
Conformity mark according to Directive 98/37 / CEE8. Machine
type9. Name and address of the manufacturer/importer.

8
2.2 IDENTIFICATION OF MAIN COMPONENTS
1. Grass catcher
2. Grass discharge tube
3. Driving seat
4. Front steering wheel
5. Light switch
6. Blade activation switch
7. Engine switch
8. Reverse pedal
9. forward pedal
10. Cutting height adjustment lever
11. Collection bag turning lever
12. Engine throttle
13. Rear wheel
14. Cutting deck
15. Brake pedal
16. Brake lock / parking brake
17. Front wheel
3. ASSEMBLY
For storage and transportation purposes, some machine components are not factory installed and must
be assembled after unpacking. Follow the instructions below.
IMPORTANTThe machine is supplied without engine oil or fuel. Before starting the engine, fill it
with proper oil and fuel. Consult your sales center.
3.1 UNPACKING When unpacking the machine, be careful to gather all individual parts and
accessories, and do not damage the mower deck when removing the machine from the deck.
Remove the 6 bolts at the bottom of the packing shelf at first, then
you can lift the top frame to release the machine (the operation
will be done by two people). And cut the fixed wire at the front and
rear of the tractor frame, then remove the machine from the
platform. (Fig.1)
The packaging contains (☛fig.2)
1. The machine2. The grass catcher cover board3. steering wheel
4. The seat
5. Side retention tube
6. The grass catcher
7. Front bracket
8. An envelope containing:- the instruction manual and
documents- nuts and bolts
- ignition keys - tools
NOTE To avoid damage to the mower deck, set the mower deck
to its maximum height on the machine and use extreme care
when removing the machine from the deck.

2
NOTE On Hydrostatic Drive Models: For easy movement or removal of the
machine from the platform, place the drive disengagement lever in the “B”
position to unlock traction and allow the machine to move freely.
3.2 MOUNTING THE STEERING WHEEL
Place the machine on a flat surface and align the front wheels. Place the steering wheel on the
protruding hub with the spokes facing the seat.
3.3 MOUNTING THE SEAT
Mount the seat on the plate with the screws.
3.4 CONNECT THE BATTERY
First connect the red cable to the positive (+) pole, using the supplied screws as shown. Apply silicone
grease to the terminals and check that the protective cap of the red cable is in place.

3
3.5 ASSEMBLE THE COLLECTING BAG SUPPORT
Using the nuts and bolts inside the attached envelope, fit the two brackets onto the rear frame.
NOTE: Pay attention to the difference between the pin on the left bracket and the pin on the
right. Improper mounting will result in the grass catcher not being placed correctly on the
bracket. Each of the supports has a different shape.
3.6 ASSEMBLE THE COLLECTING BAG
3.6.1 Place the front bracket inside the grass catcher, then use the nuts and bolts inside the attached
envelope to fit onto the front of the grass catcher.
3.6.2 Use the nuts and bolts to fasten the top bracket to the front bracket. Attach the bag to the front
support.
3.6.3 Place the tipping lever on the grass catcher deck board and insert the pin with nut and bolt in
place.

4
3.6.4 Attach the side retaining tube to the grass catcher, use screws to fit it into the upper bracket and
lower bracket.
3.6.5 Mounting the outlet guard (grass catcher)
Never use the machine without having installed the outlet protections! Attach the grass
catcher to the brackets and center it up with the back plate so that the two reference marks
line up. Make sure the bottom tube of the grass catcher opening is engaged with the pawl.
3.7 REFUELING
NOTE Check your engine manual to see what type of oil and fuel
you can use. With the engine off, check the oil level according to the
instructions in the engine manual, this should be between the MIN
and MAX marks on the engine oil gauge. Refuel with a funnel, but do not
completely fill the tank.
The capacity of the tank is about 7.5 liters.
DANGER Refueling should be done in an open or well-ventilated
area with the engine off. Always remember that gasoline fumes are
flammable.
DO NOT USE AN OPEN FLAME (CANDLE OR SIMILAR TYPE)
TO LOOK INSIDE THE TANK AND DO NOT SMOKE WHEN REFUELING.
IMPORTANT Do not spill gasoline on plastic parts to avoid damaging
them. In case of accidental spills or leaks, clean up immediately with
water. The warranty does not cover damage to plastic body parts or
the engine caused by gasoline.

5
4. CONTROLS AND ACCESSORIES
4.1 STEERING WHEELTurns the front wheels and allows you to steer the machine while working.
4.2 THROTTLE
Regulates the motor the number of rpm and the forward speed. The positions are indicated on a plate
showing the following symbols:
"CHOKE" cold start
"SLOW" for minimum engine speed
"FAST" for maximum engine speed
- The «CHOKE» position enriches the mixture, so it should only be used for as long as necessary when
starting the machine cold.- When moving from one area to another, place the lever in a position
between «SLOW» and «FAST ».- When cutting, switch to «FAST» to give full motor power to the
cutting system.
4.3 ACTIVATION OF THE CUTTING SYSTEM AND BRAKE CONTROLThe switch allows you to
engage the blades using the electromagnetic clutch:
O «A» Pressed = Leaves unhooked
I «B» Pulled = Hooked Sheets
If you activate the blades without taking the necessary safety precautions, the
engine will shut down.
4.4 LIGHT SWITCH (Fig1)
To turn on the headlights, turn the key to the «ON» position.
IMPORTANT The light on the mower is for supplemental lighting only. Only use the mower in
broad daylight.

6
4.5 IGNITION KEY (☛Fig2)
It has three positions:
"OFF" everything is off;
"ON" activates all parts;
“START” engages the starter motor. If you release the key at “START”, it will automatically
return to “ON”.
4.6 SOUND WARNINGS
- The audible warning indicates that the grass catcher is full.
4.7 CUTTING HEIGHT ADJUSTMENT LEVER There are six positions for this lever (shown as "1" to
"6" on the label), corresponding to various heights between 3 and 9 cm.
- To go from one height to another, press the release button at the end of the lever
4.8 PARKING BRAKE This brake prevents the machine from moving when it has been parked. There
are two positions:
"A" = Brake off
«B» = Brake activated
The brake is applied by pressing pedal A down and then pressing
pedal B. When you lift your foot off the pedal, the lever will lock it in
the down position. To disengage the parking brake, press pedal A.
The lever will return to the free position.
NOTE The engine can only be started in the parking
position.

7
4.9 GRASS CATCHER RELEASE LEVER This removable lever tilts and empties the grass catcher.
This means less work for the operator.
4.10 DRIVE PEDAL This pedal activates the drive of the wheels and controls the forward and reverse
speeds of the machine.
- To activate forward, press towards «F» with your toe. As the pressure on the pedal increases, the
speed of the machine increases.- Reverse gear is activated by pressing the pedal towards «R».
IMPORTANT Only shift into reverse when the machine has stopped moving. Just push
towards “F” or “R” when the parking pedal is off.
4.11 HYDROSTATIC TRANSMISSION DISABLE LEVER This lever has two positions as shown on the
label:
«A» = Transmission activated: for all uses, when moving and during cutting;
“B” = Transmission Off – This makes it much easier to move the machine by
hand, with the engine off.
IMPORTANT To avoid damage to the transmission unit, this
operation must be carried out only when the engine has stopped.

8
5. INSTRUCTIONS FOR USE
5.1 SAFETY RECOMMENDATIONS
DANGER The machine must only be used for the purpose for which it was designed (cutting
and collecting grass).
Do not tamper with or remove the safety devices installed on the machine. REMEMBER THAT THE
USER IS ALWAYS RESPONSIBLE FOR DAMAGE AND INJURIES TO OTHERS.
Before using the machine:- read the general safety regulations, paying special attention to driving and
cutting on slopes;- read the instructions for use carefully, make sure you are familiar with the controls
and know how to stop the blades and the motor quickly;- never put your hands or feet next to or under
rotating parts and always keep away from the outlet.
Do not use the machine when you are in poor health or under the influence of medication or any other
substance that may reduce your reflex actions and your ability to concentrate.
It is the responsibility of the user to assess the potential risk of the area where the work is to be carried
out and take all necessary precautions to ensure their own safety and that of others, especially on
slopes or uneven, slippery and unstable terrain.
Do not leave the machine on tall grass with the engine running to avoid the risk of starting a fire.
CAVEAT This machine should not be used on slopes greater than 10° (17%). If the machine is likely to
be used primarily on sloping ground (never more than 10°), place the counterweights under
the front wheel support. These improve stability at the front end and reduce the chances of
tipping over.
IMPORTANT: All references related to the positions of the controls are described in chapter
4.
5.2 IMPORTANCE OF CUTTING SAFETY DEVICES
Safety devices work in two ways: - They prevent the engine from starting if all the safety requirements
are not met - They stop the engine if only one of the safety requirements is missing.
a) To start the engine, it is necessary that:- the transmission is in "neutral";- the blades are not
activated;
- the operator is seated and the parking brake is applied.
b) The engine stops when the operator leaves his seat.
NOTE The blades will stop when the machine goes in reverse, pressing it towards «R». Press
the button (to the right of the seat on the rear cover) to make the blades rotate.
5.3 INSTRUCTIONS BEFORE STARTING WORK
Before you start mowing, it is necessary to carry out several checks and operations to ensure that you
can work efficiently and in maximum safety.
5.3.1 Seat adjustment
To change the position of the seat, loosen the four fixing screws and slide it along
the slots. Once you have found the correct position, tighten the four screws.
5.3.2 Tire pressure Having the correct tire pressure is the main condition to ensure
that the mower deck is horizontal and can cut evenly. Unscrew the valve caps and

9
connect a compressed air line with a pressure gauge to the valve.
The correct pressures are:
FRONT 1.0 bar (15 x 6.0-6) REAR 0.8 bar (18 x 8.5-8)
5.3.3 Checking fuel and oil (☛3.7)
5.3.4 Checking the safety and efficiency of the machine.
1. Check that the safety devices work as described (☛5.2).2. Verify that the brake is in perfect working
order.3. Do not start mowing if the blades are vibrating or if you are not sure they are sharp enough.
Always remember that:- An unsharpened blade pulls the grass and turns the grass yellow when it is
pulled off the ground.- A loose blade causes unwanted vibrations and can be dangerous.
Do not use the machine if you are not sure if it is working safely or efficiently. If in doubt, contact your
dealer immediately for necessary checks and repairs.
5.4 USE OF THE MACHINE
5.4.1 Start
DANGER The engine must be started in an open or well-ventilated area! ALWAYS
REMEMBER THAT EXHAUST GASES ARE TOXIC!
To start the engine:- open the fuel stopcock (to "I")- deactivate the blades
(☛4.3);
- operate the parking brake (☛4.8);
- keep the transmission pedal in the NEUTRAL position;
- sit in the driver's seat; - when starting cold, move the throttle to the
"CHOKE" position shown on the label; - if the engine is already warm, set
the lever between "SLOW" and "FAST"; - put the ignition key and turn
"ON" to make electrical contact, then turn "START" to start the engine; - release the key once the
engine has started. When the engine has started, move the throttle to "SLOW".
IMPORTANT The choke should be closed as soon as the engine is running smoothly. Using
it when it's already hot can damage the spark plugs and cause the engine to run erratically.
NOTE: if there are problems starting the engine, do not insist, as you may run the risk of
discharging the battery and flooding the engine. Turn the key to the «OFF» position, wait a
few seconds and then repeat the operation. If the malfunction persists, consult the engine manual or
your nearest technical center.
IMPORTANT: Always keep in mind that the safety devices prevent the engine from starting if
the safety requirements are not met (☛5.2). In these cases, once the situation has been
corrected, the key must first be turned to "OFF" before the engine can be restarted.
5.4.2 Starting and movement without cutting
This machine has not been approved for use on public roads. It must be used (as indicated
by the highway code) in private areas closed to traffic.
When moving the machine, the blades should be off and the mower deck raised as high as possible.
Set the throttle between "SLOW" and "FAST",
Unlock the parking brake and release the brake pedal (☛4.8).Press the drive pedal (☛4.10) in direction
«F» and reach the required speed by gradually increasing the pressure on the pedal and operating the
accelerator.
The drive must be activated as described (☛4.10)) to prevent sudden activation causing the
vehicle to overturn and lose control of the vehicle, especially on slopes.

10
5.4.3 Braking
The machine already slows down considerably simply by releasing the drive pedal. If you release the
drive pedal, the machine will stop if it is on a flat area. If there is a gradient or you require more
consistent braking, you can press the brake pedal.
5.4.4 Reverse
IMPORTANT It should be activated only when the machine has stopped moving. When the machine
has stopped moving, begin to back up by pressing the drive pedal in the “R” direction (☛4.10).
5.4.5 Cutting To start cutting:
-move the throttle to «FAST»;
- raise the mower deck as high as possible;
- activate the blades (☛4.3);
- start moving forwards on the grass very slowly and with the greatest
caution, as already described;
- adjust the cutting height and speed taking into account the conditions of
the grass (height, density and humidity of the grass).
CAVEAT When mowing on sloping ground, reduce your speed to ensure safe conditions.
NOTE: This machine has not been approved for mowing in reverse. The blades will stop when
the machine is in reverse by pressing the drive pedal to "R". Press the button (on the right of
the back cover) to make the blades rotate.
Regardless of conditions, always reduce speed if you notice a drop in engine power; if you travel too
fast compared to the amount of grass being cut, you will not be able to mow well.
Disengage the blades and raise the mower deck as high as possible whenever you need to clear an
obstacle.
5.4.6 Emptying the grass catcher
NOTE: this operation can only be carried out with the blades
disconnected, otherwise the motor stops.
Do not allow the grass catcher to become too full as this can block the
catcher channel. When the grass catcher is full, you will hear an audible
warning.
At this point:
- disable the blades (☛4.3) and the sound will stop;
- lower the engine speed;
- stop driving;- apply the parking brake on slopes;
- pull the lever and raise the grass catcher to empty it; (☛4.9)
- close the grass catcher so that it hooks into the pawl.
NOTE Occasionally, an audible warning may be heard at the time the blade is activated, even when the
catcher has been completely emptied. This is due to grass debris on the micro-switch
sensor. To stop the signal, disable the blades and immediately enable them again. If the
warning sound continues, stop the engine, remove the grass catcher, and remove any
debris in the catcher that is triggering the sensor.
5.4.7 Unlock output channel

11
Cutting very tall or wet grass, especially at excessively high speeds, can clog the collector channel. If
this happens, proceed as follows:
- stop moving forward, disengage the blades and stop the engine;
- remove the grass catcher or guard;
- remove the grass cuttings; can reach them from the outlet of the collector channel.
CAVEAT This maintenance work should only be done with the engine off and the blades fully paid off.
5.4.8 End of cut
When you have finished mowing, disengage the blades, lower the engine speed and mount the mower
with the mower deck as high as possible.
5.4.9 End of work
Stop the machine, move the throttle to "SLOW" and turn the engine off by turning the key to "OFF".
When the engine has stopped, close the fuel cock (☛5.4.1)
CAVEAT To prevent engine backfire, set the throttle to "SLOW" for 20 seconds before
stopping the engine. Always remove the ignition key before leaving the machine unattended!
IMPORTANT To keep the battery charged, do not leave the key in the "ON" position when
the engine is not running.
5.4.10 Cleaning the machine
After use, clean the outside of the machine, empty the grass catcher and shake
to remove grass and other debris.
CAVEAT: Always empty the grass catcher and do not leave containers filled
with grass clippings in a room.
Clean the plastic parts of the body with a damp sponge with water and
detergent, being careful not to wet the motor, the electrical parts or the
electronic circuit board located under the dash.
IMPORTANT Never use hose nozzles or strong detergents to clean the body or engine! When washing
the inside of the mower deck and collector channel, the machine must be on firm ground with:- the
grass catcher or impact protector fitted;- the operator seated;- the engine running;- the transmission in
neutral.- blades activated.
Attach a water hose to each of the pipe fittings at a time and run water through each one for a few
minutes, with the blades moving.
When washing, the mower deck must be lowered down. Remove the grass catcher, empty and rinse it,
and then put it in a position where it can dry quickly.
5.4.11 Storage and inactivity for long periods
If you are not going to use the machine for a long time (more than 1 month), disconnect the battery
cables and follow the instructions in the motor instruction manual.
Drain the fuel tank by disconnecting the tube located at the fuel filter inlet and follow the instructions in
the engine manual.
CAVEAT Carefully remove any dry grass clippings that may have accumulated around the

12
engine or exhaust to prevent them from igniting the next time the machine is used!
Store the machine in a dry and protected place, preferably covered with a cloth or cover.
IMPORTANT The battery should be kept in a cool and dry place. Before a long storage period (more
than 1 month), always charge the battery to the maximum and then recharge it before using it again.
The next time the machine is used, check for fuel leaks from the lines, fuel cock, or carburetor.
5.4.12 Electrical card protection device.
The electronic circuit board has an automatic reset protector that breaks the circuit if there is a fault in
the electrical system. It results in stopping the engine and turning off the lamps.
The circuit automatically resets after a few seconds, but the cause of the fault must be determined and
treated to avoid reactivating the protection device.
IMPORTANT To avoid activating the protection device:- Do not reverse the cables on the battery
terminals;- Do not use the machine without its battery, as the charge regulator could be damaged.- Be
careful not to cause short circuits.
5.4.13 Summary of the main steps to follow when using the machine
Start the engine (
☛
5.4.1)
Open the fuel cock, make sure all starting conditions are met, then
turn the key.
Go forward (☛5.4.2) Push the forward pedal forward
Brake or stop (☛5.4.3) Reduce engine speed and depress the brake pedal.
Reverse (☛5.4.4) Stop the machine; step on the reverse pedal
Cut the grass (☛5.4.5)
Attach the grass catcher or crash protector and turn up the throttle;
engage the blades and adjust the height of cut. Push the drive pedal
forward
Empty the grass catcher
(☛5.4.6)
Stop moving forward, disengage the blades and pull the lever to tilt
the grass catcher.
Unlock the collector channel
(☛5.4.7)
Stop moving forward, disengage blades and turn off engine. Remove
grass catcher and clean out catch channel.
Finish cutting (☛5.4.8) Disengage blades and reduce engine speed.
Stop the engine (☛5.4.9) Reduce engine speed, wait a few seconds, turn key and close fuel
cock.
store machine (☛5.4.10)
Set the parking brake, remove the key and, if necessary, wash the
machine, the inside of the mower deck, the collector channel and the
grass catcher.
5.5 USE OF THE MACHINE ON SLOPES
Only cut on slopes with slopes up to a maximum mentioned

13
﹥15° 15°﹥10°
Grass on a slope must be mowed moving up and down and never perpendicular to the slope.
When changing direction, be very careful that the wheels facing up the slope do not hit any obstacles
(such as stones, branches, roots, etc.) that could cause the machine to slide to the side, tip over, or
cause the machine to slide sideways. lose control.
DANGERSLOW DOWN BEFORE ANY DIRECTION CHANGE ON SLOPES, and always
apply the parking brake before leaving the machine stationary and unattended.
CAVEATStart moving forward very carefully on sloping ground to avoid the risk of tipping over.
Reduce forward speed before going on a slope, especially downhill.
DANGER, use reverse to slow down going downhill: this could cause you to lose control of the
vehicle, especially on slippery terrain.
5.6 TRANSPORT
CAVEAT: If the machine is transported on a truck or trailer, use proper handling equipment and
enough people for the weight of the machine and the type of lifting system used. The machine must
never be lifted with ropes and tackle. During transport, turn off the fuel stopcock, lower the mower deck,
apply the parking brake, and secure the machine securely with ropes or chains to the hauling device.
5.7 LAWN MAINTENANCE
1. To maintain a green, smooth and attractive lawn, it must be mowed regularly. A lawn can be made
up of different types of grass. If the lawn is mowed frequently, the grass and roots grow more
vigorously, forming a solid grass bed. If the lawn is mowed less often, taller grass and weeds start to
grow (more daisies and clovers, etc.).
2. It is always better to mow the grass when it is dry.
3. Blades must be in good condition and sharpened so that the grass is cut straight without a jagged
edge causing yellowing at the ends.
4. The engine must be running at the highest speed, both to ensure proper grass cutting and to obtain
the necessary thrust to throw the clippings through the collector channel.
5. Mowing frequency should be in relation to the growth rate of the grass. The grass should not be
allowed to grow too long between one cut and the next.
6. During hot, dry periods, the grass should be cut a little higher to prevent the soil from drying out.
7. The proper grass height on a well-kept lawn is approx. 4-5cm. With one cut, it is not necessary to
remove more than a third of the total height. If the grass is very tall, it should be cut twice in a twenty-
four hour period: the first time with the blades at maximum height, possibly reducing the width of cut,
and the second time cut to the desired height.
8. The appearance of the lawn will be improved if you alternate cutting in both directions.
9. If the collector system tends to get blocked with grass, you should reduce ground speed as it may be
too fast for the grass condition. If the problem persists, the probable causes are dull blades or warped
wings.
10. Be very careful when mowing near bushes or curbs as they may distort the horizontal position of
the mower deck and damage its edge and blades.
Table of contents
Other Anova Lawn Mower manuals