manuals.online logo
Brands
  1. Home
  2. •
  3. Brands
  4. •
  5. AntennaCraft
  6. •
  7. Antenna
  8. •
  9. AntennaCraft ST4 User manual

AntennaCraft ST4 User manual

BEFORE YOU BEGIN
Read this manual and the separate Consumer Product Safety
Committee “Safety Instructions”.
WARNING:When you start to install an antenna,
use extreme caution. If the antenna starts to fall, let it
go! It could contact overhead power lines. IF the an-
tenna touches the power line, contact with the antenna,
mast, cable, or guy wires can cause electrocution and
death. Call the power company to remove the antenna.
DO NOT attempt to remove it yourself.
For your safety and convenience, plan each step of the installa-
tion. Organize the parts and check them against the following list.
You need a suitable length of RG-58 coaxial cable t-
ted with a PL-259 connector at each end, mast mount-
ing hardware, and a small wrench with a 5/16-inch
opening (not supplied).
Outdoor Scanner-Ham
Discone Antenna
25-1300 MHz
Compact Design—
allows exibility when choosing an installation site
Low wind Resistance and Lightweight—
allows higher mast mounting
Resonator and Tunable Whip—
for best 50 MHz performance
Easy Assembly and Connection—
uses rugged stainless steel hardware, radiator rods,
and standard supplied SO-239 terminal and attaches
to PL-259 cable connector (not supplied)
This discone scanner and ham base station antenna is our most
efcient omni-directional antenna system, combining a disc an-
tenna with electrically matched radiators. You can use it to re-
ceive and transmit a wide range of signals, including amateur
radio, aircraft and other special services, on your scanner or oth-
er receiver. The antenna is designed to provide high efciency
when receiving and transmitting signals on selected frequencies.
Your antenna receives VHF and UHF frequencies between
25 MHz and 1300 MHz (1.3 GHz), and transmits effectively at
50, 144, 220, 440, 900, and 1296 MHz. It handles a maximum
transmitting output power of 200 watts and provides a standing
wave ration (SWR) efciency of 1.5:1 or better over the receiv-
ing and transmitting spectrum. It is 44-inches high overall, and
ts on masts up to 1-1/2-inches in diameter. 1
Model
ST4
www.antennacraft.net 120307
ASSEMBLING THE ANTENNA
1. Install the two mount brackets on the support tube us-
ing one 8-32 x 1/2-inch screw, one #8 lockwasher and
one 8-32 nut for each bracket. Do not fully tighten it
yet.
2. Position one bracket at the midpoint of the tube. Posi-
tion the other bracket at the bottom of the tube.
3. Slide one end of the RG-58 coaxial cable with PL-259
connectors through the support tube. Connect the PL-
259 connector to the SO-239 terminal on the apex
assembly.
4. Install the apex assembly into the end of the support
tube and secure it with three 4-40 x 3/16 screws and
lockwashers.
5. Screw one 8-32 nut onto the threaded end of each of
the eight disc element rods.
6. Screw each disc element rod into the holes around
the upper disc of the apex assembly, and hand tight-
en each rod. Rotate each 8-32 nut until it ts snugly
against the disc. Then use a 5/16-inch wrench to tight-
en each nut against the disc surface to secure each
rod.
7. Screw one 8-32 nut onto the threaded end of each of
the eight cone assembly rods.
8. Screw each cone assembly rod into the base of the
cone section of the apex assembly, and hand tight-
en each rod. Next, use a wrench to tighten each nut
against the cone surface to secure each rod.
9. Insert the whip assembly into the top of the coil as-
sembly.
10. Note: Never use a wrench on the black plastic insula-
tor part of the apex assembly.
11. To secure the whip assembly, use the (supplied) allen
wrench to tighten the set screw.
12. Place the two mounting brackets against the chosen
section of the antenna mast, and secure each bracket
with a U-bolt, two ½-inch split lockwashers, and two
1/4-20 hex nuts. When each bracket is in the correct
position, tighten the nuts fully.
13. Use the appropriate mast mounting hardware (not
supplied) to secure the coaxial cable to the antenna
mast, leaving some slack in the cable. Mount the mast
section to your chosen mount, following and instruc-
tions that come with the mount.
14. Route the rest of the cable to your receiver or trans-
mitter. Attach the supplied yellow Danger Label to the
mast at eye level, as a safety reminder.
TUNING THE ANTENNA
1. To ensure your antenna works with a minimum stand-
ing wave ration (SWR) on all channels in the 6-meter
amateur radio band, we allowed extra whip length for
proper tuning.
2. To properly tune your antenna, you need a SWR me-
ter, available at your local electronics store.
3. Connect the SWR meter between the transceiver
and the antenna cable, as described in the meter’s
instructions.
4. Measure the SWR on the lowest and highest chan-
nels.
5. If the SWR reading on the lowest channel is high-
er than that specied in the meter’s instructions,
lengthen the antenna by loosening the set screw
and pulling the whip out of the coil about 1/8-inch.
If the SWR reading on the highest channel is higher
than that specied in the meter’s instructions, remove
the whip from the coil and cut 1/8-inch from its lower
end. You can cut the whip with a hacksaw or large
wire cutters. You can also use a le to make a small
groove around the whip and then break off the piece.
6. Measure the SWR again and repeat the adjustment, if
necessary. Cut off only 1/8-inch at a time, checking the
s/WR each time.
FREQUENCY CURVES
Mount Bracket
Support Tube
Nut
Lockwasher
Screw
Whip Assembly
Allen Wrench
2
3
Cone Assembly
Rod
Nut
Apex Coil
Assembly
U-Bolt
Support Tube
Nut
Lockwasher
Bracket
Mast
Rod
Support Tube
Apex
Assembly
Nut
Lockwasher
Screw
PL-259 Connector
(not supplied)
SO-239
Terminal

Other AntennaCraft Antenna manuals

AntennaCraft 1500080 User manual

AntennaCraft

AntennaCraft 1500080 User manual

AntennaCraft HDX1000 User manual

AntennaCraft

AntennaCraft HDX1000 User manual

AntennaCraft HDView360 MINI-STATE HDMS9100 User manual

AntennaCraft

AntennaCraft HDView360 MINI-STATE HDMS9100 User manual

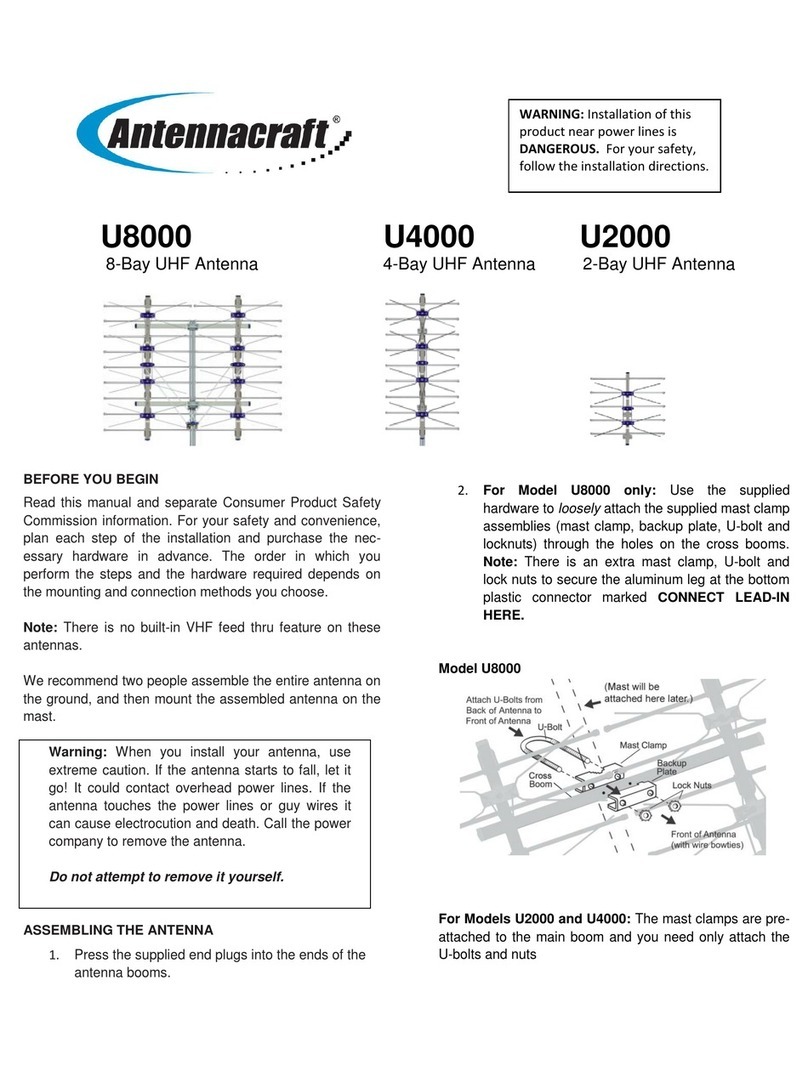
AntennaCraft U2000 User manual

AntennaCraft

AntennaCraft U2000 User manual

AntennaCraft HBU55 User manual

AntennaCraft

AntennaCraft HBU55 User manual

AntennaCraft C290 User manual

AntennaCraft

AntennaCraft C290 User manual

AntennaCraft Mini State 5MS9000 User manual

AntennaCraft

AntennaCraft Mini State 5MS9000 User manual

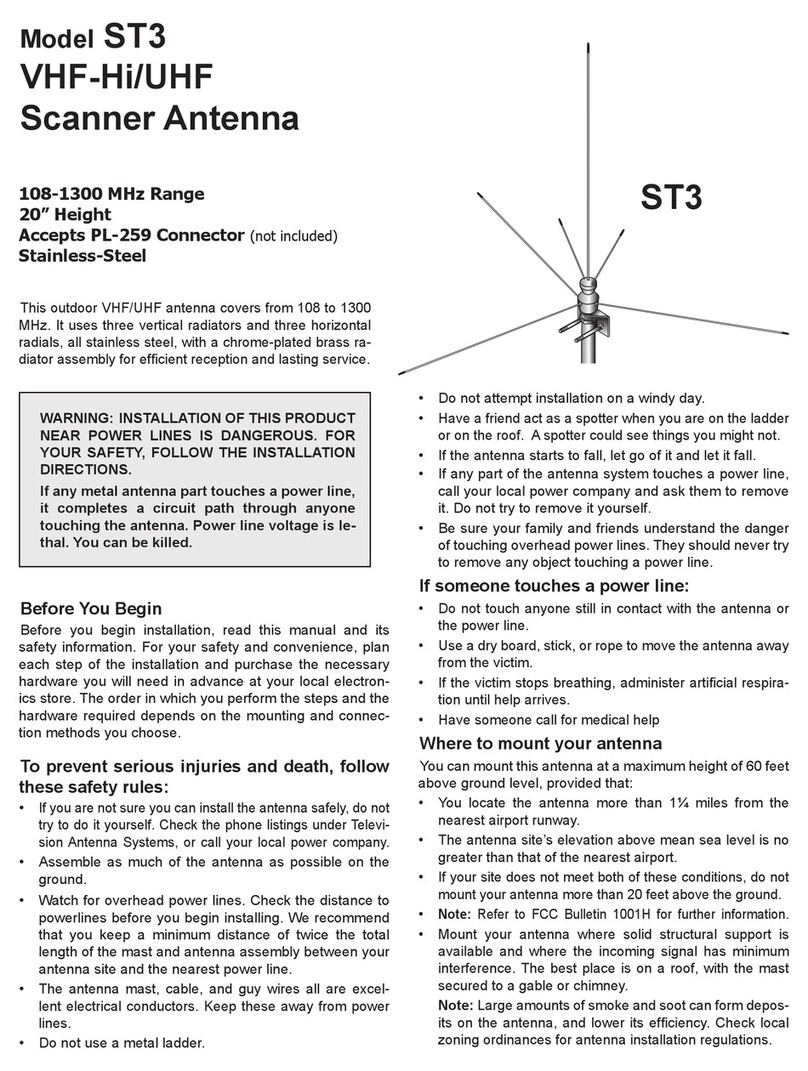
AntennaCraft ST3 User manual

AntennaCraft

AntennaCraft ST3 User manual

Popular Antenna manuals by other brands

RCA VH126N user manual

RCA

RCA VH126N user manual

Hypercable Z24A30T37301 installation instructions

Hypercable

Hypercable Z24A30T37301 installation instructions

Accutech WI-ANT-P6 user guide

Accutech

Accutech WI-ANT-P6 user guide

Winegard TR-6018 instructions

Winegard

Winegard TR-6018 instructions

Panorama Antennas GPSB Series installation instructions

Panorama Antennas

Panorama Antennas GPSB Series installation instructions

Wilson Electronics 301133 installation guide

Wilson Electronics

Wilson Electronics 301133 installation guide

RFI LTE-XPOL-002-5G Series quick start guide

RFI

RFI LTE-XPOL-002-5G Series quick start guide

Audiovox ANT3038XR Limited warranty

Audiovox

Audiovox ANT3038XR Limited warranty

Aluratek ATVA100 quick start guide

Aluratek

Aluratek ATVA100 quick start guide

Megasat DVB-T 10 user manual

Megasat

Megasat DVB-T 10 user manual

Sea Tel 2406 quick start guide

Sea Tel

Sea Tel 2406 quick start guide

Siemens SIMATIC NET ANT795-6MT Compact operating instructions

Siemens

Siemens SIMATIC NET ANT795-6MT Compact operating instructions

Thrane&Thrane EXPLORER 700 user manual

Thrane&Thrane

Thrane&Thrane EXPLORER 700 user manual

Butternut BUT-HF6V instruction manual

Butternut

Butternut BUT-HF6V instruction manual

Panasonic WX-SA250P operating instructions

Panasonic

Panasonic WX-SA250P operating instructions

Renkforce 1403767 operating instructions

Renkforce

Renkforce 1403767 operating instructions

DELTALINK ANT- 6031N Assembly guide

DELTALINK

DELTALINK ANT- 6031N Assembly guide

Shively Labs 6812B Instruction Manual Installation, Operation, & Maintenance

Shively Labs

Shively Labs 6812B Instruction Manual Installation, Operation, & Maintenance

manuals.online logo
manuals.online logoBrands
  • About & Mission
  • Contact us
  • Privacy Policy
  • Terms and Conditions

Copyright 2025 Manuals.Online. All Rights Reserved.