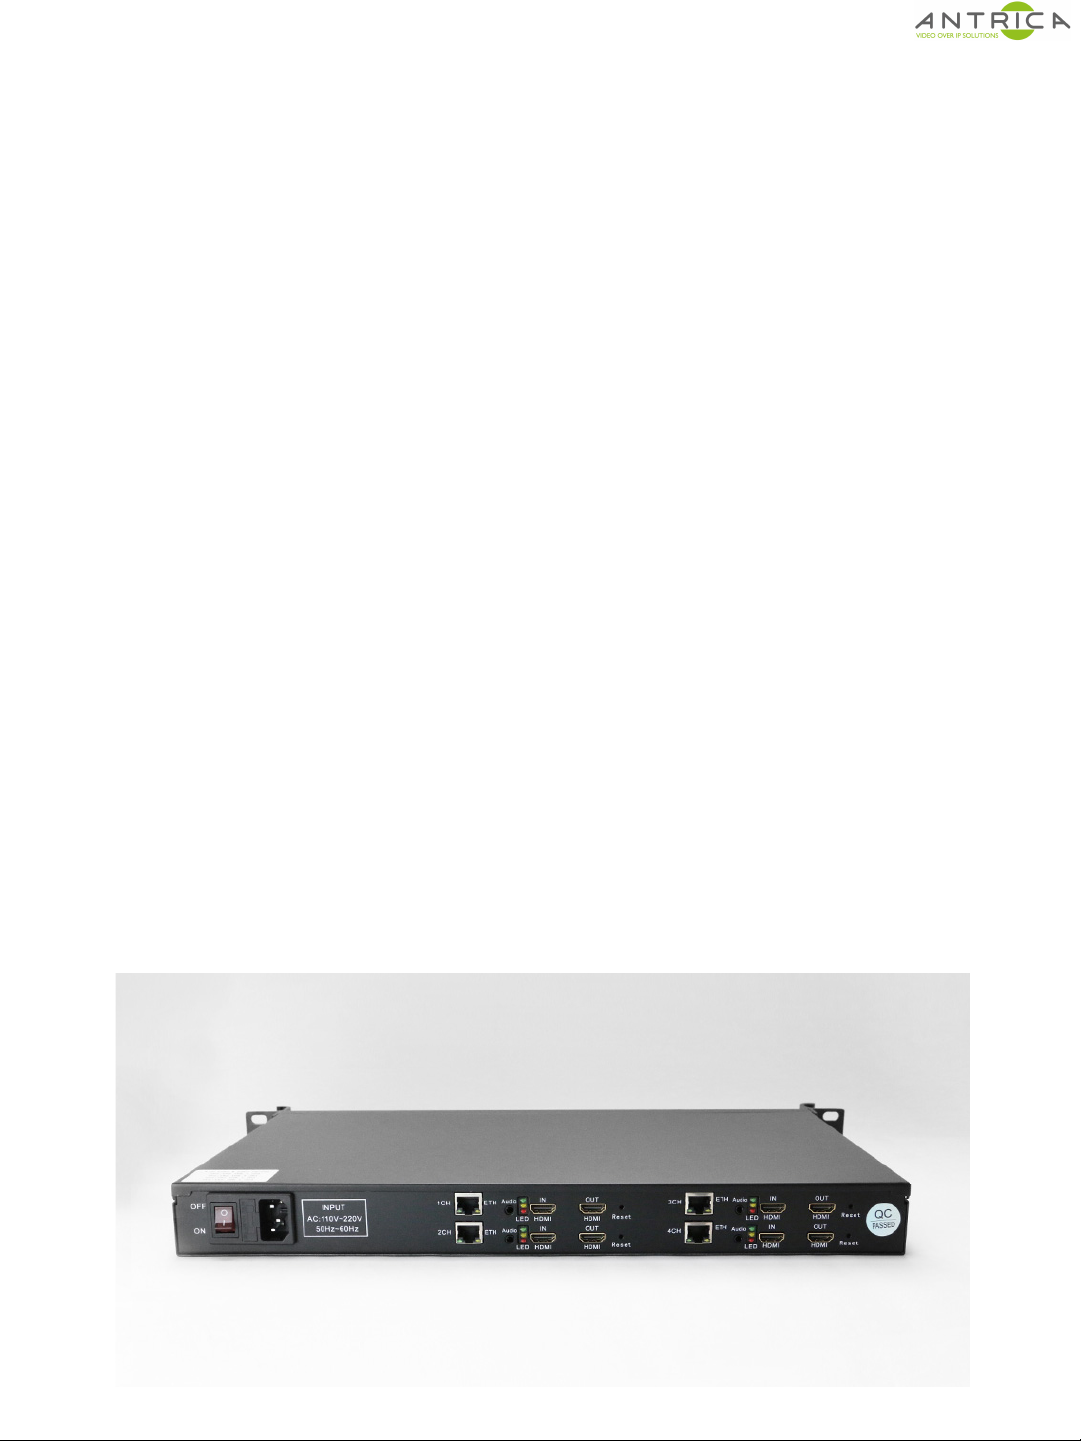
1.0 Safety Instructions
!
●Read this manual carefully before powering the device.
●Removing the device cover without permission may injury and the warranty will
be invalid
●Handle the device with care to avoid shock caused by a fall as internal
components may be damaged and warranty invalidated
●Keep all flammable metal and liquid materials from coming in contact
with the device casing as this will cause damage to
the device.
●Avoid dusty places and places with heat sources or direct sunlight or install the
device where it will be subject to sudden or severe mechanical vibration
●Connect a grounding earth connector to the metal case when fixing the case to
any surface.
●Choose the correct type of HDMI and Ethernet cable connector for connecting
to the device.
●Only use the power supply provided.
●Avoid rapid and frequent power on/off, or this may cause
damage to the semiconductor chipsets.
●Ensure power cord is correctly fitted into the AC mains supply and the 12v DC
connector correctly plugged in.
●Do not touch the power socket with wet hands to avoid
electric shock
●Take off all jewelry or ornaments ,such as ring, necklaces,
watches, bracelets, etc., before operating the device, or
otherwise the metal contact may possibly cause a short circuit
and result in components damage.
●Make sure the AC power is unplugged in case of changing cables
●Only Antrica staff are approved to remove the case else the warranty will be
invalid.
●Ensure good ventilation when the device is in operation as this may cause
damage to the device due to overheating.
●It is recommended to unplug the power cord from the wall socket if
the device will not be used for a long period of time
Page 2
"#$%&'()!*!&'+)!,-./!012314!!