666 - 6 - - 6 -
6
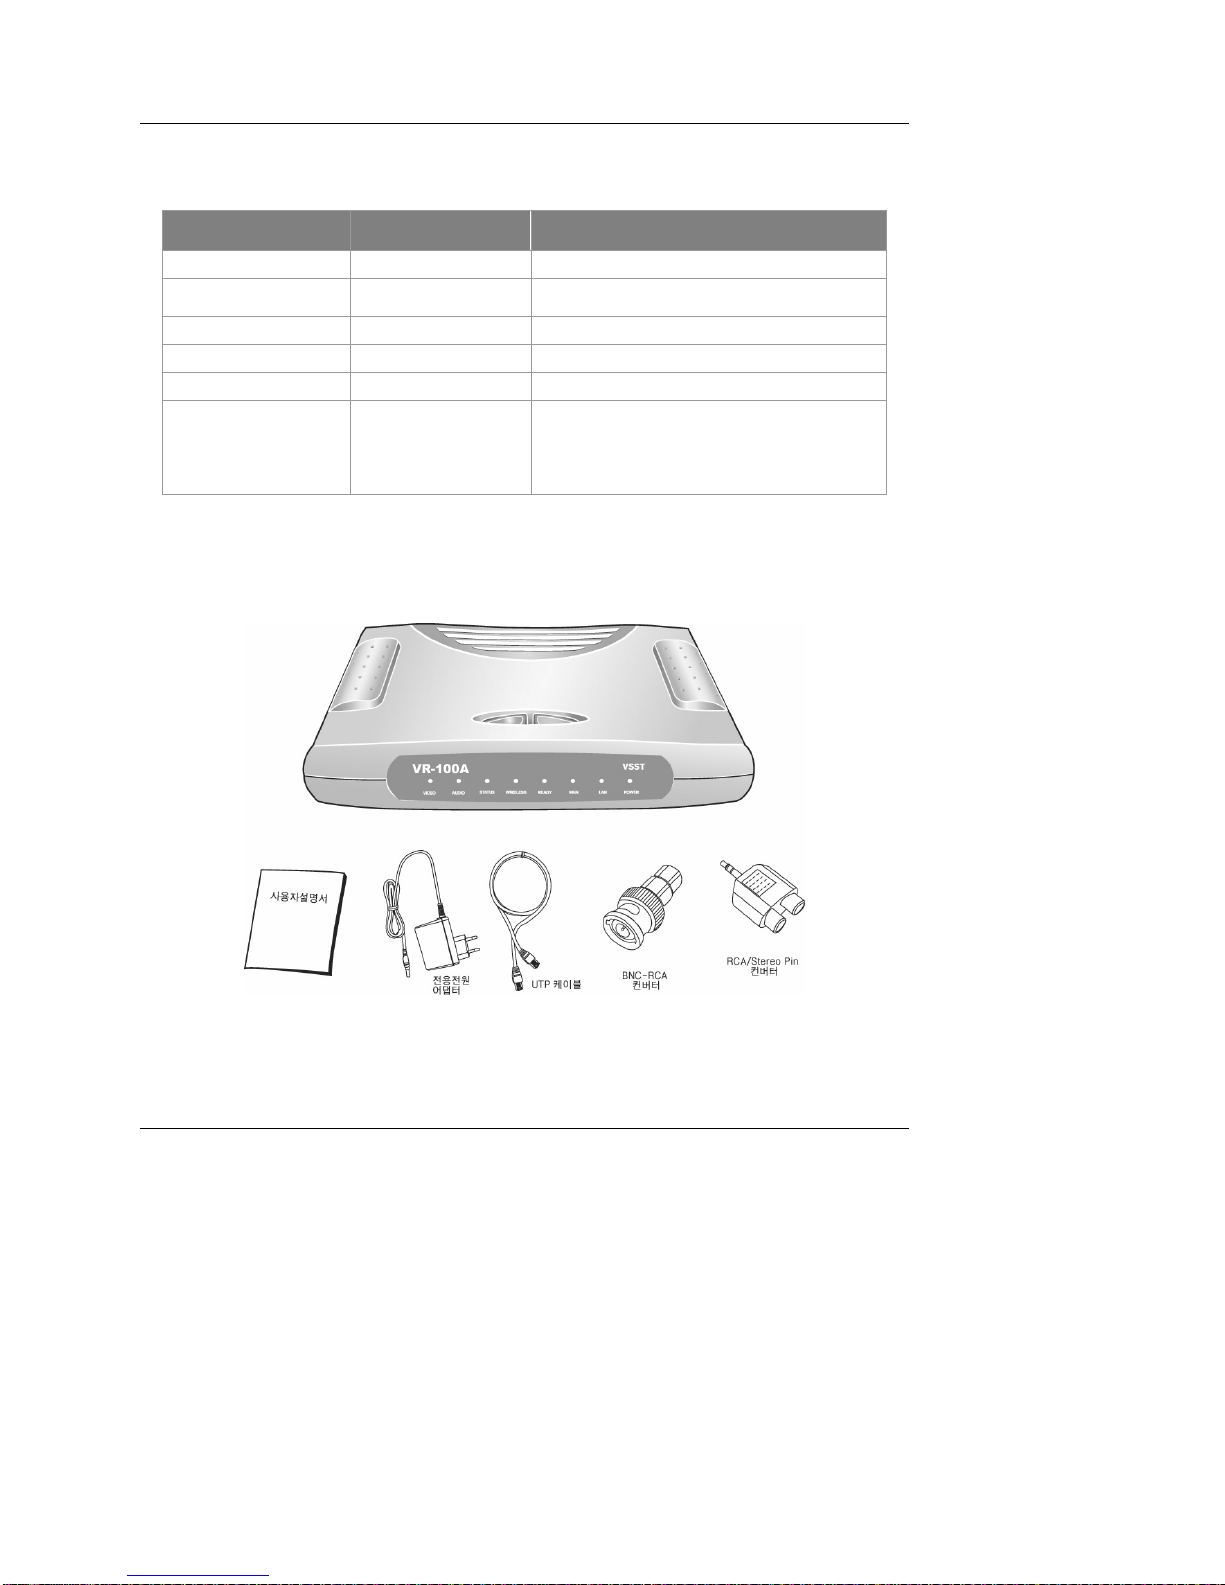
1-5. Product Specification
List
Description
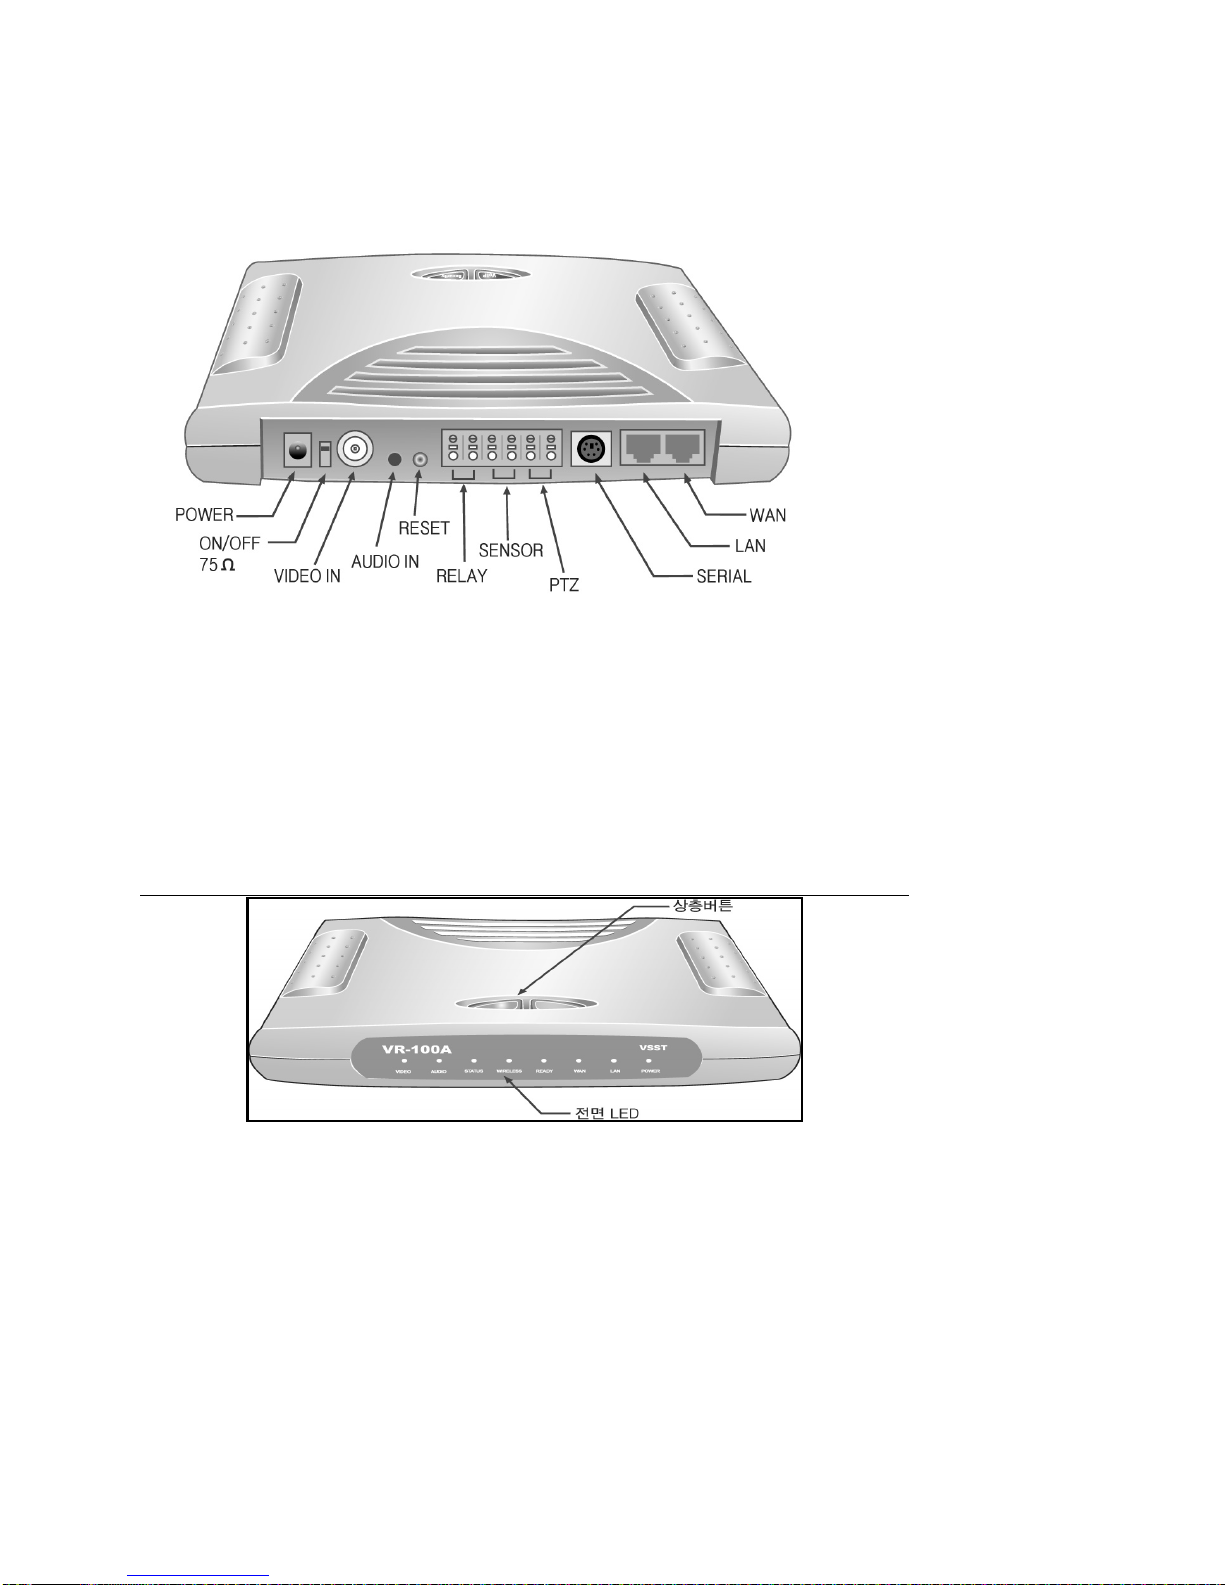
Video Interface
Support standard NTSC / PAL analog video signal with 1 channel through BNC
connector
Audio Interface
Support Standard analog stereo audio signal( RCA connector)
Network Interface
2 10/100Base-T Ethernet interface to access LAN/WAN (RJ-45 ports)
Remote Interface
2 relay inputs for remote control
Sensor Interface
2 sensor inputs to receive event through detecting sensor
Camera Interface
Remote Pan/Tilt/Zoom control through RS-232/485 interface
Interface
Spec
WLAN Interface
Wireless LAN support with WLAN PCMCIA card(IEEE 802.11b)
Video 압축 방식
MPEG-4 Simple Profile Level 1
Audio 압축 방식
MPEG-4 AAC(Advanced Audio Coding)
Image Resolution
176ⅹ144(QCIF)
Frame Rate
Max frame @ 15 fps(frames per second)
Bit Rate
Max rate @ 500 kbp
Streaming Protocol
TCP/UDP/IP based RTSP/RTP/RTCP
Video &
Audio
Server
Spec
Multi client support
Intelligent rate control and channel adaptation for multi user connection
IP setting
Supports both static IP and DHCP based Dynamic IP
Network connection
Supports PPPoE based ADSL and cable Modem
IP sharing
2 RJ-45 port setting support NAT, port forwarding based IP router / switching Hub
Remote control
Embedded HTTP server for remote control
Network
spec
Firmware Upgrade
Firmware upgrade support using FTP, serial port or UTP cable
Processor
32-bit RISC CPU와 TMS320C54x DSP
Memory
2MB FLASH ROM과 8MB DRAM
Platform
OS
Precise/MQX Real-time OS
Power
DC 6V 1.0A
Size
200 mm ⅹ 140 mm ⅹ 33 mm
Physical
spec
Weight
380 g