Aotony AF357T User manual

Aotony
User Manual
Model:AF357T
4L Air Fryer

Cleaning and Maintenance
Warranty and Service
Important Safety Instructions
· Key Safety Points
· Warning
· While Air Frying
· Package Contents & Specifications
· Product Features
· Display Diagram
· Before First Use
· DIY Air Frying
· Preset Settings
06
06
07
08
09
09
1 0
1 1
1 2
1 2
1 3
1 4
1 6
1 7
Getting to Know Your Air Fryer
Using Your Air Fryer
English Contents

Reinigung und Instandhaltung
Garantie und Service
Wichtige Sicherheitsanweisungen
· Wichtige Sicherheitspunkte
· Warnung
· Beim Luftbraten
· Packungsinhalt & Spezifikationen
· Produkteigenschaften
· Anzeigediagramm
· Vor dem ersten Gebrauch
· Luftbraten selber machen
· Voreingestellte Einstellungen
1 9
1 9
20
2 1
22
22
23
24
25
25
26
27
29
30
Lernen Sie Ihre Heißluftfritteuse kennen
Verwendung Ihrer Heißluftfritteuse
Deutscher Inhalt

Limpieza y mantenimiento
Garantía y servicio
Instrucciones importantes de seguridad
· Puntos clave de seguridad
· Advertencia
· Mientras se fríe al aire libre
· Contenido del paquete y especificaciones
· Características del producto
· Diagrama de la pantalla
· Antes del primer uso
· Freír con aire por sí mismo
· Ajustes preestablecidos
32
32
33
34
35
35
36
37
38
38
39
40
42
43
Conozca su freidora de aire
Uso de la freidora de aire
Contenidos en Inglés

THANK YOU
for purchasing the Aotony Air Fryer
Welcome to be a part of our family, we’re happy to be cooking with you!
We know you’re excited to get cooking,
but please take a few minutes to read our directions,
safety instructions, and warranty information.

Key Safety Points
Do not use the product on unstable
or poor heat-resistant surfaces to
avoid fire.
Important Safety Instructions
Do not let the child approach and
touch the product when in use,
so as to avoid safety accidents
and injuries.
It is forbidden to put the product in
the place of damp or near the fire
source. When cleaning, do not flush
the machine with water directly or
immerse it in water.
After use, should properly unplug
in time (do not draw the cable). lf
the power cord is damaged, it must
be replaced by a professional
manufacturer or another similar
professional one to avoid danger.
06
Read all instructions before using your Air Fryer.
When using this electrical appliance, basic safety precautions
should always be followed, including the following:

07
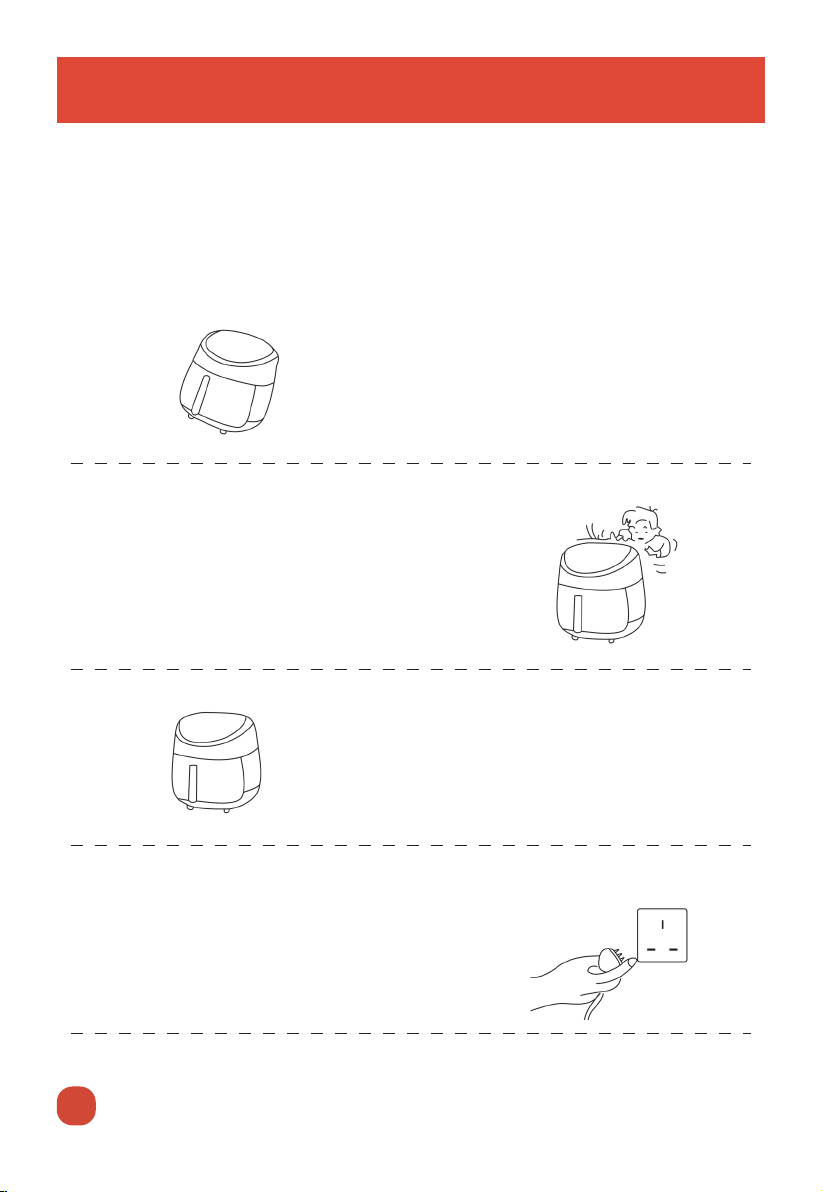
Closely supervise children near your air fryer.
Unplug when not in use, and before cleaning. Allow cooling before
putting on or taking off parts.
Do not use your air fryer if it is damaged, not working, or if the cord
or plug is damaged.
This appliance has a polarized plug (one prong wider than the other).
To reduce the risk of electric shock, this plug is intended to fit into
a polarized outlet only one way. If the plug does not fit fully in the
outlet, reverse the plug. If it still does not fit, contact a qualified
electrician. DO NOT attempt to modify the plugin anyway .
Check if the voltage indicated on the appliance corresponds to the
local main voltage before you connect the appliance.
Do not let the power cord hang over the edge of the table or counter
Keep away from hot surfaces.
Do not use third-party replacement parts or accessories, as this may
cause injuries.
Do not use outdoors.
Do not place the air fryer or any of its parts on a stove, near gas or
electric burners, or in a heated oven.
Be extremely cautious when moving your air fryer
(or removing the filter) if it contains hot oil or other hot liquids.
Do not clean with metal scouring pads. Metal fragments can break off
the pad and touch electrical parts, creating a risk of electric shock.
Do not place anything on top of your air fryer. Do not store anything
inside your air fryer.
01.
02.
03.
04.
05.
06.
07.
08.
11.
12.
09.
10.
Warning

08
While Air Frying
Never use your air fryer without the filter in place.
DO NOT place oversized foods or metal utensils into your air fryer.
DO NOT place the paper, cardboard, non-heat resistant plastic, or
similar materials, into your air fryer. You may use parchment paper
or foil.
Never put baking or parchment paper into the air fryer without food
on top. Air circulation can cause the paper to lift and touch heating coils.
DO NOT plug in the appliance or operate the control panel with wet
hands.
Always use heat-safe containers. Be extremely cautious if using
containers that aren't metal or glass.
Immediately unplug the appliance if you see dark smoke coming out of
the appliance. Wait for the smoke emission to stop, before you remove
the pan from the appliance. Dark smoke means that food is burning or
there is a circuit problem. If the cause was not burnt food, please
contact our Customer Support.
DO NOT place the appliance against a wall or other appliances. Leave
at least 4 inches of free space on the back and sides and 4 inches of
free space above the appliance.
01.
02.
03.
04.
05.
06.
07.
08.
FOR HOUSEHOLD USE ONLY
READ AND SAVE THESE INSTRUCTIONS
An air fryer works with hot air only. Never fill the baskets
with oil or fat.

Getting to Know Your Air Fryer
09
Package Contents
Specifications
Power Supply
Rated Power
Temperature Range
Time Range
Capacity
AC 220V
1400W
80-200°C
0-30 min
4L
1 x 4L Air Fryer
1 x Removable Tray
1 x Recipe Book
1 x User Manual
4 x Silicone foot pads

NOTE: There is a groove in this position, and there is also a convex groove
under the frying basket. It needs to be aligned when pushing in the basket.
The unique design prevents it from falling off.
10
Control Panel
Removable Tray
Silicone foot pad
Power Cord
Air Outlet
Product Features
Handle
Non-stick Basket
1
1

1. Menu Mode: Press " " choose 8 preset menus or choose time and
temperature setting.
2. Start/Pause/Off: Short press " " to start or pause cooking, long press to
turn off the machine.
3. Temp/Time Control: Press " " to switch time and temp.
Indicates that the corresponding " " is used to set the time
Indicates that the corresponding " " is used to set the temp
4. :Temperature icon.
5. : :Time icon.
6. Increase: Press " " to increase the time or temp.
7. Decrease: Press " " to decrease the time or temp.
Temperature/
Time Control
11
Start/Pause/Off
Menu
Mode
Shrimp
Fish
Steak
Display Diagram
Broccoli
French
Fries
Bacon
Chicken WingsCake
Control Panel

Wash the basket and basket rack thoroughly, using either a
dishwasher or a non-abrasive sponge. Dry thoroughly.
Wipe the inside and outside of the air fryer with a slightly moist cloth.
Dry with a towel.
There's plastic inside! Make sure to remove all packaging materials,
read and remove any stickers on the unit.
01.
02.
03.
Before First Use
For best results, follow these steps before using your
air fryer for the first time.
Using Your Air Fryer
Before first use of your new air fryer, we recommend you to
heat the air fryer at 200°C for 5 minutes to remove any
remaining odor.
12

3. Press the Start/Pause/Off “”to begin air frying.
2. Set the temperature and time.
Then press the temperature/time control icon “”icon to switch
to Time setting, the default Time of 20 minutes will be displayed
on LED Screen, press “”or “”to custom desired time range.
Press the menu mode icon“ ”, then the default Temperature
of 80 C will be displayed on LED Screen, press “”or “”to
custom desired temperature.
Remove the basket from the air fryer. Check food for doneness, then
carefully transfer food to plates or a platter and serve.
The power light of the appliance is flashing, and menu mode and time
and temperature control cannot be performed at this time.
NOTE: During cooking, you can remove the basket to check
on, turn, or shake foods. When you return the basket to
the unit, the timer and heating will resume where it
left off.
13
DIY Air Frying
The power light is on stable for a long time. Menu mode and time and
temperature control can be carried out.
a.
b.
4. When the timer is done, the air fryer will beep 5 times.
1. Plug on the appliance.

Press the menu mode icon“ ”, to choose between 8 preset
menus: French Fries, Broccoli, Bacon, Cake, Chicken Wings, Shrimp,
Fish, Steak.
Preset Settings
For beginning users, using a preset menu is the easiest
way to cook some certain foods. Preset menus are
programmed with a default time and temp.
14
The power light is on stable for a long time. Menu mode and time and
temperature control can be carried out.
1. Plug on the appliance.
2. Select a preset cooking program.
French Fries
Broccoli
Bacon
Cake
Chicken Wings
Shrimp
Fish
Steak
15 min
8 min
10 min
15 min
15 min
15 min
20 min
15 min
Preset Symbol Default Temperature Default Time
(Minutes)
200 C
130 C
165 C
180 C
200 C
160 C
180 C
180 C

Press the temperature/time control icon “”a second time.
The time will blink on the display. Press the “ ”or “”
buttons to change the time (1–30 minutes).
Press the temperature/time control icon “”once. The
temperature will blink on the display. Press the “ ”or “ ”
buttons to change the temperature ( 80–200°C).
NOTE:
1. The LED screen will not always be lighting on when
the appliance is working.
2. Cooking time may vary depending on your desired
flavor or thickness of ingredients, etc. Check out our
Recipe Book and the actual situation to customizing
presets for perfect results.
4. Press the Start/Pause/Off “”to begin air frying.
The power light of the appliance is flashing, and menu mode and time
and temperature control cannot be performed at this time.
15
Preset Settings
a.
b.
Remove the basket from the air fryer. Check food for doneness, then
carefully transfer food to plates or a platter and serve.
5. When the timer is done, the air fryer will beep 5 times.
3. Optionally, customize the temperature and time.

Cleaning and Maintenance
16
Unplug unit. Allow unit, basket, and basket rack to cool completely
before cleaning. Pull out the baskets for faster cooling.
Wash the basket and rack with warm soapy water, rinse, and dry well
with a towel for best results. the Basket and rack are also top-rack
dishwasher-safe.
Wipe down the outside and the inside of the unit, including the
heating coil, with a damp cloth as needed. Do not put the unit in the
dishwasher or submerge it in water or any other liquid.
Do not use abrasive cleansers on the basket, rack, exterior, or interior,
or you could damage the finishes.
For stubborn grease:
a. In a small bowl, mix 2 US tbsp / 30 mL of baking soda and 1 US
tbsp / 15 mL of water to form a spreadable paste.
b. Use a sponge to spread the paste on the baskets and scrub. Let
the baskets sit for 15 minutes before rinsing.
c. Wash baskets with soap and water before using.
Dry before using.
01.
02.
03.
04.
05.
06.
The nonstick coating on the basket and rack makes the
Air Fryer easy to clean following the steps below.

17
Warranty And Service
01. Accident, misuse, or repairs performed by unauthorized personnel.
02. Any unit that has been tampered with or used for commercial
purposes.
03. Normal wear and tear of wearable parts.
04. Use of force, damage caused by external influences.
05. Damage caused by non-observance of the User Guide,e.g. connection
to an unsuitable mains supply or non-compliance with the instructions.
06. Partially or completely dismantled appliances.
07. Defects caused by or resulting from damages from shipping or from
repairs, service, or alteration to the product or any of its parts that
have been performed by a repair person not authorized by Aotony.
Default 12-Month Warranty
Thanks for choosing Aotony air fryer. This product is
covered with Aotony product and labor warranty for
12 months from the date of its original purchase.
The warranty will not apply in cases of:

THANK YOU
für den Kauf der Aotony Heißluſtieuse
Willkommen, ein Teil unserer Familie zu sein, wir euen uns, mit
Ihnen zu kochen!
Wir wissen, dass Sie sich darauf euen, mit dem Kochen zu beginnen,
aber nehmen Sie sich bie ein paar Minuten Zeit, um unsere
Wegbeschreibung zu lesen,
Sicherheitshinweise und Garantieinformationen.

Wichtige Sicherheitspunkte
Verwenden Sie das Produkt nicht auf instabilen
oder schlecht hitzebeständigen Oberflächen, um
Feuer zu vermeiden.
Wichtige Sicherheitsanweisungen
Lassen Sie das Kind sich dem Produkt nicht
nähern und es berühren, wenn es verwendet
wird, um Sicherheitsunfälle und Verletzungen
zu vermeiden.
Es ist verboten, das Produkt an einem feuchten
Ort oder in der Nähe einer Feuerquelle zu
platzieren. Spülen Sie die Maschine beim Reinigen
nicht direkt mit Wasser und tauchen Sie sie nicht
in Wasser.
Nach dem Gebrauch sollte der Netzstecker
rechtzeitig gezogen werden (nicht am Kabel
ziehen). des Netzkabels beschädigt ist, muss es
von einem professionellen Hersteller oder einem
anderen ähnlichen professionellen Hersteller
ersetzt werden, um Gefahren zu vermeiden.
19
Lesen Sie alle Anweisungen, bevor Sie Ihre Heißluftfritteuse
verwenden. Bei der Verwendung dieses Elektrogeräts sollten
immer grundlegende Sicherheitsvorkehrungen getroffen werden,
einschließlich der folgenden:

20
Beaufsichtigen Sie Kinder in der Nähe Ihrer Heißluftfritteuse genau.
Ziehen Sie den Netzstecker, wenn Sie es nicht verwenden, und vor der Reinigung.
Vor dem Anbringen oder Abnehmen von Teilen abkühlen lassen.
Verwenden Sie Ihre Heißluftfritteuse nicht, wenn sie beschädigt ist, nicht
funktioniert oder wenn das Kabel oder der Stecker beschädigt ist.
Dieses Gerät hat einen polarisierten Stecker (ein Stift breiter als der andere). Um
das Risiko eines Stromschlags zu verringern, passt dieser Stecker nur in eine
Richtung in eine polarisierte Steckdose. Wenn der Stecker nicht vollständig in die
Steckdose passt, drehen Sie den Stecker um. Wenn es immer noch nicht passt,
wenden Sie sich an einen qualifizierten Elektriker. Versuchen Sie NICHT, das
Plugin in irgendeiner Weise zu modifizieren.
Überprüfen Sie, ob die auf dem Gerät angegebene Spannung mit der örtlichen
Netzspannung übereinstimmt, bevor Sie das Gerät anschließen.
Lassen Sie das Netzkabel nicht über Tisch- oder Tresenkanten hängen. Von
heißen Oberflächen fernhalten.
Verwenden Sie keine Ersatzteile oder Zubehör von Drittanbietern, da dies zu
Verletzungen führen kann.
Nicht im Freien verwenden.
Stellen Sie die Heißluftfritteuse oder Teile davon nicht auf einen Herd, in die
Nähe von Gas- oder Elektrobrennern oder in einen beheizten Ofen.
Seien Sie äußerst vorsichtig, wenn Sie Ihre Heißluftfritteuse bewegen
(oder Entfernen des Filters), wenn er heißes Öl oder andere heiße Flüssigkeiten
enthält.
Nicht mit Scheuerschwämmen aus Metall reinigen. Metallsplitter können vom Pad
abbrechen und elektrische Teile berühren, wodurch die Gefahr eines Stromschlags
besteht.
Stellen Sie nichts auf Ihre Heißluftfritteuse. Bewahren Sie nichts in Ihrer
Heißluftfritteuse auf.
01.
02.
03.
04.
05.
06.
07.
08.
11.
12.
09.
10.
Warnung
Table of contents
Languages:
Popular Fryer manuals by other brands

Excel
Excel TFSLC-10H001 W3 instruction manual

Dean
Dean Cool Zone Electric Fryer Installation & operation

PALSON
PALSON Black Pegasus operating instructions

RiverGrille
RiverGrille TF2014501-RG Assembly, use and care manual

Aroma
Aroma Gameday Cooker ADF-190C instruction manual

Montgomery Ward
Montgomery Ward EDF-402DR instruction manual