3
使用上のご注意
Cautions for use
●定格入力はDCS‑80が80W(8Ω)、DCS‑80Tが60W(170Ω)です。次のような信号や過大入力時には、アンプのボリューム
を下げてください。
○ハウリング音 ○電源スイッチのON/OFF時のショック音 ○アンプの過大入力(過出力)
○アンプの高低音の上げすぎ(音質調節) ○FM放送の局間ノイズや高域周波数成分を多く含んだ連続音
●大出力アンプで使用される場合には、過大入力が加わらないよう、アンプのボリュームにご注意ください。
●本機は定格入力以下のアンプをご使用の場合でも、アンプの入力が大きすぎたり、ボリュームを上げすぎたりしますと、アンプ
の出力がひずんで、 スピーカー破損の原因になることがありますので、アンプの入力感度や出力には充分ご注意ください。
●アンプのトーンコントロールやグラフィックイコライザーを使って低音や高音のレベルを上げてご使用の場合は、 通
常より大きなパワーがスピーカーに加わりますので、アンプのボリュームにご注意ください。
●Rated input values are 80 W (8 Ω) for DCS-80 and 60 W (170 Ω) for DCS-80T.
Reduce the amplifier's volume when any of the following signals or excessive input is entered:
◎Howling; ◎Snaps at switching power on and off; ◎Excessive amplifier input (output); ◎Too strong treble or bass sound
from the amplifier (tone control); ◎Inter-station noise in FM broadcasting or continuous sound containing a large amount of
high-frequency components.
●If the speaker is used with a large-output amplifier, adjust the amp's volume control so that no excessive input may be applied
on the speaker.
●Please use adequate care about amplifier's input sensitivity and output level because the speaker, even if it is used with an
amplifier with under-rated input, can be broken by distorted output from the amplifier due to too large input on it or too high
volume output from it.
●Please also be cautious about the amplifier's volume control if using the speaker by raising the bass or treble level with a tone
controller or a graphic equalizer. This is because it will apply greater power on the speaker than in its ordinary use.
Cautions for installation
●Avoid places exposed to the sun or rain or with high humidity.
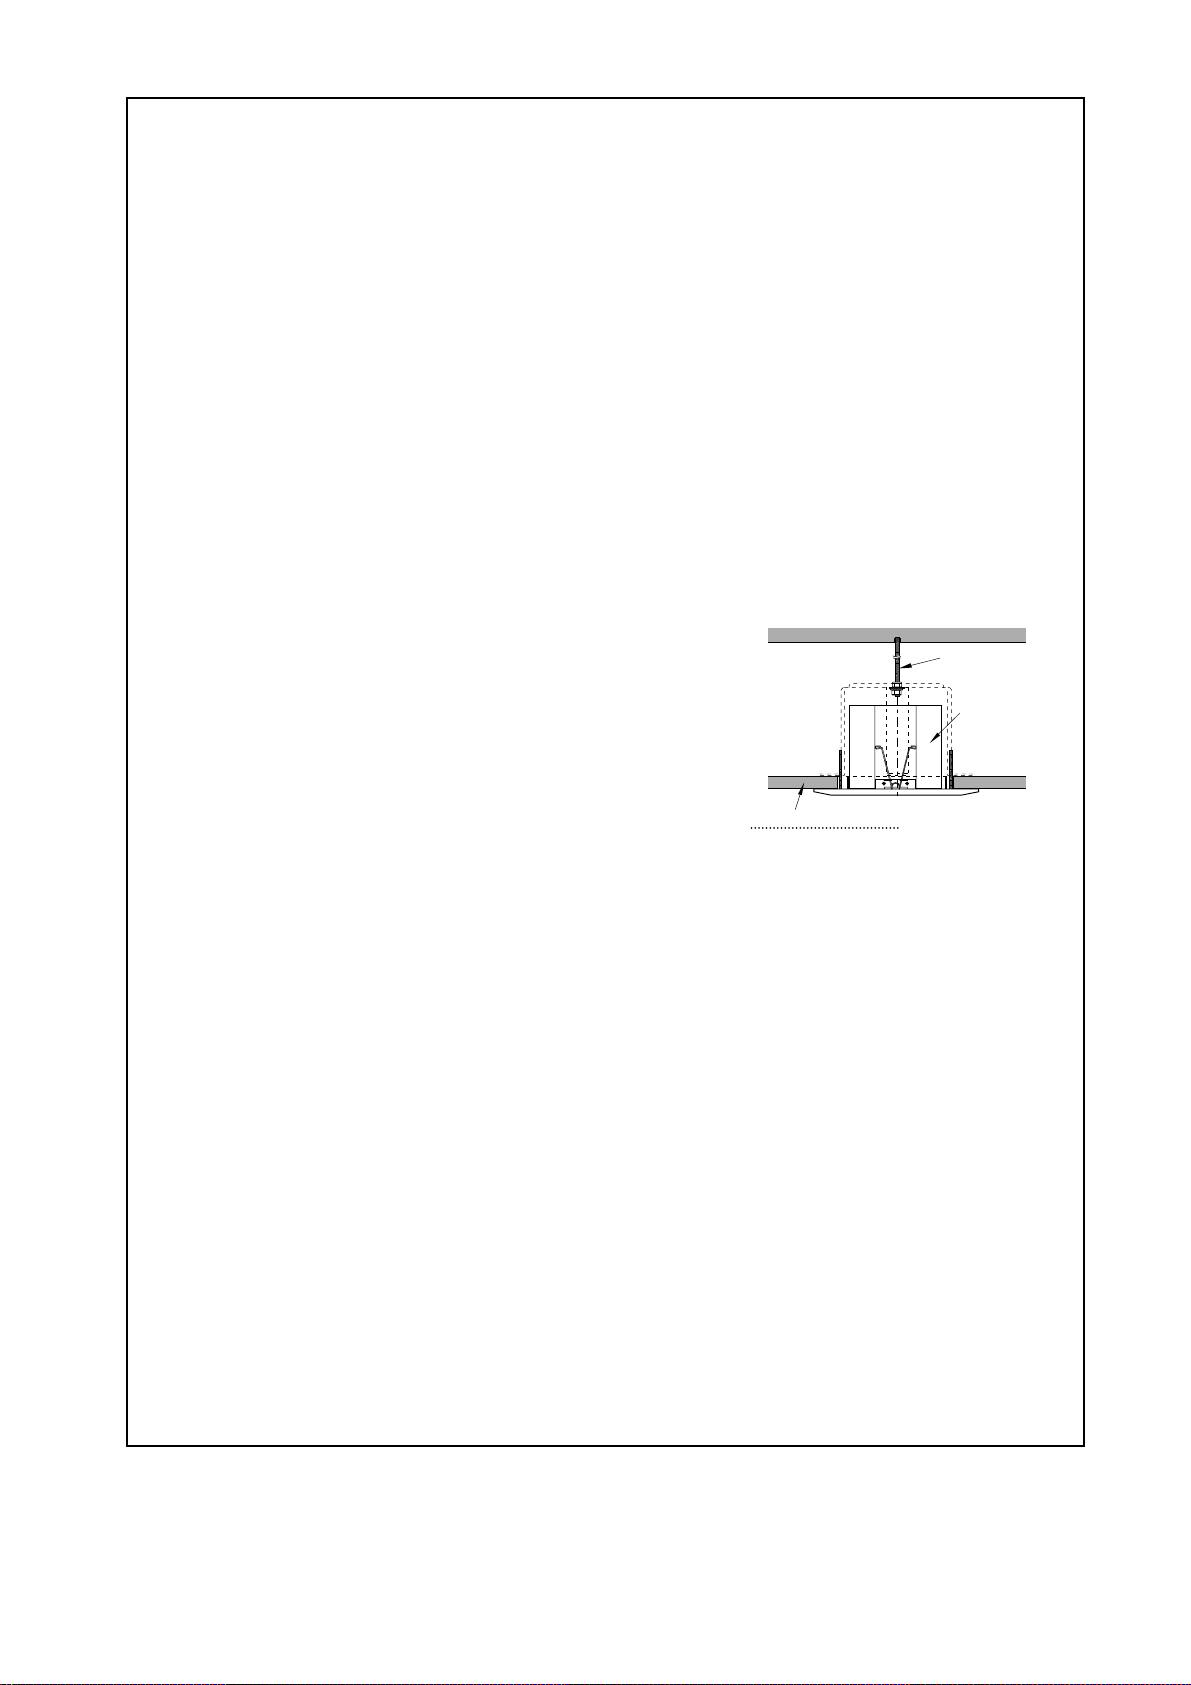
●The speaker cannot be installed on a ceiling with a thickness of 65 mm or over.
●When installing the speaker on a ceiling, be sure to secure it with an anchor bolt (M10) that must be fixed on a place or a
reinforced place solid enough to bear the speaker's weight.
In no case shall the manufacturer assume any liability for any accident attributable to installation on a place not solid enough or
insufficient means of installation.
Cautions for connection
●Be sure to turn off the power supply to the amplifier when connecting the speaker to it.
●In case of using two or more speakers at the same place, match their polarity with each other.
●The DCS-80T has an input impedance of 170 Ω (60W). Confirm the output impedance of any amplifier to be connected to the
speaker to see if the amp fits the speaker.
Protective circuit
●The speaker has a protective circuit to safeguard itself against any continuously excessive input.
●If the speaker's volume is suddenly reduced while in use, this witnesses that its protective circuit is in operation. Immediately
reduce the amplifier's volume to let the speaker get back to normal automatically. Then keep the amplifier's volume at a little lower
than before and resume the use of the speaker.
設置上のご注意
●直射日光や雨などがあたるところ、また湿気の多いところでのご使用
は避けてください。
●本機は65mm以上の厚みの天井には取り付けることができません。
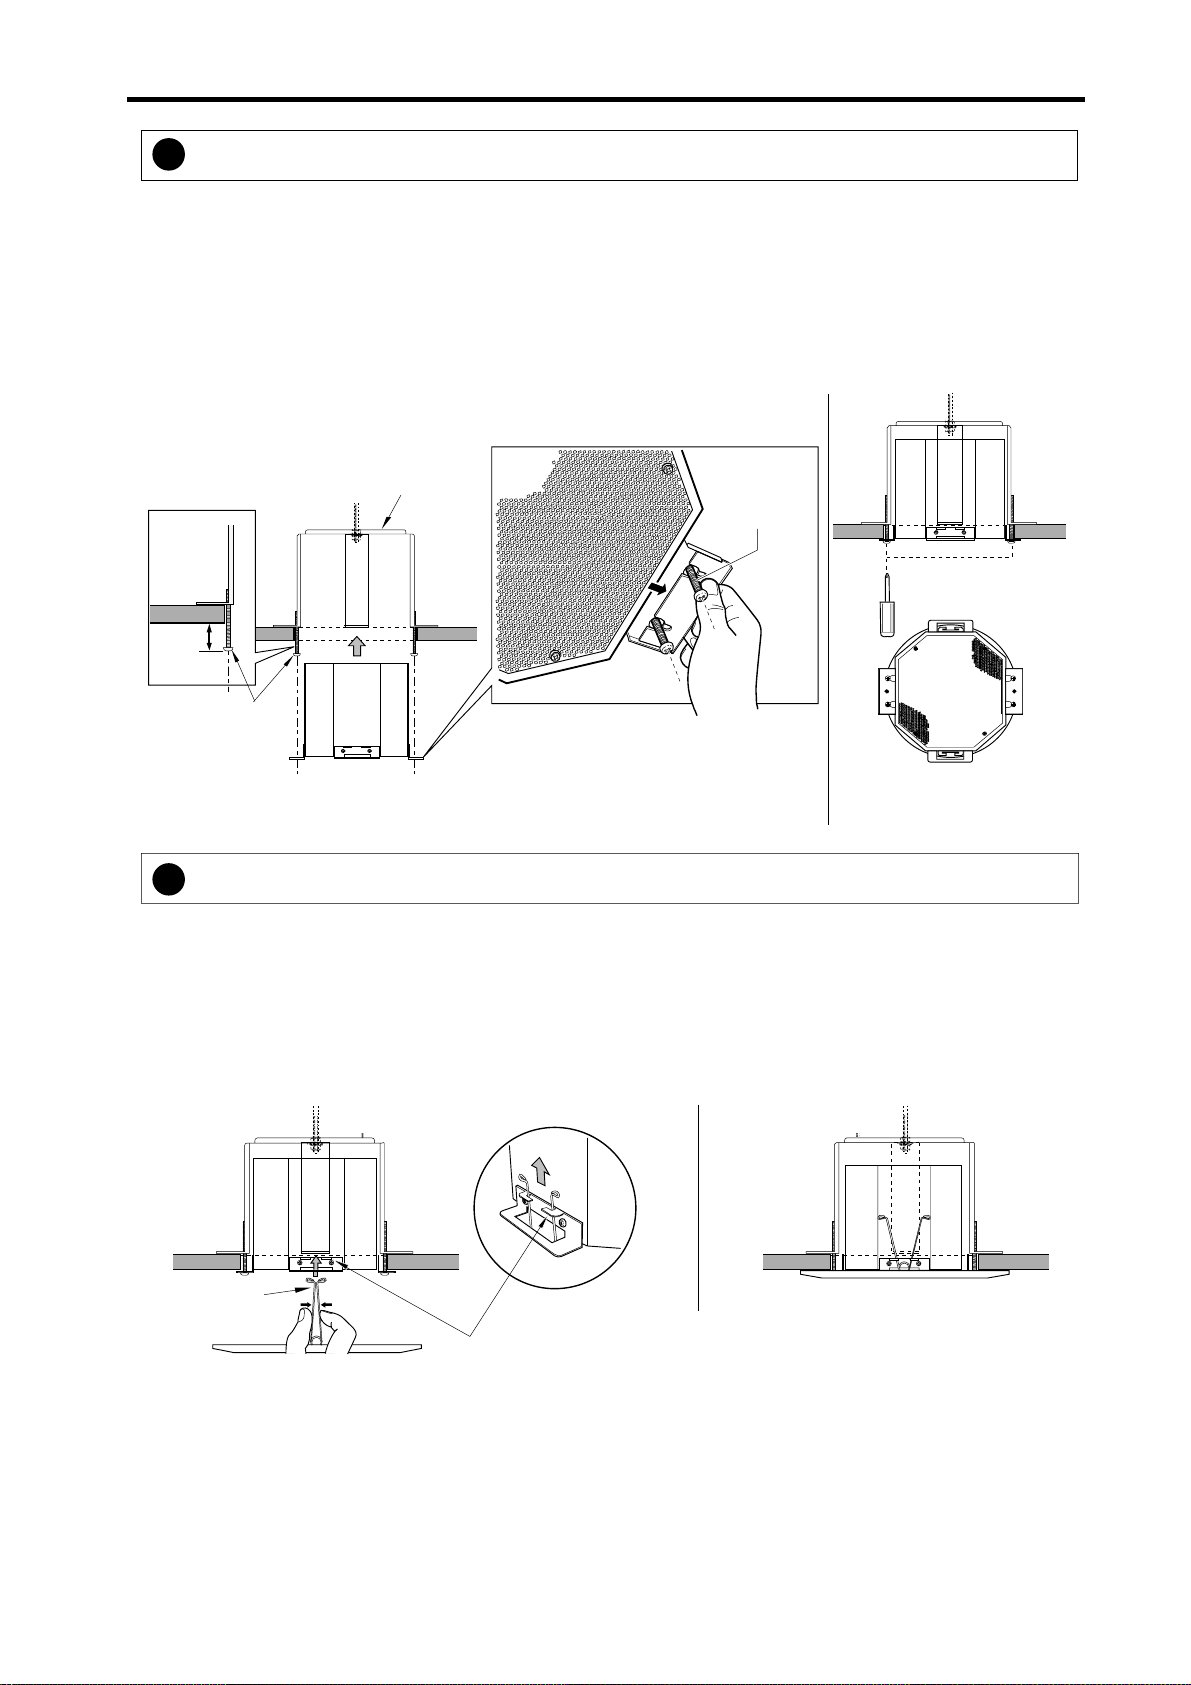
●安全ワイヤーを必ず取り付けてください。
●本機を天井に取り付ける場合は必ずアンカーボルト(M10)で固定して
ください。アンカーボルトはスピーカーの重量に充分に耐えられる場
所または、補強を施した場所へ取り付けてください。
尚、取付場所の強度不充分、取付方法の不備による事故に対する一切の
責任は負いかねます。
接続上のご注意
●アンプに接続する際、必ずアンプの電源をOFFにしてください。電源を入れたまま接続しますと、スピーカーが破損す
ることがあります。
●2個以上のスピーカーを使用される場合は、必ず極性を合わせてください。
●DCS‑80Tの入力インピーダンスは170Ω(60W)です。接続するアンプの出力インピーダンスを確認してください。
保護回路について
●本機には、連続的な過大入力からスピーカーを守るため、保護回路が組込まれています。
●使用中に音量が急に小さくなった場合には保護回路が動作しています。速やかにアンプのボリュームを下げてくだ
さい。自動復帰しましたら、音量を前より少し下げて適切な入力でご使用ください。
Ceiling panel thickness,
less than 65 mm.
天井材厚み:65mm以下
アンカーボルト(M10)
Anchor bolt (M10)
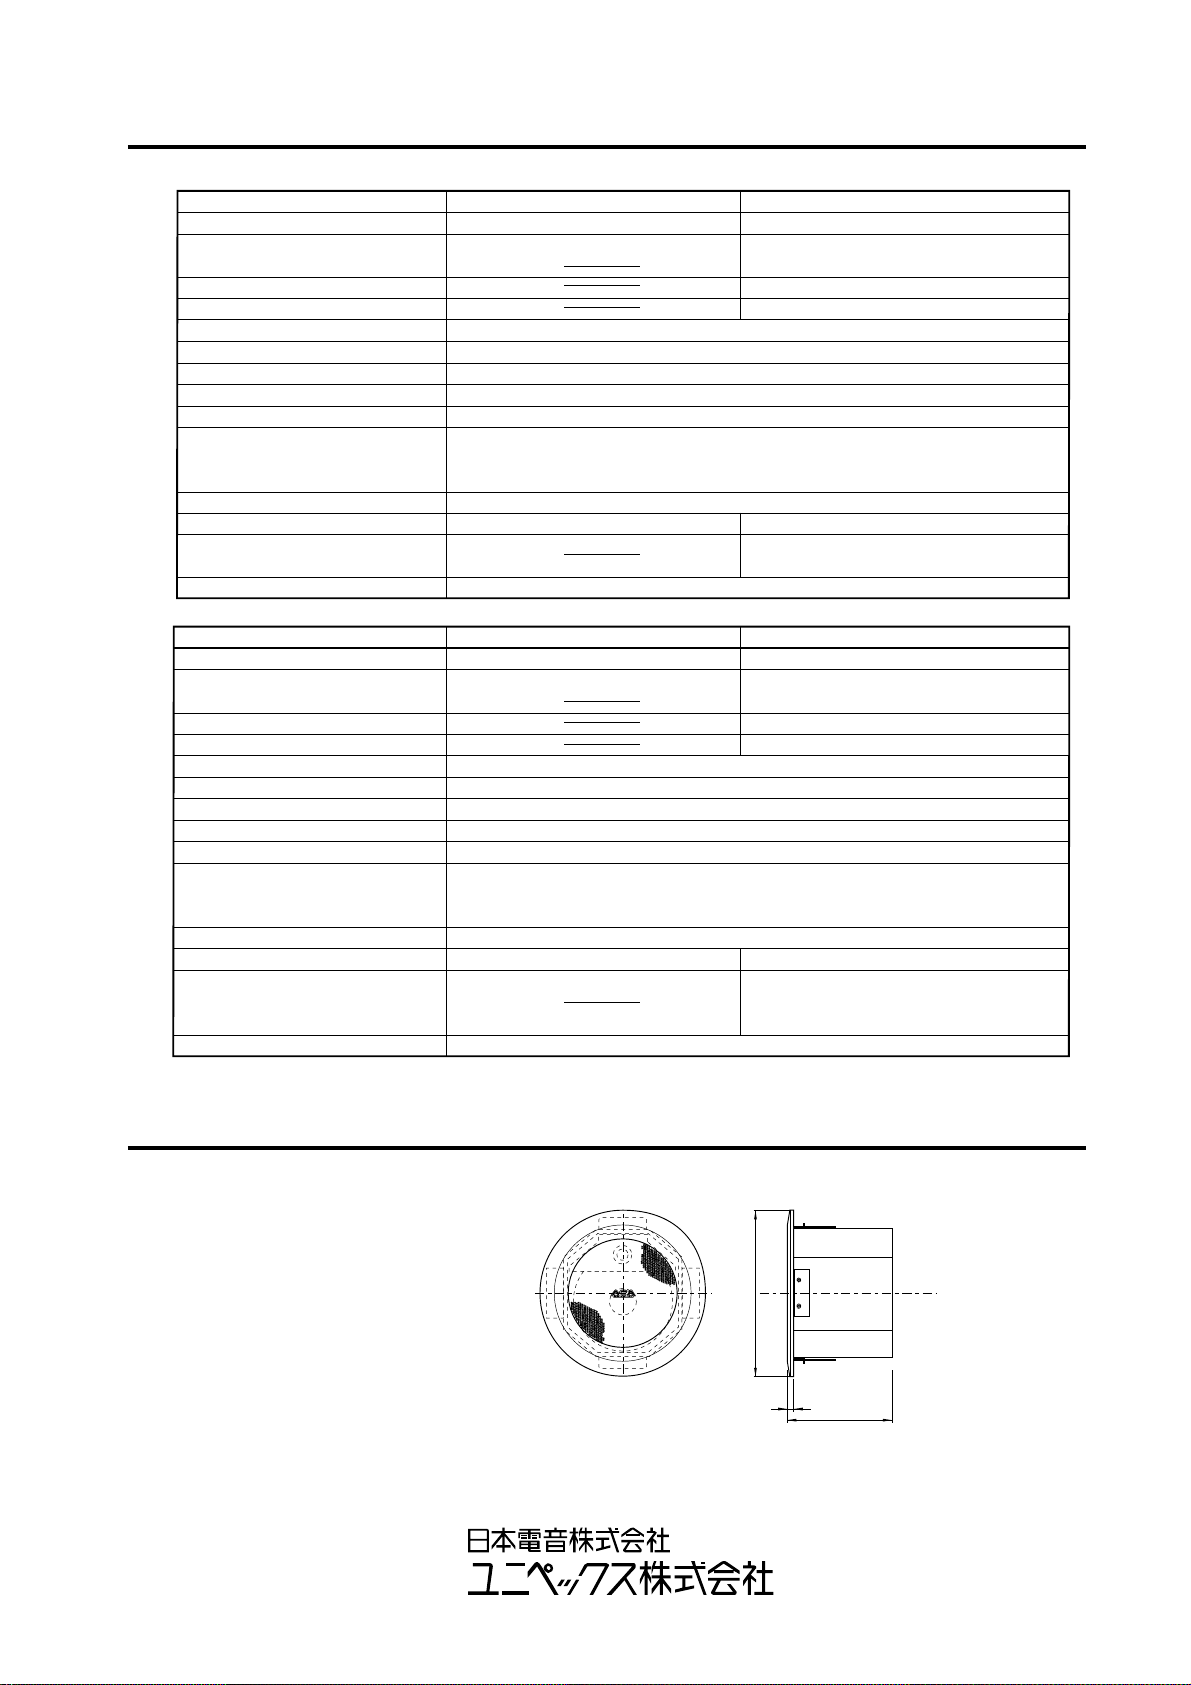
DCS‑80
DCS‑80T