APM UV9 LED User manual

Instructions for use
APM UV9 LED

Table of Contents
1. Safety Instruction
2. Product Information
2.1. System Components
2.2. Installation and Charging
3. Features
3.1. Device
3.2. Cradle
4. Product Specifications
5. Disposal
6. Troubleshooting
3
4
4
5
7
7
11
13
14
15

APM UV9 LED
The APM UV9 LED is a first of its kind light source. It is both a UV and
Visible light curing system that uses powerful light emitting diodes as
its light source. This portable handheld unit is powered by a
rechargeable lithium ion battery.
The APM UV9 LED has a UV and Visible energy output up to 1800mW/
cm2 and can emit 365nm / 385nm light , 405nm / 420nm light or a
combination of all.
It gives a cure area of 1⁄2” at 1⁄2” distance from your bond area.
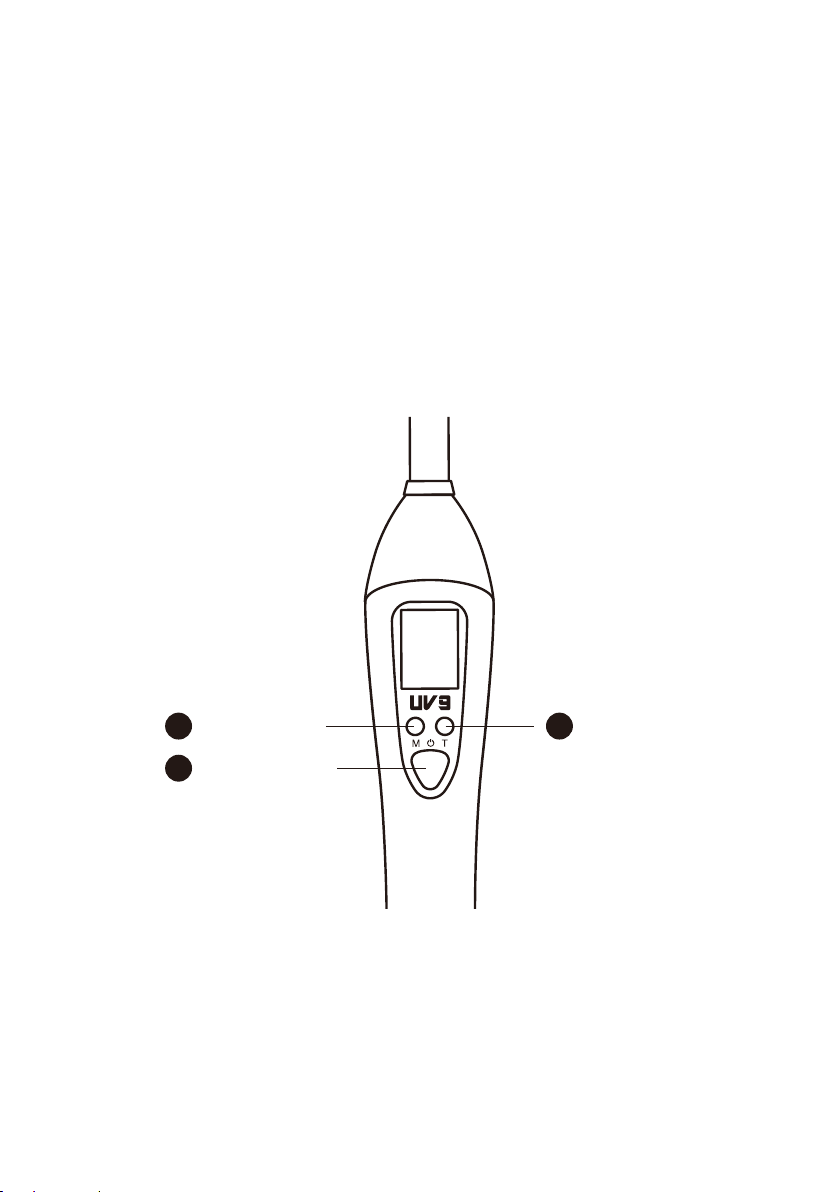
A micro-processor provides control of timing, audible
indicators, temperature sensing, and battery management. An LCD on
the device provides a read out of selected time exposures of 1~60
seconds. The LCD also displays the battery discharge level. The unit
can be manually turned off at any time by pressing the start button a
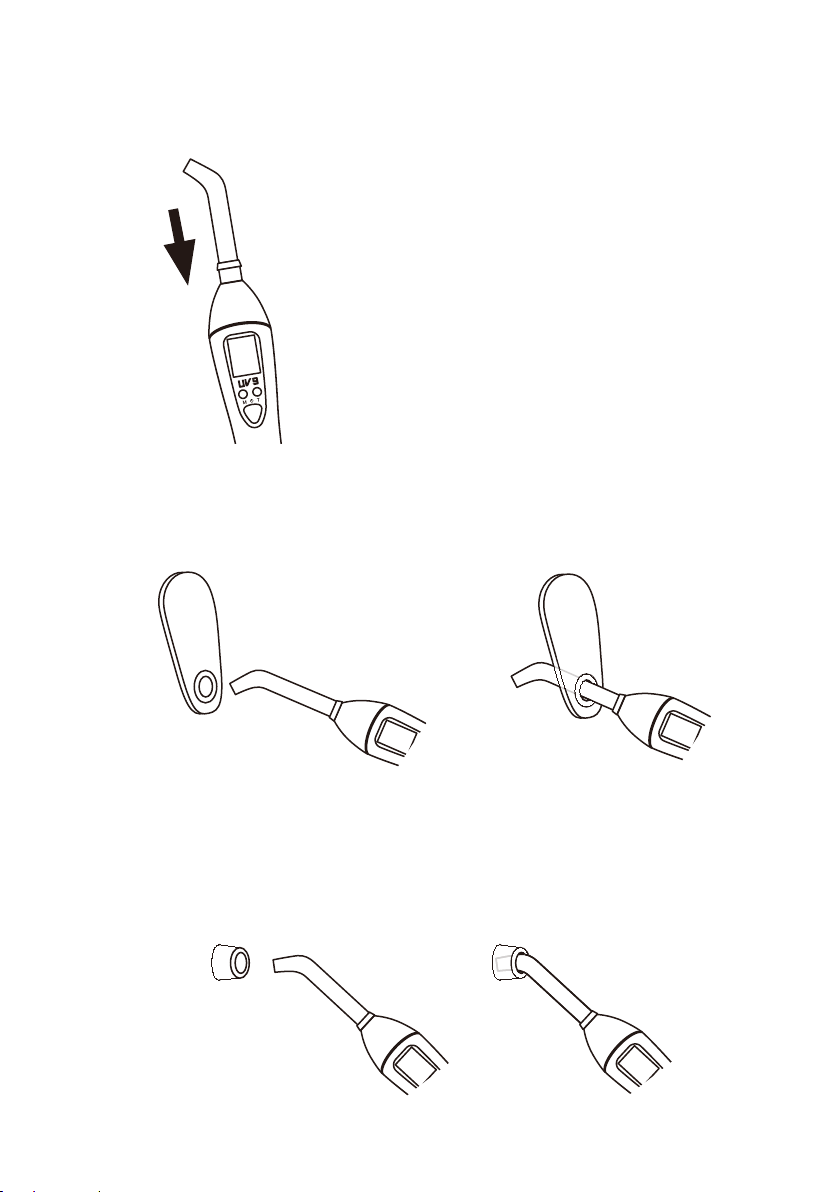
second time after your initial start. The APM UV9 LED includes the
light source, one rechargeable lithium ion battery, cradle with pass /
fail radiometer, power supply and filter.
SAFETY INSTRUCTION
This device produces high-output curing energy. A significant
increase in curing energy is possible compared with equipment
previously used. It is important to observe the following precautions and
procedures:
3
•Do not place light directly on or towards unprotected skin.
•
Do not look directly at the light emitted from this device. Do not use this
device without suitable eye protection for the operator and assistant.
Please refer to the 2.2. Installation and Charging section for suitable
eye protection.
•
Persons having a history of photosensitive reactions or who are using
photosensitizing drugs should not be exposed to light from this device.
•
Take caution when using this device in the presence of flammable liquids,
dust particles, oxidizer such as oxygen or nitrous oxide, or other
flammable substances.
1.

2.1. System Components
Included with the Purchase of your APM UV9 LED.
2. Product Information
Specifications:
Energy Output: up to 1800 mW/cm2 @ 365 nm - 420 nm
Input Power: Lithium Ion Battery (3.7 V/2500 mAh)
LED Life: 2,000 hrs
Dimensions: 38mm x 190mm (with 11mm change to 11mm Light Guide)
Weight: 180g
Power Supply: AC100-240 V, 50-60 Hz (Power Supply is CE/UL approved)
4
Instructions for use
APM UV9 LED
MANUAL
AB C D
EFG H
A
B
C
D
Item Description Quantity
E
F
G
H
UV9 LED 1
Battery 1
Cradle 1
11-11mm Light Guide 1
Filter 1
Anti-glare Shield 2
Instructions for Use 1
1
Power Supply
Input AC100-240 V, 50-60
Hz Output DC5 V/ 2 A
3.7 V/ 2500 mAh

2.2. Installation and Charging
Startup
When receiving the unit check for
damage that may have occurred during
transportation.
If necessary, contact APM Technica.
Start
Remove the protective caps from
the device and light guide which
should be kept on whenever not in
use to prevent damage. Next insert
the light guide into the handheld and
ensure the light guide is fully inserted.
5
Filter
Place the Filter on the Light Guide Rod to prevent blue light from
shining directly into your eyes.
Anti-glare Shield
We recommend installing the Anti-glare Shield on the front of the
Light Guide Rod to prevent the Light Guide Rod from being
damaged during use. The Anti-glare Shield will also reduce eye
discomfort from reflected glare.

Battery
We recommend you charge the battery fully before the first use. Put
the battery into the handheld and rotate clockwise until you hear a
"click" sound and feel the battery clicked into place.
The battery supplied is only charged to about 60% prior to
shipment. Charge it fully before using it (see page 10).
Click
6

7
3. Features
3.1. Device
3.1.1. LED Wavelength Settings
(1) UV: 365+385 nm
(2) VIS: 405+420 nm
(3) ENTIRE: 365+385+405+420 nm
3.1.2. Operation
MODE button TIME button
ON/OFF button
1
2 3

8
1 ON/OFF button
3 TIME button
A.
B.
C.
Press the large red button to start the device.
Press the same button again to turn on the curing light.
Pressing the same button during the curing cycle will interrupt and
end the cycle.
If the unit is in sleep mode, pressing this button will wake the unit
and it will display with the last mode chosen. Press 2x more to start
curing cycle.
2 MODE button
Controlled by small red button on left.
When pressed will adjust LED light source setting (UV/ VIS/
ENTIRE), intensity setting and beep.
Press 1X Press 2X Press 3X
TIME: Controlled by small red button on the right.
When pressed it will adjust light output time from 1 second to
60 seconds.
365 385
405 420
UV Mode
Intensity Mode
INTENSITY
HIGH
MEDIUM
LOW
365 385
405 420
VIS Mode
365 385
405 420
ENTIRE Mode
UNMUTE MUTE
BEEP BEEP
MUTE

9
D. 2 + 3
To check battery voltage, temperature, usage score, and version.
Press left and right small red buttons at the same time and hold
5 seconds.
Handheld Information
3.1.3. Auto-sleep
The device will automatically turn off if not operated for 3 minutes.
3.1.4. Auto-memory
The default is UV+VIS, 30 sec, unmuted on the first boot up.
Afterwards, it will use the last setting used before being turned off.
3.1.5. BEEP Reminders
Occur during button operation and low battery/overheating. The beep
can be set to MUTE/UNMUTE per instructions on page 7.
3.1.6. Battery Power
The Battery ICON is symbolized by a ladder with 0 to 5 levels.
365 385
405 420
4.0 T:2 6
001 000
000
002 000
000
001 000
000
B:
U:
V:
E:
01.001
Battery ICON
INTENSITY: Press small left button 3 times and then small
right button to select intensity setting (LOW/ MEDIUM/ HIGH).
Press left button to exit intensity mode.
BEEP: Press small left button 3 times and then small right button
to turn on/off beep setting (MUTE/UNMUTE). Press left button
to exit beep mode.

10
3.1.7. Low-voltage Protection
The handheld will automatically turn off after warning the battery
power is lower than 3.4 V.
3.1.8. Overheating Protection
Overheating protection:The display will show an overheating warning
and force the system to turn off when the light source is at a
temperature over 65 °C. The device can be restarted when the
temperature has cooled down below 45 °C.
3.1.9. Temperature Sensor Protection (NTC)
The display will show“NTC Error" and force the system to turn off when
the light source is not able to detect NTC.

11
3.2. Cradle
Input: AC100~240 V, 50-60 Hz
Output: DC 5 V, 2 A, Micro USB
B. Charging
Charge the device by placing it in the cradle so that Pogo Pins
are connected with the battery contacts. The display will show
charging symbol when charging.
3.2.1. Power Supply
3.2.2. Operation
A. Turn On
When the cradle is plugged in, it will turn on and display APM
Logo. If there is no action within 30 sec, Cradle will enter the sleep
mode (the Logo or charging symbol will flash every 10 sec).
Device charging symbol
Cradle charging symbol
FULL

12
C. Wake-up
Insert/remove handheld or test light intensity to wake up the
cradle from sleep mode.
D. Intensity Measurement
Light intensity measurement using radiometer port on right side of
cradle:
apply the light on the sensor for over 1 second.
PASS: Light intensity reaches 70% to 100% of radiant
intensity based on specification (1,260~1,800 mW/cm2).
FAILURE: If light intensity does not reach 70% of radiant
intensity based on specification return unit to APM Technica to
replace the LED/heat sink to get maximum output.
The measurement result will be displayed for 3 sec, if there is
no other action, display will return to sleep mode.
(1) It will show the test result (PASS/FAILURE) on the display after
you
(2)
(3)
(4)
MEASURING PASS
PASS
FAILURE
FAILURE
MEASURING

13
4.Product Specifications
Type of Information Specifications
Device name
Model name
Battery
Light source
LED life time
Radiant intensity
Handheld dimension
Handheld weight
Cradle dimension
Cradle weight
Equipment class (AC Adapter)
Safety
EMC
Protection from ingress of liquids
Overvoltage category
Pollution degree of the
intended environment
Use cycles per charge
Storage and transport environment
APM UV9 LED
UV9
Input: AC100~240 V, 50-60 Hz
Output: DC 5 V/2 A
Li-ion 3.7V, 2500mAh
10 W LED
Up to 2,000 hr
365~420 nm
Peak: 365 nm, 385 nm, 405 nm, 420 nm
up onto 1800 mW/cm2 @HIGH, UV Mode
Ø38 (max.) x L190 mm
180 g (with battery & light guide rod)
Ø115 (max.) x H68 mm
140 g
Class II
IEC / EN 61010-1
EN 61326-1
IPX0
1
680 times in 10 sec, Entire mode, High intensity
Indoor use.
Altitude (max.): 2000 m
Ambient temperature: 10~40 °C / 50~104 °F
Relative humidity: 30~75 %
Atmospheric pressure: 0.5~1.0 atm / 50~106 kPa
Ambient temperature: 10~40 °C / 50~104 °F
Relative humidity: 10~95 %
Atmospheric pressure: 0.5~1.0 atm / 50~106 kPa
Wavelength
Power supply
2
Operation environment

14
5.Disposal
Comply with your national regulations, guidelines and requirements for
the disposal of end-of-life electrical equipment and batteries.
This device is provided with a Li-ion battery.
For environmental reasons, please dispose of the device according to
local environmental guidelines or regulations.
Make sure the product or the battery is not mixed with other types of
waste when it is disposed of.

6.Troubleshooting
Problem
Cannot turn on the device.
Cannot charge the battery.
Display shows “overheat”.
Display shows “Error 1”.
The intensity is too low.
Remove the battery and insert it again. If
the error persists, please plug-in the
power supply to cradle and charge the
battery for at least 10 mins. Reinsert
battery and then push the ON/OFF button.
Please clean battery contacts. If the error
persists, replace battery.
If the temperature rises up to a really high
level, please wait until the unit cools down
and then use it again.
LED module has gone bad, please contact
APM Technica to return the unit for repair.
If the intensity test fails please contact
APM Technica to return the unit for
replacement of the LED/heat sink.
Resolution
15

+49 8196 998 7761
+49 8196 998 7762
www.apm-technica.de
APM Technica GmbH - Stoffener Straße 37 - D-86932 Puergen
Table of contents