A Division of Australian Performance Vehicles • ABN 38∙110∙355∙934 • 1521 Hume Highway, Campbellfield, Victoria 3061. Phone (03) 9355 5533, Free 1800 804 588.
Visit us at www.apvsafetyproducts.com
P/No. 511888700A ISSUED 04/10/2021
E A S I - G R I P I n s t a l l a t i o n I n s t r u c t i o n s
This restraint system has been designed and manufactured in Australia to “Keep you safe”.
APV is the major original equipment supplier of seat belts in Australia and strives to present
the best products in quality and performance. The EASI-GRIP restraint system offers superior
performance and encourages use by:
•“Presenting” the tongue and buckle to the operator in a convenient position.
•Tongue and buckle are ergonomically positioned at or above the hip point.
•Buckle side is designed to swivel and allow ingress / egress.
•EASI-GRIP has an ergonomically designed, comfortable, easy to manage grip thus
improving the ease of operation while wearing protective gloves in extreme weather
conditions.
EASI-GRIP is certified to SAE J386, ISO6683 and FMVSS302, meeting global safety standards
when installed per enclosed instructions.
HOW TO WEAR YOUR SEATBELT CORRECTLY
To “Buckle Up”, slide the tongue into the slot of the open end of the
buckle. It is correctly engaged when you hear an audible “click”. If
required, the flexible arms of EASI-GRIP can be pushed against the
operator's waist after the tongue is buckled in for a more snug fit.
To release the belt, push the button in the centre of the buckle and place
the grip back into the cradle of the arm.
THE AUTOMATIC LOCKING RETRACTOR (ALR) SEAT BELT
The Automatic Locking Retractor retracts the webbing to the body after
the tongue and buckle are engaged. This type of seat belt automatically
locks when the mechanism is activated after a certain amount of webbing
is withdrawn from the spool then allowed to retract a small distance. An
ALR is unlocked once a certain amount of webbing is retracted back onto
the spool.
No modifications or additions should be made by the user which will
prevent the seat belt adjustment devices from operating to remove slack.
WARNING!
•Please have the assembly installed by a licensed mechanic.
•Do not make any alterations or additions to the belt.
•No excessive slackness in the belt should be evident.
•Webbing must not be allowed to chafe against sharp edges on seat
or bodywork. Any fraying of webbing will reduce the strength and
retraction performance of the seat belt and the seat belt assembly
should be replaced.
•Do not attach the belt assembly to unsound metal, wood or plastic
structures.
•The lap section must be worn across the hips.
•Do not bleach or dye under any circumstances.
•Avoid contamination of the webbing with polishes, oil, and
chemicals, particularly battery acid.
•Cleaning may safely be carried out using mild soap and water.
•Do not attach the seat belt assembly to a vehicle seat or seat
mounting bolts, unless the vehicle manufacturer has provided seat belt
anchorages in the seat or uses the seat anchor bolts for this purpose.
•After installation, please ensure that bolts are securely tightened and
there are no apparent loose or ill-fitting parts present. Also check that
the webbing in the ALR Lap belt will pay out and retract fully.
•Belts should not be worn with straps twisted.
•Each seat belt assembly must be worn by only one occupant.
•It is essential that the entire assembly be replaced if it has been worn
during a severe impact or rollover, even if damage to the assembly is
not obvious.
•The belt should be replaced if webbing becomes frayed,
contaminated, or damaged.
Fatal accidents can occur within short time frames and at low speeds.
There is no doubt that seat belts, correctly worn, can reduce the
incidence of fatalities and serious injury. Your seat belt will give you
valuable protection, but IT IS YOUR RESPONSIBILITY IN THE INTERESTS
OF YOUR OWN SAFETY TO OPERATE YOUR MACHINERY CAREFULLY AT
ALL TIMES
IMPORTANT!
Replace your Seat Belt if:
a. The vehicle should be involved in a serious accident
b. The webbing or fittings become damaged
It is recommended that Industrial Restraints are replaced
every 18-24 months.
EASI-GRIP is protected by patent application No. 2020902886
with IP Australia & application No. 17/230304 in the United States
IMPORTANT!
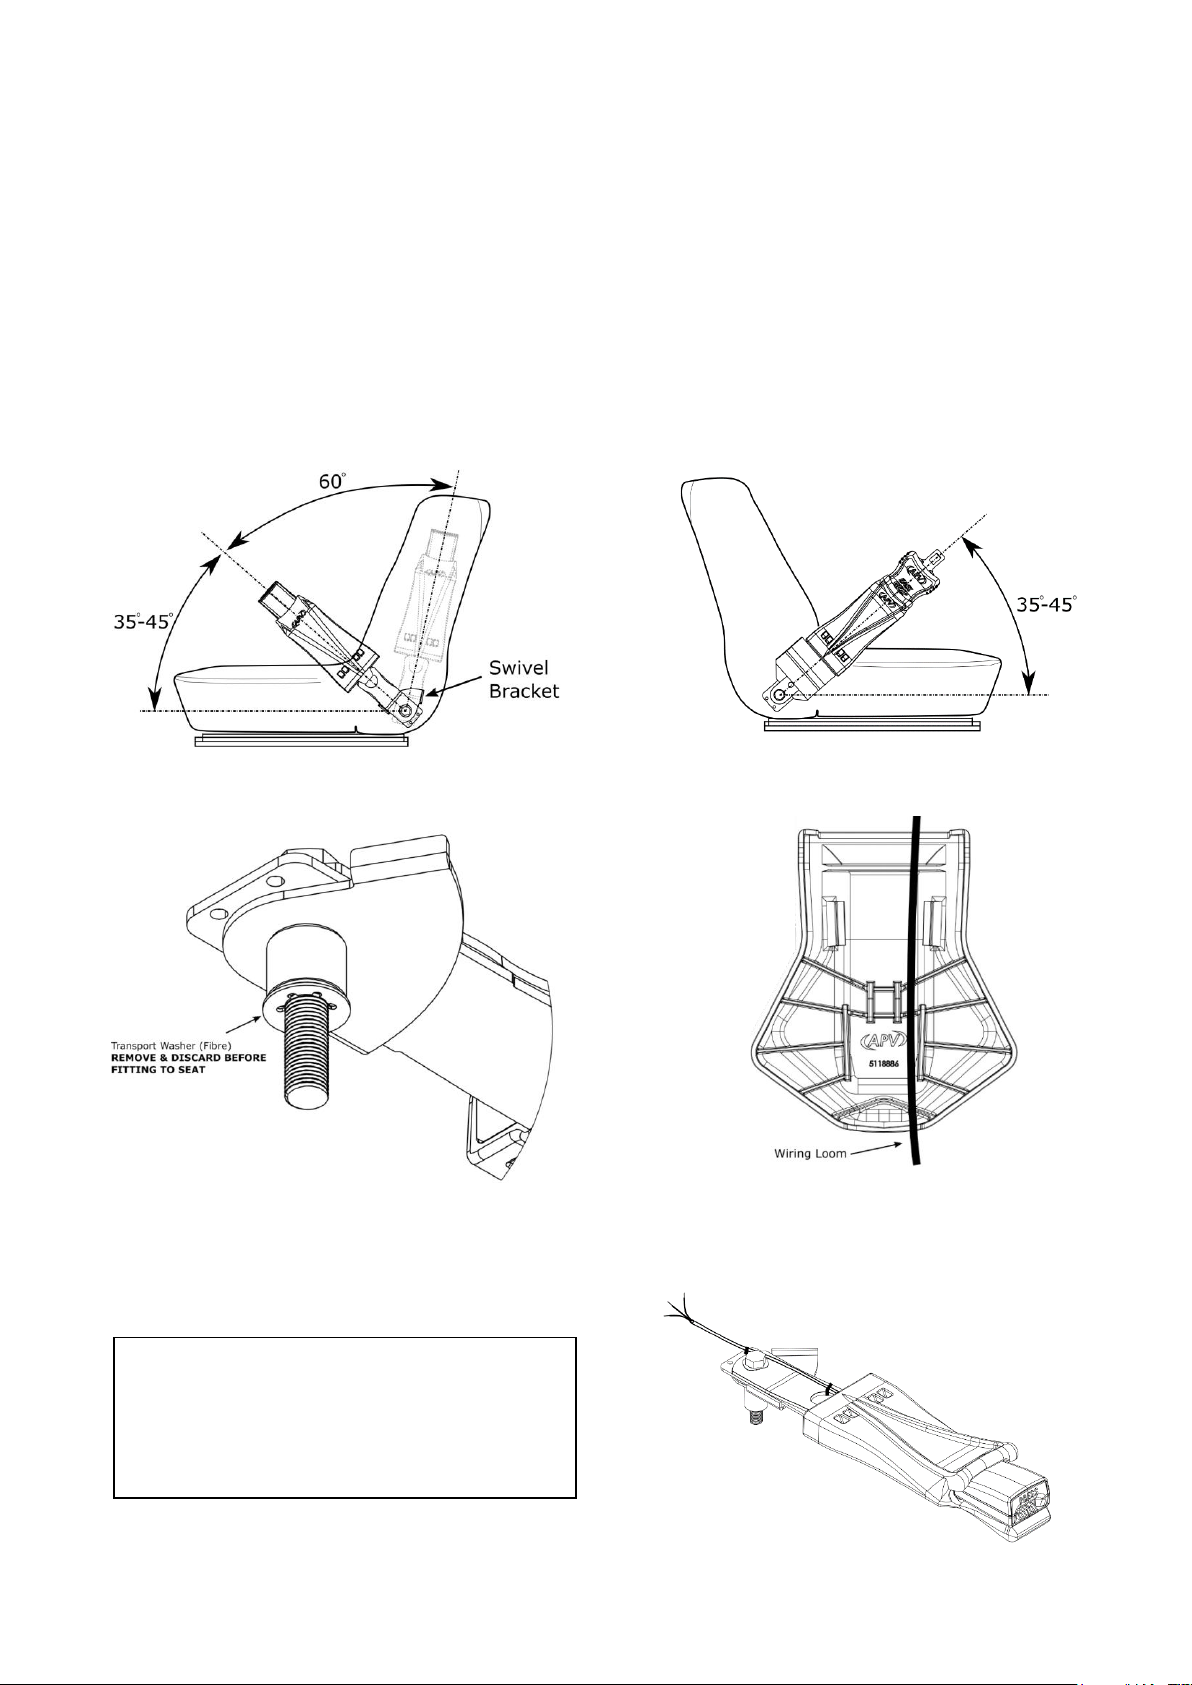
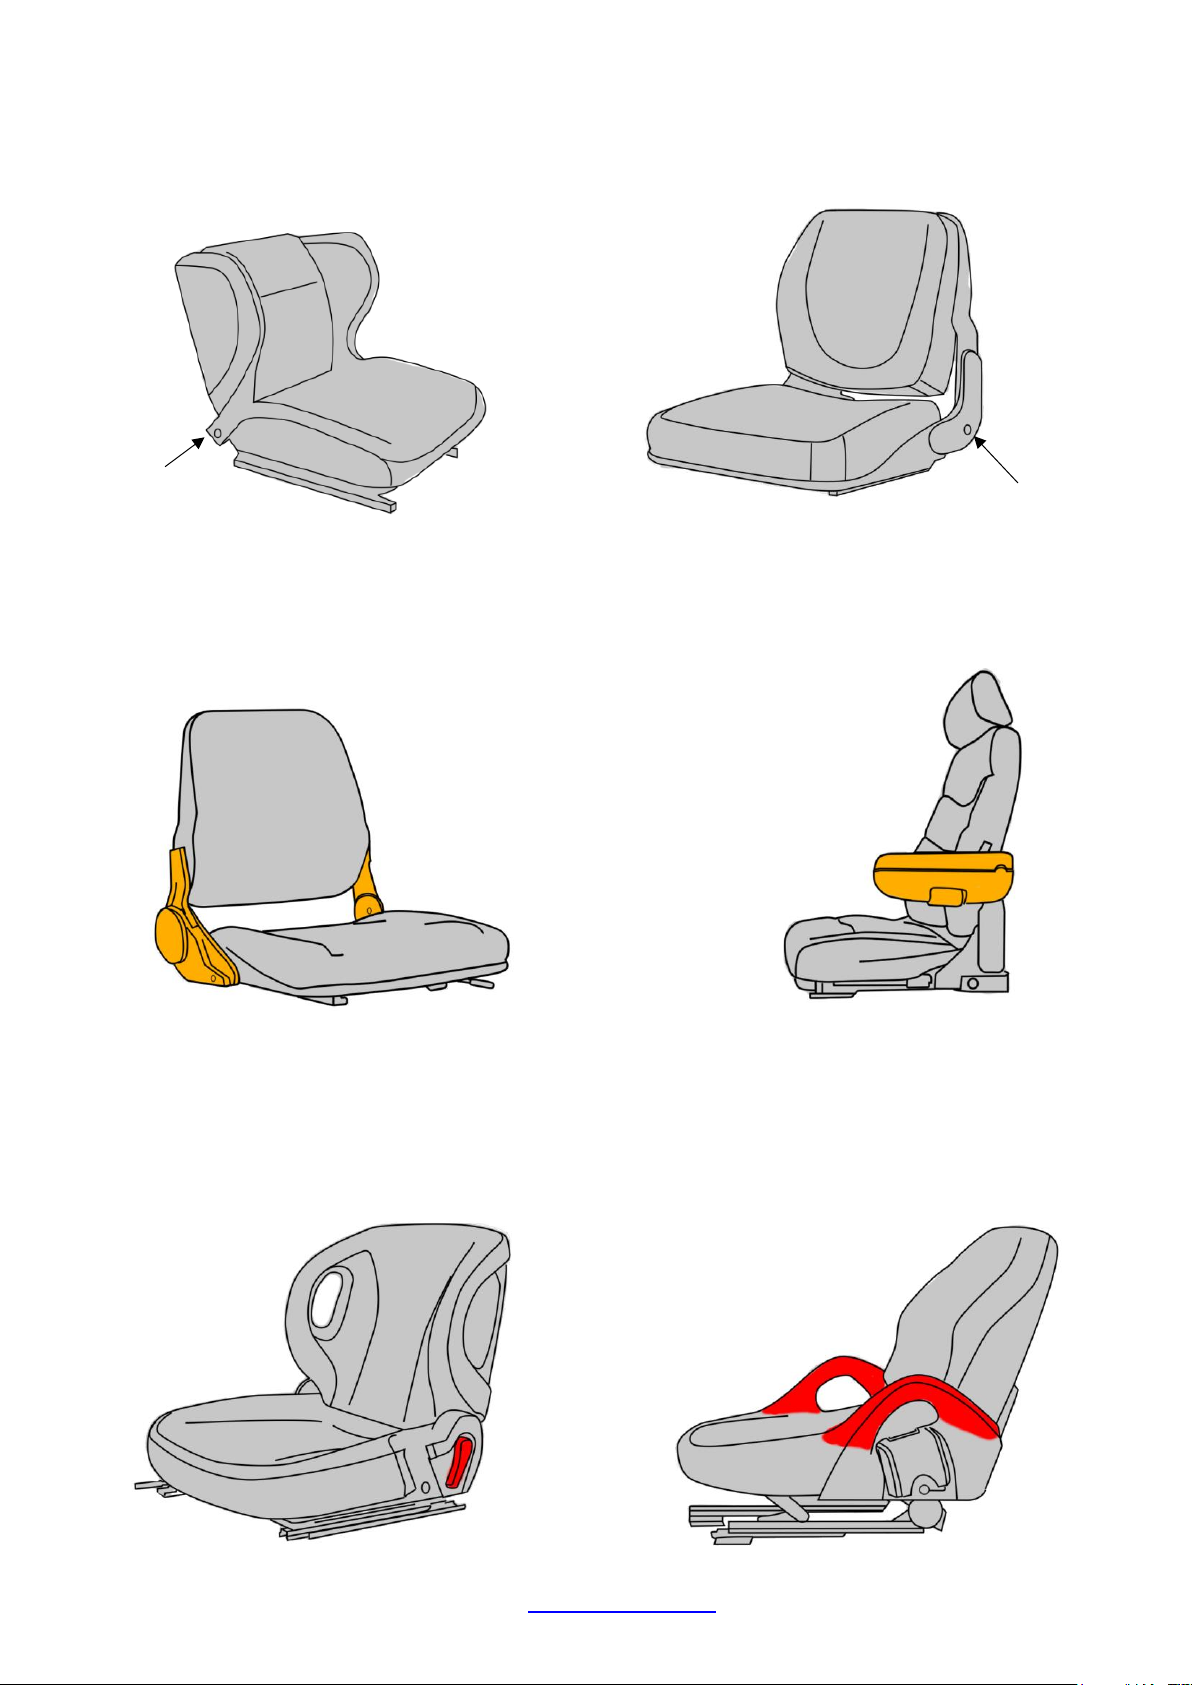
EASI-GRIP is not suitable for every seat type. If EASI-GRIP cannot
be installed correctly to the seat, it should not be used. Refer to
the guide on pg.3 to assess seat suitability.
WARNING!
Ensure the ALR locking mechanism has engaged before operating
the vehicle. If the ALR is not locked, activate it by allowing a small
amount of webbing to retract back into to spool.