Filter Overview
C-30 PRO
7KH'UXP)LOWHU&3URLVDIXOO\DXWRPDWLFSUHȴOWHUV\VWHP0DGHRIKLJKTXDOLW\PDWHUL-
DOVHQHUJ\HɝFLHQWDQGYHU\FRPSDFW7KHGUXPȴOWHUFRQVLVWVRIDSRO\SURS\OHQH33ER[
LQZKLFKWKHUHLVDGUXPZLWKDKLJKȵRZȴOWHUSDQHO:DWHUȵRZVWKUXWKHȴOWHUDQGWKHGLUW
VWLFNVRQWKHLQVLGHRIWKHGUXP7KHVSHFLDOȵDWQR]]OHVVSUD\WKHGUXPFOHDQZLWKZDWHU
from the system. The water with dirt is removed through the drain gutter into the sewer. This
cycle is repeated as often as necessary and fully automatic!
7KHKRXVLQJRIWKH&3URȴOWHUFRQVLVWVRID33FRQWDLQHUZLWKDQLQWHUPHGLDWHEXONKHDG
7KHSDUWLWLRQLVSURYLGHGZLWKDVLOLFRQHVHDOLQJVWULSPRXQWHGRQWKHȵDQJHVHSDUDWLQJWKH
waste water from the clean. Also in the partition wall, there are 2 holes, which are covered
with a lid. In case of failure of the drum control, this lid may be removed so that the water can
ȵRZSDVWWKHGUXPEXWZLWKRXWDQ\ȴOWHUIXQFWLRQ7KURXJKWKLVDWOHDVWWKHELRORJLFDOȴOWUD-
WLRQFDQEHRSHUDWHGXQWLOWKHHUURUUHFWLȴFDWLRQ
7KH&3URLVDHQHUJ\HɝFLHQWȴOWHU'XHWRWKHVSHFLDOGHVLJQȵRZVWKHZDWHUWKURXJKWKH
ȴOWHUZLWKRXWDQ\EDFNSUHVVXUHLQFRQWUDVWWRFRPPRQO\XVHGEHDGDQGVDQGȴOWHUV7KLV
PHDQVWKDW\RXQHHGDOHVVSRZHUIXOSXPSWKDQZLWKDEHDGRUVDQGȴOWHUDQG\RXDFKLHYH
WKHVDPHȴOWHUFDSDFLW\LQIDFWWKH&3URȴOWHUVPXFKPRUHGLUWIURPWKHZDWHU7KHQHZ
High Output UV-C system gives 60% more UV radiation than normal UV lamps. By building
WKLVODPSLQWKHȴOWHUGLUHFWO\EHKLQGWKHGUXP\RXZLOODFKLHYHPD[LPXPUHVXOWV2YHUWKH
\HDUVZHKDYHEHHQFRQVWDQWO\GHYHORSLQJEHWWHUDQGPRUHHɝFLHQWȴOWHUWHFKQLTXHV:HSXW
WKLVWRJHWKHULQWKH&3URGUXPȴOWHUDQGWKLVPDNHVLWLQFUHDVLQJO\HQHUJ\HɝFLHQW
5
Aqua ExclusiveFilter Overview
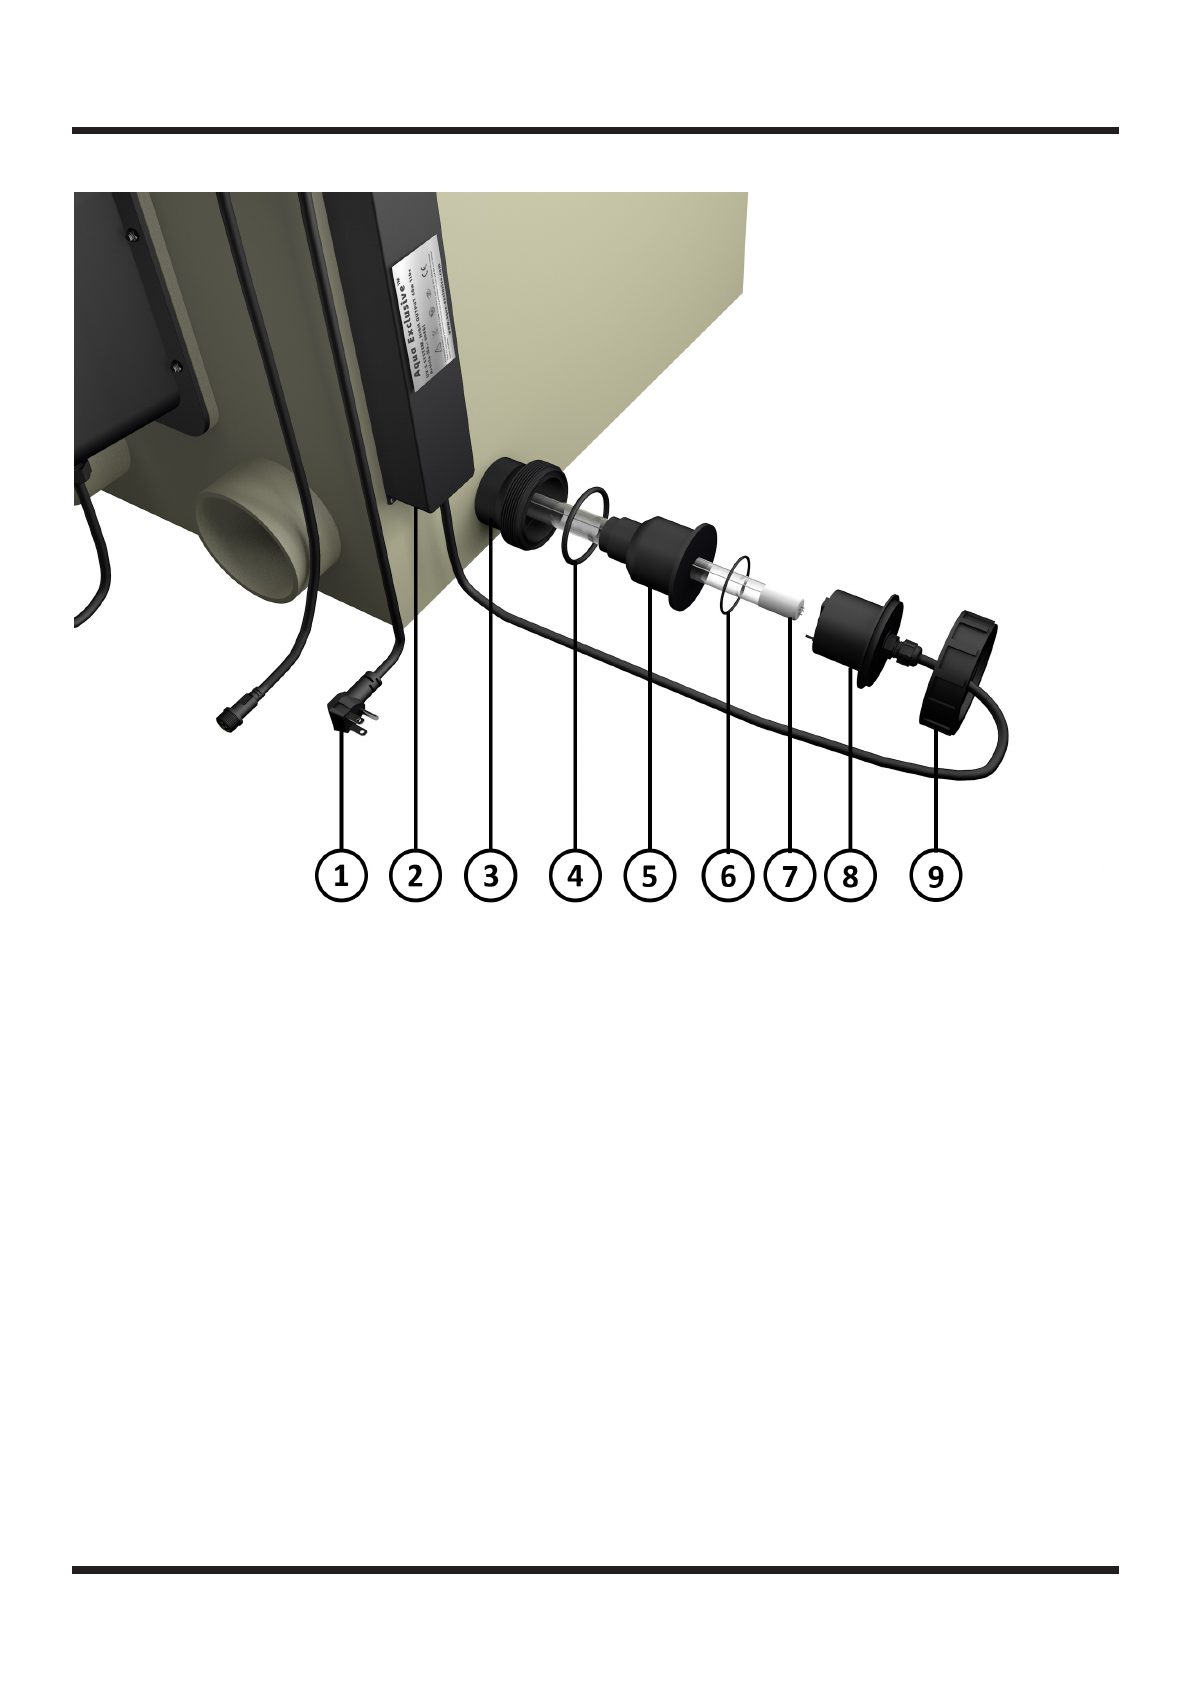
UV-C SYSTEM
The C-30 Pro is equipped with our newest UV-C technology. A 40watt UV-C system with high
RXWSXWXYODPSLVEXLOGLQVLGHWKHȴOWHURQWKHFOHDQZDWHUVLGH7KHVRSKLVWLFDWHGGHVLJQDQG
high quality materials produce a high UV-C radiation. The wavelength of the UV-C system is
exactly 253.7nm, the high level of radiation kills almost all bacteria, viruses and even fungi!
This system produces 60% more light than normal UV-C lamps and ensures clean and clear
water!
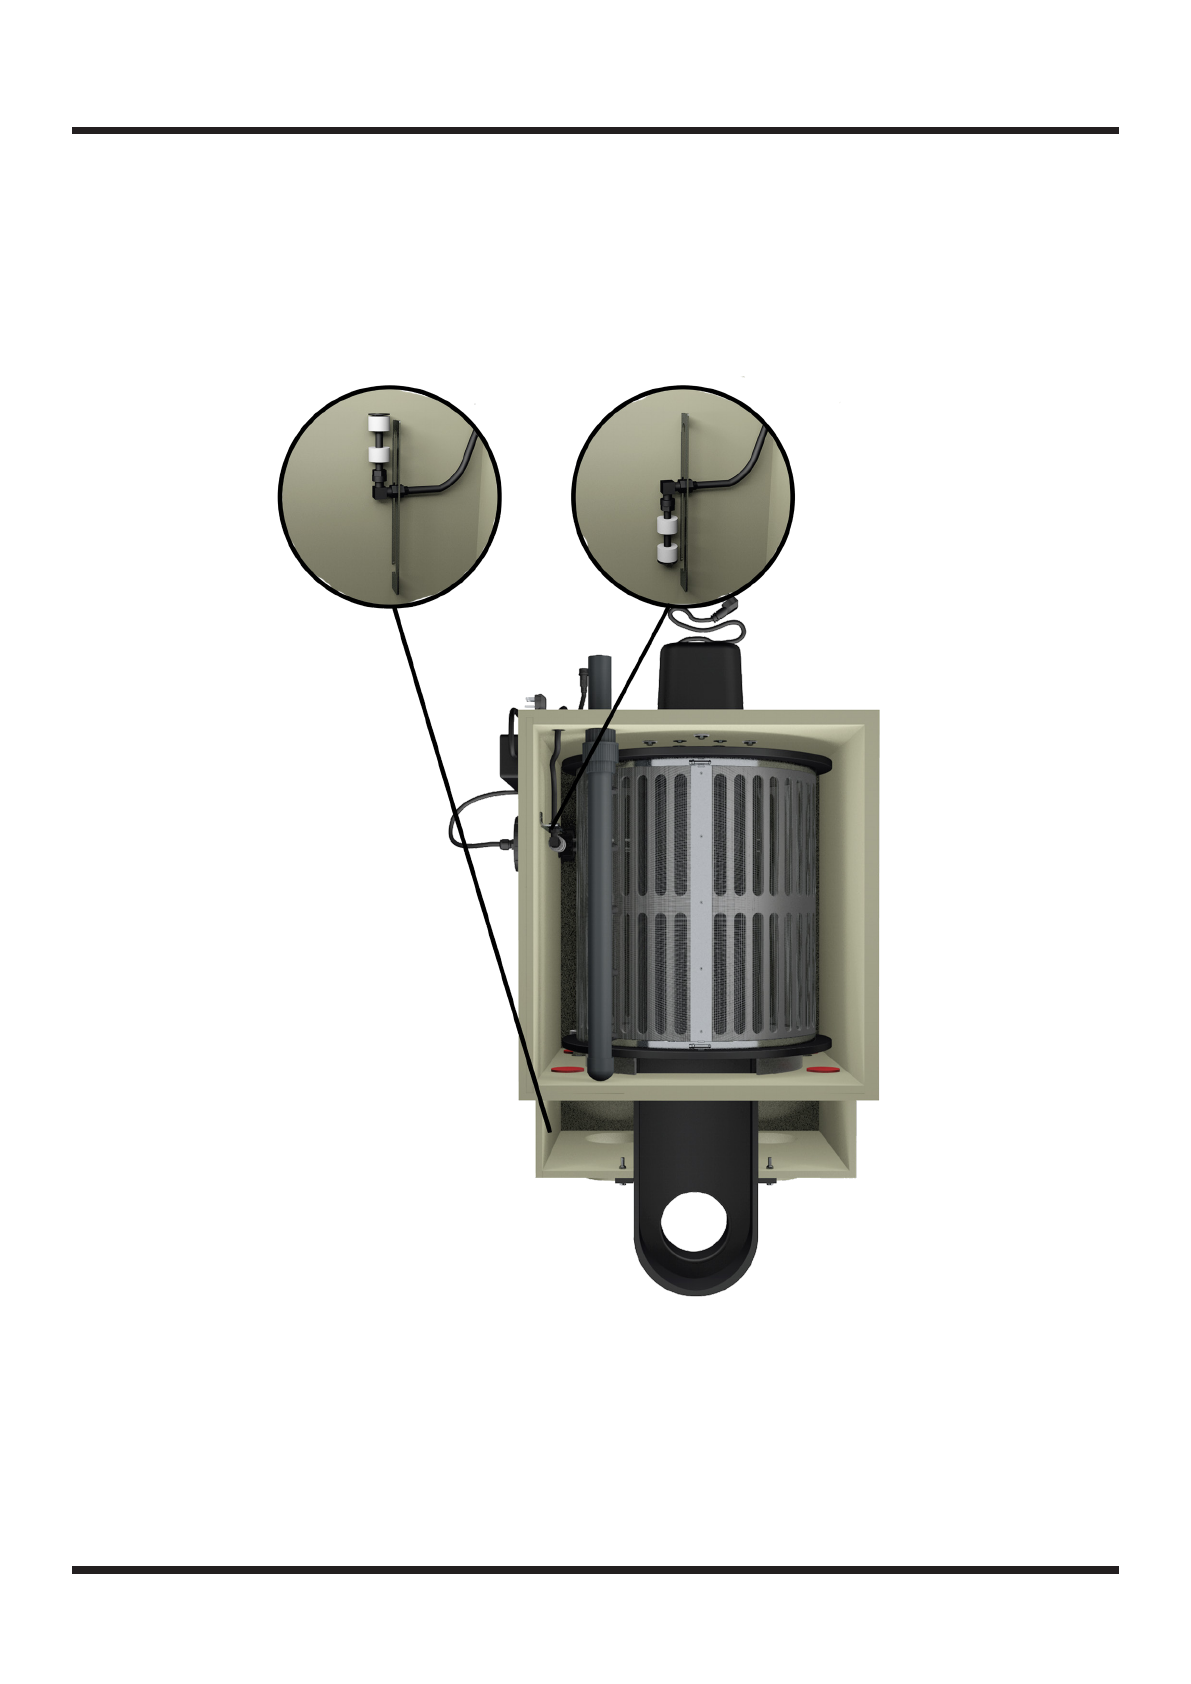
Water Level Sensor
7KHZDWHUOHYHOVHQVRULVORFDWHGRQWKHFOHDQZDWHUVLGHRIWKHGUXPȴOWHUDQGGHWHFWVZKHQ
WKHFOHDQLQJSURFHVVVKRXOGEHDFWLYDWHG'XHWRWKLVVHQVRUWKHȴOWHURQO\ULQVHVZKHQQHF-
HVVDU\$WWKHEHJLQQLQJWKHȴOWHUZLOOUXQDOLWWOHPRUHRIWHQEXWDVWKHZDWHUJHWVFOHDQHU\RX
ZLOOQRWLFHWKDWLWZLOOWDNHORQJHU7KLVDOVRGHSHQGVRQ\RXUȵRZDQGKRZPDQ\PLFURQV\RXU
ȴOWHUSDQHOLV:HVXSSO\WKHGUXPȴOWHU&3URZLWKDPLFURQKLJKȵRZȴOWHUSDQHODV
standard, we also recommend this for koi ponds.