Aqua Pulse Spas Shelly Deluxe Spa User manual

2
Contents:
3 Important safety instructions
3 Warnings
4 Hyperthermia
4 Considerations required for the location of your spa
4 Spa foundation
4 Water supply
5 Electrical safety
5 Electrical installation
5 Electrical connection point location
6 Wiring diagram
6 Important usage warnings – non warranty faults
6 Water treatment
7 How to remove your spas filter
7 Weekly filter cleaning
7 Filing your spa with water – avoiding air locks
8 Hardcover Installation
8 Hardcover use & care
8 Synthetic cabinet care
8 Acrylic shell care
8 Empty spa warning
8 Draining the spa – using the drain fitting
9 Turning jets on & off
9 Waterfall control handle
9 Air control handle
9 Main diverter handle
9 Aromatherapy control handle
11-12 Operating your Shelly Deluxe Spa
13 Setting the time
13 Setting the cycle cleaning
14 Setting the cycle heating
15 Turning on the heater manually – maintaining heat
15 Turning on the hot water massage pump
15 Turning on the air blower
15 Turning on waterfall
16 Turning on the LED lights
16 Frost prevention system
16 Ozonator
17 Troubleshooting

3
IMPORTANT SAFETY INSTRUCTIONS
Your physiological response to hot water is very subjective and depends on your age, health and medical
history. If you don’t know your tolerance to hot water or experience dizziness, headaches or nausea you
should exit the spa immediately and cool down.
WARNINGS
Children in and around the spa should be supervised at all times by a responsible adult.
•Use caution when entering or exiting the spa, where practical install a safety grab bar or handrail and
set of stairs with non-slip tape on the stair treads (cease use of the stairs immediately if the griptape is
not in tact). Turn off all the jets before entering or exiting the spa to improve visibility while entering or
exiting the spa. Remember that wet surfaces can be slippery.
•Do not allow anyone to submerge their head under the water.
•Do not use the spa unless all suction guards are installed to prevent body and hair entrapment. Donot
sit in front of or on top of the suction fittings or skimmer. This will obstruct proper circulation of the water
and may result in personal injury.
•Never operate the spa pumps without having all suction and return lines open.
•Always keep the hardcover installed and locked when the spa is not in use.
•Never allow anyone to sit or stand on the hardcover.
•People using medications and or having any adverse medical history should consult a physicianbefore
using the spa.
•People with infectious diseases should not use the spa.
•Do not use the spa if you are under the influence of alcohol or drugs.
•Do not consume alcohol or drugs while using the spa.
•Pregnant women should consult a physician before using the spa.
•As prolonged immersion in water temperatures in excess of 38°C (100°F) may damage your health,we
recommend measuring the water temperature with an accurate thermometer before entering thespa. We
also recommend establishing lower temperatures and shorter periods of use for users whomay be
affected by hot water temperature.
•In order to avoid the possibility of hyperthermia (heat stress) occurring it is recommended that the
average temperature of spa-pool water should not exceed 38°.
•Do not use the spa immediately following strenuous exercise.
•You must use a Licenced Electrical Contractor to connect the spa to power.
•The power must be supplied through a residual current device (RCD) to Australian Standards.
•If your power supply cable is damaged switch the spa off at the residual current device inside your
houses meter box, contact a Licenced Electrical Contractor to replace the cable.
•Live parts and connections must be inaccessible to any person in the spa.
•Earthed appliances must be permanently connected to fixed wiring.
•Do not permit or use electric appliances (such as lighting, telephone, radios, televisions etc.) within2
meters of the spa.
•Test the GFCI (Ground Fault Circuit Interrupter) or residual current device (RCD) monthly.
•If water is leaking from the spa stop using the spa and turn it off at the residual current device (RCD) in
the meter box until a qualified technician has resolved the problem.
•In daylight hours do not leave the spa empty or partially empty of water for any period of time, this can
cause terminal damage to the spa.
•Post emergency phone numbers for Police, Fire Department and Ambulance at the nearest phone.
•Install a CPR Resuscitation chart within easy view of the spa.
•Check with your local council to see if you require a building & fencing permit for your spa.

4
HYPERTHERMIA
Since your spa can be set to reach temperatures of 40°C (104°F) users should be aware that extended
submersion in water that exceeds normal body temperature can lead to hyperthermia. Hyperthermia occurs when
the internal temperature of the body reaches several degrees above the normal body temperature of 37°C
(98.6°F). The symptoms of hyperthermia include drowsiness, lethargy and an increase in the internal temperature
of the body. The effects of hyperthermia include:
•Unawareness of impending hazard.
•Failure to perceive heat.
•Failure to recognize the need to exit the spa.
•Physical inability to exit the spa.
•Foetal damage in pregnant woman.
•Unconsciousness resulting in the danger of drowning.
If you feel any of the symptoms of hyperthermia safely exit the spa immediately. Please note that the use of
Alcohol, Drugs or Medication can significantly increase the risk of Hyperthermia.
CONSIDERATIONS REQUIRED FOR THE LOCATION OF YOUR SPA
Contact your local council to determine if a building permit is necessary and for information on applicable bylaws
(distance from property lines, buildings, fencing requirements etc.). If you are doing any excavating contact Dial
before You Dig on 1100 to ensure that there are no underground lines.
Locate the spa where possible within close distance of a door to the house, this will maximize potential winter use.
If possible, locate the spa where you will enjoy some privacy. Make sure your spa is positioned so that access to
all cabinet panels will not be blocked. Blocking access to any cabinet panel on the spa will render the spa
unserviceable, you must have 700mm of clear uninterrupted space on all sides of the spa for a service technician
to have space to make repairs. Service technicians will not move your spa to gain access to a cabinet panel which
has been blocked in. Decking in your spa is not recommended you may render your spa unserviceable if the entire
deck is not easily removable. Our technicians will not remove your deck to service your spa.
SPA FOUNDATION
Your spa needs a good solid foundation supporting the whole base of the spa. The foundation on which your spa
sits must be able to support the weight of the spa the water in it and the weight of its users. If the foundation is
inadequate the spa may shift, this will cause stress to the spa shell which may lead to the shell cracking. Damage
caused by an inadequate or improper foundation is not covered under this warranty. It is the responsibility of the
spa owner to provide a proper foundation for the spa. A spa containing both water and people is extremely heavy,
if you are installing the spa onto decking or any other elevated structure you must consult a structural engineer to
ensure that the structure will support the weight of the spa. Ideally the spa should be installed onto a concrete
base at least 4” thick with reinforcing steel inside the concrete. If you are installing your spa indoors ensure that
your choice of flooring is impermeable to water. Ensure that water drains away from the spa protecting the cabinet
and electrical components from water damage. Do not place any item underneath the spas base to level the spa
this will cause stress to the spa shell which may lead to the shell cracking. Damage caused by packing under the
spas fibreglass base is not covered under this warranty.
WATER SUPPLY
Spas do not require a permanent water supply however there must be a water supply and hose within reach in
order to fill the spa.

5
ELECTRICAL SAFETY
Do not place your spa within 3 metres of overhead power lines.
ELECTRICAL INSTALLATION
NEVER CONNECT POWER TO THE SPA USING AN EXTENSION LEAD.
The use of an extension lead will void your spas warranty.
You will need a suitable electrical supply to run the spa.
The Shelly Deluixe Spa requires a 10Amp Residual Current Device Protected Dedicated Power Connection. Your
Licenced Electrical Contractor can hardwire the spa straight to the meter box in your house or they can install a
10Amp residual current device protected dedicated single power plug.
It is the responsibility of your Licenced Electrical Contractor to ensure the Residual Current Devise is installed at
the correct mA required by the law.
When appointing an electrician to prepare your spas electrics check that they are suitably qualified and licenced to
do so. Do not attempt to install the spas electrics yourself if you are not a fully Licenced Electrical Contractor.
If your spa is being hardwired, we recommend you install a Rotary Isolation Switch so that the spa can be isolated
from the power supply in an emergency or for service work. This is simply a rotary on/off switch but should be
sited more than 2 metres away from the spa so that users cannot be in the spa whilst operating the switch.
3 Pin Plug Rotary Isolation Switch
ELECTRICAL CONNECTION POINT LOCATION
If you have chosen to hardwire the spa your Licenced Electrical Contractor will locate the electrical
connection point here, unscrew and remove the cabinet panels directly underneath the spas touch pad.
While your electrician is on site make sure all the pumps are running before they leave site.

6
IMPORTANT USAGE WARNINGS – NON WARRANTY FAULTS
Spas are extremely delicate products and require regular maintenance. Below we will list a number of common
causes of problems which are not covered under this warranty. Should we ever need to visit you to repair your spa
you will be charged the full cost of a repair if we found that the cause was the result of poor maintenance or
customer negligence. Paying full attention to the issues below will help to reduce the risk of damage to your spa.
WATER TREATMENT
The most crucial aspects of spa maintenance is water treatment. Improper water balance will cause damage to
the spas acrylic shell, pumps, jets, heater, headrests and fittings. If we find improper water balance in your spa,
these parts will not be covered under this warranty.
Please note that your spas headrest and filter box face are sensitive to chemical exposure and will discolour
immediately if you over sanitize the water or allow them to float in the water, this will not be covered under this
warranty. Do not clean the spas headrests or filter box face with the spas water only use fresh tap water to clean
the headrests and filter box faces. If you are sanitizing the spa on a once-a-week program it is recommended to
remove the spas headrest on the day you sanitize the spa and replace them a day later to avoid over exposure to
your sanitiser.
Different chemical packs have different methods of caring for the water. You will need to refer to the user guide
that came which your chosen chemical pack for exact details on how to treat your water.
We recommend that you have the spa water tested weekly at a professional pool or spa store to gain accurate
results of the water chemistry. Do not add any doses of Chlorine for 48 hours prior to taking your water in for

7
testing. When you test at other pool or spas stores, you can use the test results they give you to calculate any
adjustments you need to make using our how to balance the water instructions. You do need to be careful to not
just apply the amounts of chemical that they tell you to apply. The reason for this is that they might set the
parameters differently to what your spa requires.
Water chemistry test history showing results for Free Chlorine, Total Chlorine, pH, Alkalinity, Calcium Hardness &
Cyanuric Acid, must be kept as a dated once-a-month digital reference as part of your warranty terms. This test
history will be required in the event of a warranty claim. It is a requirement of the Warranty Terms to keep dated
once-a-month digital water test result of the water chemistry supplied from a professional pool or spa store. Your
warranty will be made void if you cannot show these results.
THE FOLLOWING CHEMICALS CANNOT BE USED IN YOUR SPA:
Bromine, Liquid chlorine, Hydrochloric acid, Trichlor chlorine, Dichlor chlorine, Stabilized chlorine, Cyanuric acid,
Magnesium, Hydrogen peroxide & Polyhexamethylene biguanide.
SOME OF THESE PRODUCT WILL MAKE YOUR FIBREGLASS SPA SHELL DEFORM IN SHAPE & CREATE
BUBBLES & HOLES IN THE SPAS ACRYLIC LAYER.
Your warranty will be made void if you use any of these products.
HOW TO REMOVE YOUR SPAS FILTER
Remove the flat head screw in the filter box face and dispose of it.
DO NOT REINSTALL THE SCREW.
1. Slide the face plate on the filter box vertically upwards until it separates away from the filter box.
2. Remove the leaf catcher by sliding it horizontally towards the centre of the spa.
3. To remove the filter, turn the handle on the top of the filter anti-clockwise until
you can lift the filter out of the filter box.
4. To install the filter, place the filter inside the filter box and turn the handle on the
top of the filter clockwise. Do not turn the filter with force just gently screw it in
so it can be easily removed for weekly cleaning.
5. To install the leaf tray slide it horizontally into the filter box, make sure the tray sits in the middle of the
locating grooves. The filter face plate will not install if you have the leaf tray outside of the locating grooves.
6. To install the face plate on the filter box slide the face plate vertically downwards.
Note:
The black filter face will go white where the water and air meets from chemical exposure.
This is unpreventable and can occur very quickly if you over sanitize the water.
WEEKLY FILTER CLEANING
Once a week remove the filter from the spa and wash thoroughly with a garden hose, then place the filter in a
bucket of cold water and add 125ml of Filter Cleaner & Degreaser #9 or Filter Cleaner & Degreaser 1Litre Bottle.
Agitate the water and leave the filter submerged to soak for 24 hours. After 24hours remove the filter, wash it
thoroughly and allow it to completely dry out in an area exposed to the sun or wind.
It is recommended to purchase a spare filter and alternate between the filter each week to make the cleaning
process easier. Filters which are not cleaned weekly can cause your spa to stop cleaning & heating.
You filter needs to be replaced every twelve months, however if you are rotating between two filters this will
require replacement every two years. To order your replacement filter https://www.aquapulsespas.com.au/spa-
supplies-parts/universal-cartridge-filter-2/

8
FILLING YOUR SPA WITH WATER – AVOIDING AIR LOCKS
The correct way to fill your spa with water is to remove the spas filter
and place your hose inside the filter box. Be sure to remove the fitting
off the hose to prevent it from falling into the spas plumbing.
Placing the hose inside the spas main seating area may cause a build-
up of air inside the plumbing creating an air lock. Air locks can stop the
pumps and heater from working.
To help avoid this problem ensure you fill up the spa through the filter
box. You can tell if you have an air lock by turning on the pumps, if no
water appears to circulate through the system it is very likely that you have an air lock. To resolve this problem,
turn the pump off and loosen the unions at the side of the suction end of the pump until water begins to flow
through, then retighten the union and try turning the pump on again.
Alternatively contact the store of purchase for advice on other ways to remove an air lock.
Note:
Please ensure the drain fitting is closed before filling the spa with water, see instructions on page 8.
HARDCOVER INSTALLATION
Locate the green bag, which is taped to the spas packaging. This bag has the screws to fit your hardcover locks to
the spas cabinet as well as a key for the hardcover locks. Use the smaller screws supplied in this bag.
Place your hardcover on the spa and position it to fold in the direction of your preference.
On each strap of the hardcover there is a black plastic lock. Press the two prongs on each lock together and
gently pull downwards to remove the section of the lock which you will need to screw onto the spas cabinet. With
the section of the lock you have in your hand place it behind the prongs which are attached to the hardcover strap
lined up so that the bottom of each part is flush. Now raise the section of the lock you have in your hand towards
the top of the spa by 2cm and mark the position of the two holes on each lock onto the spas cabinet. Using the
smaller screws supplied in the green bag screw each lock onto the spas cabinet. Do not pre-drill holes the screws
will self-tap in, if using a drill stop before the screw is completely tight and finish tightening the screw by hand, if
you over tighten the lock you will crack the plastic.
HARDCOVER USE & CARE
To lift the hardcover, place your hand underneath the valance and lift the hardcover itself not from the handles or
valance. The handles & valance on the hardcover are not for lifting or pulling the hardcover, lifting or pulling on the
handles or valance will tear the vinyl & stitching. Never stand, sit or apply any weight to the hardcover this will
bend or break the hardcover. Do not open the zippers on your hardcover they can be extremely difficult to close
and may not close at all. To clean your hardcover wipe both the top vinyl and underside over with a damp fresh
tap water cloth. Do not use the spas water to wipe the hardcover this will leave chemical stains on the cover. To
extend the life expectancy of your hardcover apply 303 aerospace protectant to the vinyl side of your hardcover
every 30 days and balance your spas water weekly as per the chemical instructions we have supplied you with.
Poorly balanced water can blister your hardcover and breakdown the stitching.
Your hardcover must always be locked to the spas cabinet when the spa is not in use. Leaving the cover off
exposes your spa to the elements which can cause permanent damage to the spas acrylic shell and fittings, it also
allows leaves, dust etc. to enter your spa. Debris in the spa can cause blockages or damage to the equipment.
SYNTHETIC CABINET CARE
Do not use any chemicals to clean your synthetic cabinet. The best way to clean your cabinet is to regularly wipe it
down with a micro fibre cloth and fresh tap water. Where possible try to keep the cabinet from being exposed to
the sun as this causes colour fade in the cabinet and can also cause the cabinet to warp. Cabinets will have step
outs where the cabinet doors do not meet each other. We make the cabinet doors in smaller panels to make the
spa easier to service which causes the step outs you will see.
ACRYLIC SHELL CARE
One a week use a chemical free micro fibre cloth and wipe down the acrylic spa shell in and above the water line.

9
EMPTY SPA WARNING
An empty or partially empty spa of water during sunlight hours can cause deforming, melting, crazing, discolouration,
blisters or holes in the spa’s fiberglass, acrylic and fittings, this can happen within minutes of the spa being emptied
or partially empty. Your warranty does not cover deforming, melting, crazing, discolouration, blisters or holes in the
spa’s acrylic and fittings, so it is especially important your hardcover is on the spa when not in use and the spa is
filled with water at all times during daylight hours.
DRAINING THE SPA - USING THE DRAIN FITTING WARNING:
Never drain or partially drain your spa of water in sunlight hours.
Always drain your spa at night time & fully refill your spa with water the same night.
An empty or partially empty spa of water during sunlight hours can cause deforming, melting, crazing, discolouration,
blisters or holes in the spa’s fiberglass, acrylic and fittings, this can happen within minutes of the spa being emptied
or partially empty. Your warranty does not cover deforming, melting, crazing, discolouration, blisters or holes in the
spa’s acrylic and fittings, so it is especially important your hardcover is on the spa when not in use and the spa is
filled with water at all times during daylight hours.
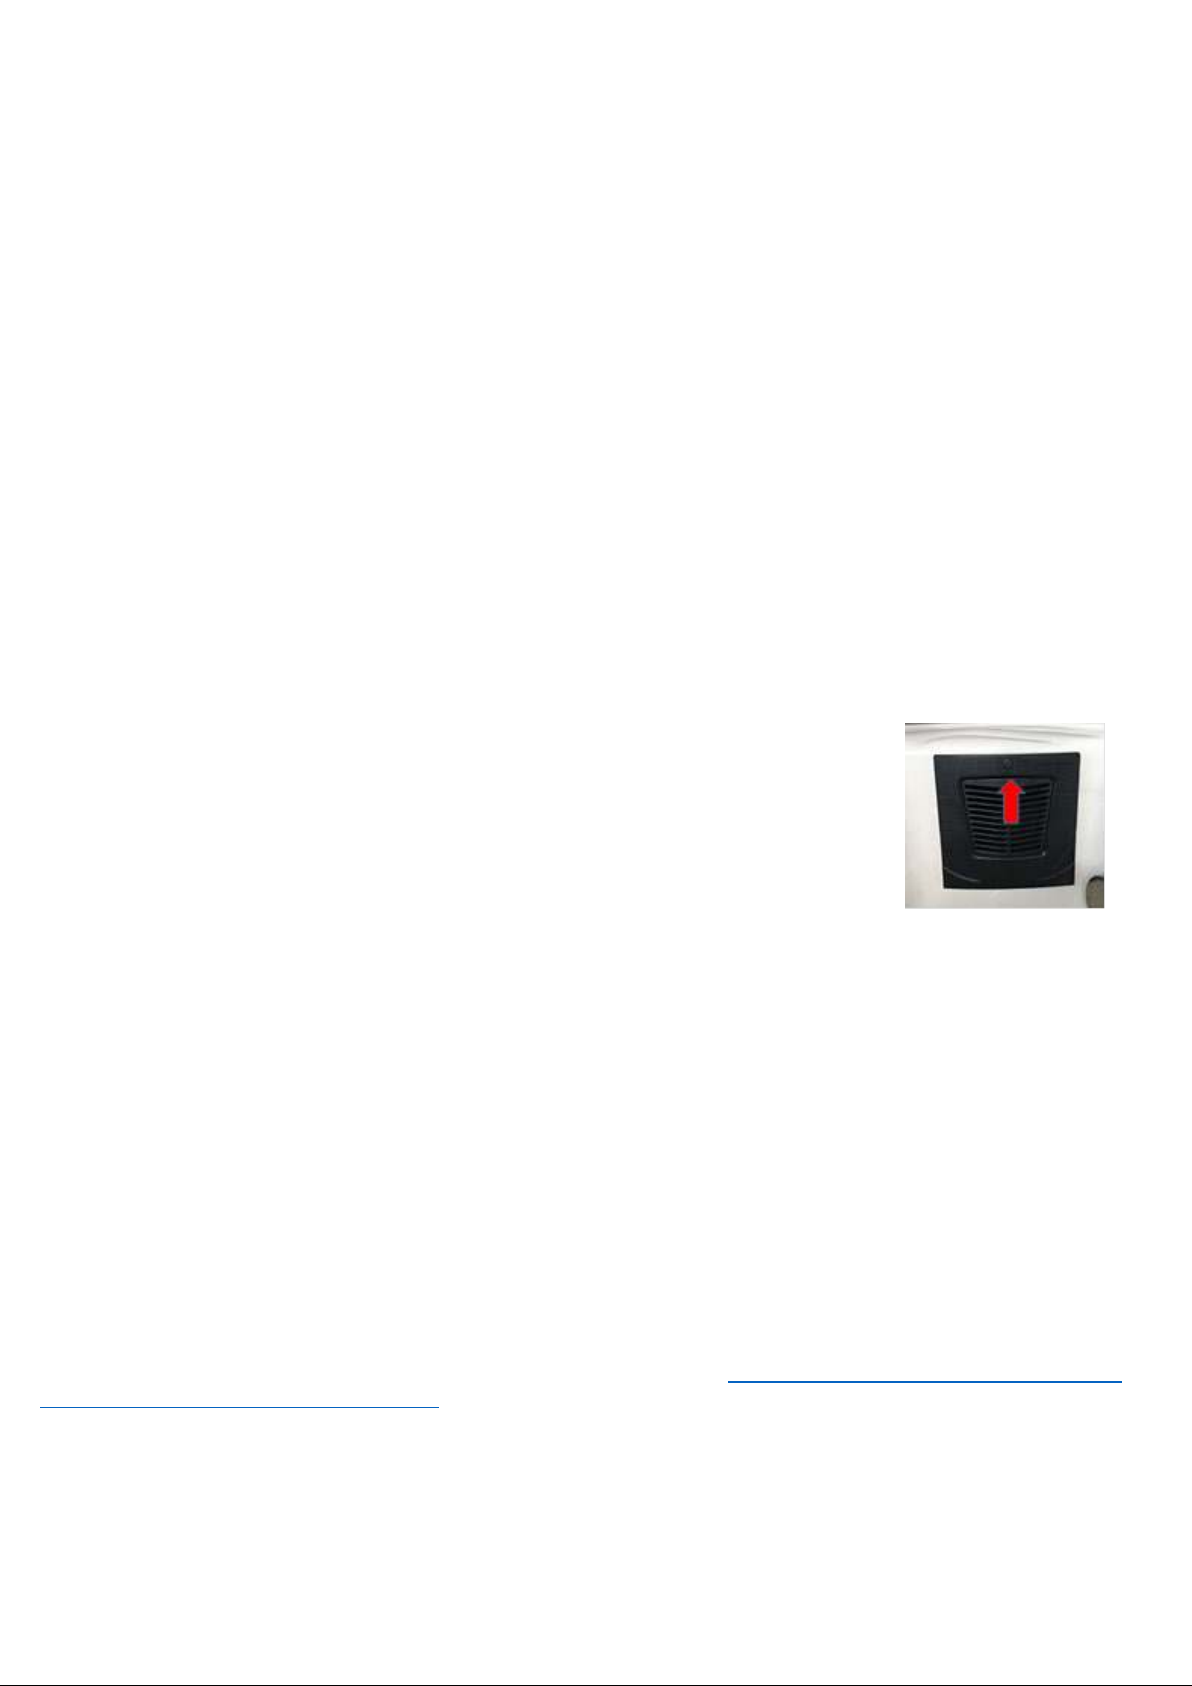
To locate your drain fitting it will be found on the touchpad side of the spa in either
the left or right hand corner of the black fibreglass base underneath the synthetic
cabinet. When you want to operate the drain fitting turn the handle clockwise and at
the same time pull the handle away from the spa to release it from the locking
keyway. When the drain fitting is pulled fully away from the fibreglass base you can
now unscrew and remove the handle by screwing it anticlockwise. With the handle
off you can now connect the supplied hose connection and attach your garden hose,
now push the drain halfway back in toward the fibreglass base and it will begin
draining the spa. Once drained remove the garden hose and garden hose
connection. Replace the handle by screwing it on clockwise and push the drain
fitting back into the fibreglass base. Once in the fibreglass base slightly turn the handle which will prevent it from
coming out when you refill the spa with water.
TURNING JETS ON & OFF
The larger jets in your spa can be turned on or off. Turning the jet face clockwise will turn the jet on which will
allow the water to flow through the jet. Turning the jet face anticlockwise will turn the jet off stopping the water from
flowing through the jet. The smaller jets in your spa can not be turned on and off, they will always remain on.
WATERFALL CONTROL HANDLE
Your waterfall control handle can be located on the spa image on page one.
When using this handle do not apply pressure to the handle at the fully open or fully closed positions you will
break the handle if you do.
To run your waterfall turn the manual heating button on and set the temperature button at least two degrees above
the current water temperature, then turn the waterfall control handle anticlockwise. To turn the waterfall off turn the
waterfall control handle clockwise until the waterfall stops running. Reduce the temperature button back to the
original temperature.
AIR CONTROL HANDLE
The air control handle can be located on the spa image on page one.
This handle controls the amount of air pressure coming from the jets, which will increase the water pressure if it is
turned anticlockwise and will decrease the water pressure if it is turned clockwise.
MAIN WATER DIVERTER
The main diverter handle can be located on the spa image on page one.
Do not turn this handle while the pumps are running and do not apply pressure to the handle at the fully open or
fully closed positions you will break the handle if you do.

10
This handle is used to divert the water within the spa, when you turn the handle to different positions the water
pressure will change within the spas chairs. This handle will make noise when the pumps are running, and the
noise level will vary depending on where the handle is positioned.
AROMATHERAPY CONTROL HANDLE
Your spa has an inbuilt aroma therapy stick which can be located on the spa image on page one. With all the
pumps turned off unscrew the fitting from the spa and take out the stick. Remove the plastic transport cover by
unscrewing the blue cap and sliding the opaque cover off to expose the scented stick inside, screw the blue cap
back onto the aroma stick leaving the opaque cover off. Reinstall the stick back into the spa, do not overtighten
the fitting it only needs to be lightly tightened. Turning the handle clockwise runs the aroma scent when you have
the air blower turned on and turning the handle anticlockwise will turn the aroma scent off.
MY SPA IS TOO HOT IN SUMMER, THE TEMPERATURE OF THE WATER IS HIGHER THAN I HAVE SET
During summer there may be times when the spas water exceeds the set temperature. This is not a fault in the
spa it is simply the ambient air temperature causing this. To combat this problem, you can use ice to cool down
the water.

11
OPERATING YOUR SHELLY DELUXE SPA
•
Your spa has two modes of operation, Standby and Active modes.
•
The spa will display ‘---’ to indicate that the spa is in Standby mode.
Please Note: The Blue buttons will only operate when the spa is in Standby mode and
theBlack buttons will only operate when the spa is in Active mode.
BUTTON
FUNCTION
MODE
Changes Between Active
& Standby Modes
N/A
Sets Cycle Cleaning and
Filtration
Standby Mode Only
Sets Heating Cycle Standby Mode Only
Sets Fahrenheit or
Celsius
Standby Mode Only
Sets Temperature Active Mode Only
No Function Active Mode Only
Turns on LED Lights Active Mode Only

12
OPERATING YOUR SHELLY DELUXE SPA
BUTTON
FUNCTION
MODE
Turns on Water Jets 1
Active Mode Only
No Function Active Mode Only
Air Blower Active Mode Only
Turns on Heater for Manual
Heating
(Jets 1 must be off)
Active Mode Only
Starts Cycle Cleaning Standby Mode Only

13
SETTING THE TIME
When turning on the spa for the first time you will need to set the clock time.To
set the clock time the spa must be in Standby mode.
The hour and minutes will begin to flash on the display.
The hour and minutes will remain static once this has completed.
If your spa loses power you may need to reset your time of day and being a digital clock the clock itself can gain or
lose time requiring adjustments to be made.
SETTING THE CYCLE CLEANING
In order to keep your spa clean you need to set the cycle cleaning. This feature will automatically turn on all of
the spas jets temporarily to purge the spas water and then will run the spas filter for the set period of time. You
must run this feature for a minimum of 6 hours every day.
Now enter the time of day you want the spa to begin the cycle cleaning, using a 24-hour clock.
Now enter the duration for which you want the spa to cycle clean.
Which will read 6:00
Once you have selected an appropriate duration press
Now press the button.
This symbol will now appear on the display panel to indicate that cycle cleaning has been set.

14
SETTING THE CYCLE HEATING
Use the preheating function at the same time you run your cleaning cycle.
Ensure the spa is in Standby Mode (---)
Press
Now enter the time of day you want the spa to begin preheating using a 24 hour clock.
(Use the same time set for the cleaning cycle).
To adjust the duration, press the and buttons
Once you have selected an appropriate time press
Now enter the duration for which you want the spa to preheat
To adjust the duration, press the and buttons and set at least 6-hour
period
which will look like 6:00
Once you have selected an appropriate duration press
Now set the temperature you want the spa to preheat too.
Press the button to adjust the temperature to the desired temperature.
Now press this button an ‘on’ sign (see below) will now be displayed next to the time which
indicatethat the preheating has been set.

15
TURNING ON THE HEATER MANUALLY- MAINTAINING HEAT
Ensure the spa is in Active Mode.
Press the button to adjust the temperature to the desired temperature.
Press this button to turn on the heater manually.
TURNING ON THE HOT WATER MASSAGE PUMP
Ensure the spa is in Active Mode.
Press this button to turn on the hot water pump.
To turn off the hot water pump press the same button again.
This pump will automatically turn itself off after a set amount of time running, if it turns off while you are
in thespa you can press the same button to make it run again.
TURNING ON THE AIR BLOWER
Ensure the spa is in Active Mode.
Press this button to turn on the air blower.
To turn off the air blower press the same button again.
This air blower will automatically turn itself off after a set amount of time running, if it turns off while you
are in the spa you can press the same button to make it run again.
TURNING THE WATERFALL ON & OFF
The waterfall will only run whilst the spa is heating once the desired heat is reached the waterfall will
not run. When using the waterfall handle do not apply pressure to the handle at the fully open or fully
closed positions you will break the handle if you do.
To run your waterfall, turn the manual – maintaining heat button on and set the temperature button at
least two degrees above the current water temperature.
Press the button to adjust the temperature two degrees higher that the current temperature.
Press this button to turn on the heater manually.

16
Ensure the spa is in Active Mode.
Press this button once to turn on the lights, the lights will now alternate between a number of
colours.
To hold a particular colour press this button second time.
To turn the lights off press the button a third time
OZONATOR
The spas ozonator will automatically turns itself on and off when required, there are no adjustments you are
able to make.
TROUBLESHOOTING

17
Symptoms
Possible Cause(s)
Possible
Resolutions
No Power
MCB Switch off
Check MCB
Inadequate wiring of power to spa
Fuse blown in control box
Consult electrician
Replace fuse
RCD Tripped
Reset
RCD Connected Improperly
Consult electrician
No Circulation
Impeller clogged
Access and clean
Water level too low
Top up water
RCD Repeatedly Tripping
Power Supply
Check power supply is adequate
Short in Grounding
Consult your electrician.
Jet Surge
Water level too low
Pump suctions are blocked
Top up water Clear
the
suctions
No Heat
Heater is not switched on
Water level is too low Heating
element is damaged
Turn on heating (See Manual)
Top
up the water
Contact
seller
Noisy
Motor Damaged or worn bearings
Low voltage
Low water level
Frozen pump
Contact
seller
Check electrical supply
Top
up the water
Thaw
out
Display
Panel Not Working Poor connection
Unplug and
reconnect the cable
Pump doesn't turn on
No power to the pump
Low water level
Air Lock
See “No Power” above
Top
up the water
See
“Air Lock” in user’s manual
Thermometer button
flashes when the Heat
Button is
pressed
Not enough pressure to the
circulation pump
Operate the circulation pump for a
few minutes before turning on the
heater.
UNLESS YOU HAVE THE APPROPRIATE ELECTRICAL LICENCE DO NOT OPEN THE SPAS
COMPUTER BOX, PLEASE CONTACT THE STORE OF PURCHASE FOR DETAILS OF A
LICENCEDCONTRACTOR.
If you have any issue with your spa and the troubleshooting does not resolve your issue, please
contact the store of purchase before engaging a technician or electrician for help
Table of contents
Other Aqua Pulse Spas Hot Tub manuals

Aqua Pulse Spas
Aqua Pulse Spas Coral Classic Spa User manual

Aqua Pulse Spas
Aqua Pulse Spas Miami Classic Spa User manual

Aqua Pulse Spas
Aqua Pulse Spas AIRLIE LUXURY SPA User manual

Aqua Pulse Spas
Aqua Pulse Spas AVALON DELUXE PLATINUM SPA User manual

Aqua Pulse Spas
Aqua Pulse Spas REEF DELUXE PLATINUM SPA User manual

Aqua Pulse Spas
Aqua Pulse Spas regency designer User manual

Aqua Pulse Spas
Aqua Pulse Spas Byron Luxury Spa Installation manual

Aqua Pulse Spas
Aqua Pulse Spas STRADBROKE LUXURY PLATINUM SPA User manual

Aqua Pulse Spas
Aqua Pulse Spas Noosa Luxury User manual

Aqua Pulse Spas
Aqua Pulse Spas Lorne Luxury User manual