Aquademy EVO TOUCH User manual

SOFFIONI
EVO TOUCH - EVO TOUCH BASIC - EVO DIAL
EVO PROF COMPLETE - EVO PROF
MANUALE DI PRE-INSTALLAZIONE E D’INSTALLAZIONE
PRE-INSTALLATION AND INSTALLATION MANUAL
MANUEL DE PRÉ-INSTALLATION ET DE MONTAGE
VORMONTAGE-INSTALLATION UND BENUTZER ANLEITUNG
MANUAL DE PRE-INSTALACIÓN E INSTALACIÓN
12-E0058
RV. 2


SOFFIONI EVO
3
CARATTERISTICHE IDRAULICHE
Pressione di eserciziomin 1,5 bar - MAX 5 bar
(per pressioni superiori prevedere l’installazione di un riduttore di pressione)
È consigliabile installare un sistema di filtraggio
e addolcimento acque
CARATTERISTICHE ELETTRICHE
Tensione di alimentazione 12Vcc +/- 3%
Assorbimento massimo: 1,3 A
Servizio di funzionamento: Continuo
Temperatura ambiente di funzionamento: da 0 a +40°C
Umidità relativa senza condensa: 5% a90%
Grado di protezione: IP66
Connessioni d'ingresso e d'uscita: Morsetto a carrello
Norma di sicurezza: Non richiesta
Norma EMC: EN55022/B
Tensione di alimentazione luci LED verificare soffione pg. 10
CARATTERISTICHE AUDIO
Potenza nominale 10W
Potenza massima 20W
Risposta in frequenza 80-20000 Hz
Impedenza 4 Ohm
PRODOTTO LASER DI CLASSE 2
Le radiazioni luminose di questa classe sono considerate a basso
rischio, ma potenzialmente pericolose. Normalmente non producono
danni permanenti se viste per pochi istanti da un occhio non protetto
AVVERTENZE
Prima di collegare l’unità per la prima volta, leggere attentamente
le sezioni seguenti. I voltaggi CA delle reti elettriche variano a
seconda del paese. Assicurarsi che il voltaggio presente nella
vostra zona sia conforme con il voltaggio richiesto.
ALIMENTATORE
Tensione di alimentazione: 220V - 12Vcc +/- 3%
Potenza: 30 Watt
Si consiglia vivamente di utilizzare l’alimentatore fornito dalla
Ditta. In caso di utilizzo di alimentatore diverso assicurarsi che le
caratteristiche richieste siano compatibili con l’apparecchio.
L’utilizzo di alimentatori con caratteristiche diverse o incompatibi-
li possono danneggiare irreparabilmente il prodotto e far decade-
re la garanzia.
PROTEZIONE AMBIENTALE
I dispositivi elettrici ed elettronici non devono essere considerati
rifiuti domestici.
I consumatori sono obbligati dalla legge a restituire i dispositivi
elettrici ed elettronici alla fine della loro vita utile ai punti di rac-
colta collettivi preposti per questo scopo o nei punti vendita.”
Dal riciclo, e re-utilizzo dei materiali od altre forme di utilizzo di
dispositivi obsoleti, voi renderete un importante contributo alla
protezione dell'ambiente.
LASER PRODUCT CLASS 2
The luminous radiations in this class are considered low-risk,
although potentially dangerous. They do not normally produce perma-
nent damage if seen briefly by the naked eye.
WARNING
Before connecting the unit for the first time, read the following
sections carefully. The CA voltages of the electric network vary
from country to country, Make sure that the voltage in your area
conforms to the voltage required.
FEEDER
Feed voltage: 220V - 12Vcc +/- 3%
Power: 30 Watt
We strongly recommend you use the feeder supplied by the
Company. If using a different feeder, make sure that the specifica-
tions required are compatible with the equipment. The use of fee-
ders with different or incompatible specifications may irreparably
damage the product and render the guarantee invalid.
PROTECTION OF THE ENVIRONMENT
The electrical and electronic devices must not be considered dome-
stic waste.
Consumers are legally obliged to return electrical and electronic
devices at the end of their life to the collective collection points pre-
pared for this purpose or in the sales points. From recycling or the
re-use of the materials or from using obsolete devices in other
ways, you will make an important contribution to the protection of
the environment.
IT EN
PLUMBING SPECIFICATIONS
Operating pressure min 1,5 bar - MAX 5 bar
(for greater pressures it is necessary to install a pressure reducing valve)
It is advisable to install a water filtration
and softener system
ELECTRICAL SPECIFICATIONS
Feed voltage 12Vcc +/- 3%
Maximum input: 1,3 A launitnoC:gninoitcnuF
Room temperature for functioning: from 0 to +40°C
Relative humidity without condensation: 5% to 90%
Level of protection: IP66
Entry and exit connections: truck terminal
Safety standards: Not required
EMC Standard: EN55022/B
LED lights power supply voltage check shower head pg. 10
AUDIO CHARACTERISTICS
Nominal power 10W
Maximum power 20W
Frequency response 80-20000 Hz
Electrical impedance 4 Ohm

SOFFIONI EVO
4
PRODUIT LASER CLASSE 2
Les radiations lumineuses de cette classe sont considérées comme
étant à risque peu élevé, mais potentiellement dangereuses.
Normalement elles ne causent pas de dommages permanents si elles
sont captées pendant quelques instants par un ?il non protégé.
AVERTISSEMENTS
Avant de brancher l’unité pour la première fois, lire attentivement
les sections suivantes. Les voltages CA des réseaux électriques
varient d’une ville à l’autre. S’assurer que le voltage présent dans
la zone intéressée est bien conforme au voltage requis.
L’ ALIMENTATEUR
Tension d’alimentation: 220V - 12Vcc +/- 3%
Puissance: 30 Watt
Il est vivement conseillé d’utiliser l’alimentateur fourni par l’entre-
prise. En cas d’utilisation d’un alimentateur différent, s’assurer si
les caractéristiques requises sont compatibles avec l’appareil.
L’utilisation d’alimentateurs ayant des caractéristiques différentes
ou incompatibles peuvent endommager le produit irréparable-
ment et de ce fait faire déchoir la garantie.
LA PROTECTION ENVIRONNEMENTALE
Les dispositifs électriques et ceux électroniques ne doivent pas être
considérés comme étant des ordures ménagères. Les consomma-
teurs sont obligés par la Loi à restituer les dispositifs électriques et
ceux électroniques à la fin de leur vie utile dans les endroits de col-
lecte sélective prévus spécialement à cet effet ou bien dans les
points de vente. Du recyclage à la ré-utilisation du matériel ou bien à
d’autres formes d’utilisation des dispositifs obsolètes, vous rendrez
une importante contribution à la protection de l’environnement.
LASER-PRODUKT DER KLASSE 2
Die Lichtstrahlungen dieser Klasse werden als mit niedrigem Risiko
jedoch potentiell gefährlich angesehen. Normalerweise rufen sie
keine Dauerschäden hervor, wenn sie wenige Augenblicke auf das
ungeschützte Auge einwirken.
WARNHINWEISE
Bevor die Einheit zum ersten Mal angeschlossen wird, müssen
nachstehende Abschnitte sorgfältig gelesen werden. Die AC-
Spannungen der Stromnetze sind je nach Land unterschiedlich.
Überprüfen Sie, dass die in ihrem Gebiet vorhandene Spannung mit
der erforderlichen Spannung übereinstimmt.
SPEISEGERÄT
Versorgungsspannung: 220V - 12Vcc +/- 3%
Leistung: 30 Watt
Es wird wärmsten empfohlen, das vom Hersteller gelieferte
Speisegerät zu benutzen. Überprüfen Sie beim Gebrauch eines
anderen Speisegeräts, dass die erforderlichen Eigenschaften mit
dem Gerät kompatibel sind. Der Gebrauch von Speisegeräten mit
anderen oder nicht kompatiblen Eigenschaften kann zu irreparablen
Schäden beim Produkt führen und die Garantie verfallen lassen.
UMWELTSCHUTZ
Elektrische und elektronische Geräte dürfen nicht als
Haushaltsabfälle angesehen werden.
Die Verbraucher sind gesetzlich verpflichtet, die elektrischen und
elektronischen Geräte bei Ende des Gerätelebens an den dafür vor-
gesehenen Sammelstellen oder in den Verkaufsstellen abzugeben.
Durch das Recycling oder die Wiederverwendung der Materialien
oder durch andere Arten des Gebrauchs von obsoleten Geräten lei-
sten Sie einen wichtigen Beitrag zum Umweltschutz.
FR DE
HYDRAULISCHE SPEZIFIKATIONEN
Betriebsdruck min 1,5 bar - MAX 5 bar
(bei einem höheren Druck sollte ein Druckminderer installiert werden)
Es wird empfohlen, ein Wasserfilterungs- und
Enthärtungssystem zu installieren.
ELEKTRISCHE SPEZIFIKATIONEN
Versorgungsspannung: 12Vcc +/- 3%
3,1:eztipssfradeB A beirtebreuaD:ecivressbeirteB
Betriebsumgebungstemperatur: von 0°C bis +40°C
Relative Feuchtigkeit ohne Kondenswasser: 5% bis 90%
66PI:essalkztuhcS
Ein- und Ausgangsanschlüsse: Rangierklemme
thciN:tfirhcsrovstiehrehciS erforderlich
B/22055NE:mroN-VME
Versorgungsspannung LED-Leuchten Brause überprüfen S. 10
AUDIO-EIGENSCHAFTEN
Nennleistung 10W
Höchstleistung 20W
Frequenzgang 80-20000 Hz
Impedanz 4 Ohm
CARACTERISTIQUES HYDRAULIQUES
Pression d’exercice min 1,5 bar - MAX 5 bar
(pour les pressions plus élevées, prévoir l’installation d’un réducteur de pression)
Il est recommandé d’installer un système de
filtrage et d’adoucissement des eaux
CARACTERISTIQUES ELECTRIQUES
Tension d’alimentation: 12 V CC +/- 3%
Absorption maximum: 1,3 A.
Service de fonctionnement: Continu
Température ambiante de fonctionnement: de 0 à + 40°C.
Humidité relative sans eau de condensation: de 5% à 90%.
Degré de protection: IP66
Connexions d’entrée et de sortie: Borne à chariot.
Consigne de sécurité: Non requise
Norme EMC: EN55022/B
Tension d’alimentation des spots LED contrôler le plafond de douche pg. 10
CARACTÉRISTIQUES AUDIO
Puissance nominale 10W
Puissance maximale 20W
Réponse en fréquence 80-20000 Hz
Impédance 4 Ohm

SOFFIONI EVO
5
PRODUCTO LÁSER DE CLASE 2
Las radiaciones luminosas de esta clase se consideran de bajo rie-
sgo, pero potencialmente peligrosas. Normalmente no provocan
daños permanentes de ser vistas durante pocos instantes por un ojo
no protegido.
ADVERTENCIAS
Antes de conectar la unidad por primera vez, lea detenidamente las
secciones siguientes. Los voltajes CA de las redes eléctricas varían
según el país. Compruebe que el voltaje presente en su zona coinci-
da con el voltaje requerido.
ALIMENTADOR
Tensión de alimentación: 220V - 12Vcc +/- 3%
Potencia: 30 Watt
Se aconseja encarecidamente utilizar el alimentador suministra-
do por la Firma. Caso que use un alimentador diferente comprue-
be que las características requeridas sean compatibles con el
aparato. El uso de alimentadores con características diferentes o
incompatibles puede dañar irreparablemente el producto y hacer
caducar la garantía.
PROTECCIÓN MEDIOAMBIENTAL
Los dispositivos eléctricos y electrónicos no se deben considerar
residuos domésticos.
La ley impone a los consumidores que lleven los dispositivos eléctri-
cos y electrónicos al final de su ciclo de vida a los puntos de reco-
gida selectiva indicados para este fin o a los puntos de venta.
Con el reciclado y la re-utilización de los materiales u otras formas
de uso de los dispositivos obsoletos, usted contribuirá a la protec-
ción del medioambiente.
ES RU
нем риска, но потенциально опасны.
обычно не вызывают необратимых повреждений.
нах в электрической сети используются различные напряжения.
параметрам напряжения заказанного оборудования.
источников питания с другими или несовместимыми характеристиками может
нанести непоправимый ущерб изделию и привести к отмене гарантии.
Электронные устройства и электрическое оборудование нельзя
тронного и электрического оборудования потребители обязаны
сдавать их в предусмотренные для этой цели централизованные
пункты сбора или торговые точки.
важный вклад в дело защиты окружающей среды.
CARACTERÍSTICAS HIDRÁULICAS
Presión de ejercicio min 1,5 bar - MAX 5 bar
(para presiones superiores prever la instalación de un reductor de presión)
Se sugiere instalar un sistema de filtración y
ablandamiento de agua.
CARACTERÍSTICAS ELÉCTRICAS
Tensión de alimentación: 12Vcc +/- 3%
Absorción máxima: 1,3 A
Servicio de funcionamiento: Continuo
Temperatura ambiente de funcionamiento: de 0 a +40°C
Humedad relativa sin condensación: 5% a90%
Grado de protección: IP66
Conexiones de entrada y salida: Abrazadera corredera
Norma de seguridad: No requerida
Norma EMC: EN55022/B
Tensión de alimentación de luces LED verifique el rociador pág. 10
CARACTERÍSTICAS AUDIO
Potencia nominal 10W
Potencia máxima 20W
Respuesta en frecuencia 80-20000 Hz
Impedancia 4 Ohm
(для более высоких давлений необходимо предусмотреть установку редуктора давления)
и умягчения воды
1,3 A
Относительная влажность без образования конденсата:5% - 90%
IP66
зажим
EN55022/B
10W
20W
80-20000 Hz
4 Ohm

SOFFIONI EVO
6
Impianto elettrico
Electrical system
Installation électrique
Elektrische Anlage
Instalación eléctrica
Электрическая система
Impianto idraulico
Hydraulic system
Installation hydraulique
Hydraulikanlage
Instalación hidráulica
Soffione serie EVO
EVO series showerheads
Douche de tête série EVO
Brause Serie EVO
Alcachofa de ducha serie EVO
EVO
(B)
(E)
(F)
(D)
(A)
(C1)
(C2)
Vano tecnico EVO
EVO technical compartment
Compartiment technique EVO
Technikschacht EVO
Hueco técnico EVO
EVO
Manopole EVO
EVO built-in handles
Poignées encastrables EVO
Einbaugriffe EVO
Manivelas empotradas EVO
EVO
HOT COLD
ON
OFF
10A
Si consiglia di predisporre un interruttore ON/OFF dedicato,
con differenziale 10A, sul circuito domestico.
It is recommanded to mount a dedicated ON/OFF switch,
with a differential 10A, for the household wiring.
Il est conseillé de prévoir uninterrupteur ON/OFF dédié,
avec un différentiel 10A, sur le circuit domestique.
Empfohlen wird die Anbringung eines entsprechenden
EIN-/AUS-Differenzialschalters 10A im Hausstromkreis.
Se recomienda preparar un interruptor ON/OFF especial,
con diferencial 10A, en el circuito doméstico.
с дифференциалом
10A
на собственной схеме.
12-E0057
12-E0057
EVO DIAL

SOFFIONI EVO
7
IT
Esempio di installazione:
(A) Alimentazione acqua calda e fredda
(B) Collegamento idraulico al soffione
(C1) Collegamento idraulico opzionale
(C2) Collegamento idraulico opzionale
(D) Alimentazione elettrica al vano tecnico EVO
(E) Collegamento elettrico tra vano tecnico e manopole EVO (vedi istruzione 12-E0057) - Distanza MAX 10 mt. - Cavo in dotazione 5 mt.
(F) Collegamento elettrico tra vano tecnico e soffione (vedi istruzione 12-E0057) - Cavo in dotazione 5 mt.
EN
Installation example:
(A) Supply of hot and cold water
(B) Water connection to showerhead
(C1) Optional water connection
(C2) Optional water connection
(D) Electrical supply to the EVO technical compartment
(E) Electrical connection between EVO control handles and technical compartment (see instructions 12-E0057)
Attention MAX. distance 10 metres (Supplied cable: 5 metres)
(F) Electrical connection between EVO series overhead shower and technical compartment (see instructions 12-E0057)
Supplied cable: 5 metres
FR
Exemple d’installation
(A) Alimentation en eau chaude et eau froide
(B) Raccordement hydraulique à la douche de tête
(C1) Raccordement hydraulique optionnel
(C2) Raccordement hydraulique optionnel
(D) Branchement électrique au compartiment technique EVO
(E) Branchement électrique entre les poignées EVO et le compartiment technique (voir instructions 12-E0057)
Attention, distance MAX : 10 mètres (Câble fourni:5 mètres)
(F) Branchement électrique entre le plafond de douche de la ligne EVO et le compartiment technique (voir instructions 12-E0057)
Câble fourni:5 mètres
DE
Installationsbeispiel
(A) Kalt- und Warmwasserversorgung
(B) Hydraulikanschluss zur Brause
(C1) Optionaler Hydraulikanschluss
(C2) Optionaler Hydraulikanschluss
(D) Elektrische Versorgung zum Technikschacht EVO
(E) Elektrischer Anschluss zwischen EVO-Bediengriffen und Anschlusskasten (siehe Anleitung 12-E0057)
Atención distancia máx. de 10 metros (Cable suministrado de 5 metros)
(F) Elektrischer Anschluss zwischen Duschkopf Serie EVO und Anschlusskasten (siehe Anleitung 12-E0057)
Cable suministrado de 5 metros
ES
Ejemplo de instalación
(A) Alimentación de agua caliente y fría
(B) Conexión hidráulica a la alcachofa de ducha
(C1) Conexión hidráulica opcional
(C2) Conexión hidráulica opcional
(D) Alimentación eléctrica al hueco técnico EVO
(E) Conexión eléctrica del instrumento EVO y el compartimento técnico (véanse instrucciones 12-E0057)
Atención máx. 10 metros - Cable suministrado longitud 5 metros
(F) Conexión eléctrica entre el rociador serie EVO y el compartimento técnico (véanse instrucciones 12-E0057)
Cable suministrado longitud 5 metros
RU
(A)
(B)
(C1)
(C2)
(D)
Электрическое питание технического отсека EVO
(E)
Электрическое соединение между рукоятками EVOитехническим отсеком (см.инструкцию12-E0057)
(F)
Электрическое соединение между потолочным душем серии EVOитехническим отсеком (см.инструкцию 12-E0057)
кабель 5 м в комплекте

SOFFIONI EVO
8
Impianto elettrico
Electrical system
Installation électrique
Elektrische Anlage
Instalación eléctrica
Электрическая система
Impianto idraulico
Hydraulic system
Installation hydraulique
Hydraulikanlage
Instalación hidráulica
(B)
(E)
(F)
(D)
(A)
(C1)
(C2)
Vano tecnico EVO
EVO technical compartment
Compartiment technique EVO
Technikschacht EVO
Hueco técnico EVO
EVO
Tastiera di controllo EVO TOUCH BASIC
Control keypadEVO TOUCH BASIC
Le clavier de contrôleEVO TOUCH BASIC
SteuertastaturEVO TOUCH BASIC
Teclado de controlEVO TOUCH BASIC
HOT COLD
ON
OFF
10A
Si consiglia di predisporre un interruttore ON/OFF dedicato,
con differenziale 10A, sul circuito domestico.
It is recommanded to mount a dedicated ON/OFF switch,
with a differential 10A, for the household wiring.
Il est conseillé de prévoir uninterrupteur ON/OFF dédié,
avec un différentiel 10A, sur le circuit domestique.
Empfohlen wird die Anbringung eines entsprechenden
EIN-/AUS-Differenzialschalters 10A im Hausstromkreis.
Se recomienda preparar un interruptor ON/OFF especial,
con diferencial 10A, en el circuito doméstico.
с дифференциалом
10A
на собственной схеме.
12-E0057
12-E0057
EVO TOUCH BASIC Soffione serie EVO
EVO series showerheads
Douche de tête série EVO
Brause Serie EVO
Alcachofa de ducha serie EVO
EVO

SOFFIONI EVO
9
IT
Esempio di installazione:
(A) Alimentazione acqua calda e fredda
(B) Collegamento idraulico al soffione
(C1) Collegamento idraulico opzionale
(C2) Collegamento idraulico opzionale
(D) Alimentazione elettrica al vano tecnico EVO
(E) Collegamento elettrico tra vano tecnico EVO e tastiera EVO TOUCH BASIC (vedi istruzione 12-E0057) - Distanza MAX 10 mt. - Cavo in dotazione 5 mt.
(F) Collegamento elettrico tra vano tecnico e soffione (vedi istruzione 12-E0057) - Cavo in dotazione 5 mt.
EN
Installation example:
(A) Supply of hot and cold water
(B) Water connection to showerhead
(C1) Optional water connection
(C2) Optional water connection
(D) Electrical supply to the EVO technical compartment
(E) Electrical connection between EVO control handles and EVO TOUCH BASIC screen keypad (see instructions 12-E0057)
Attention MAX. distance 10 metres (Supplied cable: 5 metres)
(F) Electrical connection between EVO TOUCH series overhead shower and technical compartment (see instructions 12-E0057)
Supplied cable: 5 metres
FR
Exemple d’installation
(A) Alimentation en eau chaude et eau froide
(B) Raccordement hydraulique à la douche de tête
(C1) Raccordement hydraulique optionnel
(C2) Raccordement hydraulique optionnel
(D) Branchement électrique au compartiment technique EVO
(E) Branchement électrique entre les poignées EVO et le clavier de commande EVO TOUCH BASIC (voir instructions 12-E0057)
Attention, distance MAX : 10 mètres (Câble fourni:5 mètres)
(F) Branchement électrique entre le plafond de douche de la ligne EVO TOUCH et le compartiment technique (voir instructions 12-E0057)
Câble fourni:5 mètres
DE
Installationsbeispiel
(A) Kalt- und Warmwasserversorgung
(B) Hydraulikanschluss zur Brause
(C1) Optionaler Hydraulikanschluss
(C2) Optionaler Hydraulikanschluss
(D) Elektrische Versorgung zum Technikschacht EVO
(E) Elektrische Verbindung zwischen dem Anschlussfach und dem Tastenfeld EVO TOUCH BASIC (siehe Anleitung 12-E0057)
Atención distancia máx. de 10 metros (Cable suministrado de 5 metros)
(F) Elektrischer Anschluss zwischen Duschkopf Serie EVO TOUCH und Anschlusskasten (siehe Anleitung 12-E0057)
Cable suministrado de 5 metros
ES
Ejemplo de instalación
(A) Alimentación de agua caliente y fría
(B) Conexión hidráulica a la alcachofa de ducha
(C1) Conexión hidráulica opcional
(C2) Conexión hidráulica opcional
(D) Alimentación eléctrica al hueco técnico EVO
(E) Conexión eléctrica entre caja técnica y teclado EVO TOUCH BASIC (véanse instrucciones 12-E0057)
Atención máx. 10 metros - Cable suministrado longitud 5 metros
(F) Conexión eléctrica entre el rociador serie EVO TOUCH y el compartimento técnico (véanse instrucciones 12-E0057)
Cable suministrado longitud 5 metros
RU
(A)
(B)
(C1)
(C2)
(D)
Электрическое питание технического отсека EVO
(E) Электрическое соединение между техническим отсеком и кнопочной панелью EVO TOUCH BASIC
(см.инструкцию 12-E0057)
(F)
Электрическое соединение между потолочным душем серии
EVO TOUCH
и техническим отсеком (см.инструкцию 12-E0057)
кабель 5 м в комплекте

SOFFIONI EVO
10
Impianto elettrico
Electrical system
Installation électrique
Elektrische Anlage
Instalación eléctrica
Электрическая система
Impianto idraulico
Hydraulic system
Installation hydraulique
Hydraulikanlage
Instalación hidráulica
(B)
(E)
(F)
(D)
(A)
(C1)
(C2)
Vano tecnico EVO
EVO technical compartment
Compartiment technique EVO
Technikschacht EVO
Hueco técnico EVO
EVO
Tastiera di controllo con aromaterapia EVO TOUCH
Control keypad with aromatherapy EVO TOUCH
Le clavier de contrôle avec aromathérapie EVO TOUCH
Steuertastatur für Aromatherapie EVO TOUCH
Teclado de control con aromaterapia EVO TOUCH
HOT COLD
ON
OFF
10A
Si consiglia di predisporre un interruttore ON/OFF dedicato,
con differenziale 10A, sul circuito domestico.
It is recommanded to mount a dedicated ON/OFF switch,
with a differential 10A, for the household wiring.
Il est conseillé de prévoir uninterrupteur ON/OFF dédié,
avec un différentiel 10A, sur le circuit domestique.
Empfohlen wird die Anbringung eines entsprechenden
EIN-/AUS-Differenzialschalters 10A im Hausstromkreis.
Se recomienda preparar un interruptor ON/OFF especial,
con diferencial 10A, en el circuito doméstico.
с дифференциалом
10A
на собственной схеме.
12-E0057
12-E0057
(G)
Tastiera opzionale
Optional keyboard
Clavier optionnel
Optionale Tastatur
Teclado opcional
EVO TOUCH Soffione serie EVO
EVO series showerheads
Douche de tête série EVO
Brause Serie EVO
Alcachofa de ducha serie EVO
EVO
12-E0065

SOFFIONI EVO
Impianto elettrico
Electrical system
Installation électrique
Elektrische Anlage
Instalación eléctrica
Электрическая система
Impianto idraulico
Hydraulic system
Installation hydraulique
Hydraulikanlage
Instalación hidráulica
Vano tecnico EVO
EVO technical compartment
Compartiment technique EVO
Technikschacht EVO
Hueco técnico EVO
EVO
HOT COLD
10A
Si consiglia di predisporre un interruttore ON/OFF dedicato,
con differenziale 10A, sul circuito domestico.
It is recommanded to mount a dedicated ON/OFF switch,
with a differential 10A, for the household wiring.
Il est conseillé de prévoir uninterrupteur ON/OFF dédié,
avec un différentiel 10A, sur le circuit domestique.
Empfohlen wird die Anbringung eines entsprechenden
EIN-/AUS-Differenzialschalters 10A im Hausstromkreis.
Se recomienda preparar un interruptor ON/OFF especial,
con diferencial 10A, en el circuito doméstico.
с дифференциалом
10A
на собственной схеме.
12-E0057
E0077
EVO PROF COMPLETE Soffione serie EVO
EVO series showerheads
Douche de tête série EVO
Brause Serie EVO
Alcachofa de ducha serie EVO
EVO
ON
OFF
Tastiera di controllo EVO TOUCH PROFESSIONAL (GESTIONE 4 VIE)
Control keypadEVO TOUCH PROFESSIONAL (4-WAY MANAGEMENT)
Le clavier de contrôleEVO TOUCH PROFESSIONAL (GESTION À 4 VOIES)
SteuertastaturEVO TOUCH PROFESSIONAL (4-WEGE-MANAGEMENT)
Teclado de controlEVO TOUCH PROFESSIONAL (4-WAY MANAGEMENT)
PROFESSIONAL
3 VIE
3 WAYS
3 VOIES
3 AUSGÄNGE
3 VÍAS

SOFFIONI EVO
12
Soffione HI SPA EVO
Shower Head HI SPA EVO
Plafond de douche HI SPA EVO
Kopfbrause HI SPA EVO
Ducha HI SPA EVO
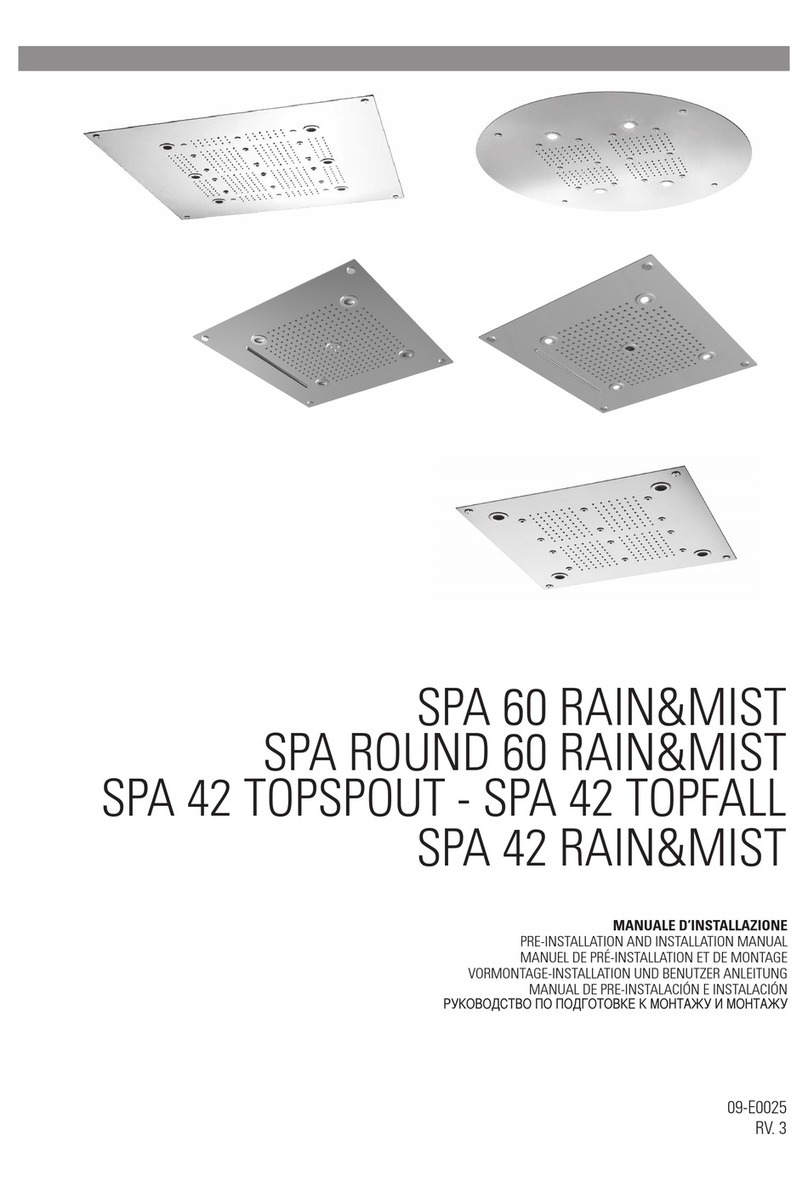
Soffione SPA ROUND 60 RAIN&MIST EVO
Shower Head SPA ROUND 60 RAIN&MIST EVO
Plafond de douche SPA ROUND 60 RAIN&MIST EVO
Kopfbrause SPA ROUND 60 RAIN&MIST EVO
Ducha SPA ROUND 60 RAIN&MIST EVO
SPA ROUND 60 RAIN&MIST EVO
LED 8 V
LED 8 V
Soffione SPA 42 TOPFALL EVO
Shower Head SPA 42 TOPFALL EVO
Plafond de douche SPA 42 TOPFALL EVO
Kopfbrause SPA 42 TOPFALL EVO
Ducha SPA 42 TOPFALL EVO
SPA 42 TOPFALL EVO
LED 8 V
Soffione SPA 42 TOPSPOUT EVO
Shower Head SPA 42 TOPSPOUT EVO
Plafond de douche SPA 42 TOPSPOUT EVO
Kopfbrause SPA 42 TOPSPOUT EVO
Ducha SPA 42 TOPSPOUT EVO
SPA 42 TOPSPOUT EVO
LED 8 V

SOFFIONI EVO
13
Kit di montaggio
Assembly Kit
Kit de montage
Montageset
Kit de montaje
HI SPA EVO
Kit di fissaggio
Fixing kit
Kit de fixation
Befestigungsset
Kit de fijación
Soffione SPA 42 RAIN&MIST EVO
Shower Head SPA 42 RAIN&MIST EVO
Plafond de douche SPA 42 RAIN&MIST EVO
Kopfbrause SPA 42 RAIN&MIST EVO
Ducha SPA 42 RAIN&MIST EVO
SPA 42 RAIN&MIST EVO
LED 8 V

IT
EN
FR
DE
ES
RU
SOFFIONI EVO
14
± 2mm
± 2mm
min 12 mm
MAX 30 mm
min 100 mm
MAX 1000 mm
Controsoffittatura
Dropped ceiling
Faux-plafond
Abhangdecke
Falso techo
Soffitto
Ceiling
Plafond
Decke
Plafond
A
B
3/4” F
Praticare nel controsoffitto una spaccatura come mostrato in figura per l’inserimento della piastra di fissaggio del soffione
ATTENZIONE! Predisporre nel controsoffitto i tubi per collegamento idraulico ed elettrico.
Make an opening in the false ceiling as shown in the picture for the insertion of the shower head’s anchor plate.
CAREFUL! Prearrange the pipes for the water and electrical connections in the false ceiling.
Pratiquer une fente dans le faux-plafond tel qu'illustré dans la figure pour l’insertion de la plaque de fixation du plafond de douche
ATTENTION! Mettre en place dans le faux plafond les tubes pour la connexion hydraulique et électrique.
Bringen Sie in der Abhangdecke einen Spalt an, wie in der Abbildung für das Einführen der Klemmplatte der Kopfbrause dargestellt.
ACHTUNG! Bereiten Sie die Abhangdecke für die Röhre für den hydraulischen und elektrischen Anschluss vor.
Efectuar en el falso techo una abertura como ilustra la figura para introducir la placa de fijación de la ducha.
ATENCIÓN! Predisponer en el falso techo los tubos para la conexión hidráulica y eléctrica.
потолочного душа.
MODELLO A B
HI SPA 590 mm 590 mm
SPA ROUND 60 RAIN&MIST 410 mm 410 mm
SPA 42 TOPSPOUT 410 mm 410 mm
SPA 42 TOPFALL 410 mm 410 mm
SPA 42 RAIN&MIST 410 mm 410 mm

IT
EN
FR
DE
ES
RU
SOFFIONI EVO
15
(1) (2)
(3)
(4)
OK
Fisher D.8
TSP 4,5x50
(fig. 1)
(fig.2)
± 2mm
± 2mm
D
C
Praticare nel soffitto 4 fori (figura1) in corrispondenza dello spacco nel controsoffitto alla distanza indicata tra loro.
Montare in kit di fissaggio (figura2) inserendo il fisher (1) nel soffitto.
Infilare la vite (2) nel nottolino (3) e avvitare fino al completo bloccaggio del kit (4).
Make four holes in the ceiling (figure 1) corresponding with the opening in the false ceiling, with a distance between each hole as shown.
Mount the fixing kit (figure 2) inserting the fisher (1) into the ceiling.
Insert the screw (2) into the fastener (3) and screw in until the kit is held fast (4).
Percer 4 trous dans le plafond (figure1) en correspondance de la fente dans le faux-plafond à la distance indiquée entre eux.
Monter le kit de fixation (figure 2) en insérant la cheville à expansion (Fisher) (1) dans le plafond.
Introduire la vis (2) dans le loqueteau (3) et visser jusqu’au blocage complet du kit (4).
Bohren Sie in die Decke 4 Löcher mit einem Abstand von jeweils (Abbildung 1) entsprechend dem Spalt in der Abhangdecke.
Verwenden Sie für die Montage das Befestigungsset (Abbildung 2) und führen Sie den Fisher (1) in die Decke.
Stecken Sie die Schrauben (2) in den Zylinder (3) und ziehen Sie sie bis zur vollständigen Verriegelung des Sets (4) fest.
Efectuar en el techo 4 orificios (figura1) en correspondencia con la hendidura del falso techo, dejando una distancia entre los mismos.
Montar el kit de fijación (figura2) introduciendo el fisher (1) en el techo.
Introducir el tornillo (2) en el tope (3) y atornillar hasta alcanzar el bloqueo completo del kit (4).
расстоянии друг от друга.
MODELLO C D
HI SPA
546 mm 546 mm
SPA ROUND 60 RAIN&MIST
360 mm 360 mm
SPA 42 TOPSPOUT
360 mm 360 mm
SPA 42 TOPFALL
360 mm 360 mm
SPA 42 RAIN&MIST
360 mm 360 mm

IT
EN
FR
DE
ES
RU
SOFFIONI EVO
16
~ 1000 mm
Inserire nella spaccatura la piastra di fissaggio del soffione come mostrato in figura.
Insert the shower head anchor plate into the hole as shown in the picture.
Introduire la plaque de fixation du plafond de douche dans la fente, tel qu’illustré dans la figure.
Führen Sie die Klemmplatte der Kopfbrause in den Spalt, wie in der Abbildung dargestellt.
Introducir en la hendidura la placa de fijación de la ducha como ilustra la figura.

IT
EN
FR
DE
ES
RU
SOFFIONI EVO
17
(1)
(2) (3)
(4) (5)
x4
Inserire la cordina nel foro sulla piastra e infilarlo nel tenditore (1).
Inserire il tenditore nel nottolino (2) precedentemente fissato nel soffitto e avvitarlo fino al completo serraggio (3).
Per regolare la lunghezza della cordina tirarla (4) fino alla misura desiderata. Per sbloccarla premere il piolo (5)
ATTENZIONE! La cordina deve essere tesa senza però sollevare la piastra di fissaggio. Ripetere l’operazione per ultimare il fissaggio.
Insert the cord into the hole in the plate and thread it into the stretcher (1).
Insert the stretcher into the fastener (2) already fixed into the ceiling and screw in until held fast (3).
To adjust the length of the cord, pull it (4) until it reaches the desired length. To unblock it press the pin (5).
CAREFUL! The cord must be taut but without raising the anchor plate.
Repeat the operation for all four corners to complete the installation.
Introduire la cordelette dans l’orifice sur la plaque et l’enfiler dans le tendeur (1).
Introduire le tendeur dans le loqueteau (2) préalablement fixé au plafond et le visser à fond (3). Pour régler la longueur de la cordelette, la tirer (4) jusqu’à
atteindre la mesure souhaitée. Pour la débloquer, appuyer sur le téton (5)
ATTENTION !La cordelette doit être tendue sans cependant soulever la plaque de fixation.
Répéter l’opération pour terminer la fixation.
Führen Sie das Seil in das Loch auf der Platte und ziehen Sie es durch die Spannschlossmutter (1).
Führen Sie die Spannschlossmutter in den Zylinder (2), bevor Sie ihn in der Kopfbrause befestigen, und ziehen Sie sie bis zur vollständigen Verriegelung fest (3).
Um die Länge des Seils zu regulieren, ziehen Sie es (4) auf das gewünschte Maß. Zur Entriegelung drücken Sie den kleinen Stift (5).
ACHTUNG! Das Seil muss gestrafft werden, ohne die Klemmplatte anzuheben.
Wiederholen Sie den Vorgang, um die Befestigung fertigzustellen.
Pasar la cuerda por el orificio de la placa e introducirla en el tensor (1).
Insertar el tensor en el tope (2) previamente fijado al techo y atornillarlo hasta que quede completamente ajustado (3).
Para regular el largo de la cuerda tirar (4) hasta alcanzar la medida deseada.Para desbloquearla presionar la traba (5).
¡ATENCIÓN! La cuerda debe estar tirante pero sin levantar la placa de fijación.
Repetir la operación para ultimar la fijación.
фиксации.

IT
EN
FR
DE
ES
RU
SOFFIONI EVO
18
Posizionata correttamente la piastra avvitare i tiranti del kit di montaggio negli appositi fori con l’accortezza di far uscire il filetto dall’inserto filettato (fig1).
ATTENZIONE! Utilizzare i fori della piastra come mostrato in figura 2. Questa procedura è valida solo per i soffionI HI-SPA 600 EVO e SPA 600 EVO.
Place the plate correctly, then screw on the tie rods of the assembly kit, making sure the extremities are protruding from the threaded insert of the plate (fig. 1).
CAUTION! Screw on the tie rods as indicated in figure 2.
Une fois la plaque correctement placée, visser les tirants du kit de montage en vous assurant de les faire ressortir par le trou fileté de la plaque (fig1).
ATTENTION! Visser les tirants dans la position indiquée dans la figure 2.
Bringen Sie die Platte in der korrekten Position an, und schrauben Sie die Stangen des Montagesets fest. Stellen Sie sicher, dass das Ende durch den
Gewindeeinsatz der Platte führt (Abb. 1).
ACHTUNG: Schrauben Sie die Stangen wie in Abb. 2 veranschaulicht fest.
Una vez que la placa ha sido posicionada correctamente, enrosque los tirantes del kit de montaje asegurándose de que su extremo sobresalga del aplique
roscado de la placa (fig1).
¡ATENCIÓN! Enrosque los tirantes en la posición indicada en la figura 2.
резьба выступала из резьбовой вставки (рис. 1).
Эта процедура относится толькокпотолочному душу моделей HI-SPA600 EVO и SPA 600 EVO
(OK) (OK)
(OK)
(OK) (OK)
(fig. 1)
(fig. 2)
60
20
HI SPA EVO

IT
EN
FR
DE
ES
RU
SOFFIONI EVO
19
Prestare attenzione anche al posizionamento dei cavi elettrici e del tubo di alimentazione dell’acqua preinstallati come in figura 1.
La posizione corretta dell’elettrovalvola (1) facilita il montaggio del soffione.
Procedere quindi al montaggio del soffione.
Also pay attention to the positioning of the pre-installed electric cables and water supply tube as seen in figure 1.
The correct positioning of the electrovalve (1) enables the shower head to be fixed easily.
Then proceed with shower head mounting.
Faire attention également au positionnement des câbles électriques et du tuyau d’alimentation de l’eau préinstallés tel qu’illustré à la figure 1.
La position correcte de l’électrovanne (1) facilite le montage du plafond de douch.
Procéder ensuite au montage de la pomme de douche.
Beachten Sie auch die Positionierung der vormontierten Stromkabel und des Wasserzulaufschlauchs wie in Abbildung 1.
Die korrekte Position des Elektroventils (1) vereinfacht die Montage der Kopfbrause.
Nehmen Sie nun die Montage der Brause vor.
Prestar atención al posicionamiento de los cables eléctricos y del tubo de alimentación de agua preinstalados, como ilustra la figura 1.
La posición correcta de la electroválvula (1) facilita el montaje de la ducha.
Después, proceda a montar el rociador.
так, как показано на рис. 1.
(fig. 1)
(OK)
(OK)
H2O
H2O
H2O

SOFFIONI EVO
IT
EN
FR
DE
ES
RU
21
Procedere con il collegamento del tubo di alimentazione dell’acqua.
Infilare i cavi elettrici (A) (B) nel tubo pre-installato per il collegamento al vano tecnico EVO (vedi istruzione 12-E0057).
Proceed with the connection of the water supply tube.
Insert the electrical cables (A) (B) into the pre-installed tube for connection to the EVO technical compartment (see 12-E0057).
Procéder au raccordement du tuyau d’alimentation en eau.
Introduire les câbles électriques (A) (B) dans le tuyau pré-installé en vue du branchement au compartiment technique EVO (voir les instructions 12-E0057).
Fahren Sie mit dem Anschluss des Wasserzulaufschlauchs fort.
Führen Sie die Elektrokabel (A) (B) in den vormontierten Schlauch zur Verbindung mit dem EVO-Anschlusskasten ein (siehe Anweisungen 12-E0057).
Proceder con la conexión del tubo de alimentación de agua.
Introduzca los cables eléctricos (A) (B) en el tubo pre-instalado para la conexión al compartimento técnico EVO (véanse las instrucciones 12-E0057).
отсеку EVO
(см. инструкцию 12-E0057).
(A) (B)
H2O
EVO - EVO TOUCH BASIC - EVO PROF
This manual suits for next models
4
Other Aquademy Bathroom Fixture manuals
Popular Bathroom Fixture manuals by other brands

Signature Hardware
Signature Hardware Berwyn 953656 manual

Kohler
Kohler ARCHER 72700X-4 installation instructions

Tiger
Tiger AKCENT 171514 Instructions for installation

Helvex
Helvex Nuva 9124 installation manual

Blaufoss
Blaufoss Star 1753 installation guide

DURAVIT
DURAVIT DuraSystem WD5003 Mounting instructions

Spectrum Brands
Spectrum Brands Pfister Shower Panel 016-900SP Quick installation guide

GRE
GRE AR10250 instruction manual

Blaufoss
Blaufoss Coony installation guide

Fleurco
Fleurco Cordoba CS148-11-50 instruction manual

Pfister
Pfister LG16 Series quick start guide

Roltechnik
Roltechnik EXCLUSIVE FLAT ROUND installation instructions