Aquamatic HYDRAMATIC Quick start guide

OPERATIONAL MANUAL
for the
HYDRAMATIC
AUTOMATIC POOL COVER SYSTEM
Exclusive Manufacturer of the Hydramatic
Hydraulic Swimming Pool Covers
2007 Revision
AQUAMATIC COVER SYSTEMS
200 Mayock Rd, Gilroy CA 95020 Ph. 800.262.4044
www.aquamatic.com
Be sure to read this manual for your safety, and care of your
cover system. Your cover is one of the most advance designs in
automatic covers and has one of the best warranties in the industry.
However, improper care and operation may severely limit your
warranty and life of the system.

Table of Contents
Important Safety Instructions Page 2
Cover Safety Page 3
Recommended Maintenance Page 4
Operating Instructions Page 5
Removing Rainwater from Pool Cover Page 6 & 7
Rope Alignment and Rope String Up Page 8
Hydraulic Pressure Adjustment Page 9
Track Extrusions, Sliders, Guides & Pulleys Page 10
Replacing a Guide Page 11
Replacing a Slider Page 12, 13 & 14
Winterizing your Cover & Recess Maintenance Page 15
Fabric Facts and Patching your Cover Page 16 & 17
Salt Water Systems and Pool Cover Maintenance Page 18
Reference Guide Page 19, 20 & 21
Quick Guide To Maintaining Your Cover Page 22
Skew Adjustment Page 23

2
IMPORTANT SAFETY NOTICE
When installing and using this electrical equipment, basic safety
precautions should always be followed, including the following:
READ AND FOLLOW ALL INSTRUCTIONS
WARNING - TO REDUCE THE RISK OF INJURY, DO NOT PERMIT
CHILDREN TO USE THIS PRODUCT UNLESS THEY ARE CLOSELY
SUPERVISED AT ALL TIMES.
REMOVE STANDING WATER - A CHILD CAN DROWN ON TOP OF THE
COVER.
NEVER OPERATE THE COVER WHILE SOMEONE IS IN THE POOL OR
SPA.
NEVER LEAVE THE COVER PARTIALLY OPEN.
WALK ON THE COVER IN AN EMERGENCY SITUATION ONLY.
A WIRE CONNECTOR IS PROVIDED ON THIS UNIT TO CONNECT A
MINIMUM NO. 8 AWG (8.4MM²) SOLID COPPER CONDUCTOR BETWEEN
THIS UNIT AND ANY METAL EQUIPMENT, METAL ENCLOSURES OF
ELECTRICAL EQUIPMENT, METAL WATER PIPE, OR CONDUIT WITHIN
5 FEET (1.5M) OF THE UNIT. CONNECT TO A GROUND FAULT
INTERRUPTER (GFCI) CIRCUIT.
FOR INSTALLATION IN A COVERED TRENCH OR COVERED
ENCLOSURE ABOVE GROUND OR IN A BENCH AT THE END OF THE
POOL.
SAVE THESE INSTRUCTIONS

3
COVER SAFETY
Sources: Drowning Prevention Society; United States Consumer Product Safety Commission; Association
of Pool & Spa Professional’s Operation Water Watch; and the American Academy of Pediatrics.
Child Monitoring Devices: www.safetyturtles.com
You can find other safety tips at: www.firstgov.com input ‘pool safety’ in the search engine.
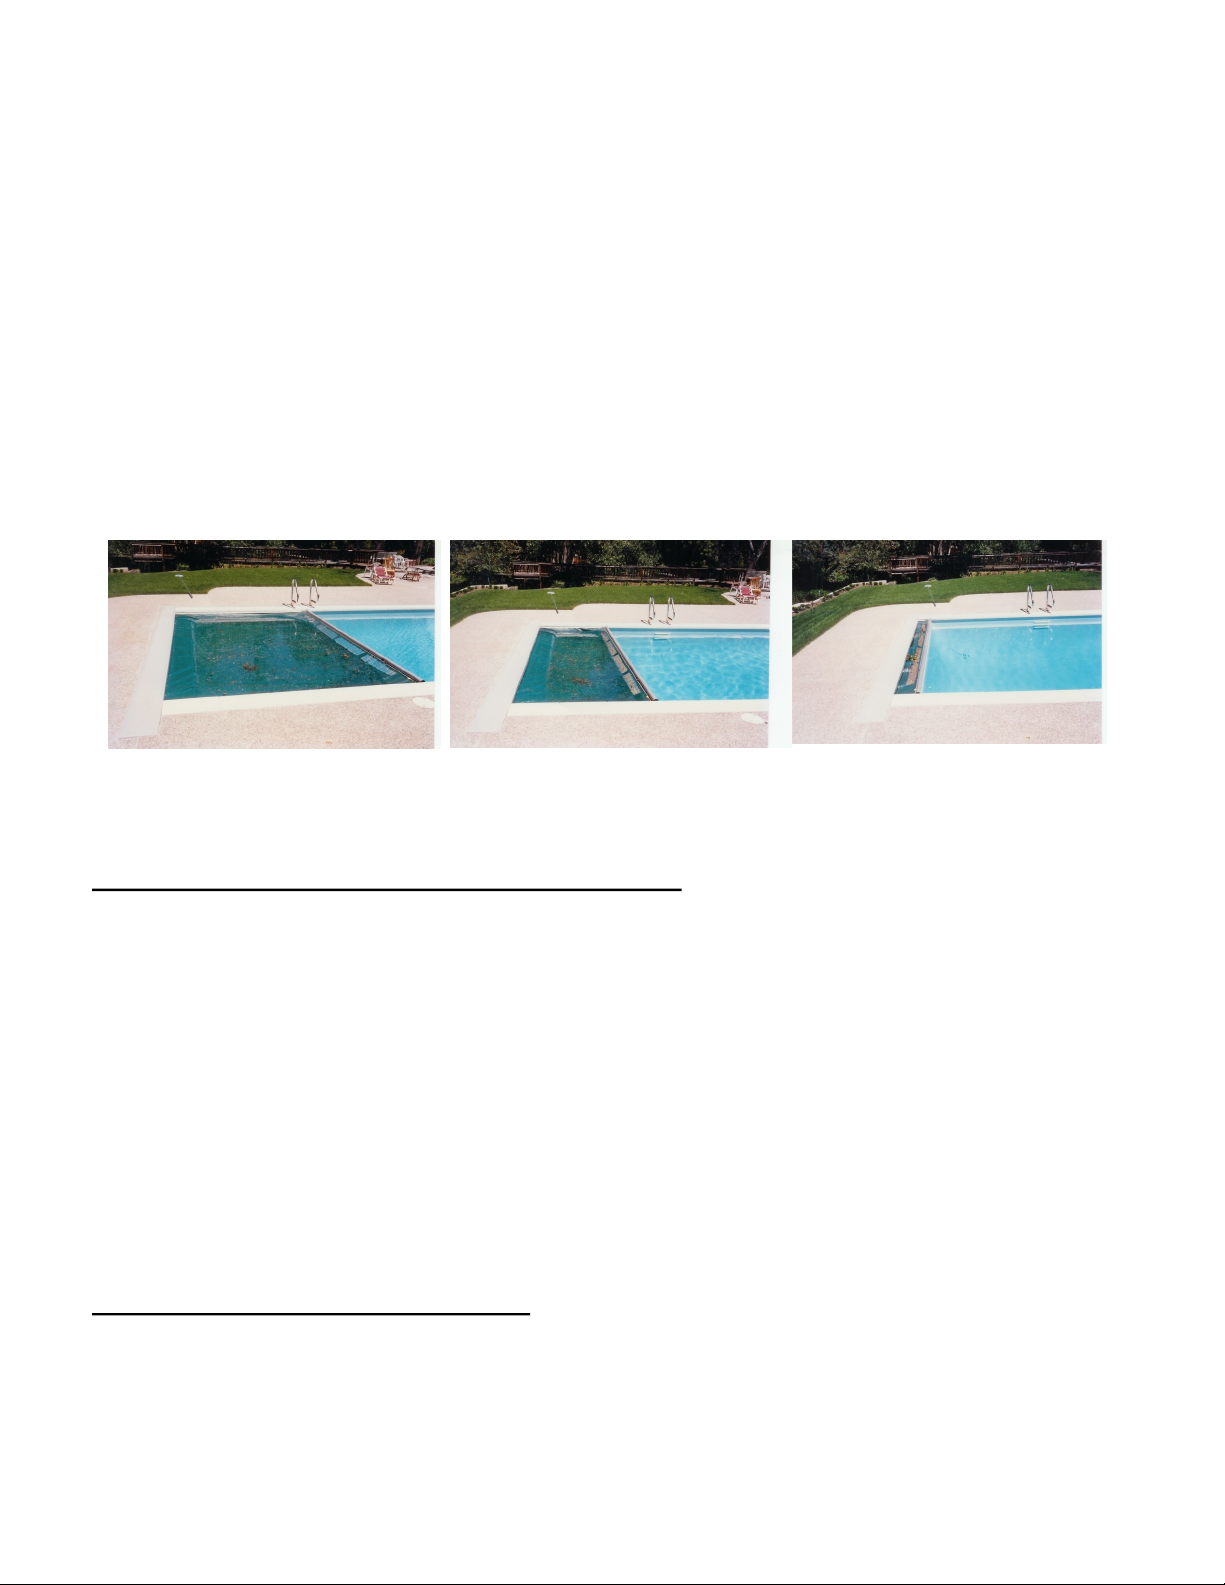
A swimming pool can provide your family with hours of entertainment and the opportunity for
healthy recreation. As a pool owner, be aware that you must secure your child’s safety. There is a risk
of a child drowning when around any body of water. There is no substitute for constant adult supervision.
Most drowning occurs during a five minute or less lapse in supervision. By providing barriers between
your child and the pool, you can avoid a tragic accident should your child momentarily slip out of sight.
Don’t rely on one system - laying safety precautions provides the strongest safeguard.
Never leave a child alone - not even for a second.
Maintain constant eye contact with your children when they are in and around the pool.
Do not consider young children water-safe because they have had swimming lessons.
Instruct baby-sitters about the potential hazards to young children in and around swimming pools and
the need for constant supervision.
Train all caretakers in life-saving, cardiopulmonary resuscitate and first aid. No exceptions.
Install a telephone pool side with emergency numbers posted.
Keep toys away from the pool when the pool is not in use. They can lure a child into the pool.
Use inflatable toys only under adult supervision. They may deflate or your child may slip off.
Post and enforce rules such as No Running, No Pushing, No Dunking, and Never Swim Alone.
Make sure you have a rescue devices accessible pool side.
Keep all doors and windows leading from the house to the pool area secure. Install self-closing
mechanisms on doors.
Enclose the pool with a barrier. In fact, fencing may be required in certain areas. Check with local
city or county building code for more information.
Install only child-proof, self-closing, self-latching gates around the pool.
Vertical bars on a pool fence should be no more than three-and three-fourths inches apart. Avoid
fences such as chain link that provide footholds for the little climber’s feet.
Place table and chairs well away from the pool fence to prevent children from climbing in the pool area.
Alert your pool maintenance people, utility personnel, and your neighbors to keep cover, gates doors
to pool closed and locked at all times.
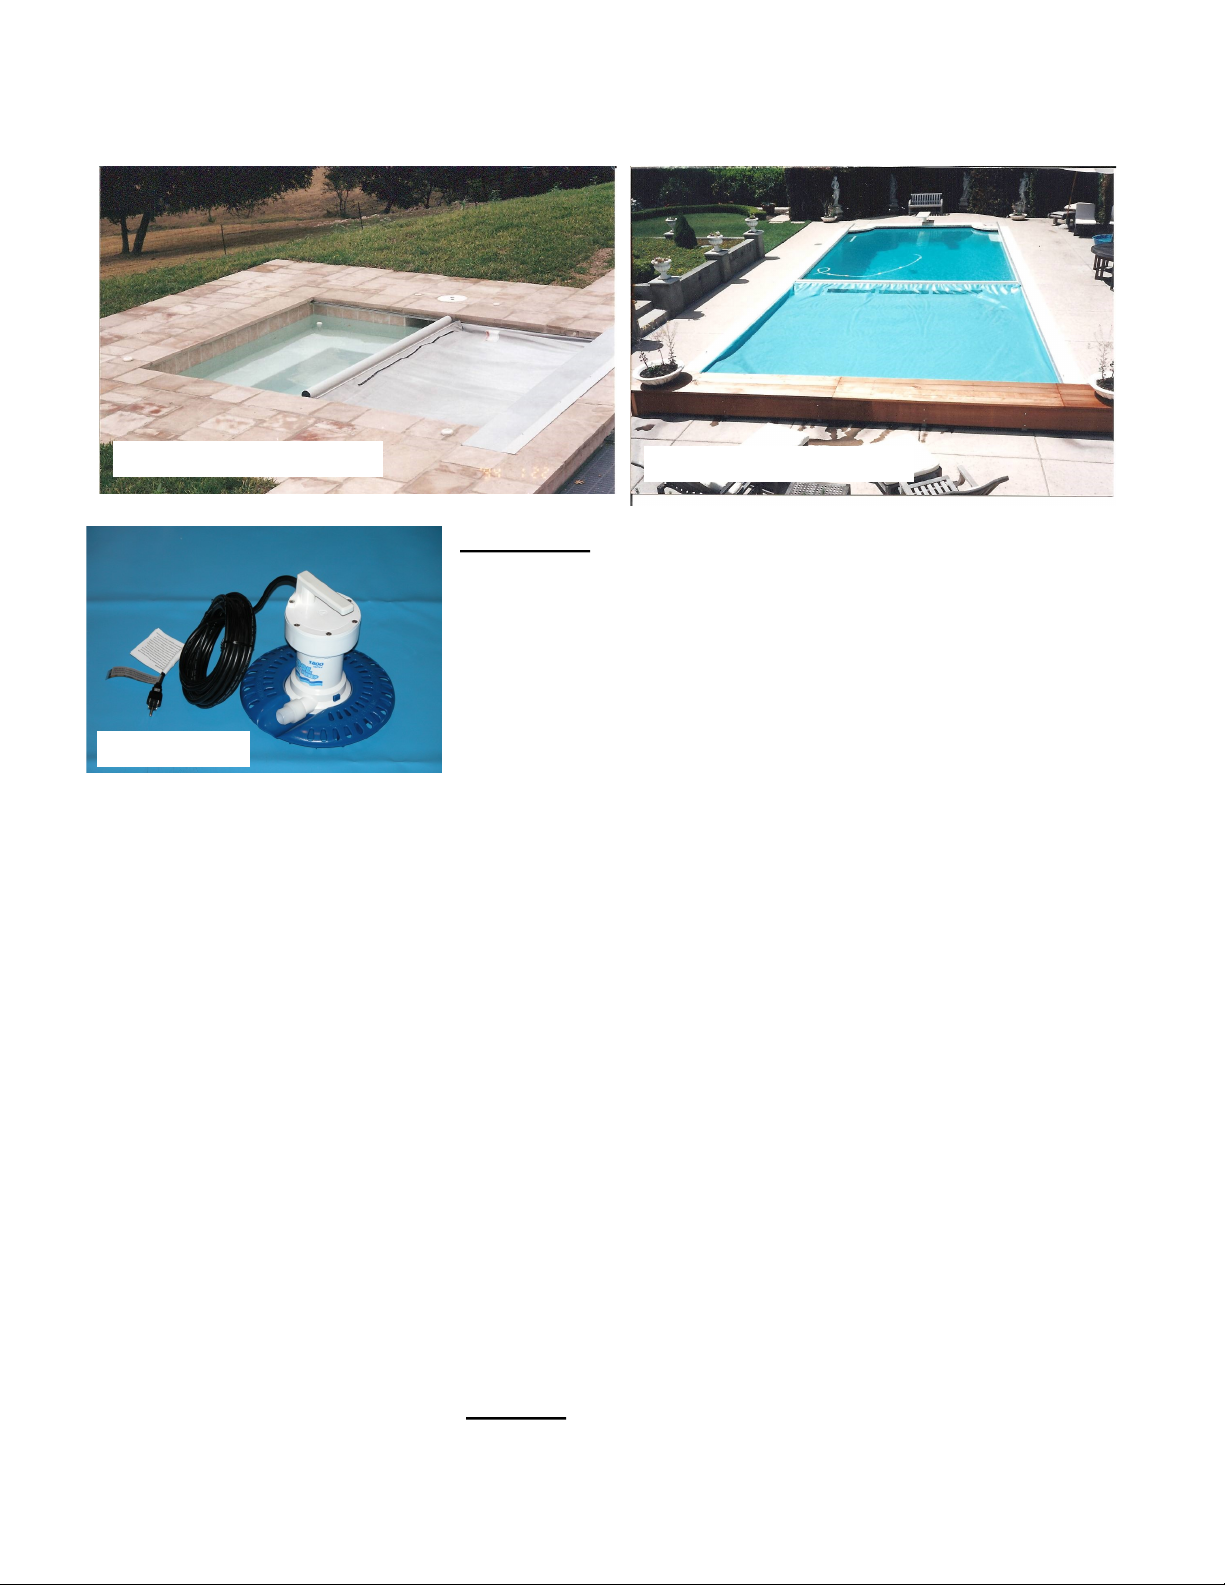
Check to ensure that spa and pool covers pass minimum safety requirements set by the American
Society of Testing Materials, ASTM F1346-91.
Never use a pool with its cover partially in place since children may become trapped under it.
Beware of a free-floating pool cover. A child can slip beneath one unnoticed.
Realize that a child can drown in as little as two inches of water. Remove any standing water off of
your spa or pool cover.
Investigate using a pool alarm and/or a monitoring system that can be worn by a child.
No objects should be in the pool area for a child to climb on and into the water.
Inspect safety and pool equipment regularly. Preventive devices are only effective if they are in proper
working order.

4
Recommended Maintenance for your System
Monthly Maintenance
1. Spray fresh water on the ends of the cover roll-up drum, and rope take-up reels.
2. Hose out tracks and then spray silicone in the track (water based silicone only, such as LPS).
3. Check drainage on cover recess. (for recessed systems)
4. Check skew adjustment.
Bi-Annually Maintenance
1. Clean out cover recess Spring and Autumn.
2. Check wear on sliders and guides and pulleys.
3. Check hydraulic fluid level (ideal 2” below cap).
4. Clean cover with mild dishwashing soap (or biodegradable cleaner like Simple Green).
5. Check skew adjustment.
6. Check fabric for pliability and integrity of reinforced mesh scrim.
This usually manifests itself by a “thinning” appearance.
7. Check drainage in cover recess.
Annual Maintenance
1. Replace sliders and guides (normal wear) if necessary.
2. Clean out cover recess.
3. Check skew adjustment.
4. Check fabric for pliability and integrity of reinforced mesh scrim.
This usually manifests itself by a “thinning” appearance.
5. Check drainage in cover recess.
2 - 3 Year Maintenance
Replace all pulleys.
Maintenance on your Salt Water System
Monthly Maintenance
1. Maintain salt levels below 3000-3200ppm. Salt levels of 4500-5500ppm can be corrosive even
without the generator operating.
2. Spray down mechanism, rope reels and end castings with fresh water. After thorough spray down
use a soft brush to loosen salt particles; and then spray down system again.
3. Install a Zinc Anode to prevent galvanic corrosion.

5
OPERATING INSTRUCTIONS
Your cover is designed to be a protective safety barrier as it floats on the water surface and can easily
support the weight of several adults in an emergency situation. However, playing or jumping on the cover
should be discouraged.
WALK ON THE COVER IN AN EMERGENCY SITUATION ONLY!
General
Sharp objects may puncture the cover fabric. Also, walking on the cover may also cause the fabric to pull
over to one side and affect the way it rolls up on the cover drum causing the cover to become temporarily
out of
skew.
For security and safety, your HYDRAMATIC cover is supplied with a spring-loaded, key-operating
switch. When you release the key switch, the cover will stop. This is required by ASTM F1346-91 stand-
ards and by various state and local codes. It also prevents the accidental covering of swimmers when the
cover is being closed. The key must be removed from the switch to prevent unauthorized persons and/or
children from operating the pool cover.
Opening and Closing the Cover
There are two important SAFETY rules:
1. NEVER OPERATE THE COVER WHILE SOMEONE IS IN THE POOL OR SPA!
2. NEVER LEAVE THE COVER PARTIALLY OPEN!
To open or close the cover, simply turn and hold the key switch in the direction of desired travel until the
cover is completely open or closed.
Your Hydramatic has a built-in pressure relief by-pass system which stops the cover when it encounters
a resistance, such as an obstruction in the track or the pool wall at the end of travel. Clearly, the operator
should then immediately release the key switch which stops the cover which prevents unnecessary loading
on the pool cover mechanism, ropes and fabric. The best approach is to release the key just a moment be-
fore it reaches fully open or fully close and to treat the pressure relief by-pass as a back-up in the event you
slightly over-run the cover. In the event you stop short of completely open or closed, jog the key switch to
obtain the required position.
The cover switch should NOT be rapidly reversed while the cover is in motion, as this may cause the cover
to remain traveling in the same direction.
NEVER FORCE THE COVER! If the cover starts to hesitate or labor in tr avel, stop or back up the
cover slightly and try again.

6
Removing Rainwater from the Cover
IT IS IMPORTANT TO KEEP WATER OFF THE COVER WHENEVER POSSIBLE FOR TWO
SEPARATE REASONS:
Safety - water left on top of the cover may still be unsafe for small children. Stepping on part of the cover will create
a low area towards which water will flow. Hence, 1/2” of water will become a puddle 4 to 6 inches deep.
WATER ON TOP OF THE COVER IS THE SAME AS NO COVER AT ALL.
Your Hydramatic cover may be equipped with easy-to-use, built in, patented rainwater removal system which
removes the water from on top of the cover, as the cover is retracted into the recessed housing or bench.
Normally it should take only a few minutes to remove all of the water from the top of the cover.
** Not all covers are equipped with this option. Limitations are due to size, pool design relative to vanishing edge and
spa placement. Aquamatic reserves the right to exclude this from any system without notice **
**If you have any more than 1” of water on top of your pool cover, the cover pump is needed.**
There are two types of rainwater removal systems
Zipper-enclosed screen system for the Under Track units (Hydramatic only)
With the cover still in the closed position, reach down and pull the zipper open the entire width of the cover. As you
retract (open) the cover, the surface water on the cover will begin to dam up at the mechanism end until the leading
edge of the cover is back far enough to allow the water to flow through the screen mesh pocket into the swimming
pool.
Take caution, do not bring the cover back too fast! When the leading edge bar of the cover starts to bow
down, release the key switch until the lower edge of the screen mesh comes back up to the surface of the water, then
retract the cover some more, normally about a foot or two. Continue this procedure until the cover is completely
retracted.
Run the cover slightly forward from underneath the unit lid to expose the zipper, and with your hand, remove the
debris from the mesh pocket. Zip the pocket back up before closing the cover or it will scoop water back up as it
travels across the pool.
Note: Vanishing edge, Lift-Lid, and other hidden (inverted) leading edge installation will likely exclude this option.
Open mesh system for the Top Track units (Hydramatic only)
Use the same procedure as above, except there will be no opening of the zipper. There will be more of a damming
action on the top track units, so you will have to take more time to drain the water on these systems. This is due to the
fact that the track sits at a greater height from the water surface than an undertrack installation.

7
Removing water from the cover with these pumps may take up to several hours, after which time, the pump,
outlet hose and electrical cord must be removed from the cover before retracting it and then be placed back
on the cover after it is closed.
This automatic self-starting pump has been supplied with the cover in order to conform to ASTM F134-91
standards.
The intent of this standard is to require a means of removing water from the top of pool covers during the
owner’s absence, especially during the rainy seasons.
If you are going to be absent from your pool, it is advised that you arrange for a responsible person or
neighbor to periodically check the cover surface for water and remove it if needed, using the built-in
system. If you are using your cover pump, have that person make sure that it is working properly.
Note: On non-rectangular pools and top track systems you will need to sweep any appreciable water off of
the top of any part of the fabric which is resting on the deck area. Attempting to move the cover without
doing the above will severely stress and overload the system.
Note: In some extr eme stor m conditions, you may find it easier to leave the cover open during these
times. Once that weather has subsided, return cover to the closed position. Include high winds in this condi-
tion.
Note: If the pool or spa ar e dr ained, DO NOT keep the cover on the pool, r etr act completely.
Undertrack with closed zipper
Cover Pump
Top Track with Screens
Cover Pump
A third, top-of-the-cover water removal system, which has been
supplied with your unit, is an automatic cover pump. With this
system you must attach a garden hose to the pump’s outlet side,
plug it into a standard GFCI outlet, and place it near the center of
the cover. Read the instructions supplied with the pump for assem-
bly. Be sure the outlet hose is run out of an area that has
adequate drainage away from the swimming pool. The pump is
covered under the manufacturers warranty. For service, return it
to the cover pump manufactures service center.
Removing Rainwater from the Cover - continued

8
Left Hand Motor Unit Rope String-Up
Please note that the compensating pulley and pulley brackets are not to scale. This rendering is only
meant to show proper rope mounting.

9
Hydraulic Pressure Adjustment
The amount of pressure that the powerpack (hydraulic pump) supplies to the hydraulic motors is more or less directly
related to the amount of torque or turning power that the motor can produce. Less pressure-less torque, more
pressure-more torque. Since you are using the pressure as a sensor to stop the cover when it reaches the end of travel
or meets an obstruction, you want to set the pressure just high enough to make the cover move, but low enough so
that it will stop when it meets an obstruction.
At the powerpack, there is an adjustable pressure relief valve. This is a spring-loaded screw valve, which will allow
hydraulic fluid to bypass back to the reservoir above a certain pressure setting. If the pressure needs to be adjusted,
refer to the following:
The pressure can be adjusted with a minimum amount of effort. The adjustment valve is located at the three o’clock
position, mid pack (looking from the tank end). See diagram below. Loosen the 9/16” nut with a socket. While
holding down the nut, screw the 3/16” Allen set screw in, to increase the pressure. This can be done by inserting the
Allen wrench through the end of the socket. Tighten the nut to reseal the adjustment. Make only small adjustments a
the time; 1/4 to 1/2 turns. Check to see that the cover operates in both directions without any hesitations.
Repeat adjustment if necessary.
It is very important to make sure that moisture and dirt stay out of the hydraulic fluid. Normally, the only place that it
might enter the system is through the powerpack’s fluid reservoir filler cap. Make sure that it is always on. Dirt and
moisture can severely affect the life of the pump and hydraulic motors.
It is rec-
ommended that you arrange to have your fluid
changed at least every ten years to make sure that
the system remains in top condition. This can be done
simply by removing the filler cap of the reservoir and inverting the
powerpack to drain the old fluid. Pour the old fluid into an approved oil reclamation container. Replace the fluid
with automatic transmission fluid (Dexron type only). You may need approximately 3.5 quarts to fill the reservoir.
Run the system several times and repeat the draining and filling process as described above. Only fill the reservoir to
within 1-2 inch of the top to allow for fluid expansion.
Filler Cap
Reservoir Tank
Valve Hose Fittings #516H & #515H Solenoid
Magnet
#514H
Pressure Relief Valve
Solenoid Valve #513 H
Hydraulic Power Pack Relay #522H

10
Track Extrusions
The tracks on the undertrack units will usually stay free of debris, so there should be no need to clean
these.
The tracks on the deck (top and flush) tend to accumulate debris, especially if the cover is left off of the
pool for extended lengths of time. In order to clean the tracks out, simply use a garden hose with a pressure
nozzle attached and spray down the exposed inside edge of the track. If your pool environment is in an area
with a lot of blowing sand or dirt, you may need to clean out the tracks more often, in some cases even once
a month. If you are on a weekly or bi-monthly pool maintenance program, then you could have it added to
the maintenance routine.
Lubrication of Track
Using water based Silicone spray such as LPS (NOT WD 40 or similar oil based products). Spray along
aluminum tracks where the slider will travel. Lubricate between black slider and stainless steel leading edge
bar plate. The bolt that attaches these two parts together should remain slightly loose to allow the leading
edge bar to slide laterally from side to side. Excessive wear on sliders will result if tracks are not lubricated
and may result in abnormal wear on the tracks, which would require non-warranty replacement.
Changing a Pulley
The pulley end caps on the top track units should also be cleaned every six months, as this is a prime area
for debris to be impacted. This is done by unscrewing the cap hold down screw and removing the pulley
cap. Once removed, flush the debris out with water. Always make sure that the system has NOT been
operated for a least an hour so that the hydraulic pressure has bled off. Do not remove the pulley.
Reposition the pulley cap and secure the hold down screw, making sure that it is properly positioned and
the rope is on the pulley.
Never run the system with the pulley caps removed.
Sliders and Guides
The sliders and guides are wear surfaces. These parts should give you many years of use if properly main-
tained. Periodically spraying a small amount of silicone spray on these pieces will significantly reduce the
friction on these parts. Also, keeping the track cleaned as described previously will reduce the wear on the
sliders.
Track guides (black delrin piece at end of the track, as shown above) wear because of the movement of the
fabric across them as the cover travels across the pool. These ensure that the fabric feeds into the track.
When they wear down a point that allows the fabric to pull out of the track, there can be severe damage
caused to the edges of the fabric. Therefore, it is necessary to replace these as they become worn.
Guides can be replaced by the homeowner will relative ease.
Top Track End Cap
End Guide

11
Replacing a Guide
Top Track
To replace a guide the cover can be in the open or closed position.
1). You should be able to have access to the guides
from the front opening, if not remove the top
of the bench.
2). Remove the 3 (3/8”) nuts that secure
the guide to the threaded studs.
3). Remove the top half of guide, then
remove the bottom half. You may
need to remove a track screw if
the track cannot be raised to release
the guide from the forward stud.
4). Replace bottom half of guide over
forward stud, and secure nut.
5). Make sure rope and cover are
properly seated in the bottom
half. Secure top half with the two
remaining nuts.
Under Track
1). Take lid off the cover recess.
2). Remove the (3) screws and 3/8” nuts that hold the guide to the guide
bracket.
3). Remove top half of the guide.
4). Remove bottom half of the guide.
5). Replace the bottom with the tab in center
groove of the track, make sure rope and
cover are properly sealed in bottom half
grooves.
6). Replace top half of the guide.
7). Re-secure nuts and bolts as required.
Top side of Guide
Bottom side of Guide
Flush track with guide
Top track
Guide

12
Replacing a Slider
Sliders (black delrin piece holding up front of cover) wear as they move along the length of the track.
Maintaining the proper angle in the track will reduce some of the wear. The slider is secured to the rope
at the front of the cover with two small screws. As the slider wears, the screws are exposed and will start
to drag in the track. This causes the lower edge of the track to become marred. Aluminum shavings from
the track is an indication that the sliders are worn out and need to be replaced.
The sliders can be changed by the homeowner but are somewhat more involved than any other
maintenance repair.
The sliders can also be used to replace a rope in the unlikely event of breakage. Ropes are not part of the
cover fabric warranty and may need replacing before new fabric is needed. Ropes, sliders, guides,
pulleys and fabric edges (white webbing) are considered consumables and are not covered by the fabric
warranty.
Leading Edge Bar and
Slider
Slider with Stop Plate
Leading Edge Bar
Guide
Stop Bracket

13
HOW TO CHANGE A SLIDER
If you are replacing a slider due to wear and tear or as part of a maintenance program then it is advisable that the
“end stop guides” are also replaced.
It is also advisable to change both sliders.
TO REMOVE A SLIDER
1). Fully retract the cover to the fully open position until the slider is as close to the track guide as possible.
2). Remove pit housing lid to expose drive unit.
3). Jog the key to open position to release tension on rope then, using your hands pull rope cords that are wound
up onto the drive wheel this is required to release the tension on the cover fabric.
4). Remove two track screws. This will enable you to lift the track and enable ‘End Stop Guides’ to be removed.
5). Remove end stop and end stop guides.
6). Take slider out of tracks.
7). Remove slider plate from leading edge bar on flushtrack. On standard toptrack or undertrack you
need only to unbolt the slider.
8). Remove slider plate from slider undo 4 x ‘Slider Plate’ screws.
9). Remove slider from rope undo 4 x slider screws with a #0 Philips bit driver
All replacement sliders are
supplied full size.
You may need to cut
down the replacement
to match you existing slid-
er.

14
HOW TO REPLACE A SLIDER continued
9). Place rope cord back into new slider GREAT CARE must be taken when replacing the new slider.
It is VERY IMPORTANT that the slider screws are screwed down to the correct depth to prevent
unnecessary wear and tear. See diagram below.
10).
When all four slider screws have been inserted slight bulging may occur in the neck and tub of the slider.
If this happens take a small file and file the bulge level. See diagram below.
11). When you are satisfied that the slider is attached, reinsert slider back into the tracks and reassemble i.e.
slider - slider Plate (using slider plate screws, new holes may need to be drilled) - leading edge bar.
NOTE: - When reassembling slider plate to leading edge bar make sure that they are free to move from left to
right (this enables the leading edge bar to move back and for the preventing jamming). To identify the correct
“free moving joints’ LOCKING Nuts are used.
12). When all parts have been reassembled lubricate running tracks and leading edge ‘free moving joint’ with
Silicone Spray (water based only) and check for skew adjustment.

15
Winterizing Your Cover
It is important to maintain the same water level all year. Pool covers do have a limit as to how much water,
snow, and ice they can support. Without the support of water underneath the cover, tracks may pull down, and the
cover may tear. Damage could also occur to the coping or may create a hazardous situation. A gallon of water
equals (8) pounds, rain water accumulation can quickly result in a ton of water. ** In areas of high snowfall, open
cover completely **
Do not run the cover below 40*F as this can create cold cracks in the vinyl
Inspect your water level at least once a week. If you are intending to lower your water level when you close your pool
for the winter, Aquamatic requires that you keep the cover rolled up in its recess or enclosure.
Fall Maintenance: As freezing weather or the rainy season approaches, it is important to keep any standing
water off your cover. Your cover pump can be left on the cover through freezing weather. Refer to cover pump
instructions that are supplied in your cover pump box. (Any questions or warranty issues with the cover pump should
be sent directly to the pump manufacturer and not Aquamatic).
Recess and Vault Maintenance
On undertrack cover systems, the cover recess, should be kept free of leaves and debris to allow rainwater
and pool spillover to drain freely.
Although, maoisture will not necessarily damage a hydraulic system, water should not be left standing in the pit, as the
system should not be submerged. Also standing water will become stagnant and produce an offensive odor. Algae will
also grow in such water and can be carried into the pool by the cover fabric being immersed in it.
If too many leaves accumulate in the pit, they will eventually rub on the cover as it winds up on the drum
and possibly retard the cover operation. This will also cause the leaves to be carried back onto the pool by the cover
fabric.
We suggest cleaning out the pit at least twice a year, once in the early spring, and again in the early fall.
This can be accomplished by using a garden hose and spraying the debris towards one end of the cover recess
and removing it with your hands and a wet-dry vacuum. BE SURE TO ALWAYS WEAR GLOVES, AS
SPIDERS, SNAKES RODENTS LIKE TO MAKE THEIR HOMES IN THESE LOCATIONS.
Your Hydramatic Cover is designed to float on the pool water surface and will only function properly when
the pool water level is maintained within 1 to 2 inches of its normal operating level.
Remember, a cubic foot of water weighs approximately 62 lbs. Therefore, 1 inch of water on a 20 ft. by
40 ft. cover is equal to about two tons of weight or about 4000 lbs. However, if the pool cover is
completely supported by pool water, the net effect of the weight is essentially negligible.

16
FABRIC FACTS
Why is there extra slack, wrinkles or folds in the cover? There are several factors that we use in determining
slack. The width of the pool, water level drop and the geographical area can all affect the amount of slack we
use. The reasons we have slack or wrinkles in our pool covers are as follows:
Your pool cover is manufactured with extra slack in the cover for the following reasons
The cover is designed to rest on the water to handle excessive surface loading from rain and snow loads.
If the cover has less than 85% contact with the waters surface, damage to the cover, tracks, and coping
can occur.
Covers do shrink, the percentage does vary depending location and environment. Indoor pools may
shrink more than an outdoor as they commonly heated year-round.
If your cover becomes tight, the cover will bind, and will not open and close properly and is also no long-
er safe and will need to be replaced.
To adjust and accommodate for variations and fluctuations in water levels.
The following cover maintenance will prolong the life of your Cover
Inspect fabric for abnormal wear. (See following page for details)
Maintain correct water level.
Adjust skew when needed.
Remove excessive bird droppings.
Clean and maintain cover vault housing and keep drain clear of debris.
Remove sharp objects from cover before opening the cover.
Remove leaves, branches, sand and dirt or any organic matter from cover.
Rinsing your cover off with fresh water every 3 to 6 months.
Chemicals for your Cover
An important thing to remember regarding chemicals and your new cover is that you will almost certainly
have to change the frequency and/or quantity frequency that you add chemicals to the water. Where it was
previously necessary to chlorinate your pool at a constant rate because chemicals dissipated at a constant rate,
with proper use, the cover will substantially reduce the loss of chemicals.

17
Chemicals for your Cover - continued
Avoid build up of excessive chemicals, which can cause improper chemical balance that can lead to
premature deterioration of the vinyl cover. (This is not covered by the warranty).
After adding chemicals to your pool, allow chemicals to circulate before closing the cover.
*IF IT IS SAFE TO SWIM IN IT, IT IS SAFE TO COVER!*
High alkalinity (high pH) or high chlorine levels can begin to break down the cover prematurely.
Some pH adjusters may create harmful levels of alkalinity (high pH) if not allowed to mix with the
water before the cover is closed.
Some chlorine shock treatments require as long as 12 to 24 hours to return to a safe swimming range.
Making sure your water is balanced should be on top of the checklist before covering the pool for
extended periods of time, such as winterizing.
Double check the water after the chemicals have had a change to mix completely. This may require
checking the pool water a day or two later.
When covering the pool for long periods of time turn down ozone generators and chemical feeders to
their lowest level. Constant long-term build up of ozone can damage the fabric.
Inspecting your Cover
You should inspect your fabric every six months for any leaks. Patch even the smallest holes as soon as
they occur. If water penetrates the vinyl and comes in contact with the scrim (the thread reinforcing), the
thread will soak up water carrying chemicals and contaminates to the inside of the material. This will lead
to stiffening and or delaminating of the vinyl.
If you have a rip in the cover larger than 8” wide or a hole large than 6” in diameter, the cover should be
returned to the factory so it can be patched on both sides, or if possible have the panel replaced with a new
one. (this cannot be done on older covers or covers that are very weathered and dirty)
Patching a hole
The patch kit includes a 12” x 12” piece of fabric and a can of HH-66 adhesive. If you find a leak, you will
need to clean the area around the leak and dry it thoroughly. Next cut the patch a minimum of 2” larger
than the repair area. Cut the corners round to prevent peeling of the corners. Brush the adhesive on both
sides of contact area , wait until tacky then press onto place and hold down with a weight for 15 minutes,
and do not operate cover for at least two hours.
Patching should be done on both sides of the hole in the cover if possible.

18
SALT IN POOL WATER AND GALVANIC CORROSION
ON AUTOMATIC SAFETY COVER SYSTEMS
“Galvanic corrosion tends to occur when dissimilar conducting materials are connected electrically and exposed to an electrolyte
(salt in water). “This can be a direct contact or secondary connection such as a common grounding path. ¹ An example of dissimilar
conducting materials is stainless-steel screws into aluminum. From 1962 to 1988, galvanic corrosion rarely occurred on aluminum
components of automatic covers.
Since 1999 when Underwriters Laboratories (UL) dictated that all metal components of automatic pool covers must be bonded to the
pool grid, we have seen an increase of galvanic corrosion on some of the aluminum components. In addition, the popularity of
electric chlorinators where salt is added to the pool water has increased.
These two changes in the industry are the reason you may experience galvanic corrosion on some aluminum components. In the past
it may have taken over 20 years for any noticeable corrosion. Today with bonded systems and salt water, reaction can occur within
two to three years.
The salt in the water acts as an electrolyte which is a non-metallic electric conductor. When removed from the pool, the cover will
deposit salt water on the mechanism end casting and main tube. If there are any “stray currents picked up” ² by the bonded pool grid,
galvanic corrosion can occuur starting where the stainless steel screws mount to the main tube and into the end casting. This
corrosion will appear as a black pitting and/or a powdery white dust. The white dust is not salt: It is aluminm that has oxidized.
Salt deposits may collect on parts such as guides and in the rope weave.
What maintenance can be done to reduce galvanic corrosion?
1. Several manufacturers of salt generators have indicated that there will be limited reaction to metals if the salt level is
maintained at levels below 3000-3200 ppm. They indicate that salt levels of 4500, 5500 ppm and above can be
corrosive even without the generator operating. Test the level and replace pool water if the salt levels are too high.
2. The mechanism should be washed down and brushed once a month is there is salt in the pool water. Spray down the
rope reels and end castings with fresh water; with a soft brush to loosen salt particles; and then hose down again.
3. On installations without a salt system, maintain a clean cover recess with twice a year rinsing of the cover
mechanism.
Salt in pool water and galvanic corrosion are not new to the industry. Salt generators were introduced over 25 years ago and those
that were in the industry at that time recall some of the concerns and problems in conjuction with heaters, pumps, filters, handrails and
light niches. Salt generators, like many other porducts, have positive and some negative factors; however, the most important
issue is to maintain proper water chemistry and salt levels. Salt generators are convenient for pool owners, although many tend to
neglect pH, alkalinity and salt levels. Regardless of the pool cover system, proper water chemistry is important to ensure the
maximum life of the pool and pool equipment:
Chorline levels: 1-5 ppm is a normal acceptable reading
Salt levels: per manuafacturers guidelines
PH levels: 7.2 - 7.8 ppm
Alkalinity levels: 80 - 120 ppm
The metal components of an Aquamatic Cover System are not warranted against galvanic corrosion created by salt water conditions;
this is not a manufacturer’s defect.
There is extensive information regarding galvanic corrosion on the internet.

19
Reference Guide
1). The sides of the cover are referred to as left or right when standing behind the drive unit facing the pool.
2). The guides are the black plastic pieces at the end of the track closest to the drive unit.
3). The leading edge (LE) is the 3” aluminum bar holding up the front of the cover fabric.
4). The tape is the white cloth webbing sewn down the entire length of the fabric on the left and right sides.
5). The sliders are the black plastic pieces that ride back and forth the length of the track and support the L.E.
Slider Underside View
Fabric with Tape
Guide
Top Track
Slider Top View
Leading Edge Bar
Guide
Cover Pump
Table of contents
Other Aquamatic Lighting Equipment manuals
Popular Lighting Equipment manuals by other brands

Apollo
Apollo MultiSpot HP LS1012 user manual

Lightolier
Lightolier Lytecaster 1100IC specification

Philips
Philips TT150 Mounting instruction

Blizzard Lighting
Blizzard Lighting Pocket Rocket user guide

ATM Lighting
ATM Lighting INS242LED Installation and maintenance manual

Beamz professional
Beamz professional WH180RGB instruction manual