Aquant BWT Series User manual

`
ENGLISH
Top-mount Sand-Filter for
Swimming Pool
Installation Manual

`
ENGLISH
What happens to the water in your pool?
This should be a question of prime consideration for all pool owners. In the
past some pools did not use filtering systems, the owner was faced with the
problem of refilling the pool with clean water when this became necessary.
Refilling the pool was laborious; meanwhile the owner had an unsanitary
pool with unpleasant bathing owing to the poor clarity of the water. Today
pool owners demand absolute hygiene, crystal clear water and economy of
effort. These objectives are achieved by effective filtration and chemical
treatment of the pool water.
After filling the pool with clean water in the summer, two basic factors can
take place due to the exposure of water to the sun and the air.
1.-Biological contamination. The water is contaminated by micro-organisms
which may be airborne or introduced by bathers.
These parasites reproduce rapidly in still warm water and algae may
form giving a greenish appearance to the pool water.
2.-Rainfall and wind may introduce dust, with leaves and seeds which
muddy and pollute the pool water.
These two factors generate in little time an unsanitary swimming pool
and unpleasant bathing.
Solutions to the problem:
1.-“CHEMICAL” TREATMENT
Maintain the correct level of sanitizer (chlorine, brome, oxygen...) in the
water to combat existing micro-organisms by its disinfecting action.
As chlorine is the more common method, it will be taken as the
reference point.
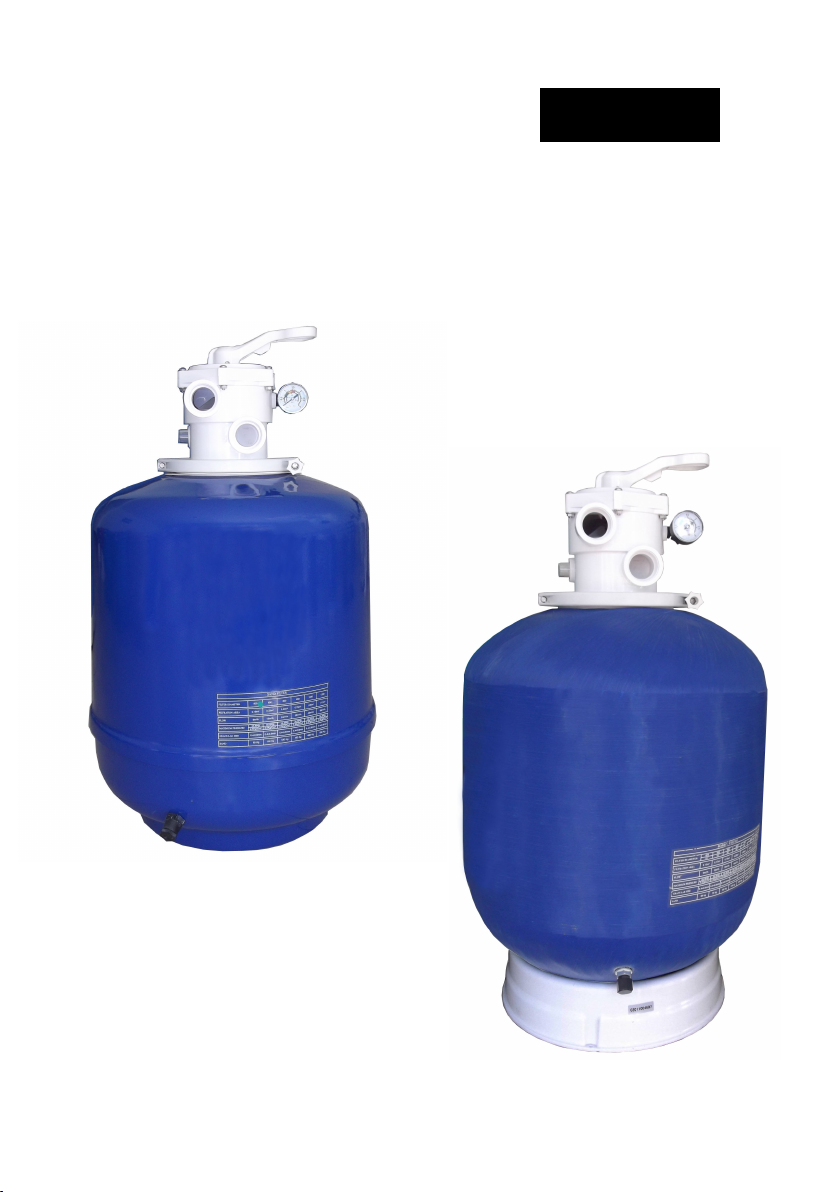
2.-“PHYSICAL” TREATMENT
Provide the pool with a filtration system (filter and pump) to remove
suspended particles from the water.

`
ENGLISH
pH LEVEL
The pH level is an indicator of acidity or alkalinity present in the water. The
neutral value is 7.0 pH. From 0 to 7 are the levels of acidity whilst from 7 to
14 are those of alkalinity. The pool usual readings vary between 6.8 and 8.4.
Why pH is important?
“THE IDEAL PH VALUE IN A POOL SHOULD BE BETWEEN 7.2 AND 7.6”.
As previously stated, sufficient residual chlorine must exist in the pool to
destroy unwanted micro-organisms, in fact the chlorine will only act as a
bactericide when the pool water has a pH of between 7.2 and 7.6.
There are other reasons which call for a correct pH level: Once above 7.6,
calcium in the pool will precipitate to a visible cloudy form (accentuated in
hard water areas).
This gives a milky appearance to the water, and hinders the filtering;
deposits may also appear on the pool walls and fittings.
Once the pH level falls below 7.0 the pool water becomes corrosive causing
eye irritation and affecting mucous membranes. There is also a long term
threat to metallic parts in the pool.
The quality of the pool water is highly dependent on maintaining constantly
the correct pH level.
CHLORINE
Standards for the amount of residual (free) chlorine in the pool water may
vary from country to country, depending on health authority regulations.
Typical legal requirements are between 0.2 and 0.6 parts per million, (i.e.
0.2-0.6 milligrams per litre).
What is understood by free or residual chlorine?
Even after the filtering process, certain bacteria remains to be destroyed by
the disinfecting action of the chlorine which is usually acting on the bacteria
in the form of hyperchloride acid.

`
ENGLISH
A quantity of chlorine that is added to the water (in excess of that needed to
destroy bacteria and oxidize organic material) remains free to combat new
bacteria introduced by bathers or atmospheric agents.
This chlorine remaining in the water is known as free residual chlorine.
FILTRATION
It is essential that the filtration is accompanied by chemical treatment of the
pool water.
The two processes are complimentary to each other.
WORKING PRINCIPLES
(6) return suction inlets (2) skimmer
(5) filter
multiport valve
(4) pump
(3) valves
Suction is taken from the main drains (1) on the bottom of the pool and the
skimmers (2) at the pool surface and fed via separate pipe work with their
corresponding valves (3), through the pump (4) to the sand filter (5).
After filtration, the water is returned to the pool via return inlets (6), which are
installed on the opposite side of the pool to the skimmers and main drains.
(1) drain

`
ENGLISH
Once in the filter, the water is circulated downwards
through silica sand and suspended particles are retained.
The filter sand needs to be washed at intervals to remove the particles it has
retained backwash.
This is achieved by reversing the flow through the filter and directing the
water containing the dislodged particles to drain.
When the filter pressure reaches over 1.3 kg/cm², it means that the sand
filter needs to be backwashed.
Bearing these principles in mind, the following installation and operation
instructions should not represent any problem.
INSTALLATION
The filter should be installed as close as possible to the swimming pool and
preferably at a level of 0.50 metres below the surface of the water in the
swimming pool. Make sure there is drainage available at the place where the
filter is to be installed.
IMPORTANT: Do not use an iron and hemp pipe for the selector valve
connection, it is essential to use plastic accessories and TEFLON tape. Pipe
terminals are available threaded fixing in 1 ½ and 2”.
Always leave enough space around the filter in order to perform the necessary
examinations and maintenance during the filter's life.
ASSEMBLY
Follow these indications for a correct assembly of the filter:
1.- Place the filter on a horizontal and clean surface.
2.- Place the filter in its final location.

`
ENGLISH
3.- In case of a filter with top valve, install the
selector valve on top of the filter with the clamp. Make sure that the joint
between the valve and the filter are correctly placed.
4.- Perform the three connections of the selector valve: pump piping to the
valve, valve to the waste drain and valve to the pool return. Each of these
three outlets is clearly identified on the valve.
5.- Set the gasket, the valve, the clamp and the manometer (see exploded
view). It is not necessary to use teflon tape, as the watertightness is
guaranteed in this case by the joint. Do not tighten the manometer with a
tool, as manually will be sufficient.
SAND LOAD
In order to obtain maximum efficiency from your filter, it should be filled with
silica sand with a grain size classification of 16 / 32 inches. With the quantity
indicated on the plate specifying the characteristics, proceed as follows:
First, fix the
gasket
Then, position
the valve
Last, place the
clamp
Fix the pressure
gauge
1
2
3
4

`
ENGLISH
FILTER-FILTERN
FILTRATION
FILTRACION
FILTRAZION
1.- Take off the clamp and the valve with the gasket.
2 - Cover the opening of the inner pipe in order not to drop sand inside it.
3.- Fill the filter with water to half capacity.
4.- Pour the required quantity of sand inside the filter.
5.- Clean the seating of the gasket joint.
6.- Fix the filter valve in place.
FILTRATION PROCESS
The selector valve has a handle of 6 positions that selects any of the
necessary operations to obtain the maximum efficiency from the filter.
IMPORTANT: Always switch off the pump, when changing the position
of the selector valve.
FILTRATION
With the pump switched off, place the handle of the
selector valve in the” FILTRATION” position.
Switch on the pump.
During this operation, it is advisable to observe the
pressure gauge from time to time as this indicates the
degree of saturation of the filter. When the pressure
reaches 18.5 PSI a “BACKWASH” should be carried out.
The main drain and skimmer valves will be regulated
according to the quantity of floating material found on
the surface of the water. Bear in mind that with the main
drain valve fully open there will be little suction from the
skimmers. If the surface sweep of the skimmers is to be
stronger, reduce the flow from the main drain.

`
ENGLISH
0.8 kg/cm² - 11.4 PSI: 1.3 kg/cm² - 18.5 PSI: This
Normal pressure at the pressure indicates that it is
beginning of a filtering necessary to “BACKWASH”
cycle.
BACKWASH
Each load of sand forms thousands of channels which
pick up all the material contained and caught up in the
filtering process, the number of free channels allowing the
water to pass is continually decreasing. This is why the
pressure rises progressively until it reaches 1.3 kg/cm2.
At this pressure the filtering sand is unable to collect any
more impurities and must be cleaned as follows:
Turn the selector valve to the “BACKWASH” position
and with the main drain and return valves open,
switch on the pump and run it for 2 minutes. When
this operation is completed, the dirt blocking the filter
will have been removed.
BACKWASH
BUCKSPULEN
LAVAGE-LAVADO
CONTROLAVAGGIO

`
ENGLISH
RECIRCULATE
In this position, the selector valve allows the water from the pump to go
directly to the swimming pool without passing through the inside of the filter.
WASTE
If the swimming pool needs to be drained, this can be done using the filter
pump. In order to do this, the selector valve should be in the “WASTE”
position. The motor is run with the main drain valve fully open, for the pump
to have sufficient suction. For the pump to suction, keep the prefilter and the
main drain pipes full of water. Before drainage, make sure that the skimmer
valves and the bottom cleaner valves are closed.
REEIRCULATE
ZIRKULIEREN
CIRCULATION
CIRCULACION
RICIRCOLO
WASTE
ENTLEEREN
EGOUT
DESAGUE
SCARICO

`
ENGLISH
RINSE
NACHSPULEN
FILTRE-EGOUT
ENJUAGUE
RISCIACOLO
RINSE
After the carrying out the ”BACKWASH”
operation on the filter and placing the installation
in the “FILTRATION” position, the water flowing
into the swimming pool will be cloudy for a few
seconds, so to prevent it from reaching the
swimming pool there is a “RINSE” position for the
selector valve which is operated as follows:
immediately after the “BACKWASH” put the valve
in the “RINSE” position and switch on the pump for 1
minute, after which the pump is switched off and the
valve placed in the “FILTRTION” position.
This position ensures that the filtered water goes
directly to the drain.
CLOSED
As its name indicates, this position is for closing off the water from the filter
to the pump and it is used for opening the collector prefilter of the pump.
CLOSED
GESCHLOSSEN
FERME
CERRADO
CHIUSE

`
ENGLISH
START-UP
When the filter has been loaded, the sand must be washed. Proceed as
follows:
1.- Place the selector valve in the " BACKWASH " position.
2.- Open the valves controlling the swimming pool suction pipes and run the
pump for 4 minutes.
3.- Stop the pump, place the handle of the selector valve into the "RINSE"
position and rinse for 1 min. Then, stop the pump and place the handle of
the selector valve into “FILTRATION” position.
When this has been done, the filter will be ready to start the filtering cycles
for the water in the swimming pool.
IMPORTANT: The pump should be switched off when the position
of the selector valve handle is being changed.
MAINTENANCE
Do not use solvents for cleaning the filter, this could damage the filter,
especially its finish.
Always replace the joints and pieces that may not be in good condition.
Backwash and rinse when needed, as instructions specified in this manual.
Clean the sand every year for a better performance with solid or liquid
product. It’s recommended to change the sand inside the filter approximately
every 3 years.
Winter period:
In order not to damage the filter during the winter period, please follow the
instructions below:
Perform a backwash and a rinse as previously detailed.

`
ENGLISH
Remove the water from the filter.
Take off the lid to ventilate the filter in the period of inactivity.
When you need to start up the filter again after a period of inactivity, follow
the instructions stated in the paragraph "START UP".
The most common PROBLEMS
EFFECT POSSIBLE CAUSE SOLUTION
The filter only
provides a small
volume of the
filtered water.
Vacuum heads
have poor suction.
Prefilter blocked. Clean filter.
Motor turning the wrong way.
Check by the arrow on
the body of the prefilter
which way the motor is
turning, if this is not
correct, reverse the
motor connections*.
Suction pipes are blocked. Proceed to clean.
The pressure
rises rapidly
during a filter
cycle.
Water pH is high (Cloudy
water). Decrease the pH.
Lack of chlorine (Greenish
coloured water). Add chlorine.
The pressure
gauge varies
considerably.
The pump is taking in air.
Check for leaks in the
prefilter and suction
pipes.
Suction is half closed.
Check that the suction
valves are completely
open.

`
ENGLISH
*If there is no arrow, the direction of the motor can be checked as follows:
Stand in front of the pump, i.e. where the inlet pipe is situated (with the
motor behind). Make sure that the direction of the motor is counter clockwise.
SAFETY WARNINGS
Never start up the system without water.
Whenever you operate the filter or the selector valve, switch off the pump
first.
Never allow children or adults to sit on the system.
Do not connect the filter directly to the water network, as the pressure of the
water may be too high and exceed the maximum work pressure allowed by
the filter.
Do not clean the lid with solvents, as it may damage its properties (finish,
transparency …).
As all the connections are made with joints, it is not necessary to tighten the
nuts excessively in order to avoid that some plastic pieces could break.

`
ENGLISH
Installation Manual
Equipped with a 6-position multiport valve that easily controls the operation
and maintenance of the filter.
The filtration sand with 0.4-0.8 mm grading guarantees a perfect filtration for
years.
Fitted with corrosion-proof collectors and diffuser that enhance the capacity
of filtration.
Table of contents
Popular Water Filtration System manuals by other brands

Express Water
Express Water Commercial Reverse Osmosis System installation manual

Proeco
Proeco Bio Flow 5000 instruction manual

Drinkpod
Drinkpod 900 Series owner's manual

HYDAC International
HYDAC International OLF-10/2 installation manual

Clean Water Systems
Clean Water Systems J-PRO-22 Installation & start?up guide

Waterway
Waterway Clear Water II owner's manual

Zodiac
Zodiac EL-24 Installation and operating instructions

Jesco
Jesco C7520 manual

CMP
CMP 25504-600-00 INSTALLATION INSTRUCTIONS & PRODUCT MANUAL

Glacier bay
Glacier bay HDGASS4 Use and care guide

Georg Fischer
Georg Fischer JRG CleanLine Combi Operating and maintenance instructions

Sicce
Sicce Tidal 55 owner's manual