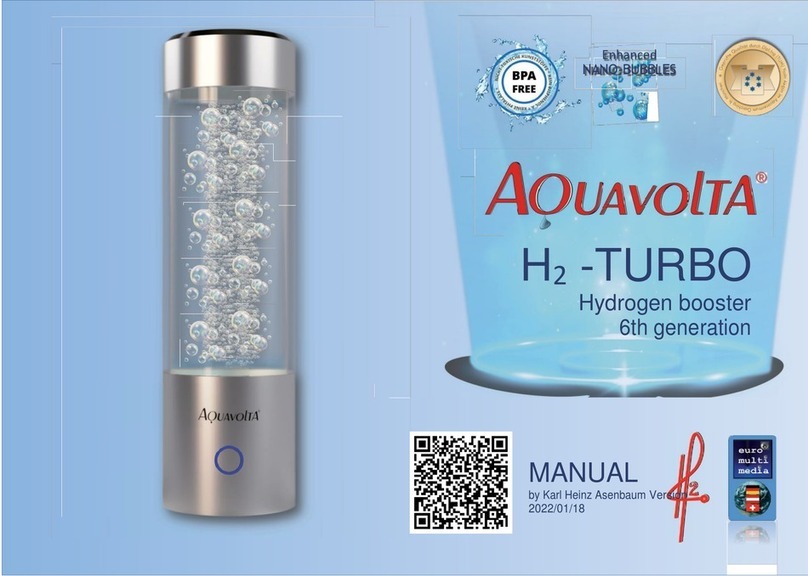
Aquavolta Lourdes User manual

Karl Heinz Asenbaum
USER MANUAL
!
!
!
!
Hydrogen Water Generator!
!
!
!
!
„Lourdes“

2 Manual chapters !
„Lourdes“ Hydrogen Generator
•03 Hydrogen fundamental concepts
•04 „Lourdes“ – A word in advance
•05 Production of hydrogen water
•06 General safety instructions
•07 Scope of delivery Model D and F
•08 Overview Model D
•09 Overview Model F
•10 Understanding the „Lourdes“
•11 Preparation for use
•12 Producing hydrogen water
•13 Checking hydrogen water
•14 Hygiene water
•15 Water tank handling
•16 Cleaning glass jug / cathode
•17 Cleaning the sponge, contacts, filter change
•18 Technical data. Troubleshooting 1
•19 Troubleshooting 2
•20 Legal notice and disclaimer
D
F
F

3 Hydrogen – The fundamental concepts
„I run on Hydrogen“. To see Hydrogen cars, out of which no emissions are emitted and only clear
water drips out, is still seldom in our smog-laden cities. Yet there is no doubt that Hydrogen gas
presents the most interesting form of alternative energies of the future. For 1 kg of hydrogen
brings 33,33 kWh/kg onto the road. Neither petrol (12 kWh/kg) nor natural gas (max. 13,1 kWh/
kg) can keep up. Hydrogen, with the H symbol that stands for Hydrogenium (“The Water
Producer”). Many say this is the beginning of the “Hydrogen Age”. Hydrogen-Water-Generators
like the “Lourdes” were developed when the possible medicinal meaning of Hydrogen Water
came into public discussion. One speaks of HRW or “Hydrogen Rich Water”. The HRW-global
market was at approx. 20 billion €in 2017.
Hydrogen is the most common element in the universe. It makes up 75% of the total mass of our
solar system. Yet on our planet Earth it is more of a scarce good. Only 0.12% of the total mass
consists of hydrogen. Most of it is H2O which has bonded as “energy-less” water in our oceans.
Water, H2O is hydrogen gas H2which has been combusted by oxygen. This occurs, for example,
with sugar which is converted from food into energy. So hydrogen doesn’t only provide energy
for fuel cells for cars, but also for the cells in the body. The H Hydrogen atom is made up of one
positively charged nucleus, the proton, which is orbited by a negatively charged electron. The
smallest of all atoms is also called “nascent” hydrogen: That means “hydrogen in its birth phase”,
for an H-atom does not stay alone for long, it bonds with a second H-atom to make what we
usually call hydrogen, H2,.. A further description for this hydrogen atom is “hydrogen radical”.
Often hydrogen gas H2 is confused with the Hydrogen ion H+. This corresponds to an H-atom
without an electron, in short it is a single proton. Positively charged hydrogen ions are the
measure of “acidity”. They occur by the splitting off of a hydroxide ion (OH-)from water (H2O). If
there are more hydroxide ions in an aqueous solution, it is alkaline, if there are more H+ ions
(protons), then it is acidic.
Negatively charged Hydrogen ions (Hydride ions) theoretically also exist. Yet they are so unstable
that they only occur as compounds.

04 “Lourdes" - A word in advance
Under the name “Lourdes", hydrogen generators are supplied by various manufacturers
from the Far East, which are technically very similar. They are water ionizers with a PEM
membrane, which means that the two electrodes necessary for water electrolysis are
applied directly to a membrane that is only permeated by protons in one direction (PEM =
proton exchange membrane). The main function, the saturation of drinking water with
molecular hydrogen, takes place in a non-pressure sealed glass container and therefore
allows only a saturation with significantly less than the atmospheric maximum saturation of
1.6 mg / l. In the best of cases you can reach 1.2 ppm. This meets the minimum therapeutic
requirement of 0.5 mg per day accepted by most scientists when drinking 0.33 liters daily.
Even if one may believe the most optimistic statement about
the "holy" water in the Lourdes pilgrim site, although it is
scientifically unproven, this water at the source (not in the
shipping canister!) contains 0.08 mg / l of dissolved hydrogen
gas. So you would need to drink 6.25 liters of it to reach a
minimum therapeutic level. Naming it "Lourdes" is therefore
just a publicity stunt and is based on a well-kept myth.
There are similar myths in the water scene about "miracle waters", such as the waters of
Nordenau (Hochsauerland), Tlacote (Mexico), and Hita (Japan), which have at least been
scientifically studied for hydrogen. However, here too there is no doubt that the content of
hydrogen is, first, insignificant and barely detectable after being bottled.If you want to drink
hydrogen water with a minimum content of 0.5 mg / liter, you must produce it and drink it
fresh.

05 How is hydrogen water produced?
When it was discovered that only dissolved hydrogen was critical to a specific
antioxidant effect of water, an industry was developing that was pressurizing H2gas
into multi-layered water bags. This is unfortunately expensive and causes big
problems with transportation and waste.
Also chemically one can produce hydrogen water by having e.g. metallic
magnesium react with an acid in the water to release hydrogen gas. On the one
hand, such hydrogen fizzy tablets release alkaline ions into the water, on the other
hand, the pH must be kept well below pH 7 by the acid components, for hydrogen
to be generated. These tablets are not available in many countries because of
licensing problems, yet with individual cases they also reach levels above 3 mg /
liter. Depending on the dosage, magnesium can cause side effects that are not
known in other types of hydrogen water.
Hydrogen-rich water has until recently been produced primarily with stationary
electrolytic water ionizers. Depending on the design, these hydrogen values reach
from 0.5 to 2.8 mg / L in the flow process and at the same time increase the pH
value. The "Lourdes" hydrogen generator, on the other hand, does not change the
pH due to its PEM membrane and also cannot dissolve more than 1.2 mg / L of
hydrogen gas in the water. Yet it is cheaper to buy than a strong water ionizer, but
also doesn’t have a built-in water filter and should therefore only be operated with
already filtered water. Even reverse osmosis water with low conductivity can be
used.
Hydrogen dissolves in water rather reluctantly, unless under high pressure. That's
exactly what hydrogen boosters do. These types of devices also work with a PEM
cell, but does not allow the hydrogen to easily escape from the water by means of
a pressure-resistant closure and forces it to dissolve more easily than in an open
device such as the Lourdes. Such Boosters are currently available only as battery-
powered small devices for on the go, whilst the “Lourdes" as a stationary batch
ionizer which can function at a 3 times higher electrolysis voltage.

06 General safety instructions
✓Operate the device only when you have
read the instruction booklet and have
understood it.
✓Before switching the device ON, the water
container has to be filled with water.
Otherwise the electrolysis cell can get
damaged and the guarantee claims
become void.
✓You cannot fill it with water over 60
degrees C.
✓Only operate the device with 220 Volts.
✓Please ensure that children and pets do
not have access to the device.
✓Never place the device under water. A
moist cloth is enough for cleaning it. Do
not use chemical cleaning agents.
✓Never drop the device.
✓Preferably use cold water (under 20° C)
✓Never place the device in direct sunlight
or subject it to temperatures under 0
degrees or over 50 degrees Celsius.
✓Stop the device if water leaks from it
during production.
✓Never place the device in moist or
polluted, dirty rooms.
✓Do not place your device outdoors.
✓Do not plug it in if the cable is damaged
or bent.
✓Do not place heavy or pointed objects
on the cable.
✓Do not touch the plug with moist or wet
fingers.
✓Only use water of the best drinking
quality if you want to drink the water
afterwards.
✓You cannot use fizzy, carbonated,
sparkling water.
✓Do not open the adapter or the device
and do not try to repair it. If it is defect
then unplug the device and inform your
dealer.

07 Scope of delivery „Lourdes“ Hydrogen-Water Generators*
D
FF
*) In this manual we describe Lourdes devices of different producers. Therefor images of the device and details can
be slightly different to the model you have purchased. Druckbehälter
•Please check after unpacking the device that everything is included. Ask your dealer in case
something is missing. Be sure that the plug complies with your mains voltage.
•Read this user manual before operating the device. If you are unsure about anything please consult
your supplier before using the device.
•If more people will use the device, they should be schooled by you on how to use it or also read this
user manual.
•Keep this user manual close at hand for any necessary inspection.
•For any possible repairs or inspections, send the device in its original box to the address given by your
supplier.
•Model D with display on top
•Model F with operating button in front
Plug
Cleaning powder!
(Citric acid)
Anode cloth
Filter cartridge for !
the water tank

08 Overview Model D
Deckeleinheit
mit Schwimmer
Gleitstab für
Schwimmer
Glastopf mit
Elektrodeneinsatz
Tankbehälter
Anodenwasser
Schwimmer
Vorderansicht
Bedieneinheit
Display +
Sensor-
Schalter
Topfkontakt Sensor
Schalter für
Wasserstoff-
Funktionen
Betriebsanzeige
Tank-Kontrolle
Elektroden-Überwachung
Multicolor LED-Display
Tankverschluss
Rückenansicht
Tankablauf
Buchse für DC- Netzteil
Gehäuse der
Bedieneinheit
Schalter für
Hygiene-
Wasser
Back view
Tank drain
Socket for DC-power supply
Housing for control
unit
Switch for
hydrogen
functions
Tank control
Electrode monitor
Multicolor LED-display
Switch for
hygiene
water
Cap with float
gauge
Gliding bar for
float gauge
Glass cylinder with
electrolysis unit
Tank for
anode water
Float gauge
Front view
Operating unit
Display +
Sensor +
Switch
Cylinder contact sensor
Power indicator
Tank seal

09 Overview Model F
Deckeleinheit
mit Schwimmer
Gleitstab für
Schwimmer
Tankbehälter
Anodenwasser
Schwimmer
Vorderansicht
Bedieneinheit
Cap with float
gauge
Gliding bar for
float gauge
Glass cylinder with
electrolysis unit
Tank for
anode water
Float gauge
Front view
Operating unit
Cylinder contact sensor
Back view
Socket for DC-power supply
Tank seal
Housing for !
control unit
Tank drain
Timer
Operating display
Water level control
Electrode monitor
Multifunction switch

10 Understanding the „Lourdes“
(+)
1 x O2
(-)
2 x H2
(+)
1 x O2
(-)
2 x H2
(+)
1 x O2
(-)
2 x H2
Electrolysis in a
water ionizer
Electrolysis in the
Lourdes
Elektrolysis in the
Booster / HIM
!
!
!
The graph above shows the differences from other electrolytic hydrogen generators. Hydrogen is also
produced in water ionizers, hydrogen boosters, or Hydrogen Infusion Machines (HIMs) through the use of
direct current to electrolyze (split) water molecules (H2O). At the end of the electrolysis process, the
divided water molecules produce the two gases hydrogen (H2) and oxygen (O2) separated by a
membrane in a ratio of 1: 2. There are different methods for this:
•Water ionizer: Both electrodes in water away from the membrane. The membrane has large pores. The
hydrogen water above becomes alkaline, below acidic.
•Lourdes: Both electrodes in the water directly on the membrane ("zero distance electrolysis" or SPE = Solid
Polymer Electrolyte). The membrane has small pores and allows only protons to go through (PEM =
proton exchange membrane). The H2-water above remains in the same pH range, below it becomes
acidic. The sensitive membrane at the bottom of the jug should not be touched or cleaned
mechanically. An empty jug should always stand on the wet anode sponge to prevent the membrane
from drying out.
•Booster / HIM: Both electrodes directly on the PEM membrane, but only the upper one in the water.
Hydrogen water above remains the same in pH. Oxygen escapes into the air.
!

11 Preparing the device
1. Remove the glass jug (1) and clean it inside and
out with clean, warm water. Never use a detergent!
Never place in the dishwasher!
2. Check that the anode sponge (2) is in the sponge
holder (3). If necessary, replace the sponge (4).
When dry, it is flat and later absorbs water.
3. Open the tank cap (5) and check that the filter (6)
is correctly inserted. If necessary, insert the
replacement filter.
4. Then slowly (7) add 400 ml of water to the tank and
screw its lid back on. This water is for electrolysis
only and is not to be drunk. You should use mineral
poor, clean water, such as distilled water for irons or
reverse osmosis water.
5. Wait until the sponge (2) is completely soaked.
After putting the jug down it must touch its visible
anode and moisten it with the water from the tank
from below.
6. Remove the lid with the float gauge vertically and
fill the glass jug with 1 - 1.8 l of drinking water. If in
doubt about drinking water quality, use mineral
water or externally filtered water.
Sponge holder
Anode sponge
1
5
3
2
8
9
Replacement sponge (flat)
4
7
6
Purified water !
is absolutely
necessary

12 Producing hydrogen water
1
3
2
5
4D
4F
6
1.Now connect the mains plug of the DC power supply to both
the 220 V socket and to the DC connection on the back (2) of
the device. The correct connection is indicated by the
illumination of LEDs on each of the two device types.
2.Put the glass jug (1) filled with 1 - 1.8 liters of trustworthy drinking
water into its position. Why should at least 1 liter be filled? In the
electrolysis part at the bottom of the glass jug (5), hydrogen gas
is released in the jug, which should dissolve in the water as
extensively as possible (maximum 1.6 mg / l). But this takes a lot
of time because the hydrogen bubbles you see are rising very
quickly and are reluctant to dissolve in the water. The trick of
the "Lourdes" system consists in the float disk on the sliding rod
(3), which catches the hydrogen bubbles below the water
surface before they gas out. So these have more time to
dissolve in the water. The disc must always be well below the
water surface.
3.To start Model D or F: Briefly press the 4D or 4F button once (10
minutes production time), 2 times (20 minutes) or 3 times (30
minutes). The longer the production time is selected and the
lower the amount of water in the jug, the higher the hydrogen
concentration. After the end of production, an acoustic signal
sounds. The hydrogen water is now ready and should either be
consumed immediately or bottled promptly in a glass or
stainless steel bottle with a tight seal, so that the dissolved
hydrogen cannot gas out. With a sealed closure, the dissolved
hydrogen is mostly retained for more than 12 hours.
If you do not remove the jug immediately
after the acoustic signal, the device will
remain active for up to 2 hours and will
produce smaller amounts of bubbles as a
"trickle charge" through the water.

13 Hydrogen measuring drops
Testing the amount of molecular hydrogen is carried out immediately after production with the
optional H2 Blue® Kit. A water sample of 6 ml is filled carefully into the measuring cup and one drop of
the blue measuring liquid is added. Each drop that discolours means 0,1 ppm (=100 ppb) dissolved
hydrogen gas. If a drop does not discolour automatically one can stir gently.
If the liquid still does not discolour, then the last drop does not count. With the “Lourdes” Hydrogen
Generator depending on the production time, amount of water, type of water, air pressure, and
temperature can a hydrogen water be produced with 300 to 1200 ppb (=0,3 to 1,2 ppm). Electronic
hydrogen measuring devices without a water electrode, like the widespread Trustlex ENH 1000, which
only displays a fictitious hydrogen value, is unsuitable for assessing hydrogen water. More to that in the
book by Randy Sharpe www.euromultimedia.de
Do not drink the test liquid and keep out of reach from children!
When testing use protective gloves and a wipeable surface and watch out for clothing. The drops
contain methylene blue, a very intensive dye.

14 Hygiene function
1
2
Water is known to be the "element of life" and also attracts bacteria. Therefore, it is important to
regularly sterilize the jug from which you drink. The Lourdes doesn’t need an external disinfectant, for
it produces oxygen and ozone itself which provides complete sterilization. In the electrolysis unit in
the bottom of the jug, normally hydrogen gas is produced which rises upwards, whilst on the bottom
oxygen and ozone are generated. So the sponge unit is germ-free below the jug. But if you want to
sterilize the inside of the jug, the electricity current must flow in the opposite direction whilst water is
inside the jug. This is done by pressing a button:
•For model D press the button "O" (Cleaning). Thereupon if the
display color changes to red, oxygen and ozone bubbles are now
rising in the device and on the right side of the display above the
“O" the remaining disinfection time (1) is displayed. The produced
hygienic water is not suitable for drinking. Finally, the jug must be
rinsed with clear water.
•For model F the control knob is pressed for more than 3 seconds
until the word "CLEANING" starts to flash. Above is the remaining
disinfection time (2) displayed in red, The produced hygienic water
is not suitable for drinking, After completion the jug has to be rinsed
with clean water.
• After 15 minutes of cleaning you will hear an acoustic signal.
• The cleaning water can be used for household hygiene purposes.
By adding 1/4 teaspoon salt (full jug) you can increase the quality
of disinfection (clear chlorine smell).
Blinks
3 seconds

15 Changing the water and refilling the tank
1
2
The water in the closed 400 ml tank of the device serves to
keep the sponge permanently moisturized and is gradually
consumed by electrolysis. As soon as the water drop signal (1)
or (2) starts to flash, the tank must be refilled. The fuel cap
opens by turning it to the left! Filtration through the filter can
take up to 10 minutes. It is best to use distilled or reverse
osmosis water (steam iron water). Make sure that the tank
does not overflow because leaking water could damage
electronic components. After refilling the warning light should
go out and the re-inserted sponge should be well moistened in
the water.
If you are transporting the Lourdes or do not want to use it for
more than a week (holidays etc.) you should change the tank
water (and of course the water in the jug) before the next time
it is used.
To empty the tank, first remove the jug and sponge holder with
the sponge. Unplug the power plug. Then open the tank cap
and place the unit over a water spout. Finally, pull the plug of
the drainage hole and drain the water.
Attention: During the procedure, make sure that you do not
lose the sponge or the very small drainage plug and replace it
after emptying.

16 Interior cleaning glass jug / cathode
The inside of the production glass jug and the grid-shaped negative
electrode (cathode) that produces the hydrogen must be cleaned
with visible traces of limescale on the electrode grid with 1 teaspoon of
citric acid dissolved in 0.5 liters of warm (max. 60 degrees C) water. The
citric acid solution should be allowed to act for 1 hour and then rinse
the container and the electrode several times with warm water.
Important: The platinized electrodes adhere directly to the highly
sensitive membrane and must not be touched or even brushed. Avoid
touching the electrodes or the membrane both on the top (inside) and
on the bottom (outside), so as not to damage them, otherwise the
whole glass pot has to be replaced at an extra cost.
Citric acid
1 teaspoon /
0,5 Liter
Don’t touch!

17 Exterior cleaning / sponge / contacts / tank filter
• Wipe the exterior of the jug with a lightly moistened soft cloth or microfiber cloth. Do not use
detergents.
• The sponge and the sponge holder may discolor over time due to the oxygen and ozone-
containing water, but remain hygienically flawless due to the constant oxidation. The sponge
usually lasts about 1 year and should then be replaced. The replacement sponge is very thin in
the dry state and expands only when in contact with water to full size.
• The two pins for electrical contact with the electrodes can be gently
cleaned when visibly dirty with a soft cloth. Deposits may affect the
function because the electrodes in the jug then no longer get power. The
contacts on the bottom of the glass jug should also be wiped off gently if
they are dirty or rusty. Attention: Never touch the electrodes or the
membrane in the bottom of the jug. The glass jug including the electrodes
is an expendable material and has to be changed every 3 - 5 years with
an average daily use of 6 liters.
•The filter in the tank housing is not a drinking water filter, but serves
technical purposes. If distilled water or reverse osmosis water (steam iron
water) is used, it must be replaced once the tank has been emptied (p.15)
once a year. To do this, open the tank cap by turning it to the left, replace
the filter as shown on the left, fill with 400 ml of new water (attention: takes
up to 10 minutes with a new filter) and screw the tank cap back on.
Dispose of the old filter as residual waste.

18 Technical data. Troubleshooting 1
Lourdes
Technical data
Dimensions
360 x 160 x 270 mm (L x W x H)
Production jug
Fill with maximum 1,8 Liter drinking water
Dissolved H2
0,3 to 1,2 ppm
Production time H2water
Optional 10, 20 or 30 minutes
Production time Hygiene water
15 minutes
Redox potential (ORP)
Up to (-) 407 mV (CSE) with high purity water.
Power supply
AC 100–240 V, 50/60 Hz. Output.: DC 24 V, 1A – 1,2 A
Problem
Please check
Solution
Lights don’t shine
•Electricity failure?
•Cable connected at both ends?
•Cable damaged?
•Check electricity mains
•Connect both ends
•Replace cable
Blinking drop symbol
•Tank empty?
Refill tank with ca. 400 ml
Electrode monitoring blinks
Contact pins and surface
Gently clean
Low bubble formation
Brand new jug?
Rust on the contact pins?
•Full capacity after 2 hours
•Gently clean with a soft cloth
Strange sounds
Bubble formation
Temporary resonance
phenomenon

19 Troubleshooting 2
Problem
Please check
Solution
Water does not smell good
•Water in the jug is contaminated
•Inadvertently drinking hygiene
water?
•Replace hygiene water (P.14)
•Replace water in the jug.
Produce hydrogen water
Drop symbol blinks
•Tank empty?
Refill tank (P.15)
Water leaks out of the device
or base
Unplug the device
Device must be repaired
Low bubble formation
Brand new jug?
Rust on the contact pins?
•Full capacity after 2 hours
•Gently clean with a soft cloth
Please write down the phone
number of your Lourdes dealer
here:
You may also like to email the
author of this manual for a
solution to a problem not listed
here.
Mr Asenbaum can be reached per
email:

An instruction book by Aquavolta UG (limited liability). Georgenstrasse 110, 80798 Munich.
Important notes:
This instruction book contains important information. Read the whole book and if necessary repeatedly.
Do not throw it away in case you wish to read it again! You can and should ask questions and queries.
The contact address is shown above. No responsibility is taken for improper handling, mounting and/or
operation.
Disposal instructions
The device cannot be disposed of with your household waste. Often you receive a parcel label or
voucher from the sales point or the producer for returning it for the cost-free disposal or recycling. Please
don’t pollute your environment. Many of the parts of this high end device can be used again.
EXCLUSION OF LIABILITY
Molecular Hydrogen is a naturally and continually occurring gas in the human body, produced amongst
other things in the intestinal flora. Risks and side effects from consuming Hydrogen Rich Water have not
been mentioned in scientific literature. Therefore, we do not assume liability for medicinal claims or
articles about the effect of ionized water, hydrogen water and/or electrolyte water.
Author, publisher and producer do not bear liability for decisions and practices made by someone
because of the statements made in this publication. Never use this publication as the sole source for
health related measures. With health related complaints please seek advice from an accredited doctor
or therapist.
20 Legal notice and disclaimer
Table of contents
Other Aquavolta Water Filtration System manuals
Popular Water Filtration System manuals by other brands
Pureit
Pureit ADVANCED PRO MINERAL RO+UV instruction manual

AquaticLife
AquaticLife 420343 Installation, operation, maintenance guide

Aqua Medic
Aqua Medic Reef Station Operation manual
Aquapure
Aquapure AP-R05500 Operating and maintenance instructions
Aqua One
Aqua One NanoFlow 150 manual

AquaticLife
AquaticLife RO Buddie Series Installation, operation, maintenance guide


