Aquavolta H2-TURBO User manual
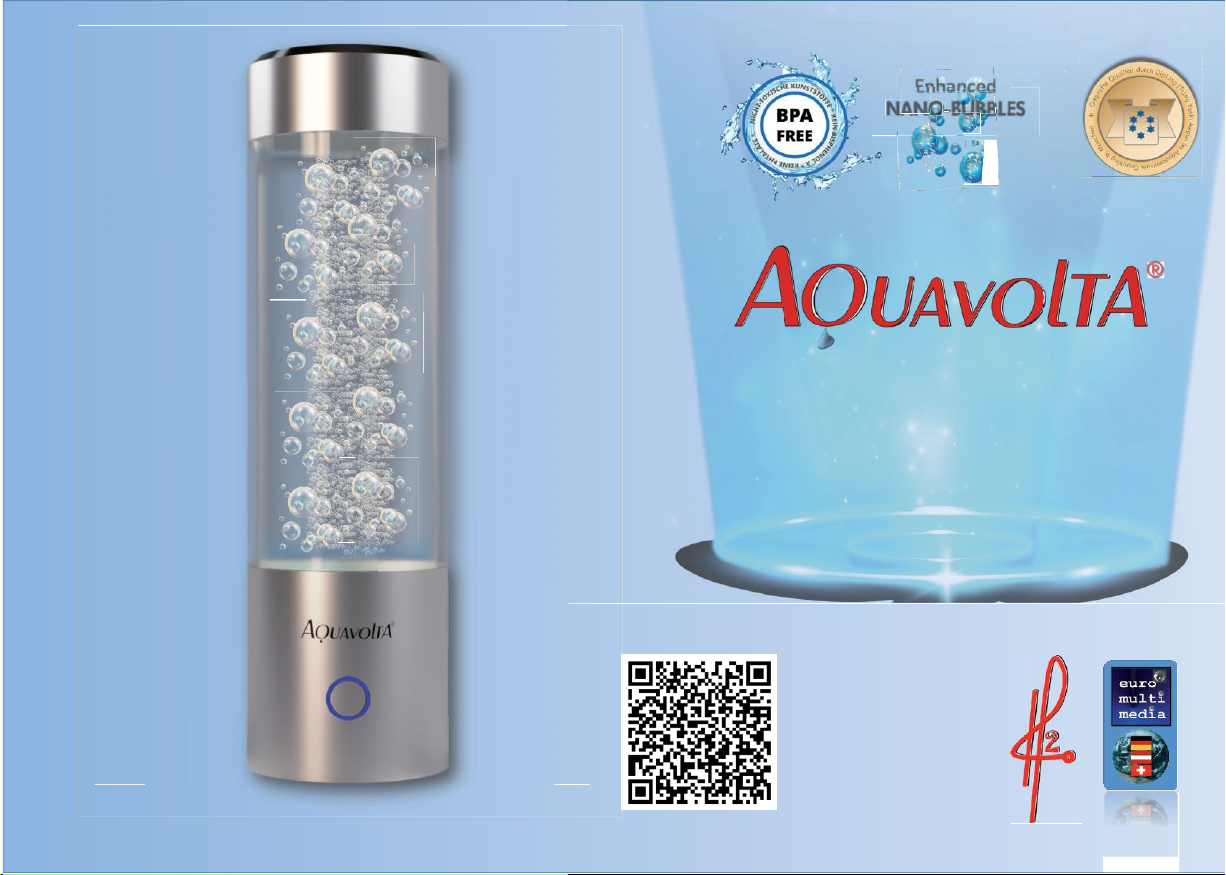
Enhanced
NANO-BUBBLES
H2-TURBO
Hydrogen booster
6th generation
MANUAL
by Karl Heinz Asenbaum
Version
2022/01/18
a
2 - What is AquaVolt
•
The brand name Aquavolta® is composed of the Latin term
for water (Aqua) and the name of the inventor of the
battery, Alessandro Volta. It stands for
electroactivated
water.
•
In Germany, it was originally referred to as electrolyte water,
and later as "active water". In the English-speaking world it is
often referred to as
"reduced", "ionized" or "hydrogen-rich" water.
•
The characteristic of AquaVolta® is that it has a negative
electrical voltage with respect to a measuring electrode,
a so-
called negative redox potential.
•
The lower the redox potential, the greater the readiness of the
water to donate electrons. For every 0.018 volts (18 millivolts)
lower redox potential, this readiness doubles. AquaVolta® water
has a 400 to 800 millivolts lower redox potential than tap
water or
bottled
mineral water.
•
Due to its high readiness to release electrons, AquaVolta® is also
called antioxidant water. However, it is not only used by doctors
for therapy, but is also establishing itself as a
modern everyday
drink
due to its pleasant taste
•
From today's scientific point of view, the
dissolved hydrogen
gas
content
("dissolved hydrogen" or dH
2
)
is mainly
responsible for the antioxidant power of AquaVolta®. To
enhance this, the AquaVolta® H
2
- Turbo was developed. It
reflects the state of the art in 2022.
®?

3
- TURBO: The 6th generation
of hydrogen boosters
•
Hydrogen gas, H
2,
has been recognized by medical
research as the "gas of life" only in the 21st century.
When drunk, dissolved in water,
this can
produce
antioxidant, anti-inflammatory and
anti-apoptotic
effects. In recent years, a mitohormetic effect
has
also
come into
focus, with benefits similar to athletic training.
•
When this began to be understood,
an industry first
developed that pressed hydrogen-rich water at high
pressure into aluminum cans or bags,
where the H
2
content could be preserved for several months. This
is not only very expensive, but
also
causes
major
waste problems.
•
Bubble tablets were also developed that
could produce
hydrogen-
rich
water. However, they are relatively expensive in the long run
and have an acidic aftertaste.
•
European consumers in particular therefore gave preference to a do-
it-yourself solution, for which Karl Heinz Asenbaum coined the term
"hydrogen booster" in his
book "Electroactivated Water" published
in 7 languages.
•
The basis of the do-it-yourself solutions is always the electrolysis of water.
Thus, stationary water ionizers work with a diaphragm electrolysis,
while
mobile electrolysis devices work with a so-called PEM cell, in which the
electrolysis gases H
2
and O
2
are cleanly separated and only
the hydrogen
accumulates in the water. In addition, boosters such as the
Aquavolta® H
2
-
Turbo
use
pressure systems to dissolve as much H
2
as possible in the water.
In
the 6th booster generation, it has now been possible to
keep the
gas
bubbles so small
that the efficiency of the booster has been significantly
increased.

4
- Always fresh hydrogen
(almost) free water selection
You can
use
your booster
anytime and anywhere
thanks to its long-lasting
battery.
We designed the
AquaVolta®
H
2
- Turbo
Hydrogen
Booster
so you don't have to rely on a single type of
water. If you don't trust the tap water you have on
the go,
you can
add
filtered tap water
and even water
from a reverse osmosis (RO) system to your
booster
.
You can also
fill
the BPE-free Tritan container with
your
favorite mineral water. It is even possible to unscrew
the Tritan container and
screw on a
mineral water
bottle with a 30 mm
thread (plastic bottles only!)
instead.
Important restriction:
The water must not contain
any carbonic acid
. Otherwise, the
gas pressure will
exceed the
capacity of the overpressure system and
the booster could be damaged or even
burst.
!
Since bottles do not have
!
Pressure equalization
holes have, this is
Method always 2nd
choice.
Maximum
production time 10 min!
&
H
2
Inhalation
Accessories
RO water
suitable!
Drinking
water of
any kind
Bottle
suitable!
P
e
5
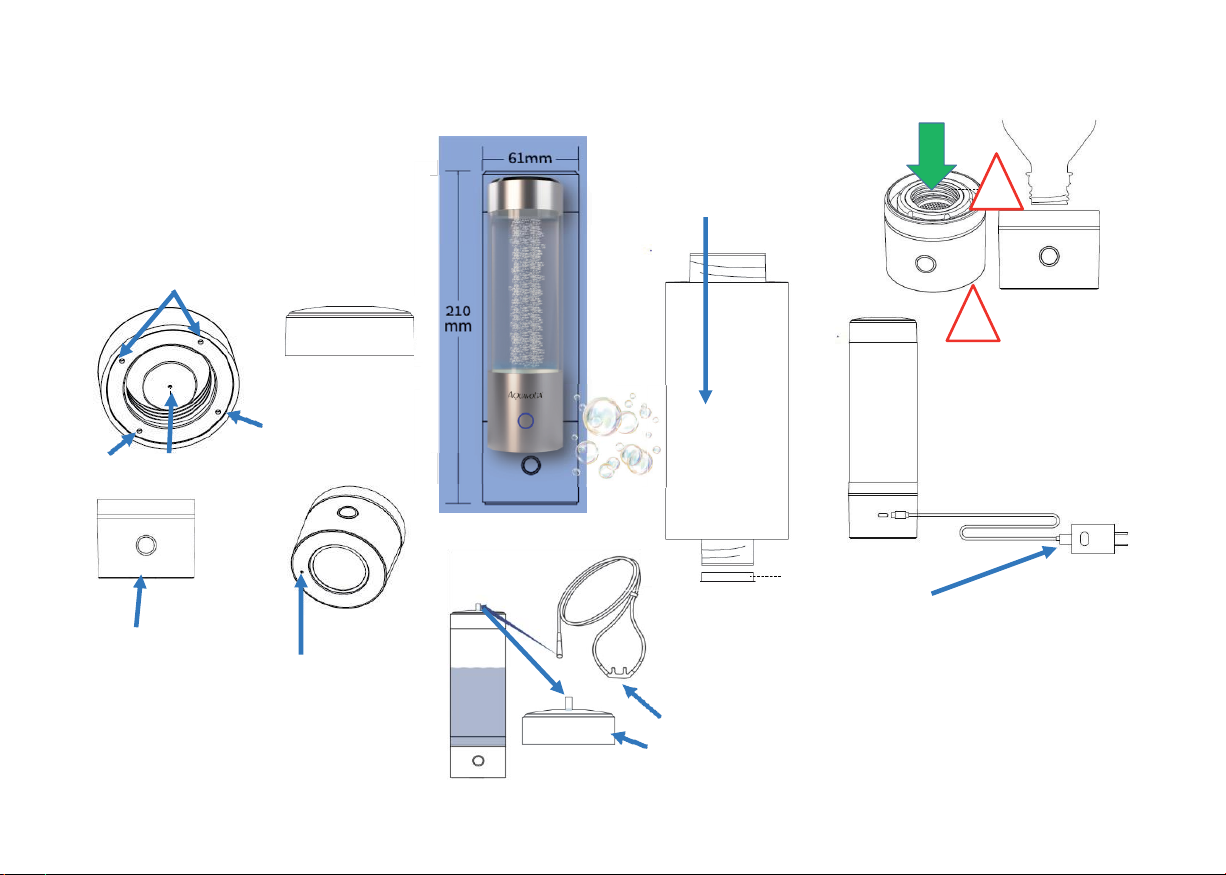
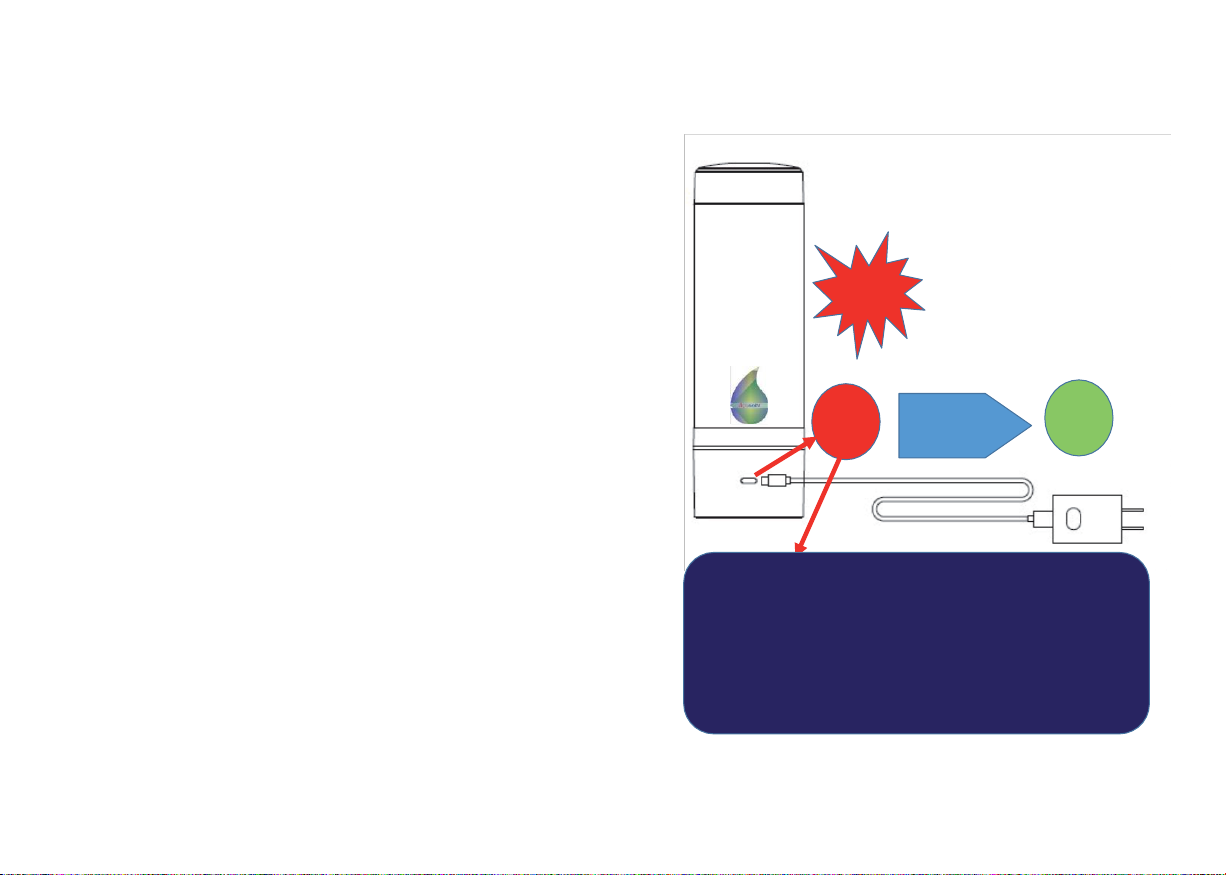
- Device description / scope of
delivery
Bottle thread
for 30
mm bottles
Pressure equalization
holes
in the screw cap
Do not block!
Screw-in
production
container 250 ml
made of Tritan
Screw cap
H
2
-
Generator
Pressure equalization
hole in the
production vessel.
Do not block. Drops
can form
here
Exit.
!
!
Since bottles do
not have
pressure
equalization holes, this
method is always second
choice. Max.
Production
time 10 min.!

USB power
supply with
USB-C
connector
Seal
Nasal cannula
for H2 inhalation
Lid for H2
inhalation
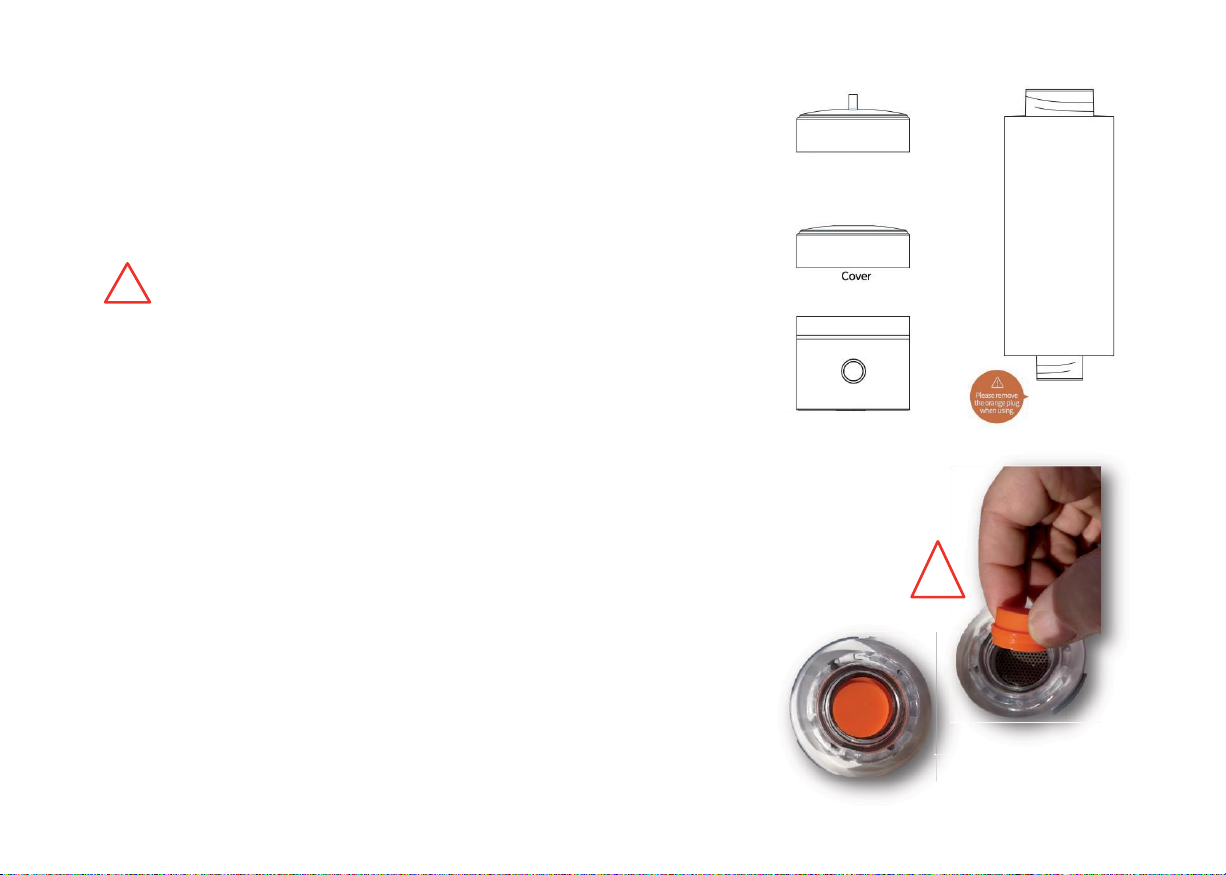
6
- Operation preparation
1.
The device is built from 3 components. The H2 generator. The
production vessel and a lid. The lid is available in 2 versions: A: Lid for
H2 water production. B: Lid for H2
inhalation.
2.
Before commissioning, unscrew the production vessel,
remove the orange silicone plug and keep it.
On a new device, there may still
be residual water under the plug for membrane protection. Please pour this
away and
rinse with
clean
water.
3.
If you do not use the device for more than one week, fill water into the
electrolytic cell to a height of max. 1 cm and close it with the silicone
plug.
Tips
•
Before first use, fill the production vessel with water for at least 30 minutes to
soak the electrolyte membrane. Then
pour the water away.
•
The production vessel should be kept constantly moist.
•
Filled water must never be above 60o C.
•
Never immerse the device in water.
•
Do not start the hydrogen production several times in succession without
opening the lid in between.
B: Lid for H2
inhalation
A: Cover to
generate
H2
water
H2 Generator
Production
vessel
!
!

7
- General instructions for use
►
Only operate the device if you have read and
understood the operating instructions.
►
Before you switch on the unit, the water tank
must be filled with water. Otherwise, the
electrolytic cell will be damaged and the warranty
will be voided.
►
You must not fill water above 60 degrees C.
►
Use the power supply only with 220 volts.
►
Ensure that children do not have access to the
device.
►
Never put the device under water. A damp cloth is
sufficient for cleaning. Do not use chemical cleaning
agents.
►
Never drop the device.
►
Use cold water if possible (below 30° C)
►
Do not expose the device to direct sunlight or
temperatures below 0 or above 50 degrees C.
►
Do not place the device in damp or dirty rooms.
►
Do not place the device outdoors
►
Do not use the power supply if it is damaged
or the cable has been kinked.
►
Do not place heavy or pointed objects on the power
cord.
►
Do not touch any parts connected to the mains
with wet fingers.
►
Only use water of drinking quality if you intend to
drink the water afterwards.
►
You must not use carbonated water (sparkling
water). This could cause the device to explode.
►
Do not open the power supply unit or the base unit
and do not attempt any repairs in the event of a
defect. In the event of a defect, disconnect the
device from the power supply immediately and
notify your dealer.
►
Do not dispose of the device in household waste.
7
- Preparation for operation and charging
1.
Place the device on a dry flat surface.
2.
Insert the USB-C plug of the power adapter and charger into
the socket. The battery must be fully
charged
before first use
.
3.
The LED starts flashing red.
4.
Before the
first operation,
fill the glass container with max. 60o
C
warm water and let it
stand for
at least 2 hours to
moisten the
membrane cell completely.
Finally
,
renew the water again and
shake for about one
minute.
5.
Then you can fill in the water that you want to enrich with
hydrogen and drink. Only enough water should be poured in
so that the water level
does not touch
the
pressure cap, so
that no water penetrates there.
6.
At the end of the charging process, the LED lights up permanently green.
7.
Remove the plug from the power supply and charging unit.
If
possible, the generator should not be operated during
charging due to battery wear.
8.
If the LED starts flashing during operation,
the power supply
and charger
must be
reconnected until the
battery is charged.
9.
If the power adapter is defective or not at hand, you can
also
use
a common USB-C power adapter, for example for
smartphones.
1
2
3-5 hrs.
ok
It is normal if there is some water/moisture in the
production tank
when the unit is delivered,
because the
membrane
between the electrodes should always
be
kept moist.

8
- Production hydrogen water or H
2
inhalation
Important:
the device must be filled with drinking water before you press the start button.
-Press the start button for
3 seconds.
A beep indicates the
start. Blue light turns on and you can recognize the
hydrogen production by the fine bubbles rising. The
production process takes 5 minutes. If you press the start
button again briefly, the 20 min interval operation starts (5
min - 10 min pause - 5 min).
Display purple
.
•
If the light changes to red and flashes,
you
should
recharge
the device. During the charging process,
the LED is
permanently red until a green light
indicates
complete
charging. You should not
produce hydrogen water
during the
charging process.
•
Each production phase ends automatically. This can be
recognized by the LED going out and the bubble formation
being stopped. If you want to stop a running production, press
the start button again for 3 sec.
•
For the 40 min. special operation for "Inhalation", briefly press the start button again
during the "Purple" operating mode. The green display appears for 40 minutes, provided
that the battery
is sufficiently charged.
•
When you now use the nasal cannula, approx. 5 ml of H
2
gas per minute is added to
your breathing air. Recommended for power napping (midday nap) or while working at a
computer screen.
However,
therapeutic applications discussed scientifically to date
require
inhalers of 100 ml/minute or more.
brie
fly
40 min.
3
Sec.
5 min.
briefly
20 min.
10
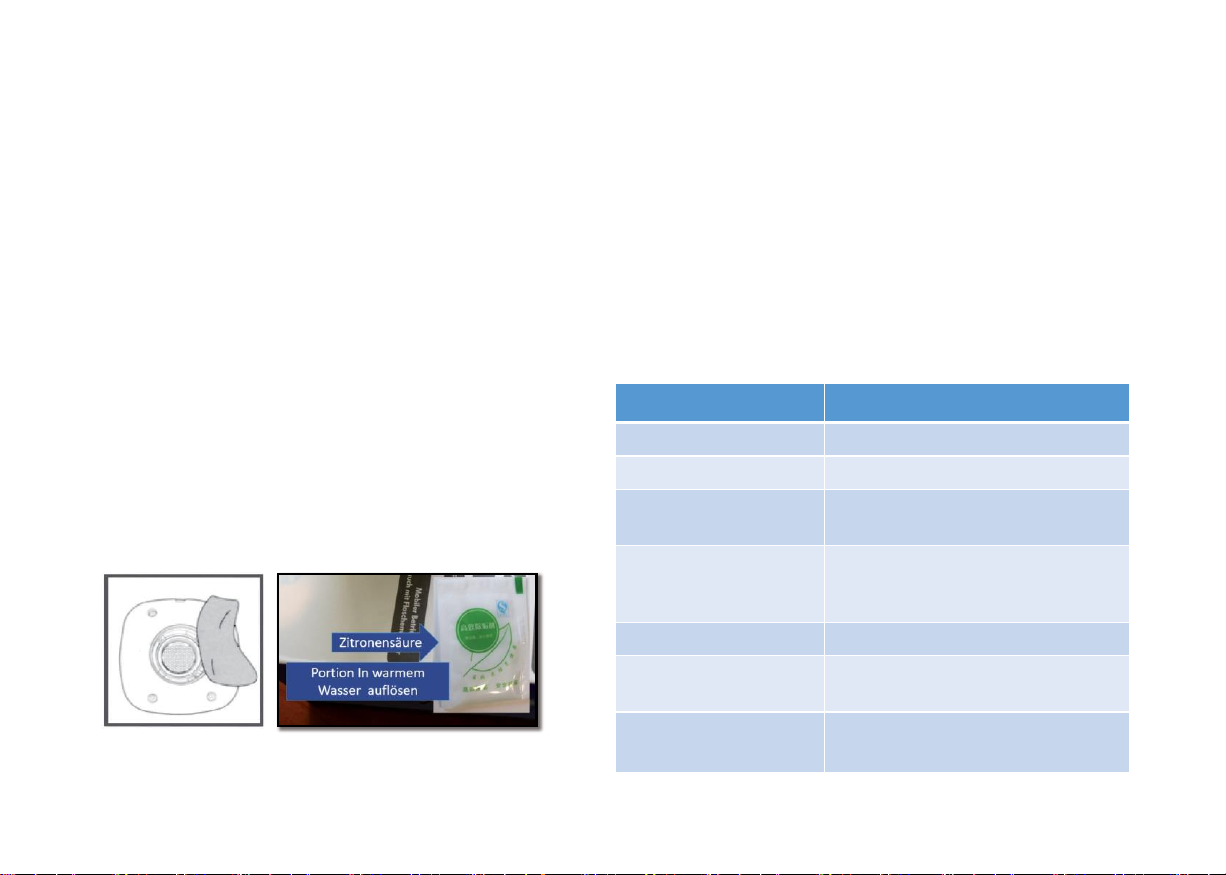
- Cleaning / Equipment hygiene / Technical data
•
The inside of the Tritan container and the grid-shaped
round
minus electrode, which produces the hydrogen,
must be
cleaned with 1 teaspoon of citric acid dissolved in
l
ukewarm
water
if there are visible traces of lime.
•
Close the screw cap and shake vigorously for 30 sec.
Allow the citric acid solution to
react for
1 hour and then
rinse
the container with lid and the
electrode several
times with warm water.
•
This cleaning is also
necessary for
hygienic reasons
at
least every 2 weeks
or if disturbing odor is perceived
in the device. In this case, the water should be approx.
50 - 60 degrees C hot
.
•
Wipe
the exterior of the device with a damp
soft cloth.
•
You can also remove coarse soiling
by
half-filling
the
pressure vessel with warm water
and shaking it
vigorously.... Then pour away the rinsing water.
•
Store the device at room temperature and not in direct
sunlight.
Aquavolta® H
2
- Turbo
Technical data
Weight (empty)
330 g
Voltage/Power
DC 5V / 2A
Power reserve/battery
Approx. 18 applications (5 min.) -
fully charged/ 1500 mAh/7.4 V
Charging time
Operating time
battery
Approx. 90 minutes
Approx. 90 minutes (water-
dependent)
Power supply (USB-C)
100 - 240 V, 50/60 Hz. DC 5V, 2 A
Hydrogen power
Level, water and
time dependent.
Approx. 0.4 ppm/min.
Temperature range
0-40℃

11
- Error Check/Service/Warranty
Your retailer is
responsible for and the contact
person for
warranty services. This applies in particular
to promises that exceed the two-year statutory
warranty. All warranty commitments are therefore listed
on your retailer's proof of purchase (invoice).
Aquavolta® General Sales and Service Center:
Aquacentrum, Inh. Yasin Akgün
Münchener Str. 4 a
D-85748 Garching near Munich
www.aquacentrum.de
•
Waste Electrical Equipment Register: WEEE Reg. No. DE
93599565
•
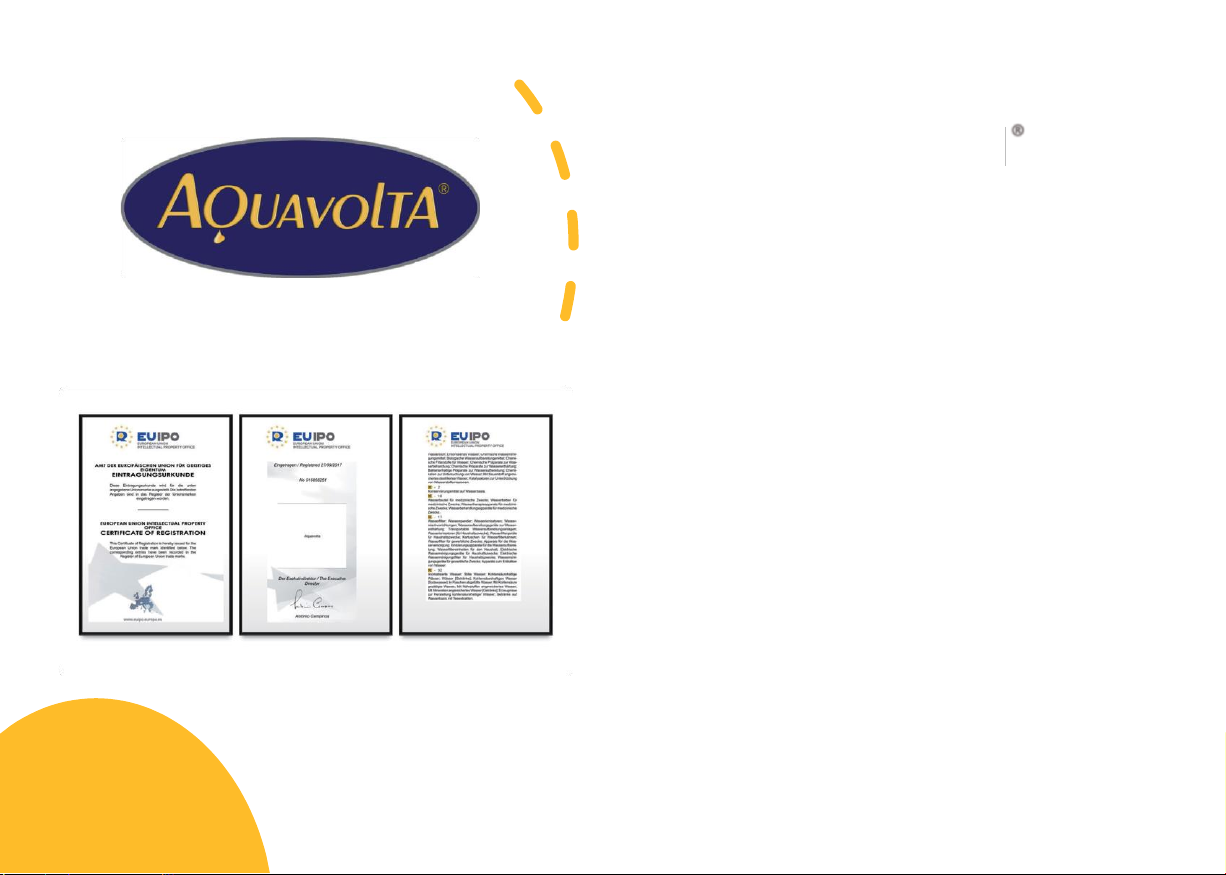
Aquavolta® is a word mark protected by the German
Patent and Trademark Office as well as by the EUIPO
Problem
Cause
testing
Solution
Booster
Battery charged?
Connect power supply unit if
necessary
does not work
Foreign body in the
Production containers and
(no
bubble
development
Pressure vessel?
Unscrew cover and
clean separately
ling)
LED does
not
light
Battery charged?
Connect power supply unit if
necessary
Charging does
not work
Check
plug and
cable
If power supply unit is
defective. Notify dealer.
Leakage
Check the seat
and
condition of the
seals
Adjust seals or
replace
with
replacement seals if
necessary.

Please note the serial number here for
service queries.
You will find this on the
underside of the H2generator.
Table of contents
Other Aquavolta Water Filtration System manuals


Popular Water Filtration System manuals by other brands

JRC
JRC NSVS1154 manual

Beko
Beko DRYPOINT M PLUS DM 08-19 KA-N Instructions for installation and operation

Canature WaterGroup
Canature WaterGroup HT 565BM-75 owner's manual

Hydac
Hydac FluidAqua Mobil FAM 25 Operating and maintenance instructions

Watermark
Watermark Puretec PureMix Z6 user guide

Culligan
Culligan WH-HD200-C Installation and operating instructions


