www.aquorwatersystems.com
1-800-458-1749
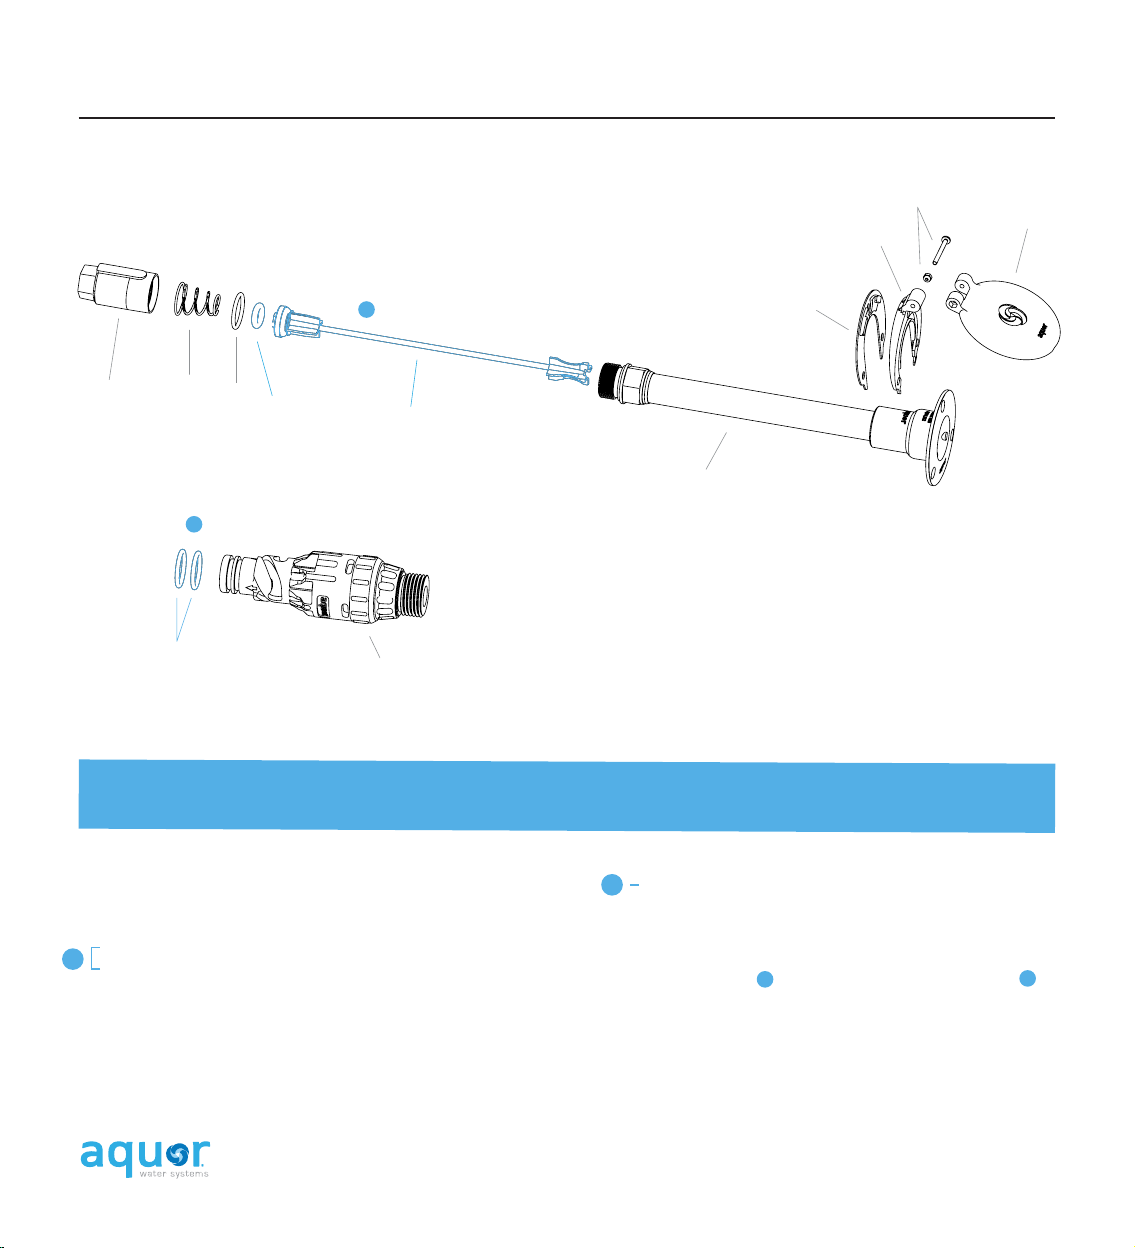
Aquor®Wall Hydrant V1+
ASSE 1019C / ASME A112.18.1 / CSA B125.1 APPROVED
13
Depending on the type of plumbing, it will vary how
the hydrant connects. Common ways of connecting
to copper plumbing include soldering and push-fit
adapters.
Tip: With PEX tubing, we recommend adding an
expansion loop inside the wall if possible. This
allows the entire hydrant and fitting assembly to
be inspected and serviced from the exterior of the
building, if ever needed.
INSTALLATION & OPERATION
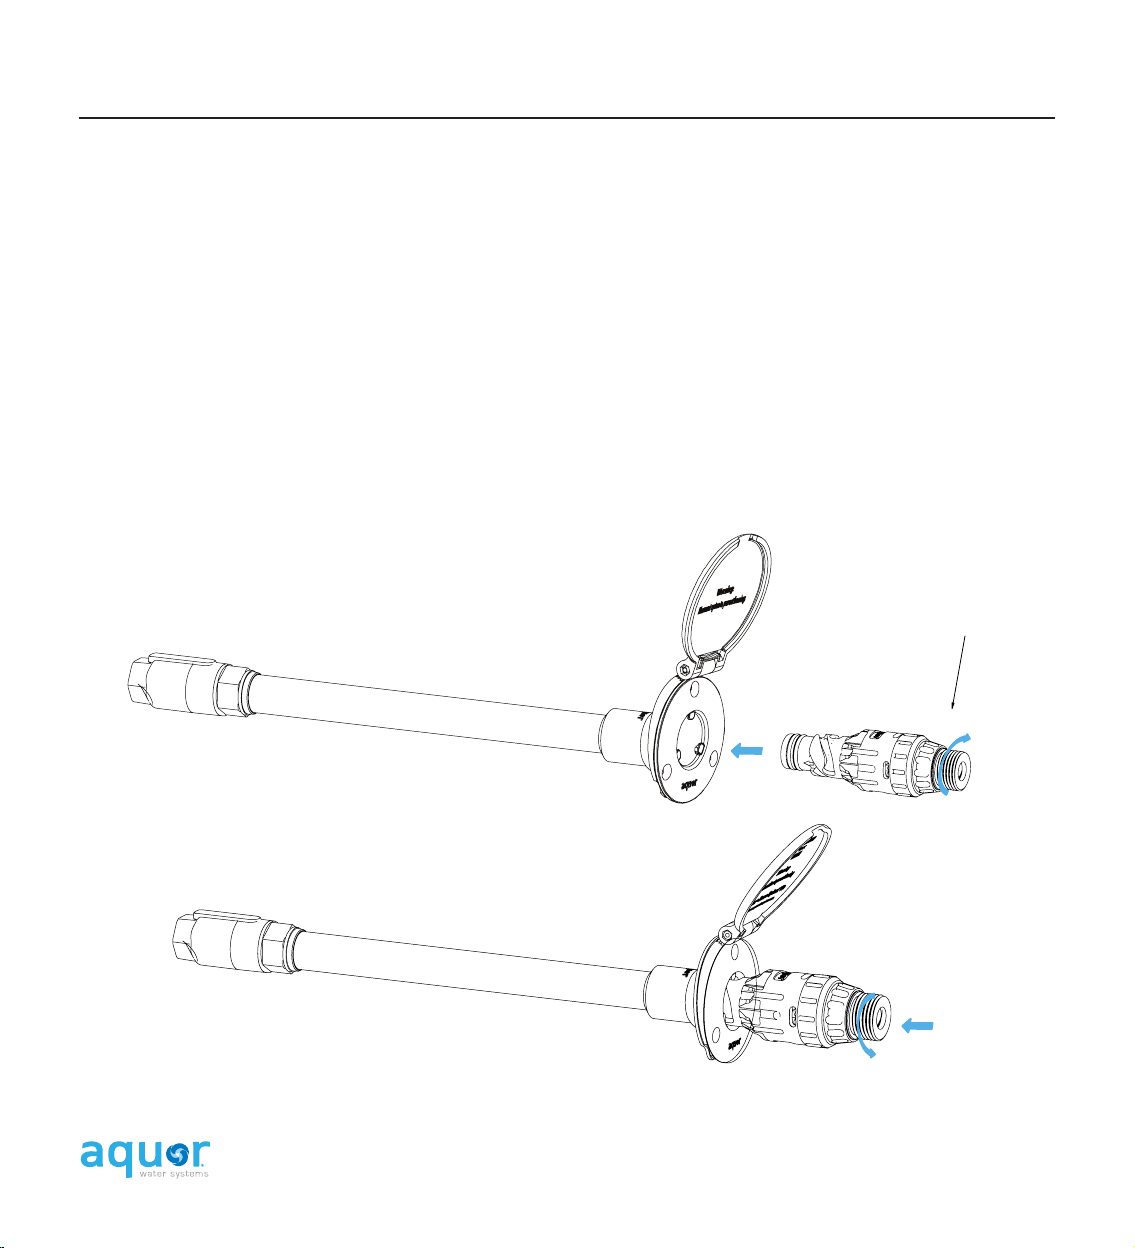
Operating Aquor® wall hydrants is a simple
process. Water starts flowing through the hydrant
when the hose connector is plugged in. Turn o the
hydrant by unplugging the hose connector.
Attach the Aquor®hose connector to any garden
hose. It can stay attached; there is no need to
remove it every use. Before storage, de-pressurize
your hose by squeezing the nozzle on the other end.
Always remove hose during freezing
temperatures.
Operation
Use any accessory as you would with a traditional
bib. Inline ball valves, timers, splitters, vacuum
breakers, and etc. can be attached to the connector.
Common ways of connecting to PEX include crimp
rings, expansion tools, and push-fit adapters.
Before plugging in, attach a garden hose to
the Aquor®hose connector.
Complete the installation by turning on the water
supply.
Aquor®Hose Connector
Ball Valve (optional)
Garden Hose
Some Aquor®hose connectors have a
one-way check valve to prevent water
from spraying when you disconnect.
Tip: With copper plumbing, consider securing the
hydrant's inlet against a stud. This way the hydrant
can be removed from the building's exterior if ever
needed. The hydrant faceplate and body can be
rotated out and re-attached to the inlet.
Use a closed-end, such as a nozzle, on the hose
to create backpressure. Connect to the hydrant
and water should pressurize the hose immediately.
Disconnect and ensure the hydrant drains, then
remains leak-free.
Inspect the hydrant and plumbing connections for
any leaks.