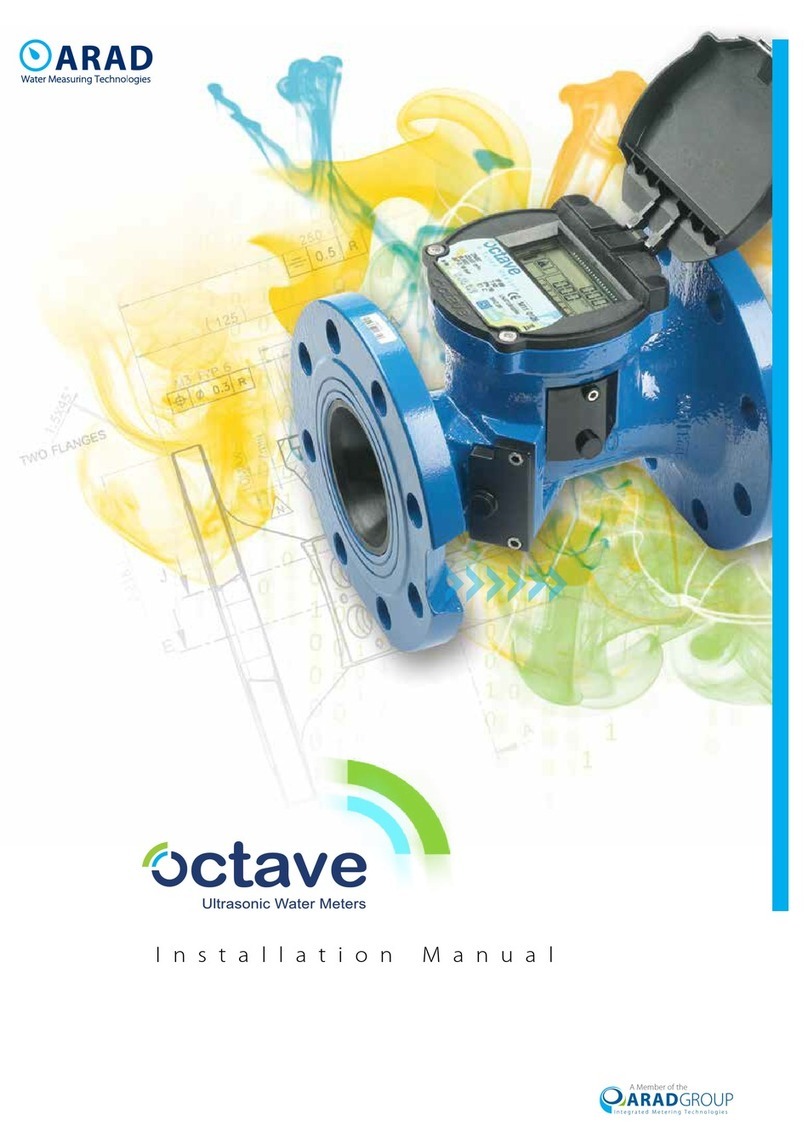
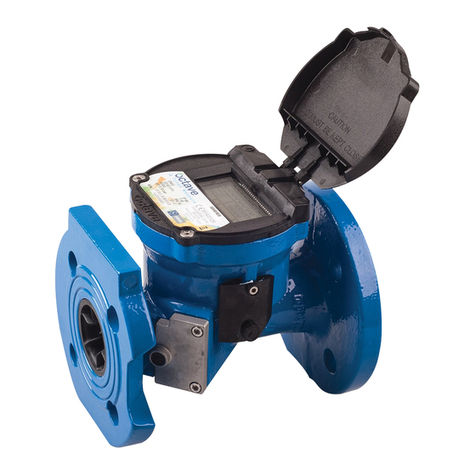
Arad Octave User manual


Contacting Arad Ltd.
You can access the Arad website at http://www.arad.co.il. From this website, you can obtain
information about the company, its products, corporate offices, special events and more.
Information in this document is subject to change without notice and does not represent a
commitment on the part of Arad Ltd. The software described in this document is furnished under
a license agreement or nondisclosure agreement. The software may be used or copied only in
accordance with the terms of the agreement. It is against the law to copy the software on any
medium except as specifically allowed in the license or nondisclosure agreement. No part of this
manual may be reproduced or transmitted in any form or by any means, for any purpose without
the express written permission of Arad Ltd. In no event shall Arad Ltd. be liable for any damages
whatsoever (including, without limitation, damages for loss of business profits, business
interruption, loss of business information or other pecuniary loss) arising out of the use of or
inability to use this product.
Arad Ltd., the Arad Ltd. logos, and all other Arad Ltd. product or service names are registered
trademarks or trademarks of Arad Ltd.
Copyright © 2019 Arad Ltd. All rights reserved.
Corporate Offices
Address Arad Ltd.
Dalia, 1923900
Israel
Telephone +972.4.989.7911 Fax +972.4.989.7960
Address Arad Measuring
Technologies Ltd.
HaMada street,
Yokneam Elite,
2069206
Israel
Telephone +972.4.993.5222 Fax +972.4.993.5227
Email [email protected]
United States and Canada
Address Master Meter Inc.
101 Regency Parkway
Mansfield TX 76063
USA
Telephone 800.765.6518
Toll free
817.842.8000
Main line
Fax 817.842.8100
M11 0126
0./#'V

Sonata Pulse Configuration Guide i
Table of Contents
Chapter 1
Introduction
About this guide . . . . . . . . . . . . . . .1
Version compatibility . . . . . . . . . . . . .2
Conventions in this guide . . . . . . . . . .3
Notices. . . . . . . . . . . . . . . . . .3
Typographical conventions . . . . . . . .3
Terminology . . . . . . . . . . . . . . .3
Chapter 2
Getting Started
Prerequisites . . . . . . . . . . . . . . . .4
Arad Smart Meters installation . . . . . . . .4
Connecting the NFC reader . . . . . . . . .5
Logging in to Arad Smart Meters . . . . . . .6
Chapter 3
Meter Info
Overview . . . . . . . . . . . . . . . . . .8
Meter . . . . . . . . . . . . . . . . . . . .8
Software. . . . . . . . . . . . . . . . . . .8
Pipe Standard . . . . . . . . . . . . . . . .9
Chapter 4
Display Settings
Overview . . . . . . . . . . . . . . . . . 10
Display . . . . . . . . . . . . . . . . . . 10
Temperature. . . . . . . . . . . . . . . . 12
The Octave display . . . . . . . . . . . . 14
Chapter 5
Output Settings
Overview . . . . . . . . . . . . . . . . . 15
No Output . . . . . . . . . . . . . . . . 16
Pulses. . . . . . . . . . . . . . . . . . . 17
Pulse 1 . . . . . . . . . . . . . . . . . 18
Pulse 2 . . . . . . . . . . . . . . . . . 19
Pulses Alarms . . . . . . . . . . . . . 20
4-20 mA . . . . . . . . . . . . . . . . . . 21
4-20 mA & Pulse. . . . . . . . . . . . . . 22
4-20 mA . . . . . . . . . . . . . . . . 22
Pulse . . . . . . . . . . . . . . . . . . 22
Encoder . . . . . . . . . . . . . . . . . . 25
Encoder . . . . . . . . . . . . . . . . 25
Pulse . . . . . . . . . . . . . . . . . . 27
Encoder + Pulse . . . . . . . . . . . . 28
Extended Encoder . . . . . . . . . . . . . 29
CZ Module . . . . . . . . . . . . . . . . 31
Modbus . . . . . . . . . . . . . . . . . . 32
Modbus . . . . . . . . . . . . . . . . 32
Pulse . . . . . . . . . . . . . . . . . . 34
Mbus . . . . . . . . . . . . . . . . . . . 35
Mbus . . . . . . . . . . . . . . . . . . 35
Pulse . . . . . . . . . . . . . . . . . . 37

Sonata Pulse Configuration Guide ii
Chapter 6
Alarm Thresholds
Overview . . . . . . . . . . . . . . . . . 40
Configuration . . . . . . . . . . . . . . . 40
Flow Rate Alarm . . . . . . . . . . . . . . 41
Leakage . . . . . . . . . . . . . . . . . . 41
Pipe Burst . . . . . . . . . . . . . . . . . 42
Reverse Flow . . . . . . . . . . . . . . . 42
Chapter 7
Meter Logs
Overview . . . . . . . . . . . . . . . . . 43
Meter Logs . . . . . . . . . . . . . . . . 43
Configuration . . . . . . . . . . . . . . . 44
Alarms Logs . . . . . . . . . . . . . . . . 45
System . . . . . . . . . . . . . . . . . 45
Flow . . . . . . . . . . . . . . . . . . 45
Chapter 8
Advanced
Overview . . . . . . . . . . . . . . . . . 46
Clock Settings . . . . . . . . . . . . . . . 47
RTC Date Time . . . . . . . . . . . . . 47
Shabbat . . . . . . . . . . . . . . . . 48
LCD Test . . . . . . . . . . . . . . . . . 49
Totalizer Data . . . . . . . . . . . . . . . 50
Volume Totalizer . . . . . . . . . . . . 50
Special Functions . . . . . . . . . . . . . 51
Flow Simulation . . . . . . . . . . . . . . 52
Simulating flow . . . . . . . . . . . . . 52
Application Settings . . . . . . . . . . . . 53
Graph . . . . . . . . . . . . . . . . . 53
Recording . . . . . . . . . . . . . . . 53
Configuration Files . . . . . . . . . . . 55
About . . . . . . . . . . . . . . . . . . . 56
Exit . . . . . . . . . . . . . . . . . . . . 57
Chapter 9
Troubleshooting
Error messages . . . . . . . . . . . . . . 58
Possible issues . . . . . . . . . . . . . . 60
Meter values not updated . . . . . . . . 60
Display and output mismatch . . . . . . 60
Unintended disconnect . . . . . . . . . 60
Chapter 10
RS-232 Connection
Overview . . . . . . . . . . . . . . . . . 61
Removing the tamper-protective shield . . . 62
Connecting the communication module to
the water meter . . . . . . . . . . . . . . 64
Connecting the communication module to
the PC (Windows 7/10) . . . . . . . . . . 65
Arad Smart Meters serial connection
settings . . . . . . . . . . . . . . . . . . 66
Attaching the tamper-free shield . . . . . . 67
Chapter 11
Glossary
Units used in Arad Smart Meters . . . . . . 68

Octave Configuration Guide 1
1 Introduction
About this guide
This guide provides instructions on how to configure the Octave water meter
using the Arad Smart Meters software.
Arad Smart Meters is the software used to configure all Arad’s water meters in
the Arad ultrasonic water product line. The interface is simple, yet
comprehensive; it provides all the options needed to customize Octave
ultrasonic water meter measurements to the exact requirements, including
configuration of the data to output.

Octave Configuration Guide 2
Version compatibility
Configuration abilities are dependent on the match of the meter’s software to
the configuration software. The meter’s version is indicated in the Meter Info
tab’s Software section. The Arad Smart Meters version is indicated in both the
top-left corner of the login page, and in the Advanced options About tab. The
following table provides the information for checking version compatibility.
NOTE: Current Arad Smart Meters versions are backward compatible with
older Octave meter versions up to version 3.16.
Arad Smart Meters version 1.0.0.24 does not support Octave meter version
3.15.
Octave meter version Compatible Arad Smart Meters versions
4.2.16 1.0.0.24
4.02.09 4.0003.57 | 1.0.0.13 | 1.0.0.24
4.01 4.0003.14 | 4.0003.57
4.00 4.0003.14 | 4.0003.40 |4.0003.57
3.17 4.0003.14 | 4.0003.40
3.16 4.0003.14 | 4.0003.40 | 4.0003.57
3.15 4.0003.14 | 4.0003.57

Octave Configuration Guide 3
Conventions in this guide
Notices
IMPORTANT: alerts you to a condition that might cause problems.
NOTE: emphasizes important information.
Typographical conventions
•Bold typeface indicates an interface element or dialog box name.
•>indicates the click sequence, e.g., “Click Advanced > LCD Test
means you tap the Advanced tab then choose LCD Test from the
menu.
•Italics are used to denote file names, file paths and user input.
•Quotes are used for indicating values that can be chosen, usually
options in drop-down menus, for example “Forward”.
Terminology
Forward flow in this document is the equivalent of upstream flow in other
documentation, and reverse flow in this document is the equivalent of
downstream flow or backward flow in other documentation.
Due to the prevalence of PCs with touchscreens, the verb “tap” was chosen to
indicate a physical selection action — the equivalent of a mouse click.

Octave Configuration Guide 4
2 Getting Started
Prerequisites
Make sure before you install the Arad Smart Meters application that you have
the required equipment and that the computer meets the minimum requirements
for using the application:
•PC installed with Windows 7 or later
•Arad Smart Meters application
•NFC reader kit (P/N 70000093)
•Octave Configuration Guide (this guide)
NOTE: There is an option to purchase separately an RS-232 module for
communicating with the meter (P/N 96500819).
See RS-232 Connection for information on setting up this module to work
with Arad Smart Meters.
Arad Smart Meters installation
1. A link for downloading the Arad Smart Meters application will be forwarded
to you by your local distributor. Download the file to the computer you will
use to configure Sonata Pulse water meters.
2. Arad IT personnel will perform the installation of the application by remote.
3. After Arad Smart Meters is installed on the computer, the Arad Smart
Meters shortcut is added to the computer’s desktop.

Octave Configuration Guide 5
Connecting the NFC reader
To set up communication between the Arad Smart Meters application and the
Sonata Pulse water meter, you need to attach the NFC reader.
IMPORTANT: When the NFC reader and the meter are in a connected state,
meter output is disabled. Therefore, initial configuration of the meter should be
completed before the meter is installed.
1. Fasten the NFC reader to the plastic adapter (A) and
clasp the adapter + NFC reader to the Octave display (B).
2. Double-click the Arad Smart Meters shortcut on the desktop to start the
software.
3. Log in. See Logging in to Arad Smart Meters.
IMPORTANT: Before removing the NFC reader from the meter always tap
Disconnect. Otherwise the meter remains in a connected state. When the
meter is in a connected state, meter output is disabled.

Octave Configuration Guide 6
Logging in to Arad Smart Meters
IMPORTANT: The logged in user should be an administrator user with full
permissions to all folders.
1. Connect the USB end of the NFC reader to a PC which has Arad Smart
Meters installed on it. The Link led will be lit (green).
2. Start the Arad Smart Meters application. Do so by double-clicking the Arad
Smart Meters desktop shortcut. Alternatively, find the Arad folder in the
Start menu and tap Arad Smart Meters.
The application opens to the Please Login page.

Octave Configuration Guide 7
3. If this is the first time you are logging in, tap Settings (bottom-right) and in
the Connection tab select the NFC check box.
4. Tap Back to return to the log in page.
5. In the Password box enter the password that was provided to you by Arad
IT personnel when installing the application, and then tap Login.
The application opens.
The left panel provides tabs for reaching the various configuration options.
The tabs are arranged in the logical configuration sequence. The meter is
supplied with configuration defaults, which you may need to change per
your specific setup.
In the following chapters we describe the various configuration options
provided in each of these tabs.

Octave Configuration Guide 8
3 Meter Info
Overview
The Meter Info tab presents the Octave water meter’s ID and version
information. It also presents the pipe standard this meter supports.
Meter
Meter ID - the meter’s unique ID.
HW ID - the meter’s board ID.
Calibration Date - the date the meter was calibrated (table 3).
Software
Version - the meter’s embedded firmware version.
Checksum (0x) - the firmware’s checksum value.
ASIC Version - the version of the application-specific integrated circuit
embedded in the meter’s board.
Compilation Date - the date the meter’s firmware was compiled.

Octave Configuration Guide 9
Pipe Standard
Type - the pipe standard the meter complies with. The options are either ISO or
AWWA.

Octave Configuration Guide 10
4 Display Settings
Overview
The Display Settings tab is for configuring the Octave meter’s display (LCD).
Here you set the meter’s display units, number of digits following the decimal
point and mode, and also determine whether the meter’s display settings are
applied to the output stream of the connected module.
Display
Units - set the meter’s flow rate measurement units. The available
flow rate-volume unit combinations are:
•Flow Rate: m3/h - Volume: m3
•Flow Rate: Lt / s - Volume: m3
•Flow Rate: GPM - Volume: GAL
•Flow Rate: GPM - Volume: Ft3
•Flow Rate: GPM - Volume: A.F.
•Flow Rate: IGPM - Volume: IGAL
•Flow Rate: GPM - Volume: A.I.

Octave Configuration Guide 11
•Flow Rate: BPM - Volume: Barrel
•Flow Rate: Lt / m - Volume: m3
Refer to the Glossary for unfamiliar abbreviations.
Update Modules Units - select this check box to synchronize the units of the
meter’s connected module output to the units set for the meter’s display.
Volume resolution (Digits) - set the display resolution, which is the number of
digits after the decimal point. The maximum value is “5”.
In the following examples we show you how 789 liters (cubic meters) are
presented per the value you enter in this field.
Entering “0” uses a 1000 liter resolution, therefore as 789 is less than 1000
liters nothing will be shown in the display:
Entering “1” uses a 100 liter resolution, and as there are 7 hundreds in 789
liters, “7” will be shown in the display:
Entering “2” uses a 10 liter resolution, and as there are 78 tens in 789 liters,
“78” will be shown in the display:

Octave Configuration Guide 12
Entering “3” uses a 1 liter resolution, and as there are 789 liters, “789” will be
shown in the display:
Display x 1000 - not yet implemented. (Keep the default of “Disable”.)
Mode - select the meter’s accumulated volume display mode:
•“Forward Volume” – the display presents only the measure of forward
flow (FWD).
•“Net Signed Volume” – the display presents the result of the forward
flow minus reverse flow calculation, indicating reverse flow with a
minus symbol, e.g. -789.
•“Alternate (Forward/Reverse volume)” – the display alternates
between presenting forward flow (FWD) and reverse flow (BCK).
•“Net Unsigned Volume” – the display presents the result of the
forward flow minus reverse flow calculation using zero as a reference
point.
Reverse flow will be indicated by counting backwards from zero. For
example 1 liter of reverse flow will be 0.999 when the Volume
Resolution is set to 3 digits.
Forward flow will count from zero forwards, for example 1 liter of
forward flow will be 0.001 if the Volume Resolution is set to 3 digits.
Alternate Timer (sec) - when the selected mode is “Alternate (Forward/Reverse
volume)”, set the time for displaying each direction’s measurement. The default
value is “2”, i.e. every two seconds the display alternates the flow direction.
Temperature
Mode - determine whether water temperature measurements are presented on
the display or not, and if yes — which temperature scale to use.
•“Off” – no temperature measurement is displayed.
•“Celsius (°C)” – display measured temperature in Celsius degrees
•“Fahrenheit (°F)” – display measured temperature in Fahrenheit
degrees

Octave Configuration Guide 13
NOTE: Tap Save to keep your changes. Tap Revert to return the display
settings to the last saved configuration.
After tapping Save you will be prompted with the following message:
Tap Yes to apply your changes. All data preceding these changes will be purged
from the data logger.
Tap No to continue without applying any changes to the display settings.
If needed, tap Record to create a manual output file per the recording
configuration in Application Settings.

Octave Configuration Guide 14
The Octave display
* Legend of output mode display values:
[Blank] Pulses
4-20 mA 4-20 mA
AMI TYPE: 0 Encoder and Extended Encoder
AMI TYPE: 1 Mbus
AMI TYPE: 2 Modbus
AMI TYPE: 3 CZ Module
Total volume
Flow
rate
Flow
direction
Resolution
No measurement
Various alert
NFC reader
connection Shabbat
mode
conditions Temperature
Output
mode*
Volume’s mode
Pulse resolution
(or serial
connection if
applicable)

Octave Configuration Guide 15
5 Output Settings
Overview
The Output Settings tab is for configuring the output per the target output
module.
This chapter describes the configuration settings per the target output types
and modes as follows:
•No Output
•Pulses
•4-20 mA
•4-20 mA & Pulse (only 4-20 mA, or 4-20 mA & Pulse)
•Encoder (only encoder, only pulses, or encoder + pulse)
•Extended Encoder (only encoder, only pulses, or encoder + pulse)
•CZ Module
•Modbus (only Modbus, or Modbus + pulse)
•Mbus (only Mbus, or Mbus + pulse)
At the bottom of the page for each type of output configuration there are three
controls: Save, Revert and Record.
After you complete output configuration, tap Save to keep your changes. Tap
Revert to return the output settings to the last saved configuration.
And if needed, tap Record to create a manual output file per the recording
configuration in Application Settings.

Octave Configuration Guide 16
No Output
Select when there is no readout device connected to the water meter and no
output is needed; information is read directly from the meter’s display.
This output type may be the default if the meter was ordered with no specific
configuration prerequisites and no attached module. The technician will
configure the meter afterwards per the module assigned to it.
Other manuals for Octave
2
Table of contents
Other Arad Measuring Instrument manuals
Popular Measuring Instrument manuals by other brands
Agilent Technologies
Agilent Technologies U1461A quick start guide
Keysight Technologies
Keysight Technologies N9000B Configuration guide
Dakota Digital
Dakota Digital HLY-5000X manual
AmpliVox
AmpliVox 270 operating manual
Hanna Instruments
Hanna Instruments HI 8819 instruction manual
Oxford Technical Solutions
Oxford Technical Solutions xNAV user manual

oxford diffraction
oxford diffraction Xcalibur Series user manual
Halma
Halma Ocean Optics DH-mini UV-Vis-NIR Installation and operation manual
Ametek Drexelbrook
Ametek Drexelbrook DR2000 quick start
Kestrel
Kestrel 2000 manual
Burkert
Burkert 8222 ELEMENT NEUTRINO operating instructions

levr
levr LH-20S user manual
