araimo UltraCleaner H3 User manual

us.oraimo.com
Scan to Visit Our Website
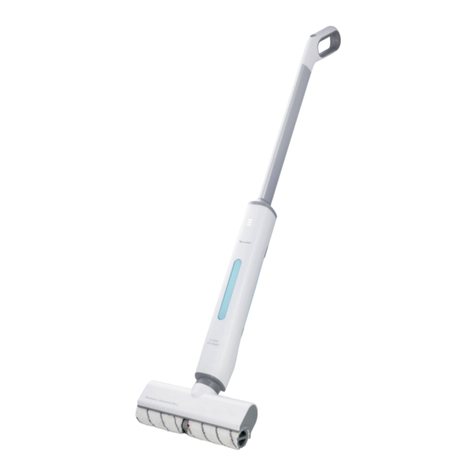
Cordless Handheld Vacuum
OHV-103
UltraCleaner H3

Package Contents
Cordless Handheld Vacuum x 1
Long Crevice Brush x 1
Flexible Hose x 1
2-in-1 Brush (Anti-static Brush and Silicone Brush) x 1
Adapter x 1
HEPA Filter x 2
Cleaning Brush x 1
Welcome Guide x 1
Handle
Flashlight Button
On/Off Button
Light Indicator
Dust Container Release Button
HEPA Filter
Stainless Steel Filter
Dust Container
Suction Nozzle
Battery Release Button
Charging Port
Battery
Flexible Hose
Long Crevice Brush
2-in-1 Brush (Anti-static Brush and Silicone Brush)
Product Overview
1.
2.
3.
4.
5.
6.
7.
8.
9.
10.
11.
12.
13.
14.
15.
1
3
4
7
8
6
5
10
12
11
Handle
Battery
Battery Release Button
Long Crevice BrushFlexible Hose
Charging Port
Flashlight ButtonOn/Off Button
Light Indicator
Stainless Steel Filter
Dust Container
Suction Nozzle
Dust Container Release Button
HEPA Filter
2
9
13
2-in-1 Brush
(Anti-static Brush and Silicone Brush)
1415
EN Welcome guide
DE Willkommensleitfaden
FR Guide de bienvenue
ES Guida di benvenuto
IT Guía de bienvenida
1-7
8-14
15-21
22-29
30-36

Specifications
Size: 400*110*140mm
Material: ABS
Battery: 2200mAh
Suction Power:120W
Charging Time:3-4 hrs
Dust Container Capacity: 500mL
Usage Type: Dry
The vacuum cleaner is disassembled when packing, so you need to assemble each part after
receiving the package.
Crevice and brush tool can be used after the simple operation, while the flexible hose and 2-in-1
Brush need to be installed on the dust container to use.
Quickly assemble the accessories to use.
Using Instruction
The crevice tool is used to clean the dust in the wall corners and other gaps.
The flexible hose is used to clean some areas that hard to reach (under the bed or sofa) or clean
the car.
The 2-in-1 brush is used to clean pet hair on furniture, carpets, stairs and more.
1.
2.
3.
3
21
Button Functions
Charging the Vacuum
Attention
Dust Container Release Button
Press the release button on both sides of the vacuum cleaner to detach the dust container from
the motor.
Power Button
Push the power switch to turn on the vacuum cleaner.
Flashlight Button
Press the button to turn on the flashlight. This button can be used without turning on the vacuum
cleaner.
Battery Release Button
Press this button to detach the battery from the motor for convenient replacing.
1.
2.
3.
4.
Place the vacuum cleaner with the adapter directly.
When charging, the blue LED indicators will flash. It takes 4-5 hours to fully charge the vacuum
cleaner.
When charging is finished, the indicator turns blue and flashes for 10 seconds then turns off.
The indicator turns off means it is fully charged and can be used.
The last blue LED flashes for 10s indicates that the vacuum cleaner needs to be charged.
1.
2.
3.
4.
If the battery temperature is below 0°C, the machine will be turned off to protect the motor and
battery. Do not charge the product and store it at a temperature below 0°C.
To extend battery life, please avoid charging immediately after full discharge, the product needs
to be cooled for a few minutes.
Avoid using the product when the battery surface is hot. Running the machine at a low
temperature helps to extend the working time and service life of the battery.
If you do not use the vacuum cleaner for a long time, remove the battery from the battery
compartment and place it in a cool place.
1.
2.
3.
4.
2 3 41
Blue Flashing
Flashing4.5H
Blue Turn Off

Cleaning and Maintenance
1. Empty the Dust Container
Please fully charge the vacuum cleaner before first use.
The vacuum cleaner can not be used to suck liquid. If the liquid is sucked, the motor will be
damaged, resulting in a short circuit or other problems.
Before using the vacuum cleaner, check whether the Brush head and accessories are clean.
The brush may damage some carpets or floors. When using this product for cleaning, the hard
brush roller may cause some carpets to fluff. If it happens, please do not use the brush head
when vacuuming and consult the carpet manufacturer whether the carpet can be cleaned by the
vacuum cleaner.
5.
6.
7.
8.
2. Clean & Replace the Dust Container Filter
It is recommended to clean the dust container timely after each use and clean stainless steel
filter and HEPA filter regularly. If the dust is heavy, please clean the filter after each use. It is
recommended to clean the filter unit at least once a month if you use it infrequently. Check or
clean the filter unit following the instructions to ensure normal performance. heavy, please clean
the filter after each use. It is recommended to clean the filter unit at least once a month if you use
it infrequently. Check or clean the filter unit following the instructions to ensure normal
performance.
Depart the motor block and the dust container as shown.
Take out the filter unit and rotate the stainless steel filter out, pour out the dust in the stainless
steel filter.
Separately clean the dust container, stainless steel filter and HEPA filter.
-If the dust is few, you can clean the dust container and filter with a damp cloth and ensure the
accessories are dry when reinstalling them.
-If the dust is heavy, it is recommended to clean the dust container and the filter after each use.
Before cleaning, tap two filters to remove excessive dust and debris.
Clean the filter unit with cold water only, please do not use the detergent or wash it in
dishwasher or wash machine.
-Firstly, clean the stainless steel filter. Rinse it under running water until it is clean.
-Then, clean the HEPA filter. Hold the edge of the filter, and rinse the inside and outside of the
filter under running water. Gently squeeze out the dirt from the filter until the water is clean.
Rinse the dust container under the running water until it is cleaned.
Place the filter in a well ventilated and dry environment for at least 24 hours to allow it to dry
thoroughly.
Check that the filter unit is completely dry.
Reinstall the filter unit, put the stainless steel filter back into the filter unit, place it back into the
dust container, and lock the dust container until you hear the "click" sound.
If you use the vacuum cleaner to clean fine dust, the filter unit may need to be cleaned more
frequently.
Do not put any accessories of this product in the dishwasher, wash machine or dry it in a tumble
dryer, oven, microwave or open flame. Please do not use detergents, polishes and air fresheners
to clean.
1.
2
3.
4.
5.
6.
7.
8.
9.
Max
Click
Do not exceed the maximum capacity.
Press dust container release button to detach the dust container from motor block.
Upward tilt the dust container to avoid dust spilling when removing the dust container.
The dust container cannot be opened if no pressing the release button.
Please do not remove the dust container violently.
Remove the filter and pour out the dust as shows.
To prevent dust from blowing, please put the dust container into the dust bag and carefully
empty it.
Carefully remove the dust bag from the dust container and seal the dust bag for routine
handling.
To replace the filter unit, make sure that the dust container and seal are completely dry.
Re-align the filter device to the correct position and put it back into the dust container.
Close the dust container until you hear the "click" sound.
1.
2
3.
4.
5.
6.
7.
8.
9.
10.
Once the dust reaches the "MAX" mark, empty it as soon as possible.

Do not leave appliance when plugged in. Unplug from outlet when not in use and before
servicing.
Do not use outdoors or on wet surfaces.
Do not allow to be used as a toy. Close attention is necessary when used by or near children.
Use only as described in this manual. Use only manufacturer's recommended attachments.
Do not use with damaged cord or plug. If appliance is not working as it should, has been
dropped, damaged, left outdoors, or dropped into water, return it to a service center.
Do not pull or carry by cord, use cord as a handle, close a door on cord, or pull cord around
sharp edges or corners. Do not run appliance over cord. Keep cord away from heated surfaces.
Do not unplug by pulling on cord. To unplug, grasp the plug, not the cord.
Do not handle plug or appliance with wet hands.
Do not put any object into openings. Do not use with any opening blocked; keep free of dust,
lint, hair, and anything that may reduce air flow.
Keep hair, loose clothing, fingers, and all parts of body away from openings and moving parts.
Turn off all controls before unplugging.
Use extra care when cleaning on stairs.
Do not use to pick up flammable or combustible liquids, such as gasoline, or use in areas where
they may be present.
Do not pick up anything that is burning or smoking, such as cigarettes, matches, or hot ashes.
Do not use without dust bag and/or filters in place.
Household and indoor use only.
When using an electrical appliance, basic precautions should always be followed, including the
following:
READ ALL INSTRUCTIONS BEFORE USING (THIS APPLIANCE) WARNING - To reduce the risk of
fire, electric shock, or injury
1.
2
3.
4.
5.
6.
7.
8.
9.
10.
11.
12.
13.
14.
15.
16.
Problem Cause Remedy
Low suction or almost
no suctionl
The product is hot
while using
The product does
not work
The vacuum cleaner
cannot vacuum the
pet hair
Troubleshooting
The product in normal
mode can work up to
25-30 minutes. After the
product is used for a
period of time, the
suction will decrease
with time.
The suction is small at
initial
1.
2.
If the suction becomes
smaller, first check the
product usage time.
Check whether the product
is fully charged.
Check if the filter is dirty.l
1.
2.
3
Power off first, if the dust
container is full, clean it
according to the guide of
emptying the dust container.
Clean the filter according to
the filter cleaning operation
guide.
1.
2.
In the weak suction state, it
may not be able to suck the
hair with adsorption force, It
needs to be charged
according to the charging
guide.
2. Loosen the hair with the
brush before use.
1.
2.
The dust container is
full
The filter screen and
the foam filter element
are blocked
1.
2.
The battery is low
The pet hair is stained
with liquid and solidify
on the sofa
1.
2.
Run out of battery Contact customer service team
in time
Important Safety Instructions

Order ID:
Product Model:
Problem Description:
Customer's Name
Warranty Certificate
us.oraimo.com
Scan to Visit Our Website
Made in China
This product is covered by a guarantee from the date of purchase. The warranty is valid only when
the warranty card is properly completed.
Warranty is limited to the core product. Accessories included in the package are not covered.
Please contact us if you have a question or experience a problem with the prodoct ,we promise we
will give you a satisfied solution within 24 hours
This manual suits for next models
1
Table of contents

