Aramsco Syclone XL User manual

07-02353A F588 1 Aramsco
Owner’s Manual
SycloneXL PortableDehumidifier
Model F588 #00000
Aramsco™ A Safeguard Industrial Company
1480 Grandview Ave., Paulsboro, NJ 08066
The Aramsco Syclone XL dehumidifier reduces humidity in enclosed environments by removing
water vapor from the air. The Syclone XL is rugged, durable and highly portable, making it ideal
for water damage restoration, structural drying, construction, and other applications requiring
temporary, high-performance dehumidification.
SAV E TH ESE I NS TRU CTI ONS
SAFETY INSTRUCTIONS
WARNING! Do not alter or modify your dehumidifier
in any way. Use only replacement parts authorized
by Aramsco Modifications or use of unapproved
parts could create a hazard and will void your
warranty. Contact your authorized distributor for
assistance.
WARNING! Electric shock hazard, rotating fan, hot
surface hazards. Unplug unit before opening cover
for cleaning or servicing. Unit must be grounded.
Inspect the power cord before use. If cord is
damaged, do not use. Always grasp the plug (not
the cord) to unplug.
Insert three-prong plug on power cord into a
matching electrically grounded outlet. Do not use
adapter. Never cut off third prong. Do not use an
extension cord.
The unit must be operated on a 120V/60Hz circuit
protected by a Ground Fault Circuit Interrupter
(GFCI) device.
Keep motor and wiring dry.
Do not attempt to repair the unit. For Authorized
Service Centers, contact Aramsco.
CONTROLS AND OPERATING
INSTRUCTIONS
Set unit upright
NOTICE: Transporting or storing the unit in a
horizontal position is not recommended. When the
machine is placed in a horizontal position, the oil
from the compressor can flow into the refrigerant
coils and reduce the ability of the dehumidifier to
function and possibly damage the unit. If the unit
has been placed in a horizontal position, set it
upright and let it stand for at least 30 minutes before
turning it on.
Positioning a Dehumidifier
For best results, operate your dehumidifier in an
enclosed area. Close all doors and windows to maximize
the unit’s water removal efficiency. Place your
dehumidifier away from obstructions, and keep it away
from anything that could obstruct airflow into and out of
the unit.
Extend handle
Release the handle by rotating red locking lever
outward, then lift handle up into place. Rotate red lever
back into locked position to secure handle in operating
position.
WARNING
CORRECT PLUG REMOVAL
Grasp IEC plug and pull straight out
IMPORTANT: Damage to IEC receptacle or
dehumidifier resulting from improper removal
of the power cord is not covered by warranty.
The IEC power cord is a wear item and is not
covered by warranty.

07-02353A F588 2 Aramsco
NOTICE: Do not use the extended handle to lift the unit
off the ground horizontally. Do not use the extended
handle as an attachment point to strap the unit in a
vehicle for transport. These uses will place undue strain
on the handle attachment points in the housing.
Set up drain hose
This unit automatically pumps out water on a
regular basis. This dehumidifier is equipped
with a quick-connect fitting for attachment to
the provided drain hose located in the tray on
top of the unit. Unwrap the entire hose and
place the open end in a sink, drain, bucket or
outdoors –anywhere that water can drain out
safely. If you use a bucket or other container
for water collection, check it regularly to
prevent overflows.
NOTICE: Uncoil and straighten the entire
drain hose. Do not leave any part of the hose
coiled on the unit and do not place the end of
the hose higher than 20 ft. (6 m) above the
bottom of the unit. Also check for kinks or
other obstructions that might restrict the flow
of water. A kink or blockage will cause the unit
to turn off produce an ER9 error code. See
“Error Messages,” below, for more
information.
Plug in electrical cord
The dehumidifier should be plugged into a
GFCI-protected 115 volt outlet rated for at
least 15amps. Remove the cord from the
storage tray and uncoil it. Always plug the
cord firmly into the unit first, and then plug the
other end into a suitable electrical outlet.
Startup display and normal display modes
When unit is first plugged into AC power, the
control panel display will briefly cycle through
a series of readouts. This is part of the unit’s
self-diagnosis procedure and no user
intervention is required.
Turn the unit on
The control panel has a display and a
touchpad with four keys. Press the ON/OFF to
turn the unit on. The unit will now go through a
compressor delay countdown (up to 60
seconds in duration) and a self-diagnostics
process, then switch to normal display
mode.
Drain hose
quick-connect.
Power cord
socket.
Model serial
number label
FRONT
REAR
Humid air inlet.
Air filter.
Power cord and
drain hose
storage.
Process (dehumidified)
air outlet.
Front panel. Remove to
access the pump and
coils for cleaning. See
Fig. B.
Integrated handle. Use the
red lever to lock handle
upright for use or down
for loading or storage.
Control panel.
FIG A: PARTS IDENTIFICATION
Drain hose quick-
connect.

07-02353A F588 3 Aramsco
UNIT ON XXXX HRS
INLET XXX°C / INLET 00%
The first line of the display shows the total number of
hours the unit has been in operation. This value may be
reset to zero to track job hours (see “Job Hours Reset”
below). The second line of the display alternates
between inlet temperature and inlet humidity.
User Settings Menu
A number of settings may be changed by the user.
System information can also be displayed. These items
are accessed by pressing DISPLAY MENU. Each press
of the key will display the next parameter. When you
reach the parameter you wish to adjust, press MENU
SELECTION to increase the value. Press DISPLAY
MENU again to accept the setting and re-start the
display cycle.
Note that only menu items followed by a greater-than
symbol ( >) may be adjusted.
Error messages
If the onboard diagnostics discover a problem, the unit
will display an error message. See “Error Messages,”
below, for an explanation of each message.
Control Panel Guide
ON/OFF. Press to turn the unit on or off. When the
machine is turned on, the display normally reads
PLEASE WAIT COMP. DELAY and performs a numeral
countdown from a maximum of 60 seconds to 0. This
delay allows time for refrigerant pressures to equalize for
easier starting. Once the unit completes the compressor
delay, the display shows UNIT ON XXXX HRS and
cycles between INLET XXX°C and INLET XX%. NOTE:
If no compressor delay countdown is displayed, a delay
is not necessary and the machine will begin operation
immediately.
DISPLAY MENU. Press to cycle through the display of
additional dehumidifier conditions and User Settings. To
return to the main menu, press the ON/OFF key once.
MENU SELECTION. Press to change the values of the
"User Defined" settings. The MENU SELECTION key
acts as the UP key for adjusting the setpoint for
Humidistat mode operation. See User Settings Menu
(next page) for details.
PURGE. Press to empty water from the condensate
pump reservoir. The display will read PUMP PURGING
with a numeral countdown. NOTE: During normal
operation, the pump purges automatically.
NOTE: During normal operation, the pump purges auto-
matically.
ON/OFF
Press and release to turn unit on
or off.
DISPLAY MENU
Press to select next item in menu.
Menu item will show in display.
MENU SELECTION /
UP KEY
Press to toggle or select values in
menu displayed.
PURGE PUMP
Press and release to start purge.
Display will count down seconds
remaining until purge is complete.
CONTROL PANEL
ON/OFF
DISPLAY
DISPLAY
MENU
MENU
SELECTION /
UP KEY
PURGE PUMP

07-02353A F588 4 Aramsco
USER SETTINGS
Only menu items followed by a greater-than symbol (>) can be adjusted. If no keys are selected for 5 minutes on screens: INLET
OUTLET, GRAIN DPR, the display will return to normal display mode. In all the other menu items, the display with return to the normal
display mode after 20 seconds. Items without the symbol (>) are for information only and cannot be changed or reset. See System
Messages below for additional display messages.
Press DISPLAY
MENU to proceed to
the next menu item. ↓
Press ˃MENU SELECTION to change the setting. →
□
1. JOB HRS RESET >
PWR INTERRUPT X
˃
1. JOB HR RESET 0
PWR INTERRUPT 0
Press ˃to reset to 0.
2. INLET OUTLET
100ʹ80% 115ʹ30%
For information only.
3. GRAIN DPR
XX GPP
Unit displays GPP if set to Fahrenheit or g/kg if set to Celsius. To change this setting, see menu item 9.
4. FILTER CHECKED
XXX HRS >
˃
4. FILTER CHECKED
0 HRS
Press ˃to clear filter hours.
5. COIL CLEANED
XXX HRS >
˃
5. COIL CLEANED
0 HRS
Press ˃to clear coil hours.
6. HUMIDISTAT
MODE OFF >
˃
6. HUMIDISTAT
MODE ON >
Press ˃to turn ON or OFF. For maximum dehumidification, make sure
HUMIDISTAT is OFF.
7. HUMIDISTAT
SETPOINT XX% >
˃
Press ˃to cycle through 40%–90% at 5% increments (default is 50%).
8. LANGUAGE
ENGLISH >
˃
8. IDIOMA
ESPANOL >
˃
8. SPRACHE
DEUTSCH >
˃
8. LANGUE
FRANCAIS >
Press ˃to change
language options.
9. TEMP UNITS
ʹF >
˃
9. TEMP UNITS
ʹC >
Press ˃to change to °F or °C.
10. COIL TEMP
XXʹ
For information only.
11. COMP CURRENT
XX.X A
For information only.
12. FIRMWARE
3.XX FXXX-XXX
For information only.
13. LIFE HOURS
XXXX HRS
(Returns to
top menu item.)
The following section available only on wireless-equipped units.
14. SENSOR ID
XXXXXXXXX
(Returns to
top menu item.)
AT THE END OF THE JOB
To reduce the possibility of drips when moving the
unit, follow these additional steps to ensure that all
water is removed from the unit.
NOTICE: The unit will complete the defrost cycle even if
the unit is turned off but still plugged in. If the unit is
unplugged during the defrost cycle, excessive water may
accumulate in the unit and may drip out when you move
the unit.

07-02353A F588 5 Aramsco
NOTICE: To ensure the condensate tank empties
completely while purging, make sure the unit is placed
upright on a horizontal surface.
1. Do not turn unit off or move it until it has returned
to normal operating mode. To confirm unit status,
review the control panel. The control panel will
display one of the following messages:
Defrost in progress:
---
DEFROST XX
Display mode when unit is in defrost mode. XX indicates
the seconds remaining on the defrost cycle.
Shutdown sequence:
WAIT FOR
DEFROST XX
Display mode when unit in defrost and unit is powered
down (shut off by user). Unit will complete the defrost
cycle to remove any built-up ice then purge the pump.
XX indicates the seconds remaining on the defrost cycle.
Drying sequence:
WAIT FOR
UNIT DRYING XXX
Display mode when unit not in defrost and unit is
powered down (shut off by user). Unit will complete the 5
minute drying cycle then purge the pump. XX indicates
the seconds remaining on the drying cycle.
Normal display:
UNIT ON XXXX HRS
INLET XXX°F / XX%
The unit has completed a defrost and drying cycle and
has returned to normal mode. You may now proceed to
step 2.
2. Gently rock the machine to ensure any water
remaining on interior surfaces falls into the sump
area.
3. Press the PURGE key. When the purge cycle is
complete, turn the unit off.
4. Remove the external drain hose, drain it carefully,
coil it and return it to the storage tray on the top of
the unit.
TRANSPORTATION AND STORAGE
IMPORTANT: Before moving, transporting or
storing, purge unit and stow hose and power cord as
described in the “At the End of the Job” section
above.
NOTICE: Handle the unit carefully. Do not drop, throw or
place the unit where it could fall. Rough treatment can
damage the dehumidifier and may create a hazardous
condition or void the warranty.
Do not expose the control panel to moisture, snow
or rain.
Store and transport securely to avoid any damaging
impact to internal parts.
Secure during transport to prevent sliding and
possible injury to vehicle occupants.
Do not transport or store the unit on its front, sides or
back. This will help to prevent any remaining moisture
from escaping from the unit or flowing into areas
outside the sump.
MAINTENANCE SCHEDULE
WARNING! ELECTRIC SHOCK HAZARD. Unplug the
dehumidifier before performing any maintenance.
WARNING: Risk of dust and contaminants exposure.
Use of respirator mask and gloves is recommended. If
unit has been exposed to potentially dangerous
contaminants, clean thoroughly and sanitize before
reuse.
NOTICE: The unit is fitted with sensitive electronic
sensors. Protect the sensors and their lead wires from
damage and do not expose them to water or cleaning
solution.
The following tools and supplies are needed to
complete the maintenance procedures described in
this manual:
Philips screwdriver
T-20 Torx bit and driver
10 mm nutdriver or socket and ratchet
Cleaning cloths
HEPA vacuum cleaner with soft brush nozzle and
crevice tool.
Recommended
Cordless drill, small knife, small-jaw pliers, coil
cleaning solution, rotomolded housing cleaning
solution.
Before each use
Inspect the electrical cord for damage. Look for
fraying, cuts, etc. Replace the cord if you find any
damage.
Inspect filter. Replace if accumulation of dust and
debris is visible.
NOTICE: Replace used filters only with a new Aramsco
filter part no. F579 (24-pack). Other filter types do not
provide adequate filtration or airflow. Each filter is
individually wrapped to protect filtration effectiveness.
Remove the wrapper before installing the filter into the
dehumidifier.
Monthly
Inspect coils. Clean when dust accumulation is visible.
In normal use, dust can accumulate and can restrict
airflow, reducing performance and causing the unit to
overheat.
To maintain appearance, wipe interior and exterior
surfaces with a damp cloth. For deep cleaning and a

07-02353A F588 6 Aramsco
lasting, protective shine, use an automotive interior
treatment product.
As Needed
Clean Pump Check Valve and Basin. If the unit
displays the message “ER9 PUMP BLOCKED PUMP
& HOSE”, the pump check valve and pump basin may
need to be cleaned. This requires removal of the front
housing.
Clean coils. Inspect the horizontal evaporator (cold)
coil with the front cover removed. If excessive dust and
debris is present, vacuum thoroughly and/or clean with
alkaline (non-acidic) coil cleaner.
SYSTEM MESSAGES
The Control Panel will display the following messages
based on system performance and environmental
conditions. User action, if any is required, is indicated
in the third column.
C O N T R O L P A N E L
M E S S A G E
E X P L A N A T I O N
U S E R A C T I O N
INITIALIZING
Unit is powering up.
None
FIRMWARE VERSION
XXX
Indicates control board firmware version number.
None
FXXX-XXX
Model number.
None
OFF
Unit has finished powering up and is operating.
None
PLEASE WAIT
COMP. DELAY XX
60s delay before compressor turns on. Allows system
pressure to equalize.
None
UNIT ON XXXX HRS
INLET XXX°F / XX%
First line: indicates total operating hours.
Second line: Toggles between inlet temperature and
inlet RH every 2 seconds.
None
HUMIDISTAT
INLET XXX°F / XX%
First line: indicates unit is in humidistat mode
Second line: Toggles between inlet temperature and
inlet RH every 2 seconds.
None
LOW TEMP
INLET XXX°F / XX%
Unit shuts off if inlet temp below 45°F/7°C. Turns back
on when inlet reaches 50°F/10°C.
None
---
PUMP PURGING XX
Displays when the Pump Purge button is pressed.
Shows time remaining in seconds.
None
HI TEMP CYCLE
REMAINING XX MIN
Unit overload limit reached. Cool-down initiated.
None
---
DEFROST XXXX
Unit is defrosting, with countdown in seconds.
None
WAIT FOR
DEFROST XXX
Unit turned off when coil is cold or already in a defrost
cycle. Proceeds to finish cycle or initiate one to clear the
coils of ice before storage.
None
WAIT FOR
UNIT DRYING XXX
Occurs when unit is turned off and coil is not frozen.
Clears the coils of water before storage.
None
CHECK FILTER >
OFF
Prompt to check filter.
Check filter. Press the > key
to reset
CLEAN COILS >
OFF
Prompt to clean coils and interior.
Clean coils. Press the > key
to reset
Remove the 4
screws from front
housing, and slide
off to access coils
and pump for
service.
Fig. B: Disassembly for Cleaning

07-02353A F588 7 Aramsco
ERROR MESSAGES
If the control system detects an error, it will produce an error (“ER”) message. If this occurs, first unplug the unit and then
plug it back in. This will usually reset the electronics, and the unit will begin operating normally. If the error message
reappears, refer to the explanations and solutions shown below. If these solutions do not fix the problem, contact your
local authorized service center.
C O N T R O L P A N E L
M E S S A G E
E X P L A N A T I O N A N D S O L U T I O N
ER4 DEFROST
SENSOR CONNECT
–or–
ER4 OUTLET
SENSOR CONNECT
Temp sensor is open, missing, or shorted. Check that temp sensors are installed
correctly on control panel. If error persists, contact service.
ER5 SENSOR
CONNECTION ON BD
Inlet Temp/RH sensor is open, missing, or shorted. Check that inlet temp/RH sensor is
installed correctly on control panel and inlet shroud. If error persists, contact service.
ER6 CONTACT
SERVICE CENTER
Current sensor failure. If error persists, contact service.
ER7 INVALID
MODEL SETTING
Incorrect or unsupported DIP switch settings. Contact Aramsco service department for
correct DIP switch settings.
ER8 BUTTON STUCK
ALL BUTTONS
Key is stuck or has been held down too long. Contact service.
ER9 PUMP BLOCKED
PUMP & HOSE
Check for obstructions. Is the hose kinked under the unit or pinched shut by a wheel?
Check the pump for blockage and service if needed.

07-02353A F588 8 Aramsco
TROUBLESHOOTING
F A U L T
C A U S E
S O L U T I O N
Water drips out
when moving unit
Unit was unplugged before
purging was complete.
Purge unit before moving. See “At the End of the Job.”
Unit does not
operate
Unit not switched on.
No power to machine.
Switch unit on.
Plug in unit; check power cord connection at wall outlet and at
base of unit.
Unit operating,
but room not dry
Not enough time to dry.
Poor air movement in room.
Excessive moist air infiltration.
Make sure “Humidistat” is OFF.
Allow more time for drying.
Increase air movement with air movers.
Seal off area to reduce infiltration.
Unit collects too
little water
Room air is dry.
Room temperature is too low.
Filter is full.
Coils are clogged.
Make sure “Humidistat” is OFF.
Confirm humidity level with hygrometer.
Increase room temperature.
Check filter. Replace as necessary.
Check coils. Clean as necessary.
If the problem you are experiencing is not listed here, call your local distributor or contact
our Service Department at 800-932-3030 for further assistance.
SPECIFICATIONS
Model
Syclone XL (F588)
Water removal AHAM
(80°F/60% RH)
125 pts. | 59.2 L / day
Process air (max.)
320 CFM
Dimensions
(H × D × W)
32.1 × 19.8 × 20.0 in.
81.5 × 50.3 × 50.8 cm
Weight
106 lbs. | 48.1 kg
Amps
8.0A
Volts
120V
Frequency
60Hz
Power
960W
Operating range
33°F–100°F | 1°C–38°C
Noise level (avg.)
53 dB
Drain hose
40 ft. | 12.2 m
Power cord
25 ft. | 7.6 m
Construction
Rotomolded shell
Safety
ETL certified CSA 22.2 no. 92
Specifications are subject to change without notice. Some values
may be approximate.
*Fan speed varies automatically for optimized performance.
Order replacement air filters from your local distributor.
Part no. F579 (24 pack).
FOR PARTS AND SERVICE CALL YOUR LOCAL
ARAMSCO DISTRIBUTOR OR ARAMSCO AT 800 767
6933. Aramsco™ A Safeguard Industrial Company.
1480 Grandview Ave., Paulsboro, NJ 08066
For proper disposal, this unit should be taken to a
recycler licensed to process refrigeration equipment.
WARNING: This product and other substances
that may become airborne from its use contain
chemicals, including lead and phthalates, known to the
State of California to cause cancer, birth defects, or
other reproductive harm. For more information, go to
P65Warnings.ca.gov
`

07-02353A F588 9 Aramsco
Manualdelpropietario
DeshumidificadorportátilSycloneXL
Modelo F588
Aramsco™ A Safeguard Industrial Company
1480 Grandview Ave., Paulsboro, NJ 08066
El deshumidificador Aramsco Syclone XL reduce la humedad en ambientes cerrados al eliminar
el vapor de agua del aire. El Syclone XL es robusto, durable y altamente portátil y es ideal para
la restauración tras daños por agua, el secado estructural, la construcción y otras aplicaciones
que requieran una deshumidificación temporaria de alto rendimiento.
CO NSE RVE E STA S INS TR U CCI ON ES
INSTRUCCIONES DE SEGURIDAD
¡ADVERTENCIA! No altere ni modifique su
deshumidificador de ninguna forma. Use solo piezas
de repuesto autorizadas por Aramsco Las
modificaciones o el uso de piezas no aprobadas
podrían crear un peligro y anularán su garantía.
Comuníquese con su distribuidor autorizado para
obtener asistencia.
¡ADVERTENCIA! Peligro de descarga eléctrica,
ventilador rotativo, peligros de superficie caliente.
Desenchufe la unidad antes de abrir la cubierta para
limpiar o reparar. La unidad debe estar puesta a
tierra.
Inspeccione el cable de alimentación antes de usar.
Si el cable está dañado, no lo use. Siempre
sostenga el enchufe (no el cable) para desenchufar.
Inserte el enchufe de tres patas en un tomacorriente
correspondiente con puesta a tierra. No use un
adaptador. Nunca corte la tercera pata. No use un
cable de extensión.
La unidad debe utilizarse en un circuito de
115 V/60 Hz protegido por un dispositivo de
interruptor de circuito de pérdida a tierra (GFCI).
Mantenga seco el motor y la cablería.
No intente reparar la unidad. Para conocer la
ubicación de un centro de servicio autorizado,
comuníquese con Aramsco.
CONTROLES E INSTRUCCIONES DE
OPERACIÓN
Coloque la unidad en posición vertical
AVISO: No se recomienda transportar o almacenar la
unidad en posición horizontal. Si la máquina se
coloca en posición horizontal, el aceite del
compresor puede fluir hasta las bobinas del
refrigerante y reducir la posibilidad de que el
deshumidificador funcione y puede dañar la unidad.
Si la unidad se ha colocado en posición horizontal,
colóquela en posición vertical y déjela quieta al
menos 30 minutos antes de encenderla.
Dónde colocar el deshumidificador
Para obtener mejores resultados, opere su
deshumidificador en un área cerrada. Cierre todas las
puertas y ventanas para maximizar la eficiencia de
eliminación de agua de la unidad. Coloque el
deshumidificador lejos de obstrucciones y manténgalo
alejado de cualquier objeto que pueda obstruir el flujo de
aire hacia y desde la unidad.
ADVERTENCIA
EXTRACCIÓN CORRECTA DEL
ENCHUFE
Sostenga el enchufe macho IEC y tire
directamente hacia afuera
IMPORTANTE: El daño al receptáculo IEC o el
deshumidificador resultante de la extracción
incorrecta del cable no está cubierta por la
garantía. El cable IEC es un elemento de desgaste
y no está cubierto por la garantía.

07-02353A F588 10 Aramsco
Extienda el mango
Desbloquee el mango girando la palanca roja de
bloqueo hacia afuera y luego levante el mango hasta
que esté en su lugar. Gire la palanca roja hasta la
posición de bloqueo para que el mango quede fijo en la
posición de funcionamiento.
AVISO: No use el mango extendido para levantar la
unidad del suelo de forma horizontal. No use el mango
extendido como punto de sujeción para sujetar la unidad
a un vehículo para su transporte. Estos usos aplicarán
una tensión indebida a los puntos de sujeción del mango
en la carcasa.
Instale la manguera de drenaje
Esta unidad bombea automáticamente el agua hacia
afuera de forma uniforme. Este deshumidificador está
equipado con un accesorio de conexión rápida para su
conexión a la manguera de drenaje provista ubicado en
la bandeja sobre la unidad. Desenrolle la manguera
completamente y coloque el extremo abierto en un
lavabo, drenaje, cubo o en el exterior: en cualquier
lugar donde el agua pueda drenarse de forma
segura. Si usa un cubo u otro contenedor para la
recolección de agua, compruébelo constantemente
para evitar derrames.
AVISO: Desenrolle y enderece toda la manguera
de drenaje. No deje ninguna parte de la manguera
enrollada en la unidad y no coloque el extremo de
la manguera a más de 20 pies (6 m) por encima de
la parte inferior de la unidad. Compruebe también
que no haya acodaduras u otras obstrucciones que
puedan limitar el flujo de agua. Una acodadura o un
bloqueo causarán que la unidad se apague y
genere un código de error ER9. Consulte los
“Mensajes de error” para obtener más información.
Enchufe el cable eléctrico
El deshumidificador se debe enchufar en un
tomacorriente de 120 voltios protegido por un GFCI
con una clasificación de al menos 15amperios.
Quite el cable de la bandeja de almacenamiento y
desenróllelo. Siempre enchufe bien el cable en la
unidad primero y luego enchufe el otro extremo en
un tomacorriente adecuado.
Pantalla de arranque y modos de pantalla
normal
Cuando la unidad se enchufe por primera vez en un
tomacorriente de CA, la pantalla del panel de
control mostrará brevemente una serie de lecturas
de salida. Esto es parte del procedimiento de
autodiagnóstico y el usuario no tiene que llevar a
cabo ninguna acción.
Enchufe del cable de
alimentación.
Etiqueta con el número
de serie del modelo.
FRENTE
PARTE
POSTERIOR
Entrada de aire
húmedo. Filtro de
aire.
Lugar de
almacenamiento del
cable de alimentación
y la manguera de
drenaje.
Salida de aire
(deshumidificado) tras
el proceso.
Panel delantero.
Extráigalo para acceder
a la bomba y a las
bobinas para su
limpieza. Vea la Fig. B.
Mango integrado. Use la palanca
roja para bloquear el mango en
posición vertical para usar o
abajo para cargar o almacenar.
Panel de control.
FIG. A: IDENTIFICACIÓN DE PIEZAS
Conexión rápida de la
manguera de drenaje.

07-02353A F588 11 Aramsco
Encienda la unidad
El panel de control tiene una pantalla y un panel táctil
con cuatro teclas. Presione el botón ON/OFF
(ENCENDIDO/ APAGADO) para encender la unidad. La
unidad comenzará una cuenta regresiva de retardo del
compresor (hasta 60 segundos de duración) y un
proceso de autodiagnóstico y luego pasará al modo de
pantalla normal.
ENCENDIDO/APAGADO
Presione y suelte para encender o
apagar la unidad.
MENÚ EN PANTALLA
Presione para seleccionar el
siguiente elemento en el menú.
El elemento del menú aparecerá
en la pantalla.
SELECCIÓN EN EL
MENÚ/TECLA HACIA
ARRIBA
Presione para alternar o
seleccionar valores en el menú
exhibido.
BOMBA DE PURGA
Presione y suelte para comenzar
la purga. La pantalla mostrará
una cuenta regresiva con los
segundos que faltan para que se
complete la purga
PRENDIDO XXXX HR
ENTRADA XXX°C / 00%
La primera línea de la pantalla muestra la cantidad total
de horas que la unidad ha estado en funcionamiento.
Este valor se puede reiniciar a cero para realizar un
seguimiento de las horas de trabajo (vea “Reinicio de
horas de trabajo” más abajo). En la segunda línea de la
pantalla se alterna la temperatura de entrada y la
humedad de entrada.
Menú de ajustes del usuario
El usuario puede hacer varios ajustes. También se
puede mostrar información del sistema. Se puede
acceder a estos elementos presionando el DISPLAY
MENU (MENÚ EN PANTALLA). Cada vez que presione
la tecla se mostrará el parámetro que siga. Cuando
llegue al parámetro que desee ajustar, presione MENU
SELECTION (SELECCIÓN EN EL MENÚ) para
aumentar el valor. Presione DISPLAY MENU
nuevamente para aceptar el ajuste y reiniciar el ciclo de
la pantalla.
Tenga en cuenta que solo se pueden ajustar los
elementos del menú que estén seguidos por el símbolo
mayor que ( >).
Mensajes de error
Si el diagnóstico integrado descubre un problema, la
unidad mostrará un mensaje de error. Vea “Mensajes de
error” para leer una explicación de cada mensaje.
Guía del panel de controlON/OFF: presione
esta tecla para encender o apagar la unidad. Cuando se
enciende la máquina, la pantalla normalmente muestra
el mensaje PLEASE WAIT COMP. DELAY (ESPERE A
RETRASO DEL COMPRESOR) y realiza una cuenta
regresiva desde un máximo de 60 segundos hasta 0.
Este retraso da tiempo para que las presiones del
refrigerante se equiparen para que haya un arranque
más sencillo. Una vez que la unidad complete el retraso
del compresor, la pantalla mostrará el mensaje
UNIT ON XX HRS (UNIDAD ENCENDIDA XX HORAS)
y alterna entre INLET XX°F (ENTRADA XX °F) e
INLET XX% (ENTRADA XX %). NOTA: Si no aparece la
cuenta regresiva de retraso del compresor, no se
necesita un retraso y la máquina comenzará a funcionar
de inmediato.
DISPLAY MENU: presione esta tecla para alternar entre
la exhibición de condiciones adicionales del
deshumidificador y los ajustes del usuario. Para regresar
al menú principal, presione la tecla ON/OFF una vez.
MENU SELECTION: presione esta tecla para cambiar
los valores de los ajustes "definidos por el usuario". La
tecla MENU SELECTION funciona como tecla hacia
ARRIBA para configurar el punto de ajuste para el
funcionamiento en modo Humidistat. Vea el Menú de
ajustes de usuario (página siguiente) para obtener más
información. PURGE: presione esta tecla para vaciar el
agua del depósito de la bomba de condensado. La
pantalla mostrará el mensaje PUMP PURGING (LA
BOMBA ESTÁ PURGANDO) con una cuenta regresiva.
NOTA: Durante el funcionamiento normal, la bomba
purga el agua automáticamente.
PANEL DE CONTROL
ENCENDIDO/
APAGADO
PANTALLA
MENÚ EN
PANTALLA
SELECCIÓN EN EL
MENÚ/TECLA HACIA
ARRIBA
BOMBA DE
PURGA

07-02353A F588 12 Aramsco
AJUSTES DE USUARIO
Solo se pueden ajustar los elementos del menú que estén seguidos de un símbolo de «mayor que» (>). Si no se selecciona ninguna tecla en las
siguientes pantallas en un lapso de 5 minutos: INLET OUTLET (ENTRADA SALIDA), DPR GRAIN (GRANO DE DPR), la pantalla volverá al modo de
visualización normal. En todos los demás elementos de menú, la pantalla regresará al modo de visualización normal después de 20 segundos. Los
elementos que no tienen el símbolo (>) son únicamente para información y no se pueden cambiar ni restablecer. Consulte los mensajes del sistema a
continuación para ver los mensajes de pantalla adicionales.
Presione MOSTRAR
MENÚ para pasar a la
siguiente opción del
menú. ↓
Presione > SELECCIÓN DEL MENÚ para cambiar el ajuste. →
1. HRS REINICIAR>
FALLA DE LUZ X
>
1. H DE TRABAJO 0
FALLA DE LUZ 0
Presione > para restablecer a 0.
2. ENTRADA SALIDA
100ʹ80% 115ʹ30%
Sólo para información.
3. ENTRADA-SALIDA
XX.X g/kg
4. FILTRO VERIF
XXX HR >
>
4. FILTRO VERIF
0 HRS
Presione > para borrar las horas de limpieza del filtro.
5. LIMPIAR BOBINA
XXX HRS >
>
5. LIMPIAR BOBINA
0 HRS
Presione > para borrar las horas de limpieza de la bobina.
6. HIGROSTATO
MODO APAGADO>
>
6. HIGROSTATO
MODO PRENDIDO>
Presione > para poner en ON u OFF (ENCENDER o APAGAR). Para una deshumidificación
máxima, vele por que HUMIDISTAT esté apagado.
7. CONSIGNA
HIGROSTATO XX%>
>
Presione > para alternar entre el 40% y el 90% en incrementos de 5% (el valor predeterminado es de 50%).
8. IDIOMA
ESPANOL >
>
8. SPRACHE
DEUTSCH >
>
8. LANGUE
FRANCAIS >
>
8. LANGUAGE
ENGLISH >
Presione > para cambiar las
opciones de idioma.
9. TEMPERATURA
ʹC >
>
9. TEMPERATURA
ʹF >
Presione > para cambiar a °F o °C.
10. TEMP BOBINA
XXʹ
Sólo para información.
11. CORR COMPRS
XX.X A
Sólo para información.
12. FIRMWARE
3.XX FXXX-XXX
Sólo para información.
13. TOTAL DE HRS
XXXX HR
(Regresa al
elemento del menú
superior).
La siguiente sección está disponible sólo en las unidades equipadas con sistema inalámbrico.
14. SENSOR ID
XXXXXXXXX
(Regresa al
elemento del menú
superior).

07-02353A F588 13 Aramsco
AL FINAL DE TRABAJO
Para reducir la posibilidad de goteo al mover la
unidad, siga estos pasos adicionales para velar por
la extracción de toda el agua de la unidad.
AVISO: La unidad completará el ciclo de
descongelamiento incluso si está apagada, pero aún
enchufada. Si la unidad se desenchufa durante el ciclo
de descongelamiento, puede acumularse una cantidad
excesiva de agua en la unidad y puede gotear al mover
la unidad.
AVISO: Para que el tanque de condensado esté vaciado
por completo tras la purga, vele por colocar la unidad en
posición vertical sobre una superficie horizontal.
1. No apague ni mueva la unidad hasta que regrese
al modo normal de funcionamiento. Para corroborar
el estado de la unidad, examine el panel de control.
El panel de control mostrará uno de los mensajes
siguientes:
Descongelamiento en marcha:
---
DESCONGELE XXXX
Es el modo de la pantalla si la unidad está en el modo
de descongelamiento. XX indica los segundos restantes
del ciclo de descongelamiento.
Secuencia de apagado:
ESPERE A QUE SE
DESCONGELE XXX
Es el modo de la pantalla si la unidad está en el modo
de descongelamiento y está apagada (por el usuario).
La unidad completará el ciclo de descongelamiento para
eliminar la acumulación de hielo y luego purgará la
bomba. XX indica los segundos restantes del ciclo de
descongelamiento.
Secuencia de secado:
ESPERE A QUE SE
SECADO XXX
Es el modo de la pantalla si la unidad no está en el
modo de descongelamiento y está apagada (por el
usuario). La unidad completará el ciclo de secado de 5
minutos y luego purgará la bomba. XX indica los
segundos restantes del ciclo de secado.
Pantalla normal:
PRENDIDO XXXX HR
ENTRADA XXX°C / XX%
La unidad ha completado un ciclo de descongelamiento
y secado y ha regresado al modo normal. Ahora puede
avanzar al paso 2.
2. Agite suavemente la máquina para velar por que
el agua que quede en las superficies interiores caiga
al área del sumidero.
3. Presione la tecla PURGE (PURGAR). Cuando
finalice el ciclo de purga, apague la unidad.
4. Retire la manguera de drenaje externo, vacíela
con cuidado, enróllela y vuelva a colocarla en la
bandeja de almacenamiento en la parte superior de
la unidad.
TRANSPORTE Y ALMACENAMIENTO
IMPORTANTE: Antes de mover, transportar o
almacenar la unidad, púrguela y almacene la
manguera y el cable de alimentación tal como se
describe en la sección “Al finalizar el trabajo” más
arriba.
AVISO: Maneje la unidad con cuidado. No permita que
la unidad se caiga, no la arroje y no la coloque en un
lugar donde podría caerse. El tratamiento brusco podría
dañar el deshumidificador y puede propiciar una
situación peligrosa o anular la garantía.
No exponga el panel de control a la humedad, la
nieve o la lluvia.
Almacene y transporte de forma segura para evitar
impactos dañinos en las partes internas.
Sujete durante su transporte para prevenir su
deslizamiento y posibles lesiones a los ocupantes
del vehículo.
No almacene ni transporte la unidad apoyada sobre
el frente, los lados o la parte posterior. Esto ayudará
a prevenir que la humedad que quede salga de la
unidad o llegue a áreas fuera del sumidero.
PLAN DE MANTENIMIENTO
¡ADVERTENCIA! PELIGRO DE DESCARGA
ELÉCTRICA. Desenchufe el deshumidificador antes de
realizar tareas de mantenimiento.
ADVERTENCIA: Riesgo de exposición al polvo y a
contaminantes. Se recomienda el uso de una máscara y
guantes. Si la unidad ha estado expuesta a
contaminantes potencialmente peligrosos, limpie bien y
desinfecte antes de volver a utilizar.
AVISO: La unidad está equipada con sensores
electrónicos sensibles. Proteja los sensores y los hilos
conductores contra daños y no los exponga al agua ni a
una solución limpiadora.
Se necesitan las siguientes herramientas e insumos
para completar los procedimientos de
mantenimiento que se describen en este manual:
Destornillador Philips
Broca T-20 Torx
Llave para tuercas o llave de cubo y trinquete
(10 mm)
Paños de limpieza
Aspiradora HEPA con una boquilla con cepillo blando
y herramienta para cavidades.

07-02353A F588 14 Aramsco
Recomendado
Taladro inalámbrico, cuchillo pequeño, pinzas de
punta pequeña, solución limpiadora de bobinas,
solución limpiadora de carcasas rotomoldeadas.
Antes de cada uso
Inspeccione el cable eléctrico para detectar daños:
busque raeduras, cortes, etc. Reemplace el cable si
detecta algún daño.
Inspeccione el filtro: reemplácelo si observa que hay
acumulación de polvo y suciedad.
AVISO: Reemplace los filtros usados con un filtro nuevo
Aramsco, número de pieza F579 (paquete de 24). Otros
tipos de filtros no proporcionan filtración o flujo de aire
adecuados. Cada filtro se envuelve individualmente para
conservar la eficiencia de la filtración. Quite la envoltura
antes de instalar el filtro en el deshumidificador.
Mensual
Inspeccione las bobinas: limpie si observa que hay
acumulación de polvo. Con un uso normal, el polvo
puede acumularse y puede restringir el flujo de aire, lo
cual disminuye el rendimiento y provoca el
recalentamiento de la unidad.
Para mantener el aspecto: limpie la superficie interior y
exterior con un paño húmedo. Para una limpieza
profunda y un brillo duradero y de protección, use un
tratamiento automotriz en el interior.
Según sea necesario
Limpie la válvula de retención de la bomba y el
recipiente: si la unidad muestra el mensaje “ER9
BOMBA TAPADA BOMBA&MANGUERA,” debe limpiar
la válvula de retención de la bomba y el recipiente de la
bomba. Esto exige la extracción de la carcasa del frente.
Limpie las bobinas: inspeccione la bobina evaporadora
horizontal (frío) sin la cubierta del frente. Si observa una
cantidad excesiva de polvo y suciedad, aspire bien o
limpie con un limpiador la alcalino (no ácido) para
bobinas.
MENSAJES DEL SISTEMA
El panel de control mostrará los mensajes siguientes de
acuerdo con el rendimiento del sistema y las
condiciones ambientales. Si se necesita alguna acción
por parte del usuario, se indicará en la tercera columna.
Retire los 4
tornillos de la
carcasa delantera,
y deslice hacia
afuera para
acceder a las
bobinas ya la
bomba para hacer
el mantenimiento.
Fig. B: Desensamble para la limpieza

07-02353A F588 15 Aramsco
MENSAJE DEL PANEL DE
CONTROL
EXPLICACIÓN
ACCIÓN DEL USUARIO
INICIALIZAR
La unidad se está encendiendo.
Ninguna
VERSION FIRMWARE
XXX
Indica el número de versión del firmware del tablero de
control.
Ninguna
FXXX-XXX
Número de modelo.
Ninguna
APAGADO
La unidad ha completado el encendido y está
funcionando.
Ninguna
POR FAVOR ESPERE
RETAR COMPRS XX
Retraso de 60 segundos antes que se encienda el
compresor. Permite que se equipare la presión del
sistema.
Ninguna
PRENDIDO XXXX HR
ENTRADA XXX °C / XX%
Primera línea: indica las horas totales de
funcionamiento.
Segunda línea: alterna entre la temperatura de entrada
y la humedad relativa de entrada cada 2 segundos.
Ninguna
HIGROSTATO
ENTRADA XXX °C /
HUMISTATO
ENTRADA XX %
Primera línea: indica que la unidad está en el modo
Humidistat.
Segunda línea: alterna entre la temperatura de entrada
y la humedad relativa de entrada cada 2 segundos.
Ninguna
BAJA TEMP
ENTRADA XXX °C / XX%
La unidad se apaga si la temperatura de entrada es
inferior a 45 °F/7 °C. Se vuelve a encender cuando la
temperatura de entrada llega a 50 °F/10 °C.
Ninguna
---
PURGA DE AQUA XX
La purga de la bomba tiene una cuenta regresiva en
segundos. Presione la tecla nuevamente para
detenerla.
Ninguna
CICLO ALTA TEMP.
MIN RESTANTES XX
Se alcanzó el límite de sobrecarga de la unidad. Se
inició el enfriamiento
Ninguna
---
DESCONGELE XXXX
La unidad se está descongelando, y hay una cuenta
regresiva en segundos.
Ninguna
ESPERE A QUE SE
DESCONGELE XXX
La unidad se apaga cuando la bobina está fría o ya está
en el ciclo de descongelamiento. Avanza al ciclo final o
inicia un ciclo para eliminar el hielo de las bobinas antes
de almacenar la unidad.
Ninguna
ESPERE A QUE SE
SECADO XXX
Ocurre cuando la unidad se apaga y la bobina no está
congelada. Elimina el agua de las bobinas antes de
almacenar la unidad.
Ninguna
VERIFICA FILTRO >
APAGADO
Indicación para verifica el filtro.
Verifica el filtro. Presione la
tecla > para reiniciar
LIMPIAR BOBINA
APAGADO
Indicación para limpiar las bobinas y el interior.
Limpie las bobinas. Presione
la tecla > para reiniciar

07-02353A F588 16 Aramsco
MENSAJES DE ERROR
Si el sistema de control detecta un error, mostrará un mensaje de error (“ER”). Si esto sucede, primero desenchufe la
unidad y luego vuelva a enchufarla. Esto habitualmente reiniciará los componentes electrónicos, y la unidad volverá a
funcionar como siempre. Si el mensaje de error vuelve a aparecer, consulte las explicaciones y soluciones que se
muestran a continuación. Si estas soluciones no resuelven el problema, comuníquese con su centro de servicio
autorizado local.
MENSAJE DEL PANEL DE
CONTROL
EXPLICACIÓN Y SOLUCIÓN
ER4 CONEXION
SENSOR DESCONG
or
ER4 CONEXION
SENSOR SALIDA
El sensor de temperatura está abierto, no está o hay un cortocircuito. Verifique que los
sensores de temperatura están instalados correctamente en el panel de control. Si el
error continúa, comuníquese con el servicio técnico.
ER5 CONEXION
SENSOR TABLERO
El sensor de temperatura/humedad relativa de entrada está abierto, no está o hay un
cortocircuito. Verifique que el sensor de temperatura/humedad relativa de entrada esté
instalado correctamente en el panel de control y la cubierta de entrada. Si el error
continúa, comuníquese con el servicio técnico.
ER6 CONTACTAR
CENTRO DE SERV
Falla del sensor de corriente. Si el error continúa, comuníquese con el servicio técnico.
ER7 INVAL
AJUSTE
Ajuste incorrecto o no admitido del interruptor DIP. Comuníquese con el servicio de
atención al usuario de Aramsco para conocer el ajuste correcto del interruptor DIP.
ER8 BOTON
ATORADO
Se ha atascado una tecla o se ha mantenido presionada por demasiado tiempo.
Comuníquese con el servicio técnico.
ER9 BOMBA TAPADA
BOMBA&MANGUERA
Compruebe que no haya obstrucciones ¿La manguera está acodada debajo de la
unidad o aplastada por una rueda? Verifique que no haya bloqueos en la bomba y
repare de ser necesario.

07-02353A F588 17 Aramsco
RESOLUCIÓN DE PROBLEMAS
FALLA
CAUSA
SOLUCIÓN
Gotea agua al
mover la unidad
La unidad se desenchufó
antes de completar la purga.
Purgue la unidad antes de moverla. Vea “Al final del trabajo”.
La unidad no
funciona.
Unidad no encendida.
La unidad no está enchufada.
Encienda la unidad.
Enchufe la unidad; compruebe la conexión del cable de
alimentación en el tomacorriente y en la base de la unidad.
La unidad
funciona, pero la
sala no está seca
No se asignó un tiempo
suficiente para secar.
Movimiento de aire deficiente
en la sala.
Entrada de aire
excesivamente húmedo.
Verifique que “Humidistat” esté apagado.
Asigne más tiempo al secado.
Aumente el movimiento de aire con ventiladores.
Cierre la sala para reducir el ingreso de aire.
La unidad recoge
muy poca agua
El aire de la sala es seco.
La temperatura de la sala es
demasiado baja.
El filtro está lleno.
Las bobinas están obstruidas.
Verifique que “Humidistat” esté apagado.
Confirme el nivel de humedad con un higrómetro.
Aumente la temperatura de la sala.
Examine el filtro. Reemplácelo de ser necesario.
Examine las bobinas. Límpielas de ser necesario.
Si el problema que experimenta no figura en esta lista, llame a su distribuidor local o comuníquese con
nuestro Servicio de Atención al Cliente al 800-932-3030 para obtener asistencia.
ESPECIFICACIONES TÉCNICAS
Modelo
Syclone XL (F588)
Extracción de agua AHAM
(80 °F/60 % de humedad
relativa)
125 pintas | 59,2 l/día
Dimensiones
(altura × ancho ×
profundidad)
32,1 × 19,8 × 20,0 in.
81,5 × 50,3 × 50,8 cm
Peso
106 lbs. | 48,1 kg
Amperios
8,0 A
Voltios
120 V
Frecuencia
60 Hz
Potencia
960 W
Intervalo de funcionamiento
33 °F–100 °F | 1 °C–38 °C
Aire tratado (máx.)
320 pies cúbicos por minuto
Nivel sonoro (promedio)
53 dB
Manguera de drenaje
40 pies | 12,2 m
Cable de alimentación
25 pies | 7,6 m
Construcción
Carcasa rotomoldeada
Seguridad
Certificación ETL CSA 22.2 n.º 92
Las especificaciones técnicas pueden cambiar sin previo aviso.
Algunos valores pueden ser aproximados.
*La velocidad del ventilador varía automáticamente para un
rendimiento optimizado.
Filtro de aire N.º de pieza F579 (paquete de 24).
PARA PIEZAS Y SERVICIO, LLAME A SU
DISTRIBUIDOR LOCAL DE ARAMSCO O ARAMSCO
AL 800-767-6933. Aramsco™ A Safeguard Industrial
Company. 1480 Grandview Ave., Paulsboro, NJ 08066
Para desecharla de forma adecuada, esta unidad debe
llevarse a un reciclador licenciado que se encargue de
equipos de refrigeración.
ADVERTENCIA: Este producto y otras sustancias
que pueden desprenderse del aire por su uso
contienen productos químicos, entre ellos plomo y
ftalatos, que el estado de California sabe que causan
cáncer, defectos congénitos u otros daños durante la
gestación. Para obtener más información, visite
P65Warnings.ca.gov.

07-02353A F588 18 Aramsco
Manuel d’utilisation
DéshumidificateurportatifSycloneXL
Modèle F588
Aramsco™ A Safeguard Industrial Company
1480 Grandview Ave., Paulsboro, NJ 08066
Le déshumidificateur Aramsco Syclone XL réduit l’humidité dans des endroits fermés en éliminant la
vapeur d’eau dans l’air. Le Syclone XL est robuste, durable et hautement portatif, ce qui en fait
l’équipement idéal pour réparer des dégâts causés par l’eau, sécher des structures, les travaux de
construction et d’autres applications qui nécessitent une déshumidification temporaire, hautement
performante.
CO NS ERV ER CES I NS TRU CTI ONS
INSTRUCTIONS DE SÉCURITÉ
AVERTISSEMENT ! En aucun cas, vous ne devez
altérer ou modifier votre déshumidificateur. Utilisez
seulement des pièces de rechange autorisées par
Aramsco Des modifications ou l’utilisation de pièces
non approuvées peuvent entraîner un risque de
danger et annuleront votre garantie. Contactez votre
distributeur agréé pour une assistance.
AVERTISSEMENT ! Risques de choc électrique,
ventilateur rotatif, surface brûlante. Débranchez
l’unité avant d’ouvrir le couvercle pour procéder à
un nettoyage ou un entretien. L’appareil doit être
mis à la terre.
Inspectez le câble d’alimentation avant utilisation. Si
le câble est endommagé, ne l’utilisez pas. Saisissez
toujours la prise (pas le câble) pour débrancher.
Insérez la fiche triphasée du câble d’alimentation
dans une prise de terre correspondante. N’utilisez
pas d’adaptateur. Ne coupez jamais la troisième
broche. N’utilisez pas de rallonge.
L’appareil doit fonctionner sur un circuit 120V/60Hz
protégé par un disjoncteur différentiel de fuite à la
terre (DDFT).
Maintenez le moteur et le câblage au sec.
Ne tentez pas de réparer l’appareil. Pour les centres
d’entretien et de réparation agréés, contactez
Aramsco.
COMMANDES ET INSTRUCTIONS DE
FONCTIONNEMENT
Mettez l’unité debout en position verticale.
NOTICE : Le transport ou l’entreposage de l’unité
dans la position horizontale n’est pas recommandé.
Lorsque la machine est placée en position
horizontale, l’huile du compresseur peut s’écouler
dans les serpentins du réfrigérant et cela peut
réduire les capacités de fonctionnement du
déshumidificateur et causer des dommages
éventuels de l’appareil. Si l’unité a été placée en
position horizontale, mettez-la debout en position
verticale et laissez-la dans cette position pendant au
moins 30 minutes avant de la mettre en marche.
Positionner un déshumidificateur
Pour obtenir des résultats optimaux, faites fonctionner
votre déshumidificateur dans un endroit fermé. Fermez
toutes les portes et les fenêtres pour maximiser
l’absorption d’eau de l’appareil. Éloignez votre
déshumidificateur des obstructions et de tout objet
pouvant gêner le flux d’air dans et hors de l’appareil.
Poignée d’extension
Relâchez la poignée en tournant la manette rouge vers
l’extérieur, puis positionnez la poignée vers le haut.
AVERTISSEMENT
RETRAIT CORRECT DE LA PRISE
Saisissez la prise IEC et tirez tout droit.
IMPORTANT : Des dommages de la prise IEC ou du
déshumidificateur résultant d’un retrait incorrect du câble
d’alimentation ne sont pas couverts par la garantie. Le
câble d’alimentation IEC est une pièce d’usure et n’est
pas couvert par la garantie.

07-02353A F588 19 Aramsco
Tournez la manette rouge de nouveau pour la bloquer
en positionnement de fonctionnement.
NOTICE : N’utilisez pas la poignée d’extension pour
soulever l’appareil du sol, de manière horizontale.
N’utilisez pas la poignée d’extension comme dispositif
de fixation pour attacher l’unité dans un véhicule pour le
transport. Une telle utilisation exerce une pression
excessive sur les points d’attache de la poignée dans le
logement.
Mise en place du tuyau de vidange
Cet appareil pompe de l’eau automatiquement sur
une base régulière. Ce déshumidificateur est équipé
d’un raccord à connexion rapide pour l’attachement
au tuyau de vidange fourni, situé sur le plateau sur
le dessus de l’unité. Déballez le tuyau
entier et placez l’extrémité ouverte dans
un bac, drain ou seau, ou dehors, dans
un endroit où l’eau peut s’écouler en
toute sécurité. Si vous utilisez un seau
ou un autre contenant pour la collecte
de l’eau, vérifiez régulièrement pour
éviter un débordement.
NOTICE : Déroulez et redressez le tuyau
de vidange entier. Ne laissez aucune partie
du tuyau enroulée sur l’unité et ne placez
pas l’extrémité du tuyau à une hauteur de
plus de 6 m (20 ft), à partir du bas de
l’unité. Vérifiez aussi qu’il n’y ait pas de
torsion ou d’obstructions qui puissent
restreindre le flux d’eau. Une torsion ou
une obstruction du câble peut entraîner un
arrêt de l’unité et produire un code d’erreur
ER9. Voir « Messages d’erreur » pour plus
d’informations.
Brancher le câble électrique
Le déshumidificateur doit être branché sur
une prise de 120 volts avec protection
DDFT, d’au moins 15 amps. Retirez le
câble du plateau de rangement et
déroulez-le. Branchez toujours le câble
fermement sur l’unité d’abord, puis
branchez l’autre extrémité sur une prise
électrique appropriée.
Modes d’affichage de démarrage et
d’affichage normal
Lorsque l’unité est d’abord branchée sur
une prise AC, le panneau de commande
affiche brièvement une série de valeurs.
Cela fait partie d’une procédure d’auto-
diagnostic et aucune intervention de
l’utilisateur n’est nécessaire.
Mettre l’unité en marche
Le panneau de commande contient un
écran d’affichage et un pavé tactile de
quatre touches. Appuyez sur le bouton
ON/OFF pour mettre l’unité en marche.
L’unité va maintenant effectuer un compte
à rebours (d’une durée d’au plus 60
secondes) et un processus d’auto-
diagnostic, puis passera en mode
d’affichage normal.
ON/OFF
Appuyez sur la touche et relâchez
pour mettre l’unité en marche ou
l’arrêter.
MENU D’AFFICHAGE
Appuyez pour sélectionner
l’élément suivant dans le menu.
L’article du menu s’affiche.
SÉLECTION DE MENU /
TOUCHE VERS LE
HAUT
Appuyez pour basculer ou
sélectionnez les valeurs affichées
dans le menu.
POMPE DE PURGE
Appuyez sur le bouton et relâchez
pour commencer la purge. Un
compte à rebours affiche les
secondes restantes jusqu’à ce que
la purge soit terminée.
Fiche du câble
d’alimentation
.
Étiquette du numéro de
série du modèle
AVANT
ARRIÈRE
Entrée d’air humide.
Filtre d’air
Rangement du câble
d’alimentation et du
tuyau de vidange.
Sortie d’air de
traitement
(déshumidifié).
Panneau avant. Retirez
pour accéder à la pompe
et aux serpentins pour le
nettoyage. Voir la Fig. B.
Poignée intégrée. Utilisez la manette
rouge pour bloquer la poignée en
position verticale pour le
fonctionnement ou l’abaisser pour le
chargement ou le rangement.
Panneau de commande.
FIG. A : IDENTIFICATION DES
PIÈCES
Raccord rapide du
tuyau de vidange.

07-02353A F588 20 Aramsco
XXXX HRS TRAVAIL
ENTREE XXX°C
La première ligne de l'affichage indique le nombre total
d’heures pendant lesquelles l’unité a fonctionné. Cette
valeur doit être réinitialisée sur zéro pour suivre les
heures de travail (voir « Réinitialisation des heures de
travail » ci-dessous). La deuxième ligne de l’affichage
alterne entre la température en entrée et l’humidité en
entrée.
Menu des paramètres d’utilisateur
Un certain nombre de paramètres peuvent être changés
par l’utilisateur. Les informations du système peuvent
aussi être affichées. Appuyez sur DISPLAY MENU
(menu d’affichage) pour accéder à ces éléments.
Chaque pression sur la touche fait afficher le paramètre
suivant. Lorsque vous obtenez le paramètre que vous
voulez ajuster, appuyez sur MENU SELECTION
(sélection de menu) pour augmenter la valeur. Appuyez
de nouveau sur DISPLAY MENU (menu d’affichage)
pour accepter le paramètre et redémarrer le cycle
d’affichage.
Notez que seulement des éléments de menu suivis du
symbole supérieur à ( >) peuvent être ajustés.
Messages d’erreur
Si le système de diagnostics embarqué découvre un
problème, l’unité affichera un message d’erreur. Voir
« Messages d’erreur » pour une explication de chaque
message.
Guide du panneau de commande
ON/OFF. Appuyez pour mettre l’unité en marche ou à
l’arrêt. Lorsque la machine est en marche, l’écran affiche
PLEASE WAIT COMP. DELAY (veuillez patienter
jusqu’à la fin du délai) et effectue un compte à rebours
numérique d’un maximum de 60 secondes à 0. Ce délai
laisse le temps suffisant pour équilibrer les pressions du
réfrigérant et permettre un démarrage facile. Une fois
que l’unité termine le délai du compresseur, l’affichage
montre UNIT ON XX HRS (unité en marche xx heures)
et passe de INLET XX°F (entrée xxºF) à INLET XX%
(entrée xx%). REMARQUE : Si aucun compte à rebours
n’est affiché, un délai n’est pas nécessaire et la machine
commence à fonctionner immédiatement.
MENU D’AFFICHAGE. Appuyez pour afficher les
conditions supplémentaires du déshumidificateur et les
paramètres utilisateur. Pour revenir au menu principal,
appuyez une fois sur la touche ON/OFF
SÉLECTION DE MENU. Appuyez pour changer les
valeurs des paramètres « définis par l’utilisateur ». La
touche MENU SELECTION agit comme la touche vers le
haut pour régler le point de consigne pour un
fonctionnement en mode « Humidistat » (hygrostat). Voir
le menu des paramètres utilisateur (page suivante) pour
plus de détails. PURGE. Appuyez pour vider l’eau du
réservoir de la pompe à condensat. L’écran affiche
PUMP PURGING (purge de pompe) avec un compte à
rebours. REMARQUE : En mode de fonctionnement
normal, la pompe purge automatiquement.
REMARQUE : En mode de fonctionnement normal, la
pompe purge automatiquement.
PANNEAU DE COMMANDE
ON/OFF
AFFICHAGE
MENU
D’AFFICHAGE
SÉLECTION DE
MENU / TOUCHE
VERS LE HAUT
POMPE DE
PURGE
This manual suits for next models
1
Table of contents
Languages:
Popular Dehumidifier manuals by other brands
Anslut
Anslut 417-045 Operating instruction
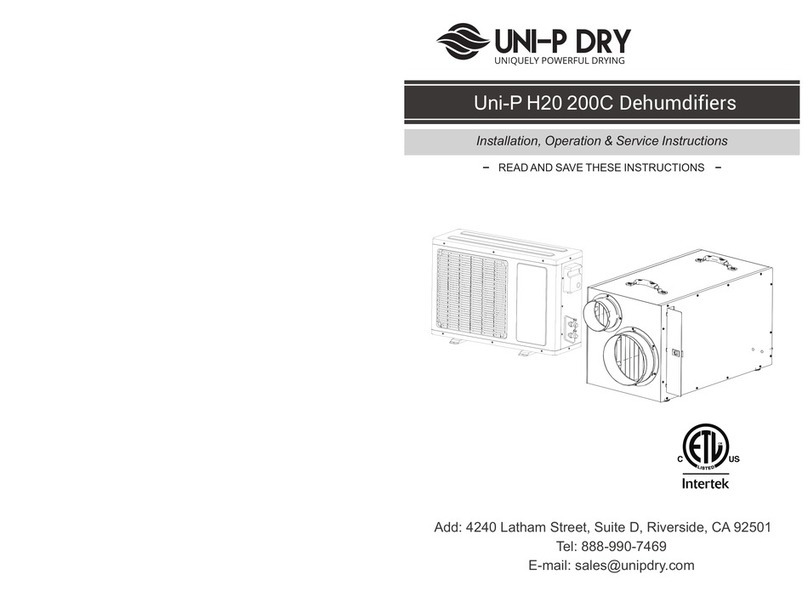
Uni-P Dry
Uni-P Dry H20 200C Installation, operation & service instructions

Fehom
Fehom YDA-858F user manual
Whynter
Whynter RPD-652DB instruction manual
Kenmore
Kenmore 580.53301 owner's manual
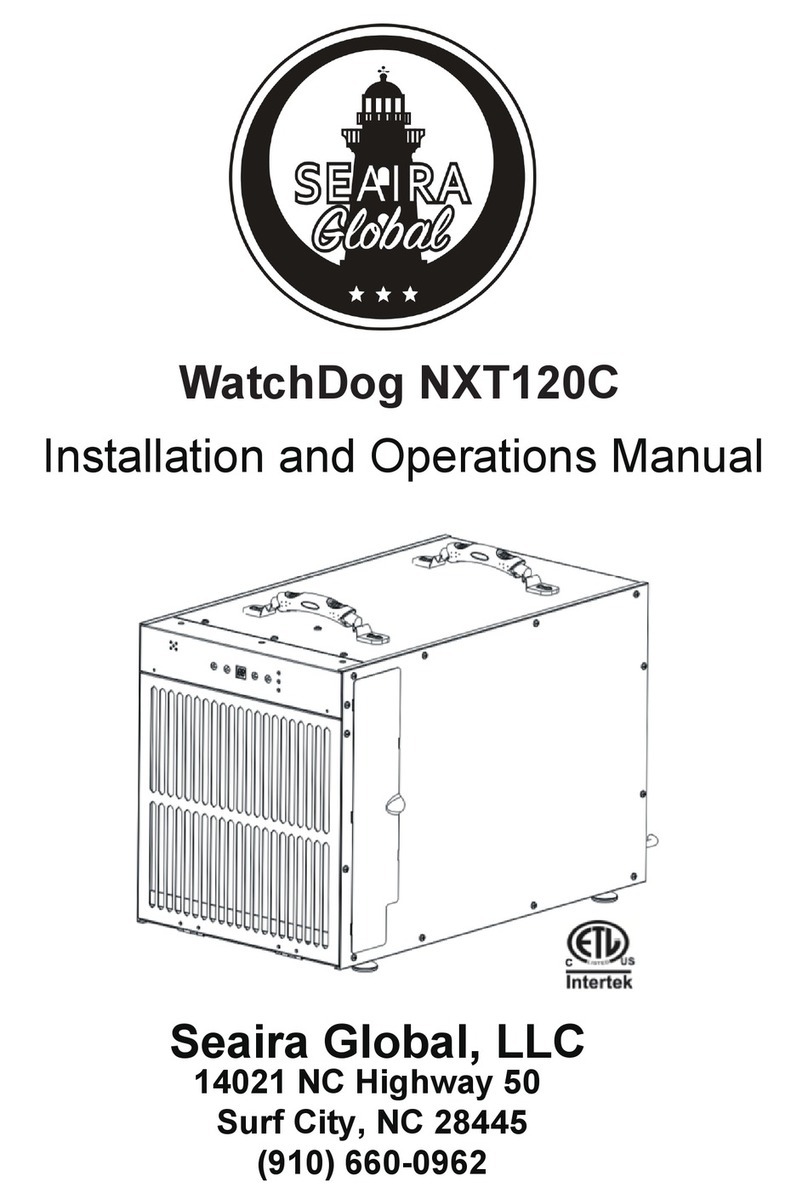
Seaira Global
Seaira Global WatchDog NXT120C Installation and operation manual

