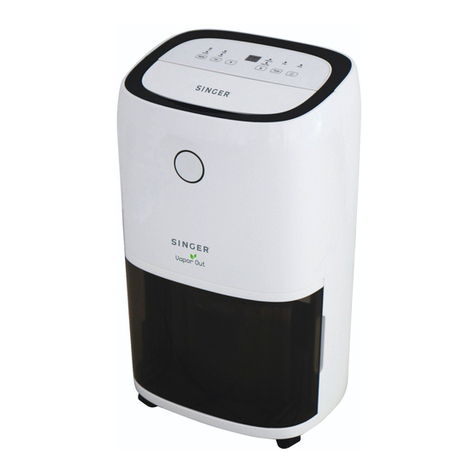
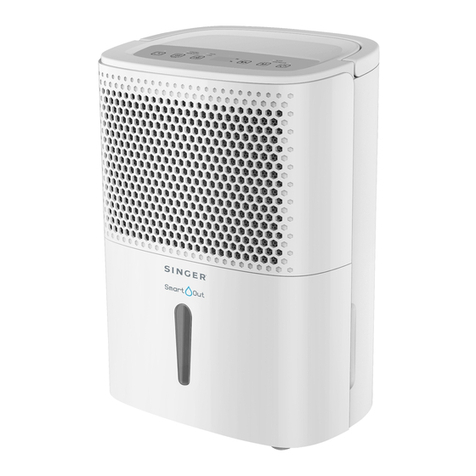
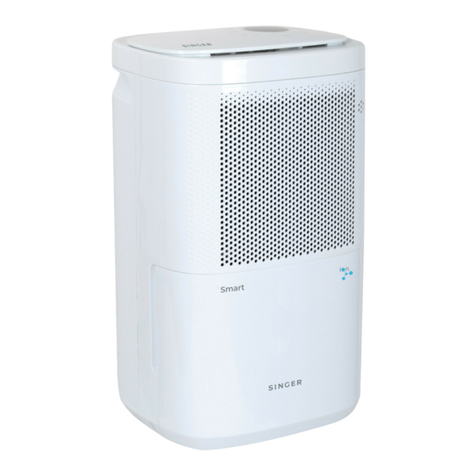
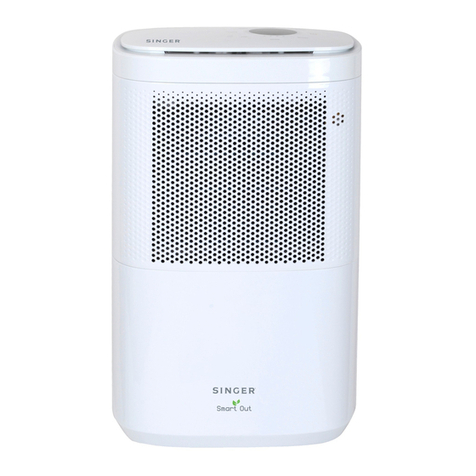
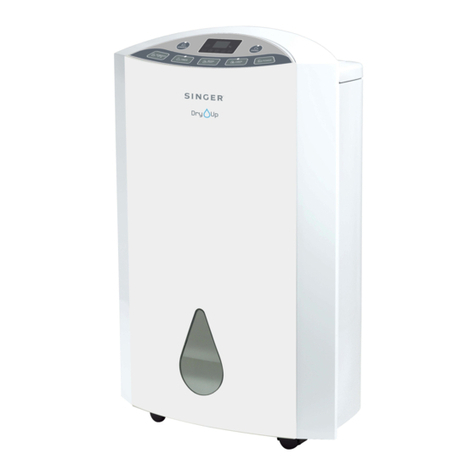
Singer SDHM-10DI User manual

Dehumidifier
Αφυγραντήρας
Влагоабсорбатор
SDHM-10DI
GB
INSTRUCTION MANUAL
GR
ΒΙΒΛΙΟ ΟΔΗΓΙΩΝ
BG
ИНСТРУКЦИИ ЗА ЕКСПЛОАТАЦИЯ

2
ENGLISH
Please keep this manual carefully for further reference!
INTRODUCTION
• Before using your new Dehumidifier, please carefully read
through the following instructions. Keep this booklet in a
safe place for future reference.
• After removing the packaging, make sure that the appli-
ance is in good condition.
• Do not allow children to play with the packaging materials
as there is risk of suffocation.
IMPORTANT SAFETY INFORMATION
• Avoid installation behind a door.
• Use only with the supply voltage specified on the rating
plate of the Dehumidifier.
• Do not place appliance close to a radiant heat source.
• Do not immerse in liquid or allow liquid to run into the
interior of the appliance, as this could create an electrical
shock hazard.
• Do not use this appliance on a wet surface, or where it can
fall or be pushed into water.
• Do not reach for an appliance that has fallen into water.
Switch off at supply and unplug immediately.
• Do not operate any appliance with a damaged cord, plug
or after the appliance malfunctions or has been dropped
or damaged in any manner. Refer appliance to a qualified
electrical person for examination, electrical or mechanical
adjustment, service or repair before further use.

3
ENGLISH
• Do not operate appliance with wet hands.
• This appliance is intended for indoor household use only
and not for commercial or industrial use.
• Use this appliance only as described in this manual. Any
other use is not recommended by the manufacturer and
may cause fire, electric shock or injury.
• Do not use this appliance in a window as rain may cause
electric shock.
• Do not use abrasive cleaning products on this appliance.
Wipe with a soft cloth to clean the exterior. Always remove
plug from the mains supply before cleaning.
• Switch off the appliance before changing its position.
• Do not remove the power plug from the socket by pulling
the cord – grip the plug instead.
• Always unplug appliance when not in use.
• Do not run cord under carpeting, throw rugs or runners
etc. Arrange cord away from areas where it is likely to be
tripped over.
• This appliance is not intended for use by persons (includ-
ing children) with reduced physical, sensory or mental
capabilities, or lack of experience and knowledge, unless
they have been given supervision or instruction concern-
ing use of the appliance by a person responsible for their
safety.
• Young children should be supervised to ensure they do
not play with the appliance.
• If the supply cord is damaged, it must be replaced by a
qualified electrical person in order to avoid a hazard.
• Do not spray pesticides or flammable gas near the unit.
• Do not scrape the unit using sharp objects.

4
ENGLISH
• Do not splash any oil or water into the unit.
• Install the unit on a flat, horizontal surface to avoid vibra-
tion and noise.
• Do not put heavy objects on the appliance.
• Empty the water tank before moving the unit to avoid wa-
ter spilling.
• Do not tilt the unit to prevent water from spilling and dam-
aging the machine.
• Do not insert or allow slim rods or other foreign objects
to enter any opening, as this may cause an electric shock,
fire or damage to the appliance.
• If any abnormal situations occur, immediately turn off the
power supply.
• Do not put the unit close to heat-generating devices or
near flammable and dangerous materials.
• The appliance must be positioned so that the plug is ac-
cessible
• The appliance shall be installed in accordance with na-
tional wiring regulations
• The ambient temperature range for the appliance is 5°-35°

5
ENGLISH
SERVICE & REPAIR
1. For service or repair under warranty, please contact the authorized service
company that is mentioned on the guarantee card that accompanies the
product.
2. Do not operate any product with a damaged cord or plug. If the supply cord
is damaged, return the appliance to a SINGER service center for examina-
tion repair or adjustment. Do not attempt to dismantle any part of the appli-
ance. This should only be done at an authorized SINGER service centre.
3. The partial or total non-respect of the safety instructions in the present in-
struction manual will automatically release Singer of any type of responsibil-
ity in case of malfunction of the machine or injuries to persons or animals.
4. In case of manipulation, repairing or any modification of the machine made
by unqualified persons or in case of improper use, the guarantee will be
automatically cancelled.
FEATURES
Powerful dehumidification
Based on the principle of refrigerative technology, this dehumidifier can remove
excess moisture from the air, creating a comfortable environment for your room.
Compact and portable design
Design for compactness, easy to move.
Humidity Setting
Setting needed humidity according to different rooms and persons.
Time Setting
Set time to start or shutdown.
Energy Saving Design
Low power consumption

6
ENGLISH
Anion
Electrostatic cleaning, air purifying, improves lung function, myocardial function,
sleeping, metabolism, disease resistance.
SPECIFICATIONS
Model No. SDHM-10DI
Nominal Dehumidifying Capacity 10L/Day(30℃, 80%RH)
Max. Dehumidifying Capacity 10L/D
Power Supply 220V/50Hz
Rated Input Power 210W
Rated Current 1.2A
Water Tank Capacity 1.5L
Sound Pressure Level ≤45dB(A)
Refrigerant Charge R134a/95g
Net Weight 10kg
Suction Side Pressure 0.5MPa
Discharge Side Pressure 1.5MPa
Dimensions(W x D x H) 315 x 180 x 492mm
Note: The above technical parameter subject change without further notice.

7
ENGLISH
DRAWINGS
Front
Back
Handle Control Panel
LouverTop Cap
Filter Gridding
Power Cord Continuously Drain Cover
Back Panel
Front Panel
Water Tank
Castor

8
ENGLISH
OPERATIONS
1. Power on
When the power is on, the electric buzzer will have a long buzz. The unit will be
in stand-by mode. All the lights on the control panel are on for 2 seconds, and
then turn off. LED digital tube shows “- -”; (if tank full, then the full light is on;
others off)
2. Start/Shutdown
Press this button to start the unit, and re-press to shutdown.
3. 3-color humidity light
This 3-color humidity light stays at the two side of the LED tube. It will show 3
colors according to the room humidity. The colors show as follow:
60%RH, blue light
≥60%RH, <80%RH, green light
≥80%RH, red light
4. Water tank drainage
The water full indicator light will be on if the tank is full. The electric buzzer will
have a long buzz for 15 times, and then the machine shuts down automatically.
Water tank
1. Grasp the bulge of the water tank, and take out the tank.
2. Pour the water so that the tank can be empty.

9
ENGLISH
Key function
Power Key
Press this button, the machine starts running (The indicator light shows orange,
default low wind), press this key again, the machine stops running.
Timer button
Press this button to program the time when the unit will turns on or turn off. When
timer is programmed, the indicator light shows blue.
Humidity set button
Press this button to adjust humidity as following (The initial humid-
ity is 40%), from 40%Æ45%Æ50%Æ55%Æ60%Æ65%Æ70%Æ75%Æ80%Æ
40%Æ45%Æ50%.
When setting the humidity, the indicator light shows blue, and the set time is 5
secs, more than 5 secs, the machine would exit setting state, and the indicator
light turns off.
(Humidity is set in the automatic mode/common mode effectively, drying mode
cannot be set)
When the indoor humidity is lower than the set humidity, the machine would stop
automatically.

10
ENGLISH
Air speed set key
Press this button to set the high wind or low wind, wind speed can only be
changed manual in normal mode, can’t be switched in automatic mode. Under
the drying mode is high wind, can’t be switched.
High wind, the indicator light shows orange, low wind the indicator light shows
blue.
Anion
Press this button, the purifying function starts, then the Anion control circuit will
start after 8 seconds (the blue indicator light is on). Then press this button again,
Anion function will close (the blue indicator lights turns off). The control circuit
shuts down immediately.
Mode
Press this button to switch between 3 modes: Auto mode (Default); Common
mode; Continuous (clothes drying) mode.
1. Auto mode (blue light): Auto mode is the default mode when the power is on.
The light is blue and the fan speed is low. Then the fan speed can be changed ac-
cording to the environmental humidity. When the default set humidity is 50%RH,
the compressor starts to work when the environment humidity is higher (+3%) or
equals with the default set humidity.
When the environmental humidity is smaller than the setting humidity (-3%), the
compressor does not work.
When the difference between environmental humidity and the setting humidity is
more than RH10%, the fan works in low wind. Meantime, the fan speed should
be switched under this state.
2. Common mode (purple light)
Press this button to switch to common mode. The purple light is on under this
mode. When switch to this mode, the fan speed will keep the same as last mode
and the compressor will start according to the current environmental humidity
and the setting humidity. It will operate as follows: When the environment humid-
ity is more 3%RH than the setting humidity, the compressor starts to work; when

11
ENGLISH
the environment humidity is less 3%RH than the setting humidity, the compres-
sor stops operating. At that time, the fan speed is still working. When auto mode
is switched into common mode, the humidity and the fan speed can be adjusted.
3. Continuous clothes drying mode (orange light).
Press this button to switch to continuous clothes drying mode. The orange light
is on under this mode. There will be high fan speed under this mode, and the
humidity cannot be changed. The default humidity is 20%RH under this mode.
The environmental humidity can be shown on the panel.
Tank full
When the water tank is full, the indicator light shows red, the buzzer will warn for
15 times and the unit stops automatically. At this time, empty the water tank and
put it back to correct position.
CAUTIONS
1. Do not remove the float in the water tank, otherwise, the machine cannot
start work or power on
2. If the water tank is dirty, clean by cool water or warm water, cannot use clean-
er, steel wool, chemical rag duster, gas oil, benzene, thinner or other solvent
to clean it, otherwise, it would damage the water tank and lead to leakage.

12
ENGLISH
3. When you place the water tank back into place, please use two hands to
push the water tank into the machine and force to the right position. If you do
not place the water tank in the right position, the machine would not power
on or start.
Continuous drainage
This dehumidifier has a continuous drainage hole which used to be connected
by a plastic tube (inside diameter is 9mm), then the dehumidification water can
be continuous drainage.
Take off the plastic of the hole

13
ENGLISH
Insert the pipe to the hole Put the pipe in the location place
MAINTENANCE
NOTE: TURN OFF THE UNIT AND UNPLUG IT BEFORE ANY
MAINTENANCE OR REPAIR TO AVOID ELECTRIC SHOCKS.
Cleaning
• Unplug the unit before any cleaning.
• Clean the housing with a soft moisture cloth. Do not use chemical solvent
(such as benzene, alcohol, gasoline).The surface may be damaged or even
the whole case may be deformed.
• Do not sprinkle water on the unit.
Air filter
• The unit is equipped with washable air filter. Take out the washable filter. After
the cleaning operation, insert the filter back to its place after you make sure
it is completely dry.
• Clean the washable filter every 2 weeks. If the filter is blocked with dust, the
efficiency will reduce.
• Wash the air filter by immersing it gently into warm (about 40° C) water with
a neutral detergent, rinse it and dry it thoroughly in a shaded place.

14
ENGLISH
1. Take out the filter
2. Clean the filter
3. Assemble the filter
Insert the filter back to machine slowly after washing
Active Carbon Filter
There is also an Active Carbon Filter together with the unit that can be used
together with the Washable Air Filter. This Active Carbon Filter CANNOT be
cleaned. When the Filter gets very dirty, replace it with the new filter.
Note: Removing the Active Carbon Filter reduces the air-filtering ability of the
unit, but does not affect any other functionality. The unit is fully functional without
the Active Carbon Filter.

15
ENGLISH
Dehumidifier storage
If the dehumidifier will not be used for an extended period of time:
1. Drain the water tank completely and make sure no more water stocked inside.
2. Unplug the unit and fold up the power supply cord.
3. Remove and clean the air filter, allow it to dry completely and reinstall it.
4. Store the dehumidifier in a cool, dry location, away from direct sunlight, ex-
treme temperature and excessive dust.
Space distance:
When the dehumidifier is working, please ensure that the space distance is at
least 20cm around the unit, such as below picture:

16
ENGLISH
TROUBLE SHOOTING
BEFORE CALLING FOR SERVICE
Before contacting professional service, review this list. It may save
your expense and time.
This list includes common occurrences that are not the result of a de-
fect in workmanship or materials.
Problem Possible Cause Solution
The unit doesn't operate
Has the power cord been
disconnected?
Plug the power cord into
the outlet.
Is the tank full indication
lamp blinking? (The tank
is full or in a wrong posi-
tion.)
Empty the water in the
drainage tank and then
reposition the tank.
Is the temperature of the
room above 35℃or
below 5℃?
The protection device is
activated and the unit
cannot be started.
The dehumidifying
function doesn’t work
Is the air filter clogged?
Clean the air filter as
instructed under “Clean-
ing the dehumidifier”.
Is the intake duct or
discharge duct obstruct-
ed?
Remove the obstruction
from the discharge duct or
intake duct.
No air is discharged Is the air filter clogged?
Clean the air filter as
instructed under “Clean-
ing the dehumidifier”.
Operation is noisy
Is the unit tilted or
unsteady? Move the unit to a stable,
sturdy location.
Is the air filter clogged?
Clean the air filter as
instructed under
“Cleaning the dehumidi-
fier”.

17
ENGLISH
the screen show “E1” The copper head sensor Change it.
the screen show “E2”
Humidity sensor is dam-
aged or affected with
damp?
Change it.
the screen show “L0” Environmental humidity is
below 35%
Working when the humid-
ity rise
the screen show “H1” Environmental humidity is
above 95% High humidity show
the screen show “CL”
Low temperature protec-
tion, the environmental
temperature <5℃
Up the environmental
temperature
the screen show “CH” High temperature protec-
tion, the environmental
temperature >35℃
Down the environmental
temperature
Cautions: Switch off the unit and unplug it immediately if any-
thing abnormal happens. Then contact a qualified electrician.
Disposal of old Electrical & Electronic Equipment (Applicable
in the European Union and other European countries with sep-
arate collection systems).
This symbol on the product or on its packaging indicates that this
product shall not be treated as household waste. Instead it shall be
handed over to the applicable collection point for the recycling of electrical and
electronic equipment. By ensuring this productis disposed of correctly, you will
help prevent potential negative consequences for the environment and human
health, which could otherwise be caused by inappropriate waste handling of
this product. The recycling of materials will help to conserve natural resources.
For more detailed information about recycling of this product, please contact
your local city office, your household waste disposal service or the shop where
you purchased the product.

18
ΕΛΛΗΝΙΚΑ
Παρακαλούμε όπως φυλάξετε το παρόν βιβλίο οδηγιών
χρήσης για τυχόν μελλοντική αναφορά.
ΕΙΣΑΓΩΓΗ
• Πριν από τη χρήση του νέου σας αφυγραντήρα,
παρακαλούμε όπως διαβάσετε προσεκτικά τις ακόλουθες
οδηγίες. Φυλάξτε το παρόν βιβλίο οδηγιών χρήσης σε
ασφαλές μέρος για τυχόν μελλοντική αναφορά.
• Aφού αφαιρέσετε τη συσκευασία, βεβαιωθείτε ότι η
συσκευή είναι σε καλή κατάσταση.
• Μην επιτρέπετε στα παιδιά να παίζουν με τα υλικά
συσκευασίας, καθώς υπάρχει κίνδυνος ασφυξίας.
ΣΗΜΑΝΤΙΚΕΣ ΟΔΗΓΙΕΣ ΑΣΦΑΛΕΙΑΣ
• Μην τοποθετείτε τη συσκευή πίσω από την πόρτα.
• Πριν συνδέσετε τη συσκευή στο ρεύμα, ελέγξτε αν η
τάση που αναφέρεται στην ετικέτα προδιαγραφών της
συσκευής ανταποκρίνεται στην τοπική τάση.
• Μην τοποθετείτε τη συσκευή κοντά σε πηγή θερμότητας.
• Μη βυθίζετε τη συσκευή σε υγρό ήεπιτρέπετε σε υγρό
να τρέξει στο εσωτερικό της συσκευής, για αποφυγή
ηλεκτροπληξίας.
• Μη χρησιμοποιείτε αυτή τη συσκευή πάνω σε υγρή
επιφάνεια ήόπου μπορεί να πέσει σε νερό.
• Μην αγγίζετε συσκευή που έχει πέσει μέσα σε νερό.
Κλείστε την παροχή ρεύματος και αποσυνδέστε αμέσως
την πρίζα.
• Μη χρησιμοποιείτε τη συσκευή εαν το καλώδιο ρεύματος
ήτο φις είναι φθαρμένα, εαν έχουν πέσει κάτω ήέχουν
υποστεί βλάβη. Επισκεφθείτε ένα εξουσιοδοτημένο

19
ΕΛΛΗΝΙΚΑ
κατάστημα σέρβις της SINGER για έλεγχο, συντήρηση ή
επισκευή της συσκευής, πριν τη χρησιμοποιήσετε.
• Μην χρησιμοποιείτε τη συσκευή με βρεγμένα χέρια.
• Ησυσκευή προορίζεται για οικιακή χρήση σε εσωτερικούς
χώρους και όχι για επαγγελματική ήβιομηχανική χρήση.
• Χρησιμοποιήστε τη μόνο σύμφωνα με τις οδηγίες που
περιγράφονται στο παρόν βιβλίο οδηγιών χρήσης.
Οποιαδήποτε άλλη χρήση δε συνιστάται από τον
κατασκευαστή και μπορεί να έχει ως αποτέλεσμα την
πρόκληση πυρκαγιάς, ηλεκτροπληξίας ήτραυματισμού.
• Μη χρησιμοποιείτε τη συσκευή κοντά σε παράθυρο καθώς
ηβροχή μπορεί να προκαλέσει ηλεκτροπληξία.
• Μη χρησιμοποιείτε στιλβωτικά καθαριστικά προϊόντα για
να καθαρίσετε τη συσκευή. Χρησιμοποιήστε ένα μαλακό
πανί για να καθαρίσετε την εξωτερική της επιφάνεια. Πριν
από τον καθαρισμό να αφαιρείτε πάντα το φις από την
πρίζα.
• Απενεργοποιήστε τη συσκευή εαν επιθυμείτε να τη
μετακινήσετε.
• Μην αφαιρείτε το φις από την πρίζα τραβώντας το καλώδιο
– Τραβήξτε το φις από την πρίζα.
• Αποσυνδέετε τη συσκευή από το ρεύμα όταν δεν την
χρησιμοποιείτε.
• Μην περνάτε το καλώδιο κάτω από τα χαλιά, κιλίμια ή
διαδρόμους κλπ. Τακτοποιήστε το καλώδιο μακριά από
περιοχές όπου είναι πιθανό να σκοντάψετε πάνω.
• Ησυσκευή μπορεί να χρησιμοποιηθεί από παιδιά και από
άτομαμεμειωμένεςσωματικές, αισθητήριεςήδιανοητικές
ικανότητες ήέλλειψη εμπειρίας ή/και γνώσεων, μόνο
εφόσον επιτηρούνται ήέχουν ενημερωθεί σχετικά με την

20
ΕΛΛΗΝΙΚΑ
ασφαλή χρήση της συσκευής και έχουν καττανοήσει τους
υπάρχοντες κατά τη χρήση κινδύνους.
• Τα παιδιά πρέπει να επιβλέπονται για να εξασφαλιστεί ότι
δεν παίζουν με τη συσκευή.
• Εαν το καλώδιο τροφοδοσίας έχει φθαρεί θα πρέπει να
αντικατασταθεί απο έναν εξουσιοδοτημένο ηλεκτρολόγο,
προκειμένου να αποφευχθεί οκίνδυνος ηλεκτροπληξίας.
• Μην ψεκάζετε με φυτοφάρμακα ήεύφλεκτα αέρια κοντά
στη συσκευή.
• Μη χαράσετε τη συσκευή με αιχμηρά αντικείμενα.
• Μη ρίχνετε λάδι ήνερό μέσα στη συσκευή.
• Τοποθετήστε τη συσκευή σε μια σταθερή και επίπεδη
επιφάνεια για να αποφύγετε κραδασμούς και θόρυβο.
• Μην τοποθετείτε βαριά αντικείμενα πάνω στη συσκευή.
• Πριν μεταφέρετε τη συσκευή, αδειάστε το δοχείο νερού
για να μην τρέξουν νερά.
• Μη γέρνετε τη συσκευή καθώς μπορεί να τρέξει νερό
απο το δοχείο συσσώρευσης νερού και υποστεί ζημιά η
συσκευή.
• Μην εισάγετε ήεπιτρέπετε την εισαγωγή σε λεπτούς
ράβδους ήάλλα ξένα αντικείμενα στα ανοίγματα
της συσκευής, καθώς υπάρχει κίνδυνος πρόκλησης
ηλεκτροπληξίας, πυρκαγιάς ήβλάβης στη συσκευή.
• Εαν προκύψει οποιοδήποτε πρόβλημα, απενεργοποιήστε
αμέσως την παροχή ρεύματος.
• Μην τοποθετείτε τη συσκευή κοντά σε πηγές παραγωγής
θερμότητας ήκοντά σε εύφλεκτα και επικίνδυνα υλικά.
• Τοποθετήστε τη συσκευή σε σημείο όπου είναι εύκολη η
πρόσβαση στην πρίζα.
This manual suits for next models
1
Table of contents
Languages:
Other Singer Dehumidifier manuals

Singer
Singer Supreme Dry SDHM-25L-25DIA User manual

Singer
Singer SDHM-10L SMART OUT User manual

Singer
Singer Supreme Dry SDHM-12L User manual

Singer
Singer SDHM -10M User manual

Singer
Singer SDHM-16L PURE DRY ION User manual

Singer
Singer Arido SDHM-10L User manual

Singer
Singer Mega Dry SDHM-25L-50DI User manual

Singer
Singer Smart Out SDHM-10-18DI User manual

Singer
Singer PrestoDry SDHM-10L-25DIA User manual

Singer
Singer Dry Up SDHM-20L ECO User manual