Arbonia CICSA Zeta Series User manual

Manual de Instrucciones
SECATOALLAS MODELOS ZT, ZX, PUKITA, TUBON, DIJON,
CUADRO, KARNAK, VERONA y ELFIE
User guide
DRY-TOWEL MODELS ZT, ZX, PUKITA, TUBON, DIJON,
CUADRO, KARNAK, VERONA and ELFIE
GARANTÍA
5AÑOS
ES
EN
TMU
ZT 800x500 ZT 1.200x500 ELFIE 1.200x500
Pág. 2
Pág. 12

2
Español - Manual de InstruccionesTMU Secatoallas modelos ZT, ZX, PUKITA, TUBON, DIJON, CUADRO, KARNAK, VERONA y ELFIE
Gracias por haber elegido un secatoallas CICSA. Siguiendo las indicaciones de este manual de instrucciones,
le garantizamos un correcto funcionamiento, para que pueda disfrutar del producto que ha adquirido
durante muchos años. Léalo detalladamente antes de utilizar el secatoallas y guárdelo en un lugar seguro,
le será de utilidad para cualquier consulta.
SEGURIDAD
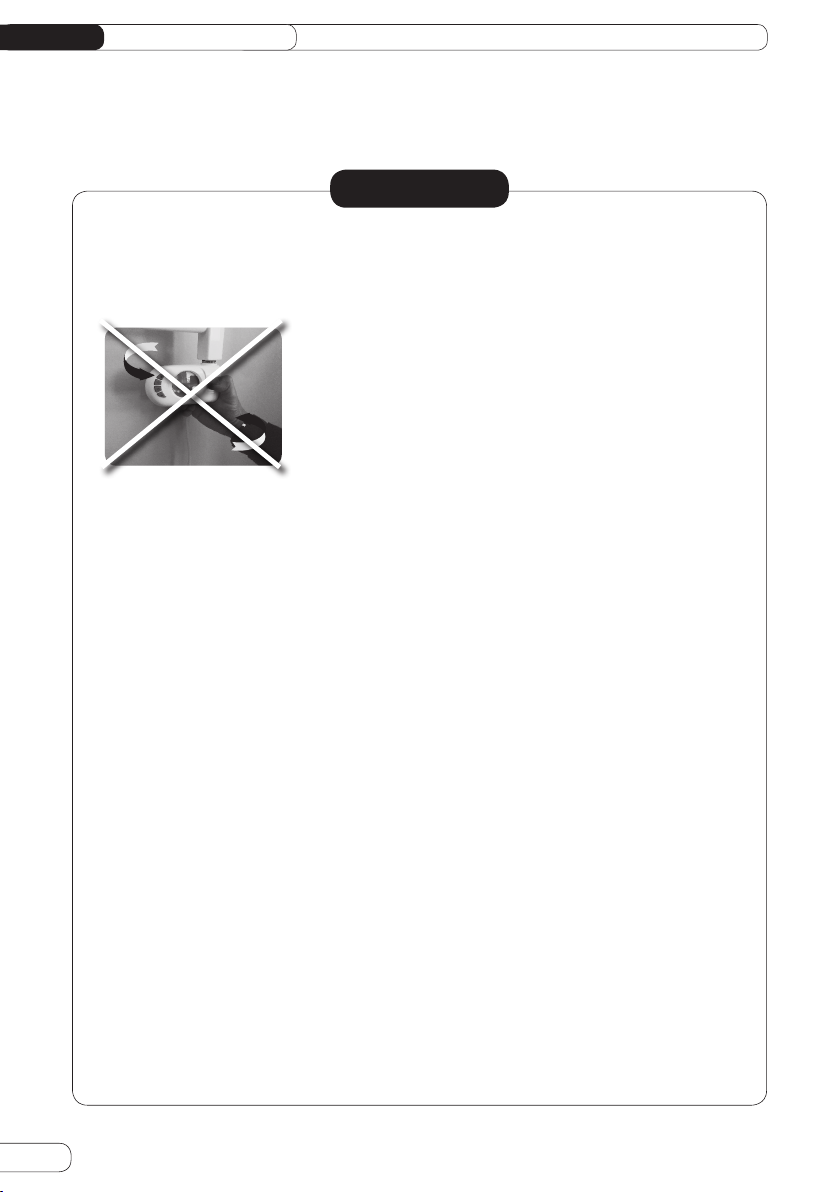
- No girar el control electrónico bajo
ningún concepto, para evitar riesgos
eléctricos y poder garantizar el correcto
funcionamiento del secatoallas.
- No abrir el control electrónico por
ningún motivo.
- Si el cable de alimentación está dañado,
debe ser sustituido por el fabricante,
por su servicio postventa o por personal
cualificado similar con el fin de evitar un
peligro.
- Comprobar que el voltaje de su hogar
se corresponde con el indicado en la
etiqueta situada en la parte posterior.
- No conectar el secatoallas si aprecia
algún daño exterior en el momento
de desembalarlo o mientras se está
procediendo a su instalación.
- No usar este dispositivo con otro tipo de
aparato. Este producto está diseñado
únicamente para su funcionamiento en
secatoallas.
- Para su correcto funcionamiento, el
radiador toallero (secatoallas) tendrá
que mantener un adecuado nivel de
fluido. En caso de avería o pérdidas
contactar con el servicio técnico.
- Es apto únicamente para su
funcionamiento con agua o agua y glicol.
- No rociar ni mojar el secatoallas con
ningún tipo de líquido.
- No tocarlo con las manos mojadas o
cualquier parte del cuerpo húmedo.
- Este aparato pueden utilizarlo niños con
edad de 8 años y superior y personas
con capacidades físicas, sensoriales
o mentales reducidas o falta de
experiencia y conocimiento, si se les
ha dado la supervisión o formación
apropiadas respecto al uso del aparato
de una manera segura y comprenden
los peligros que implica. La limpieza
y el mantenimiento a realizar por el
usuario no deben realizarlo los niños sin
supervisión.
- Este aparato sólo está destinado al
secado de ropa lavada con agua.
- Con el fin de evitar un peligro para
niños muy jóvenes, este aparato
debería instalarse de manera que el
raíl calentado más bajo esté al menos
600 mm por encima del suelo.
- Los niños menores de 3 años deben
mantenerse fuera del alcance
del aparato al menos que estén
continuamente supervisados.
- Los niños desde 3 años y menores de
8 años deben sólo encender/apagar
el aparato siempre que éste haya sido
colocado o instalado en su posición
de funcionamiento normal prevista
y que sean supervisados o hayan
recibido instrucciones relativas al uso
del aparato de una forma segura y
entiendan los riesgos que el aparato
tiene. Los niños desde 3 años y menores
de 8 años no deben enchufar, regular y
limpiar el aparato o realizar operaciones
de mantenimiento.
PRECAUCIÓN:
Algunas partes de este producto
pueden ponerse muy calientes y causar
quemaduras. Debe ponerse atención
particular cuando los niños y las
personas vulnerables estén presentes.
¡NO GIRAR!

3
Español - Manual de Instrucciones TMUSecatoallas modelos ZT, ZX, PUKITA, TUBON, DIJON, CUADRO, KARNAK, VERONA y ELFIE
SEGURIDAD (Cont.)
- El secador debe instalarse de tal forma
que los interruptores y otros controles
no pueden tocarse por una persona en el
baño o en la ducha.
- Para desconectar el secatoallas de
la red eléctrica saque la clavija de
alimentación del enchufe. Nunca tire del
cable.
- No deje el cable de conexión en contacto
con el aparato mientras esté encendido.
- La clavija del secatoallas lleva toma de
tierra, asegurase de conectarlo a una
base con toma de tierra.
- Durante su funcionamiento, debe
tenerse la precaución de mantener
el aparato alejado de materiales
combustibles tales como cortinas,
muebles, etc.
- El aparato no debe estar situado debajo
o delante de una toma de corriente.
- La instalación debe ser efectuada según
la legislación eléctrica vigente.
- El secatoallas debe ser siempre
instalado de tal manera que la clavija de
alimentación sea siempre accesible.
- El secatoallas no se debe encastrar.
- Si se ausentan, desconectar el aparato
de la toma de red, a fin de evitar
incidencias por mal funcionamiento.
- No situar objetos que puedan causar
peligro sobre el secatoallas.
IMPORTANTE
- No instalarlo nunca con la caja de mandos en posición elevada.
- El aparato vertical no debe ser utilizado horizontalmente.
- Durante la instalación utilice calces para evitar que la caja de los mandos apoye en el suelo.
NORMAS DE CONEXIÓN
La conexión a la red debe efectuarse respetando la tensión indicada en la etiqueta de características
técnicas del producto.
Está diseñado para ser montado sobre un lugar fijo. El circuito de alimentación del secatoallas debe
incorporar un interruptor de corte omnipolar con una separación de contactos de al menos 3 mm.
El aparato debe ser instalado, si es posible, al abrigo de las corrientes de aire (ventanas, puertas) o de
cualquier otro elemento que pudiera perturbar su regulación. Así, le aportará el mejor confort térmico.
Coloque cualquier objeto que pueda suponer un impedimento a la circulación del aire (muebles, sillones,
etc.) a 50 cm del aparato.
OK NO X
X

4
Español - Manual de InstruccionesTMU Secatoallas modelos ZT, ZX, PUKITA, TUBON, DIJON, CUADRO, KARNAK, VERONA y ELFIE
Consejos de instalación
Paso 1
Seleccionar la posición de montaje deseada y comprobar que la pared es apta
para colocar los tacos y soportar el peso del radiador lleno de agua. Marcar la
posición elegida de los soportes en la pared y taladrar los agujeros a la medida
de las fijaciones que está usando. Los tacos de pared (e) suministrados sólo son
adecuados para paredes sólidas. Si la pared es de pladur u otro tipo de pared
prefabricada, tendrá que utilizar los medios de fijación adecuados.
Paso 2
Atornillar la base de soporte (a) a la pared utilizando los tornillos de pared (f) y
arandelas (g) suministrados.
INSTALACIÓN
La instalación, manipulación o utilización inadecuada del secatoallas será motivo inmediato de la rescinsión de
la garantía ofrecida sobre el producto. La instalación debe de ser realizada por un profesional cualificado u otra
persona plenamente competente. Debe instalarse siguiendo las correspondientes normas Europeas.
Asegúrese de disponer del equipamiento necesario para su protección personal antes de comenzar la instalación.
Compruebe que tiene preparados todos los componentes que figuran en la caja de accesorios y que el tamaño y
acabado son los que usted necesita, antes de comenzar con la instalación.
1 x
Secatoallas 3 x
Frontal del
soporte
(c)
3 x
Arandela
(g)
3 x
Base de
soporte (a)
3 x
Tornillo
pequeño
(i)
3 x
Taco de
pared (e)
1 x
Tapón
ciego
(k)
1 x
Tapón
purgador
(j)
3 x
Tornillo de
pared (f)
3 x
Tornillo de
soporte (h)
3 x
Vástago
soporte (b)
Contenido de la caja (ejemplo ZT y ZX)
3 x
Embellecedor
(d)
Reglas particulares para cuartos de baño según el reglamento
electrotécnico para baja tensión ITC-BT-27 de septiembre de 2003
El secatoallas cumple con las normas de seguridad de CLASE I.
Puede estar instalado en los volúmenes 2 y 3, posiciones A y B
siempre que se respeten las siguientes normas:
- En el baño, nunca debe instalarse de tal forma que los
interruptores u otros dispositivos eléctricos se encuentre a
menos de 60 cm de la bañera o ducha.

5
Español - Manual de Instrucciones TMUSecatoallas modelos ZT, ZX, PUKITA, TUBON, DIJON, CUADRO, KARNAK, VERONA y ELFIE
1 - Botón +
2 - Botón Prog.
3 - Botón Encendido/Stand-by
4 - Botón -
5 - Pantalla: el modelo TMU dispone
de pantalla LED blanca sin
retroiluminación.
A - Señal sonora interna para
advertencias acústicas.
B - Protección de agua IP 44 garantizado
por un diseño especial de las partes de
conexión.
C - Sensor externo garantiza una
temperatura ambiente estable y un
aviso de reacción en caso de fuerte
variación de temperatura.
Paso 8
Conectar el control electrónico a la red. Su secatoallas está listo para su funcionamiento.
Paso 4
Alinear el vástago
soporte (b), con la base
de soporte (a) y colocar
el secatoallas en su
posición.
Paso 5
Apretar el tornillo de
soporte (h) con un
destornillador.
Paso 6
Insertar el mini tornillo (i)
en la base de soporte
(a) y apretar con un
destornillador para fijar
el soporte en la posición
deseada.
Paso 7
Presionar y encajar el
embellecedor (d) en su
posición en el frontal del
soporte (c).
Paso 3
Sin apretar totalmente, ajustar el vástago
soporte (b) al secatoallas con el frontal
del soporte (c) y el tornillo de soporte
(h). Gire el vástago soporte (b) según las
siguientes figuras:
Radiador curvoRadiador recto
ESQUEMA DEL TERMOSTATO
4
1
23
5
A
B
C

6
Español - Manual de InstruccionesTMU Secatoallas modelos ZT, ZX, PUKITA, TUBON, DIJON, CUADRO, KARNAK, VERONA y ELFIE
ESQUEMA DE LAS INDICACIONES
ENCENDIDO / STAND BY
Calentamiento activo Temperatura ºC
Indicador 24H
Reloj
Bloqueo Teclado
Programación día Actual/Semanal
Confort Modo Nocturno
CHRONO
Modo Funcionamiento Activo
- Confort
- Noche
- Antihielo
- Timer 2H · Marcha forzada
- Chrono
Presione el botón de encendido / Stand By. Cuando se activa la parte inferior de la pantalla muestra la hora actual
y el modo operativo configurado, y la temperatura se muestra en la parte superior. Cuando está en modo Stand
By, hora actual, dia de la semana, el mensaje “STB” se muestra en pantalla.
Nota: Cuando el dispositivo entra en modo “Stand By” emite dos pitidos de 0,5 seg. Cuando el dispositivo está
activado, emite un pitido de 1 seg.
EJEMPLO:
1 - MODO “CONFORT” ( ) Y NOCHE ( )» Se pueden establecer dos niveles diferentes de temperatura.
Temperatura “CONFORT” es la temperatura utilizada para los modos “Chrono y Confort”
2 - Temperatura “NOCHE” es la temperatura utilizada para los modos “Noche y Chrono”. La temperatura deseada
puede ajustarse presionando los botones + y -. El rango de temperatura configurable es de 7ºC a 32ºC.
IMPORTANTE: La temperatura en modo “Noche” debe de estar por debajo de la temperatura del modo “Confort”.
La temperatura en modo “Noche” se puede configurar entre un valor de 7ºC y la temperatura configurada en
modo ”Confort” -0,5ºC.
Ejemplo Modo “CONFORT” Ejemplo Modo “STAND BY”

7
Español - Manual de Instrucciones TMUSecatoallas modelos ZT, ZX, PUKITA, TUBON, DIJON, CUADRO, KARNAK, VERONA y ELFIE
USO DISPOSITIVO
Presione el botón ( ) para seleccionar el modo operativo deseado.
Un ícono en la pantalla indicará el modo de funcionamiento seleccionado, de acuerdo con la siguiente tabla
MODO CONFORT ( )
El modo Confort mantiene estable la temperatura ambiente a un valor seleccionado. Para establecer este modo:
- Presione el botón ( ) hasta que la pantalla muestre el icono “Confort”.
- Configure la temperatura deseada mediante los botones + y –.
MODO NOCTURNO ( )
El modo “NOCHE” establece un valor de temperatura por debajo del valor de temperatura “Confort”.
Se surgiere este modo de funcionamiento durante la noche o cuando la estancia no esté ocupada durante 2 horas
o más.
- Presione el botón ( ) hasta que la pantalla muestre el icono “Noche”.
- Configure la temperatura deseada mediante los botones + y –.
MODO ANTIHIELO ( )
En el modo ”Antihielo” la temperatura se fija en 7ºC. El dispositivo activa el elemento de calentamiento cuando la
temperatura de la estancia cae por debajo de 7ºC. Se sugiere configurar este modo operativo cuando la estancia
no está ocupada durante varios días.
- Presione el botón ( ) hasta que la pantalla muestre el icono “Antihielo“.
MODO CHRONO ( )
Este modo de operación permite al usuario configurar diferentes valores de temperatura para cada hora de cada
día de la semana.
Para activar esta función, presione el botón ( ) hasta que aparezca el icono “Chrono”.
MODO TIMER 2 H – MARCHA FORZADA ( )+ Calentamiento activo.
En el modo “TIMER 2h” se puede utilizar para calentar rápidamente la estancia o para acelerar el secado de la
toalla.
Presione el botón ( ) hasta que la pantalla muestre el icono “2h”. El dispositivo se activa a la potencia máxima
durante 2 horas, hasta una temperatura ambiente máxima de 32ºC.
El modo TIMER-2H se desactiva automáticamente después de un periodo de 2 horas y el dispositivo regresa a la
temperatura seleccionada previamente. El usuario puede cambiar a otro modo operativo en cualquier momento
simplemente presionando el botón ( ).
CONFORT NOCHE ANTIHIELO CHRONO TIMER 2H

8
Español - Manual de InstruccionesTMU Secatoallas modelos ZT, ZX, PUKITA, TUBON, DIJON, CUADRO, KARNAK, VERONA y ELFIE
Programación Modo “Chrono”
a) Establecer el día actual de la semana y la hora.
Entre en el modo “Stand By”. En Espera y presione el botón (-) al menos 3 segundos.
En la parte superior de la pantalla se mostrará el mensaje “Set-Establecer”.
Para configurar el día y la hora, presione el botón(+) hasta que la parte inferior del display, se visualice “TED”
ver imagen.
Presione el botón ( ). Para ingresar al modo de edición. La flecha parpadeante indica el día seleccionado
actualmente: presionando (+) y (-) se puede configurar el día deseado. Presione nuevamente ( ) para confirmar
el día seleccionado.
Después de esto, el procedimiento para ingresar la hora comienza y la pantalla muestra el tiempo seleccionado
actualmente.
“Horas”: Use los botones (+) y (-) para configurar la hora correcta y confirme el valor seleccionando presionando
el botón ( ).
“Minutos“: el mismo procedimiento que para la horas. Confirmar el valor seleccionado presionando el boton
( ). Al final del procedimiento, el termostato regresa a “Stand By- En Espera”.
Configuración del programa para el modo “Chrono”.
b) Seleccione el modo “StandBy-En Espera” y presione el botón (-) al menos 3 segundos.
En la parte superior de la pantalla se mostrara el mensaje “Set- Establecer”.
Para configurar el día y la hora, presione el botón (+) hasta que parte inferior de la pantalla se muestre el mensaje
“Prog”(ver imagen abajo). Presione el botón ( ) para ingresar al modo de edición. Ahora se puede definir una
secuencia de tiempo para cada día de la semana.

9
Español - Manual de Instrucciones TMUSecatoallas modelos ZT, ZX, PUKITA, TUBON, DIJON, CUADRO, KARNAK, VERONA y ELFIE
El procedimiento comienza el día 1 y el deseado, la secuencia se puede configurar con los botones (+) y (-): por
cada hora del día es posible asignar cualquiera de las temperaturas de “Confort” (se muestra la indicación de
la barra completa) presionando el botón (+) o la temperatura “Noche” (vacío barra) presionando el botón (+)
(vea la imagen a continuación).
Presione ( ) para confirmar la configuración ingresada por día 1 y repita el mismo procedimiento para los 6
restantes días de la semana (ver foto abajo)* fotos del panel de programación.
BLOQUEO DE TECLAS / KEY LOCK
Es posible bloquear los botones del dispositivo para evitar modificaciones involuntarias de la configuración.
Presione el botón ( ) durante 3 segundos para bloquear todos los botones, excepto el botón de encendido/
apagado. El icono de bloqueo de teclas se activa en la pantalla ( ). Para desbloquear el teclado, vuelva a
presionar el botón ( ) durante 3 segundos.
+
+
+
+
+
+
+
+
+
+
+
+
+
-
-
-
-
-
-
-
-
-
-
-

10
Español - Manual de InstruccionesTMU Secatoallas modelos ZT, ZX, PUKITA, TUBON, DIJON, CUADRO, KARNAK, VERONA y ELFIE
MANTENIMIENTO Y LIMPIEZA
Limpie de forma periódica la superficie del secatoallas con un paño limpio y suave, no utilice productos abrasivos
o corrosivos. Detenga el secatoallas antes de proceder a su limpieza. Para la limpieza de la caja con los mandos,
utilice un paño seco (sin disolvente).
Gracias a las altas prestaciones de sus materiales y a la calidad de su tratamiento superficial, su secatoallas está
protegido de la corrosión.
INFORMACIÓN TÉCNICA
1. Potencia: 230V ~50Hz.
2. Potencia de la resistencia: 400, 800 ó 1.200 W.
3. Temperatura de funcionamiento: de 70a 320 C.
4. Nivel de Protección: Clase I.
5. Conexión al radiador: G1/2”.
6. Sonda electrónica de temperatura NTC.
7. Función Boost (Marcha forzada) 2 horas.
8. Modos de trabajo: Confort, Noche, Antihielo,
Stand By y Marcha forzada 2 horas.
9. Normativas baja tensión:
CEE n.93/68 y CEE n.89/336 por la
compatibilidad electromagnética.
CEE EN 60335-1 y EN60335-2-43.
Los siguientes valores de fábrica se harán efectivos:
PARÁMETROS AJUSTES DE FÁBRICA
FUNCIONAMIENTO
Temperatura Programada Confort 19°C
Duración Marcha Forzada 120 Minutos
Bloqueo de Teclado Desactivado
AJUSTES DE USUARIO
Nivel de Bajada ECO -3,5°C
Temperatura Establecida Antihielo 7°C
Temperatura Mínima de Confort 7°C
Temperatura Máxima de Confort 32°C
Duracion Máxima Marcha Forzada 120 Minutos
Temperatura Máxima establecida
automáticamente de la Marcha Forzada 39°C
Unidad de Temperatura °C

11
Español - Manual de Instrucciones TMUSecatoallas modelos ZT, ZX, PUKITA, TUBON, DIJON, CUADRO, KARNAK, VERONA y ELFIE
GARANTÍA
Directiva Europea 2012/19/UE
En base a la Directiva Europea 2012/19/UE de Residuos de Aparatos Eléctricos y Electrónicos
(RAEE), dichos aparatos no pueden ser arrojados en los contenedores municipales habituales;
tienen que ser recogidos selectivamente para optimizar la recuperación y reciclado de los
componentes y materiales que los constituyen, y reducir el impacto en la salud humana y el
medio ambiente.
El símbolo del cubo de basura tachado figura en todos los productos CICSA para recordar al
consumidor la obligación de separarlos para la recogida selectiva.
Contacte con la autoridad local o con el vendedor para informarse en relación a la correcta
eliminación de su aparato.
Debe enviar su secatoallas al servicio de garantía, remítalo al distribuidor / instalador donde lo adquirió. En el
caso de que le surjan dificultades, CICSA dispone de Servicio de Asistencia Técnica: [email protected].
CICSA garantiza que este producto no presenta ningún defecto material, ni de diseño ni de fabricación en el
momento de su adquisición y durante los 5 años en el acero y estanquidad, y 2 años en componentes eléctricos
y electrónicos.
Si durante el periodo de garantía el secatoallas no funciona correctamente con un uso normal, o sea fallo de
diseño, de los materiales o de fabricación, CICSA reparará o sustituirá el secatoallas, según considere oportuno,
bajo las condiciones que se estipulan a continuación:
- La garantía sólo se facilita si se presenta el Certificado de Garantía emitido por el distribuidor o instalador al
comprador. Debe figurar en la garantía el nº de serie y modelo del secatoallas y fecha de compra del mismo.
CICSA se reserva el derecho de rechazar el servicio de garantía cuando esta información haya sido retirada o
rectificada tras la compra original del producto.
- El recibo o factura original sólo se aceptará como prueba de compra cuando se presente ante el distribuidor
o instalador que vendió el producto.
La garantía sólo se aplicará a los casos relativos a defectos de material, diseño o defecto de fabricación, en
ningún caso cubre daños del secatoallas por los siguientes:
- Uso incorrecto del producto para fines no adecuados o sin respetar las instrucciones de CICSA acerca del
uso y mantenimiento del secatoallas, así como una incorrecta instalación o uso del producto de forma que
incumpla los estándares técnicos de seguridad vigentes.
- Reparaciones realizadas por talleres de servicio no autorizados o la apertura del secatoallas por personas no
autorizadas.
- Accidentes imprevistos que se escapan del control de CICSA como rayos, incendios, riadas, desórdenes
públicos, etc.
- Las reparaciones o sustituciones que contempla esta garantía, no permiten la extensión ni nuevo comienzo
del periodo de la garantía.
- Las reparaciones o sustituciones que contemplan esta garantía se cumplirán con unidades reacondicionadas
funcionalmente equivalentes. Las piezas o componentes defectuosos retirados pasarán a ser propiedad de
CICSA.
- Esta garantía no afecta a los derechos legales del comprador previstos por la legislación nacional vigente,
ni los derechos del comprador contra los del distribuidor o instalador que surjan a partir del contrato de
compraventa.
- En ausencia de una legislación nacional vigente aplicable, esta garantía será la única protección del comprador.
CICSA, sus oficinas y distribuidores e instaladores no se responsabilizarán de ningún tipo de daños, tanto
fortuitos como accidentales, derivados de infringir cualquier norma implícita relacionada con este producto.

12
English - User guideTMU Dry-towel models ZT, ZX, PUKITA, TUBÓN, DIJON, CUADRO, KARNAK, VERONA and ELFIE
Thank you for choosing a CICSA towel radiator. Following the instructions in this user manual, we guarantee
a correct operation, so you can enjoy the product you have purchased for many years. Read it in detail
before using the towel radiator and keep it in a safe place, it will be useful for any query.
SECURITY
- Do not turn the electronic control under
any circumstances, to avoid electrical
risks and to guarantee the correct
operation of the towel radiator.
- Do not open the electronic control for
any reason.
- If the power cord is damaged, it must
be replaced by the manufacturer or by
similar qualified personnel in order to
avoid danger.
- Check that the voltage of your home
corresponds to that indicated in the
label located on the back.
- Do not connect the towel radiator if
you notice any external damage at the
time of unpacking or while it is being
installed.
- Do not use this device with another type
of device. This product is designed only
for its operation in towel-dryers.
- For its correct operation, the towel
radiator (towel rail) will have that
maintain an adequate level of fluid. In
case of breakdown or losses contact
technical service.
- It is only suitable for operation with
water or water and glycol.
- Do not spray or wet the towel radiator
with any type of liquid.
- Do not touch it with wet hands or any
part of the body wet.
- This device can be used by children
aged 8 years and above and people
with reduced physical, sensory or
mental abilities or lack of experience
and knowledge, if they have been given
appropriate supervision or training
regarding the use of the device in a safe
and secure manner and understand
the dangers involved. The cleaning and
maintenance must be carried out by an
adult and should not be carried out by
children without supervision.
- This appliance is only intended for
drying clothes washed with water.
- In order to avoid a hazard for very young
children, this device should be installed
so that the lowest heated rail is at least
600 mm above the ground.
- Children under 3 years of age should
be kept out of the reach of the
appliance unless they are continuously
supervised.
- Children from 3 years of age and under
8 years of age should only switch the
appliance on / off as long as it has
been placed or installed in its normal
operating position and if is supervised
or has received instructions regarding
the use of the device in a safe way and
understand the risks that the device has.
Children from 3 years old and under 8
years old should not plug in, regulate
and clean the appliance or carry out
maintenance operations.
CAUTION:
Some parts of this product can get
very hot and cause burns. Special
attention must be paid when children
and vulnerable people are present.
¡DON’T TURN!

13
English - User guide TMUDry-towel models ZT, ZX, PUKITA, TUBÓN, DIJON, CUADRO, KARNAK, VERONA and ELFIE
SECURITY (Cont.)
- The dryer must be installed in such a way
that the switches and other controls
cannot be touched by a person in the
bathroom or in the shower. Minimum of
60 cm of wet area 1.
- To disconnect the towel radiator from
the electrical net, remove the plug from
the plug power. Never pull the cable.
- Do not leave the connection cable in
contact with the appliance while it is
switched on.
- The plug of the towel radiator is
grounded, be sure to connect it to a base
with earth connection.
- During operation, care must be taken to
maintain the towel radiator away from
combustible materials such as curtains,
furniture, etc.
- The appliance must not be located
under or in front of a electrical plug.
- The installation must be carried out
in accordance with current electrical
legislation.
- The towel radiator must always be
installed in such a way that electrical
plug is always accessible.
- The towel radiator must not be encased.
- If you are absent, disconnect the
appliance from the main plug, in order
to avoid incidents due to malfunction.
- Do not place objects that could cause
danger on the towel radiator.
IMPORTANT
- Never install it with the control box in an elevated position.
- The vertical device must not be used horizontally.
- During installation, use shims to prevent the control box resting on the floor.
CONNECTION RULES
The connection to the electrical net must be made respecting the voltage indicated on the label of technical
characteristics of the product.
It is designed to be mounted on a fixed place. The towel radiator power supply circuit must incorporate an
omnipolar cut-off switch with a contact separation of at least 3 mm.
The appliance should be installed, if possible, protected from air currents (windows, doors) or any other
element that could disturb its regulation. Thus, it will provide the best thermal comfort. Place any object
that may suppose an impediment to the circulation of the air (furniture, armchairs, etc.) within 50 cm of
the appliance.
OK NOT
OK X
X

14
English - User guideTMU Dry-towel models ZT, ZX, PUKITA, TUBÓN, DIJON, CUADRO, KARNAK, VERONA and ELFIE
Installation advice
Step 1
Select the desired mounting position and check that the wall is suitable to place
the blocks and support the weight of the radiator filled with water. Mark the
chosen position of the brackets on the wall and drill holes to the extent of the
fixations you are using. The wall plugs (e) supplied are only suitable for solid
walls. If the wall is another type of wall prefabricated, you will have to use the
appropriate fixing means.
Step 2
Screw the support base (a) to the wall using the wall screws (f) and washers (g)
supplied.
INSTALLATION
The installation, handling or improper use of the towel radiator will be the immediate reason for the cancellation
of the warranty offered on the product. The installation must be carried out by a qualified professional or another
fully competent person. It must be installed following the corresponding European standards.
Make sure you have the necessary equipment for your personal protection before starting the installation. Check
that you have all the components listed in the accessory box ready and that the towel radiator size is what you
need, before you start with the installation.
1 x
Towel
Radiator
3 x
Frontal
support
(c)
3 x
Ring
(g)
3 x
Support
(a)
3 x
Small
Screw
(i)
3 x
Universal
Fixing Pluge
(e)
1 x
Blind
Pluge
(k)
1 x
Purge
Pluge
(j)
3 x
Wall Screw
(f)
3 x
Support
Screw (h)
3 x
Support
(b)
Box contents (example ZT y ZX)
3 x
Support Cap
(d)
Electrotechnical for low voltage ITC-BT-27 September 2003
The towel radiator complies with the CLASS I safety regulations.
It can be installed in volumes 2 and 3, positions A and B, provided
that the following rules are respected:
- In the bathroom, it should never be installed in such a way that
switches or other electrical devices is at less than 60 cm from
the bath or shower.

15
English - User guide TMUDry-towel models ZT, ZX, PUKITA, TUBÓN, DIJON, CUADRO, KARNAK, VERONA and ELFIE
1 - [+] Button
2 - Button [Prog].
3 - [On/stand-by] Button
4 - Button -
5 - Led screen (No retro-lightning).
A - Internal buzzer: For acoustic
warnings, compliant with EN60335-1
directive.
B - Water Protection: The IP44 protection
level is guaranteed by a special design of
the connection parts.
C - External sensor: Guarantees a stable
room temperature and a prompt reaction
in case of strong temperature variation.
Step 8
Connect the electronic control to the electrical net. Your towel radiator is ready for operation.
Step 4
Align the support stem
(b), with the support
base (a) and place the
towel radiator in its
position.
Step 5
Tighten the support
screw (h) with a
screwdriver.
Step 6
Insert the mini screw (i)
into the support base
(a) and tighten with a
screwdriver to fix the
bracket in the desired
position.
Step 7
Press and fit the trim (d)
in its position on the front
of the support (c).
Step 3
Without tightening completely, adjust
the support rod (b) to the towel radiator
with the front of the support (c) and the
support screw (h). Turn the support rod
(b) according to the following figures:
Straight Radiator
SCHEME OF THE THERMOSTAT
4
1
23
5
A
B
C
Curved Radiator

16
English - User guideTMU Dry-towel models ZT, ZX, PUKITA, TUBÓN, DIJON, CUADRO, KARNAK, VERONA and ELFIE
ELECTRONIC CONTROL FOR TOWEL RADIATORS
IGNITION / STAND BY
Indicator of active
heating element Congured temperature
24h Indicator
IR receiver indicator
Clock
Key-lock
Day of the week
Comfort / Night bar
(Chrono mode)
Operating mode icons
- Fil-Pilote
- Comfort
- Night
- Antifreeze
- Timer 2h
- Chrono
Function:
Open Window Detection
Press the [On/Stand-by] key to turn on the device or to enter the “Stand-by” mode.
When activated, the bottom part of the display shows the current time, while the configured operative mode and
the temperature are shown in the upper part. When in “Stand-by” mode current time, day of the week and the
message: “Stb” are displayed.
NOTE: When the device goes into “Stand-by” mode it beeps twice for 0.5s.
EXAMPLE:
1 - “COMFORT” MODE ( ) and NIGHT MODE ( )» two different levels of temperature can be established.
“COMFORT” Temperature is the one used for the “Chrono and Comfort “ modes.
2 - Ttemperature “NIGHT” is the temperature used for “Night and Chrono Modes”. The wished temperature can
be adjust pressing the buttons (+) and (-). The range of configurable temperature is between 7ºC to 32ºC.
IMPORTANT: The temperature in”Night” mode must be below the temperature of the way “Comfort”.
The temperature in “Night” mode could be configurated between a value of 7ºC and temperature formed in
“Comfort”mode -0,5ºC.
Example in “COMFORT” mode Example in “STA ND-BY” mode

17
English - User guide TMUDry-towel models ZT, ZX, PUKITA, TUBÓN, DIJON, CUADRO, KARNAK, VERONA and ELFIE
OPERATING THE DEVICE
Press the [ ] button to select the desired operative mode. An icon on the display indicates the selected
operating mode, according to the following table:
FIL-PILOTE MODE (Only for product versions equipped with “Fil-Pilote”)
In “Fil-Pilote” mode the device is managed by a central control system that sets the operating mode for all the
connected devices. The device operates with the most advanced “Fil-Pilote” system with six commands, which
allows the following functions:
1. Standby: power off the heating element, the device remains active.
2. Comfort: maintains the “Comfort” temperature set by the user.
3. Eco: maintains the room temperature 3,5°C below the “Comfort” temperature.
4. Antifreeze: maintains the room temperature at 7°C.
5. Eco-1: maintains the room temperature 1°C below the “Comfort” temperature.
6. Eco-2: maintains the room temperature 2°C below the “Comfort” temperature. The user can set the desired
temperature on the device:
-Press the [Prog] button until the “Fil-Pilote” icon is displayed.
Set the desired temperature through the [+] and [-] buttons and wait until the displayed temperature stops
COMFORT MODE [ ]
The “Comfort” stably maintains the room temperature to a selected value. To set this operative mode:
-Press the [ ] button until the display shows the “Comfort” icon
-Set the desired temperature through blinking.
NIGHT MODE [ ]
The “Night” mode sets a value of temperature below the “Comfort” temperature value.
It is suggested to set this operating mode during the night or when the room is not occupied for 2 or more hours.
-Press the [ ] button until the display shows the “ Night” icon
-Set the desired temperature through [+] and [-] buttons and wait until the displayed temperature stops blinking.
ANTIFREEZE MODE [ ]
In “Antifreeze” mode the temperature is fixed to 7°C. The device activates the heating element when the room
temperature falls below 7°C. It is suggested to set this operating mode when the room is not occupied for several
days.
Press the [ ] button until the display shows the “Antifreeze” icon.
TIMER-2H MODE [ ]
The “Timer 2h” mode can be used to quickly warm up the room or to speed up towel drying.
-Press the [ ] button until the display shows the “2h” icon.
The device is activated at the maximum power for 2 hours, up to a maximum room temperature of 32°C. The
“Timer-2h” mode is automatically deactivated after a period of 2 hours and the device returns to the operative
mode previously set. The user can switch to another operative mode at any time by simply pressing the [ ]
button.
CHRONO MODE [ ]
This operating mode allows the user to configure different temperature values for each hour of each day of the
week. The “Comfort” / “Night” temperatures and the related time intervals can be thus programmed.
-To activate this function, press the [ ] button until the “Chrono” icon is displayed.
FIL-PILOTE COMFORT NIGHT ANTIFREEZE TIMER 2H CHRONO

18
English - User guideTMU Dry-towel models ZT, ZX, PUKITA, TUBÓN, DIJON, CUADRO, KARNAK, VERONA and ELFIE
Programming the “Chrono” mode
a) Setting the current day of the week and time.
Enter into “Stand-by” mode and press the [-] button at least 3 seconds.
On the upper part of the display the message “Set” will be displayed.
To set the day and time press the [+] button until the bottom part of the display the message “TED” is displayed.
Press the [ ] button to enter the editing mode. The blinking arrow indicates the currently selected day: Pressing
the [+] / [-] buttons the desired day can then be set. Press again the [ ] button to confirm the selected day.
After that, the procedure for entering the time starts and the display shows the currently selected time.
“Hours”: Use the [+] and [-] buttons to set the correct hour and confirm the selected value pressing the [ ]
button.
“Minutes“: Same procedure as for the hours. Confirm the selected value by pressing the [ ] button. At the end
of the procedure, the thermostat returns into “Stand-by” mode.
At the end of the procedure, the thermostat returns into “Stand-by” mode.
b) Enter into “Stand-by” mode and press the [-] button at least 3 seconds.
On the upper part of the display the message “Set” will be displayed.
To set the day and time press the [+] button until the bottom part of the display the
message “Prog” is displayed. Press the [ ] button to enter the editing mode. Now a time sequence can be
defined for each day of the week.

19
English - User guide TMUDry-towel models ZT, ZX, PUKITA, TUBÓN, DIJON, CUADRO, KARNAK, VERONA and ELFIE
The procedure starts with day 1, and the desired sequence can be configured with the [+] and [-] buttons: For each
hour of the day, it is then possible to assign either the “Comfort” temperature (full bar indication displayed) by
pressing the [+] button or “Night” mode temperature (empty bar) by pressing the [+] button (see picture below).
Press [ ] to confirm the entered configuration for day 1, and repeat the same procedure for the remaining 6
days of the week.
BLOCKADE OF KEYS / KEY LOCK
It is possible to block the buttons of the device to avoid involuntary modifications of the configuration.
Press the button during 3 seconds to block all the buttons, except the button of power.
The key icon is activated on the screen . To unblock the keyboard, press the button again during 3 seconds.
+
+
+
+
+
+
+
+
+
+
+
+
+
-
-
-
-
-
-
-
-
-
-
-

20
English - User guideTMU Dry-towel models ZT, ZX, PUKITA, TUBÓN, DIJON, CUADRO, KARNAK, VERONA and ELFIE
MAINTENANCE AND CLEANING
Clean the surface of the towel-rail with a clean and soft rag, do not use abrasive products or corrosive. Stop
the device before proceeding to his cleanliness. For the cleanliness of the box with the controls, use a dry cloth
(without solvent).
Thanks to the high presentations of his materials and the quality of his superficial treatment, towel-radiator is
protected from the corrosion.
TECHNICAL INFORMATION
1. Power: 230V ~50Hz.
2. Power of the resistance: 400, 800 or 1.200 W.
3. Temperature of functioning: from 70to 320 C.
4. Protection level: Class I.
5. Connection to the radiator: G1/2”.
6. Electronic probe of temperature NTC.
7. Boost Function (Forzed march) 2 hours.
8. Manners of work: Comfort, In The Night,
Antifreee, Stand By and forced March 2 hours.
9. Normative it lowers tension:
CEE n.93/68 and CEE n.89/336 for
Electromagnetic compatibility.
CEE EN 60335-1 and EN60335-2-43.
The following values of factory will become effective:
PARAMETERS FACTORY SETTINGS
FUNCTIONING
Programmed temperature Comfort 19°C
Boost during time 120 Minutes
Block key Disable
USER SETTINGS
Level of Descent ECHO -3,5°C
Established temperature of Antifreeze 7°C
Minimal temperature of Comfort 7°C
Maximum temperature of Comfort 32°C
Boost max. During time 120 Minutes
Maximum established temperature
Automatically of the boost 39°C
Temperature Uni °C
This manual suits for next models
9
Table of contents
Languages:
Other Arbonia Bathroom Fixture manuals
Popular Bathroom Fixture manuals by other brands

Radaway
Radaway Torrenta PND Assembly instructions

HydroTherm
HydroTherm FC/500 quick start guide

homechoice
homechoice Splash user guide

Hans Grohe
Hans Grohe Raindance Select 2jet Showerpipe 27126 1... Installation/User Instructions/Warranty

Gessi
Gessi RETTANGOLO T 27043 manual

Guru
Guru EVOLUX Product guide