1
Safety and Care Advice
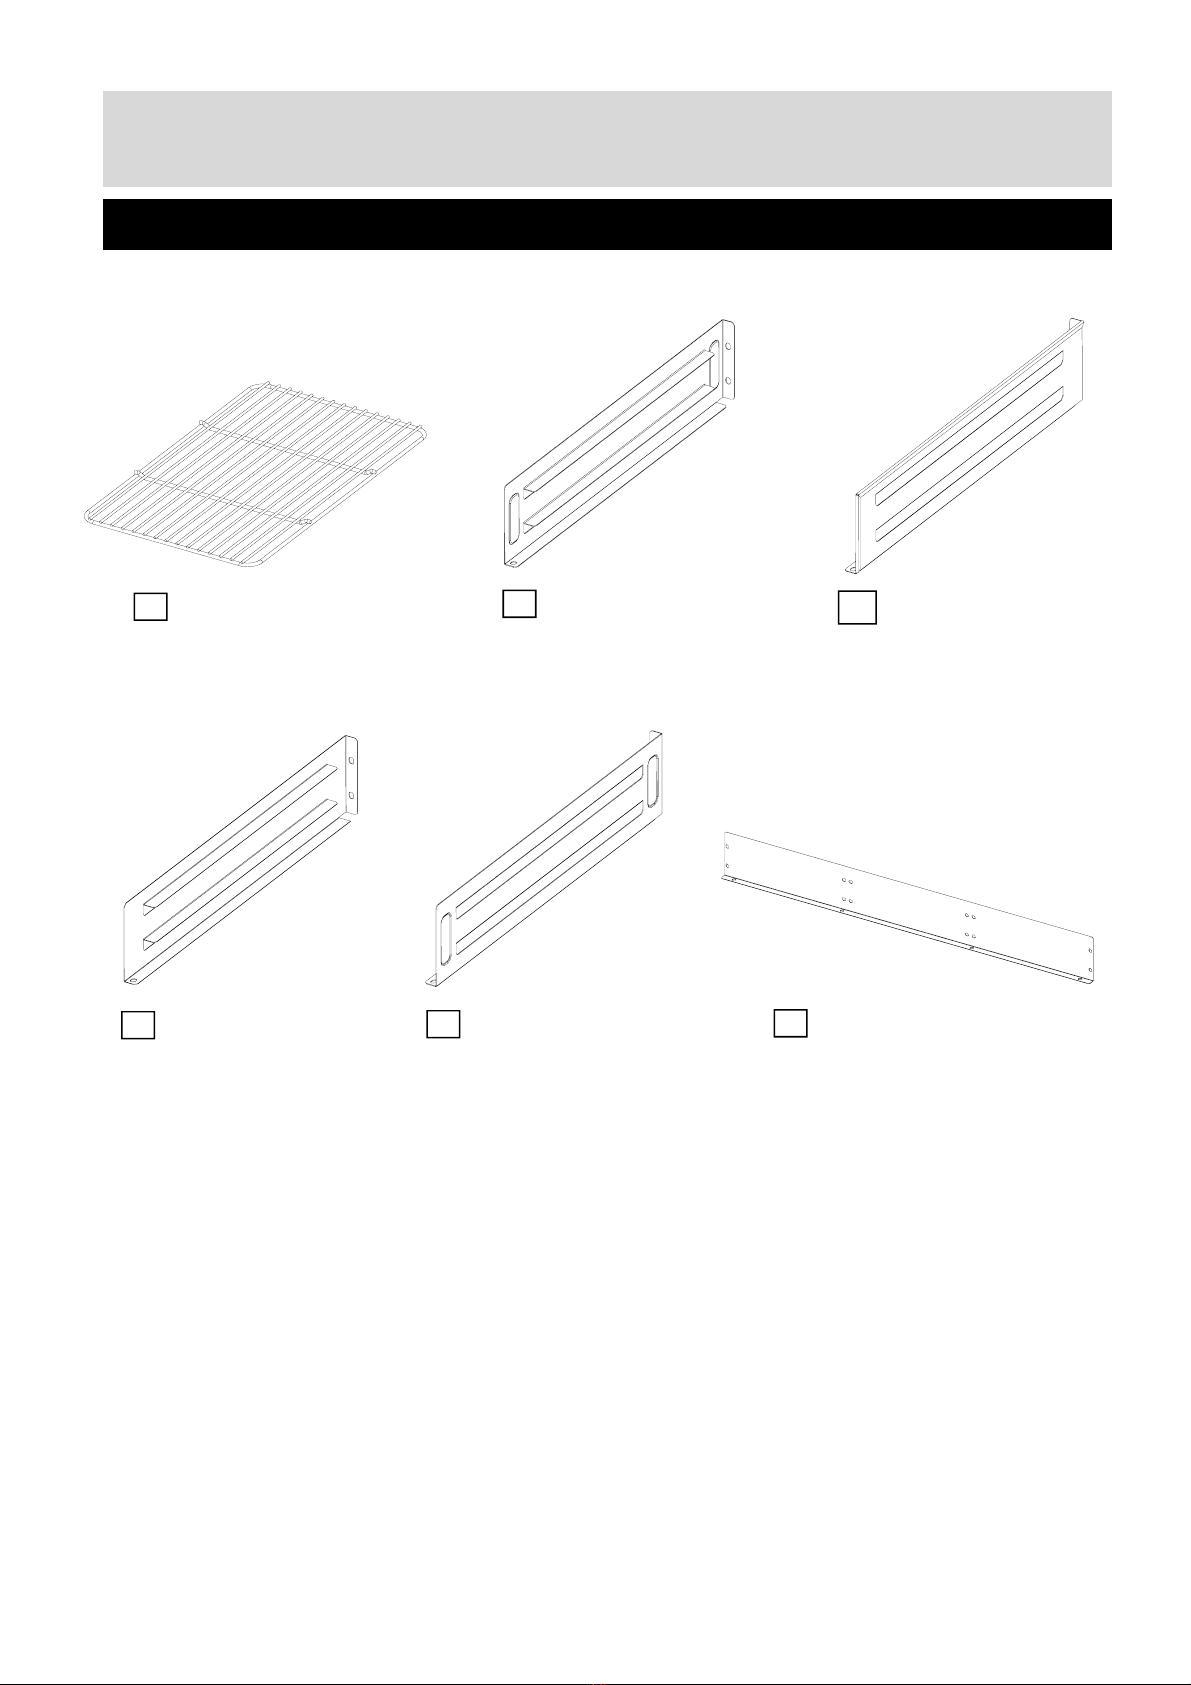
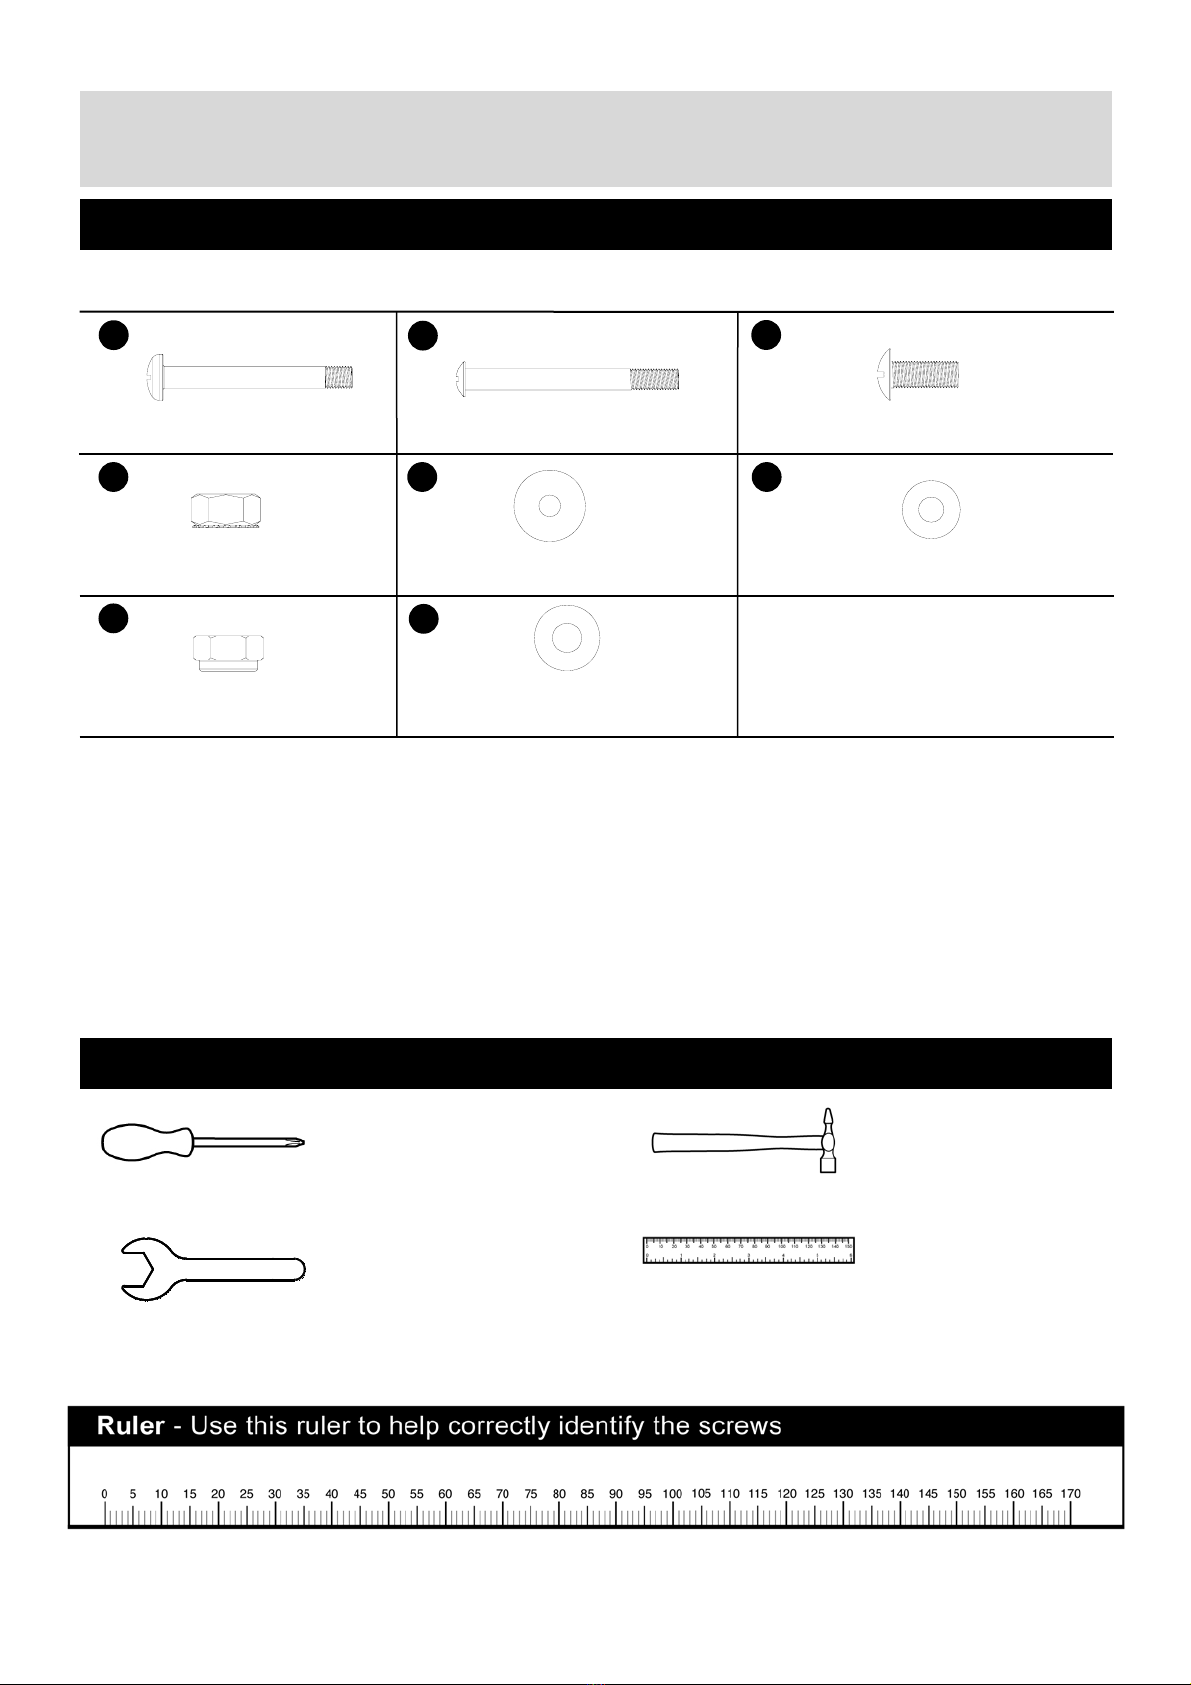
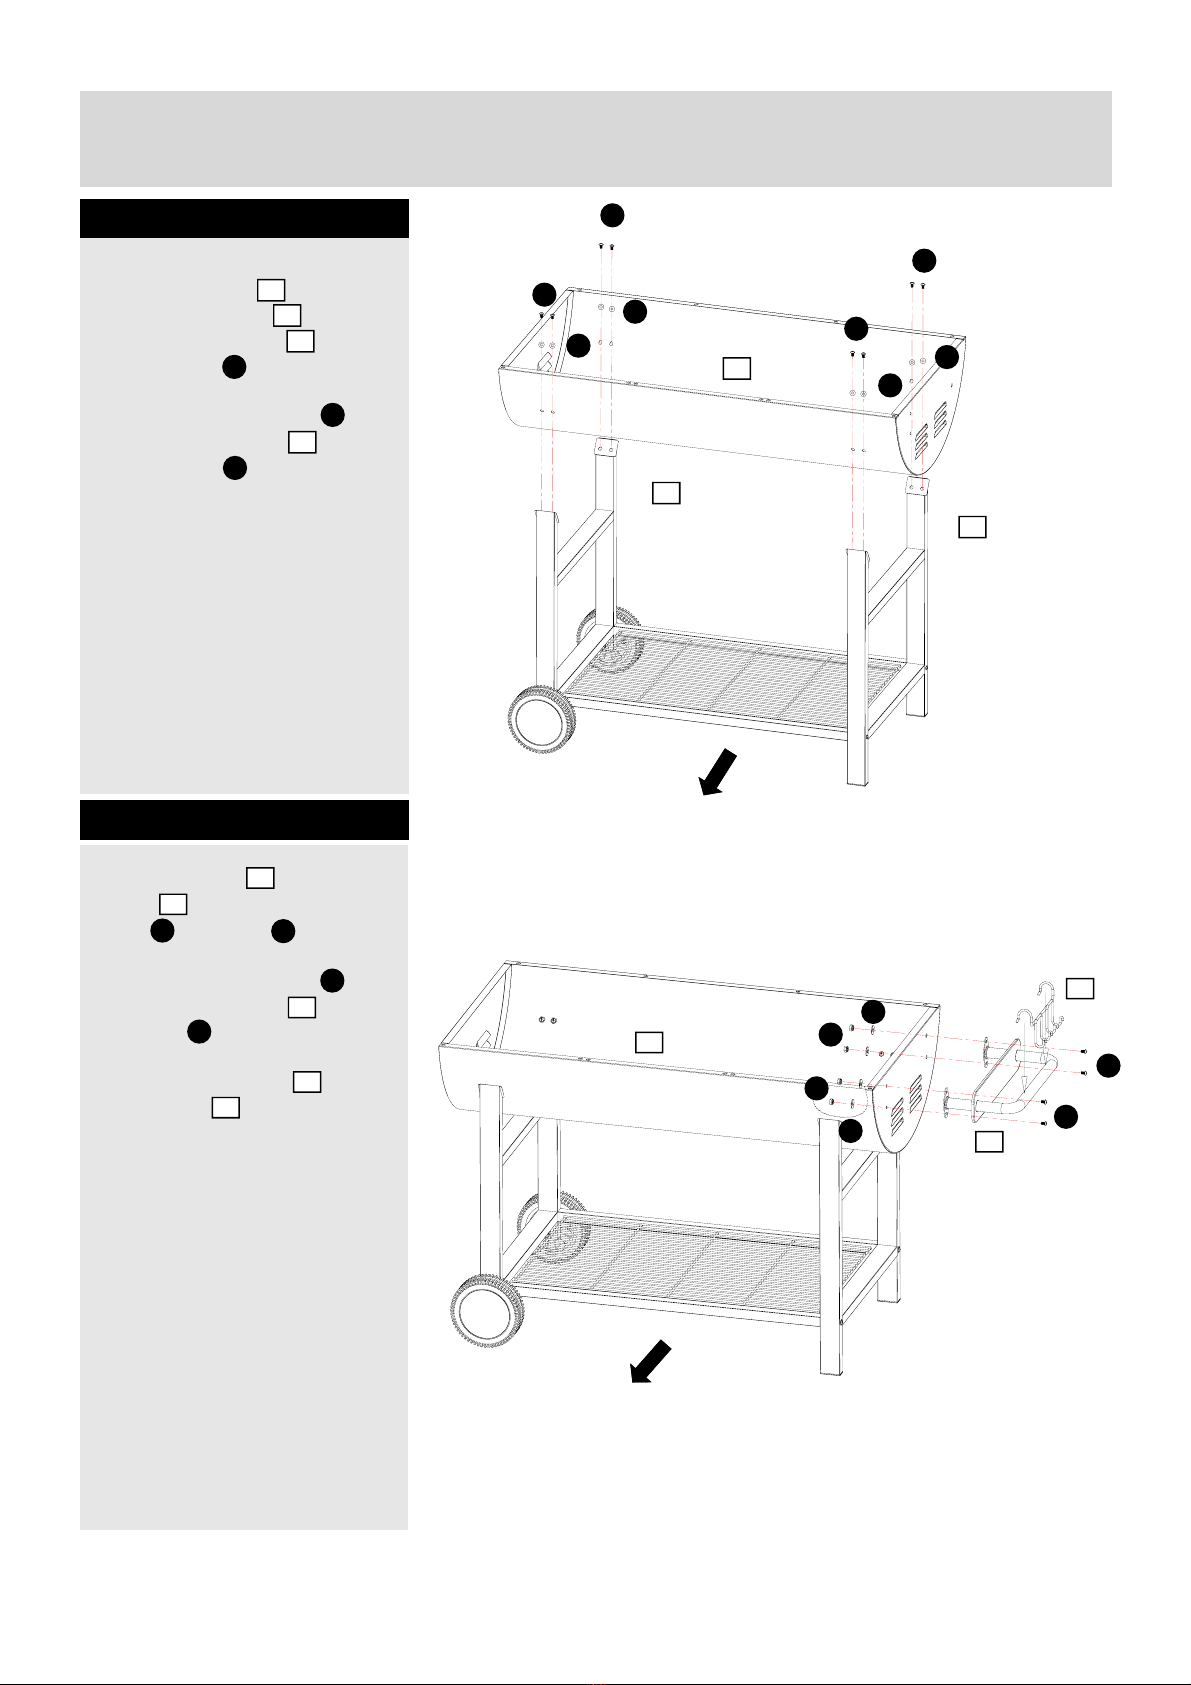
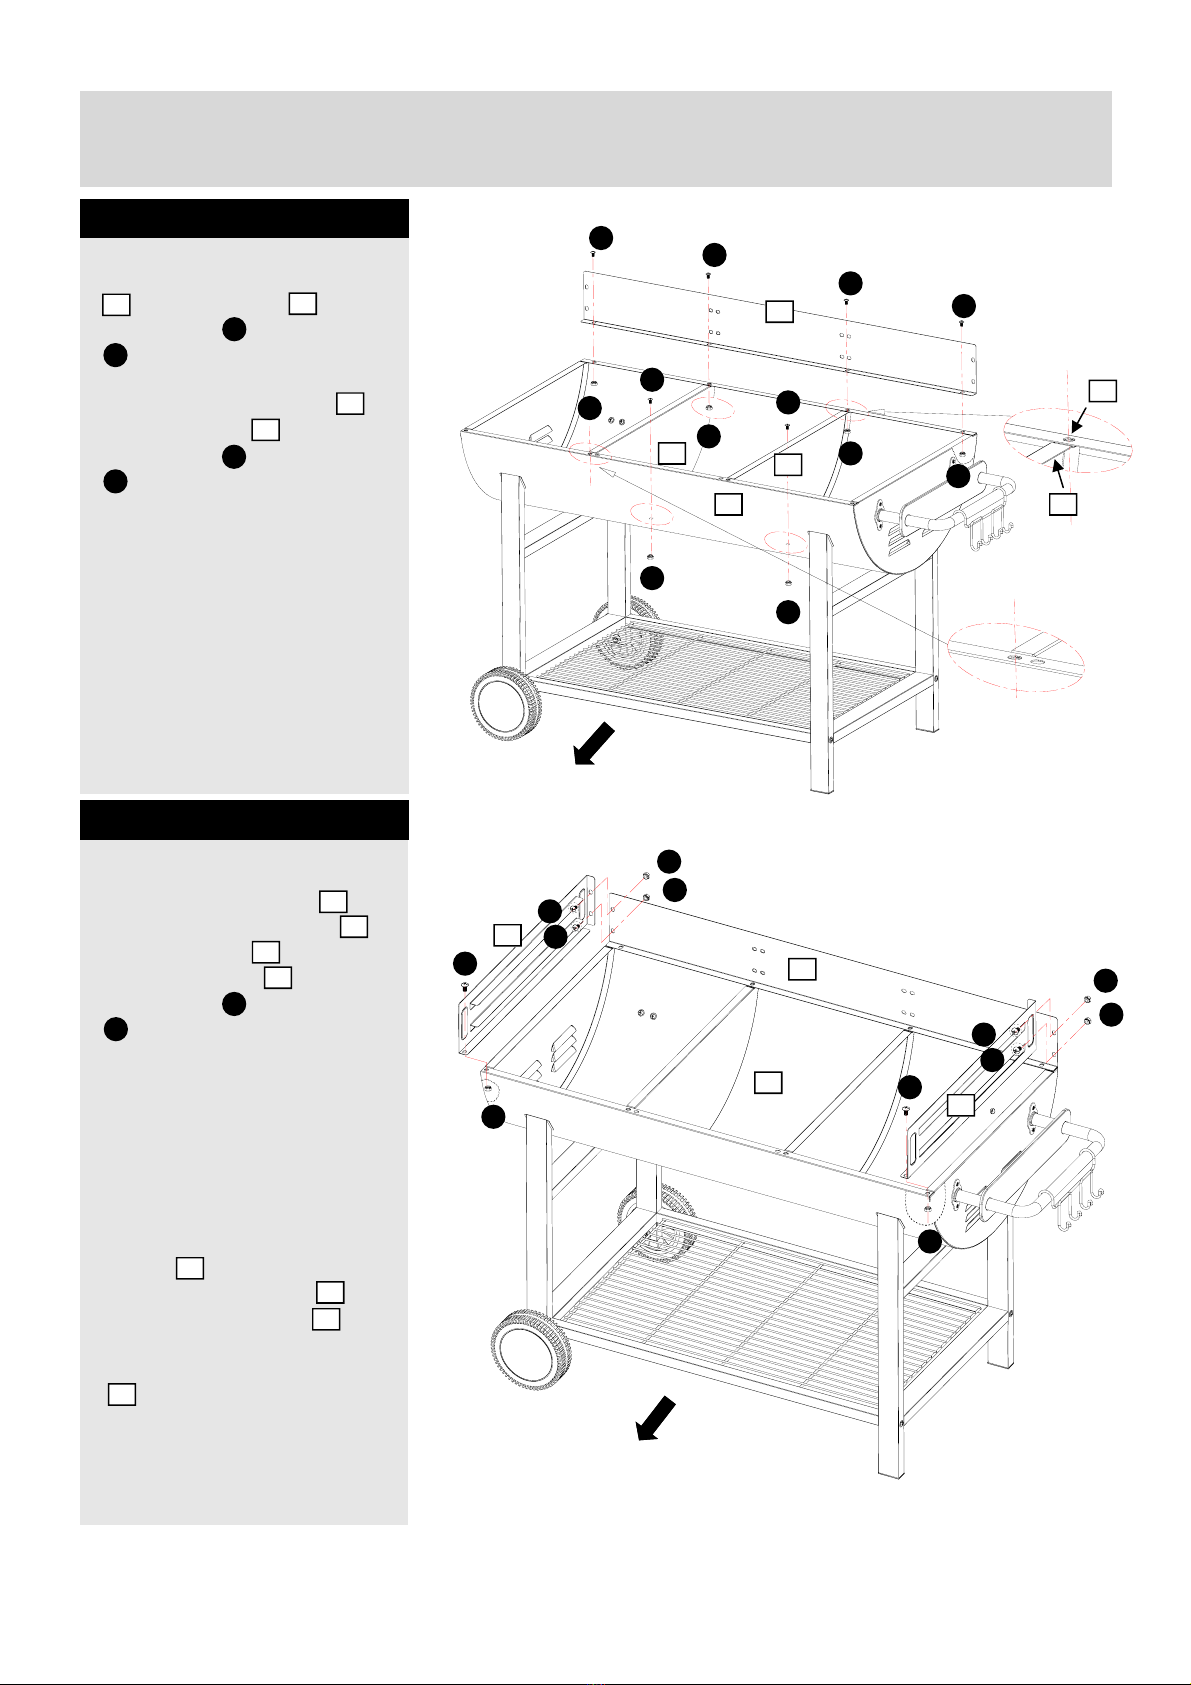
Important - Please read this instructions fully before starting assembly
Warning: Whilst every effort has been made in the manufacture of your BBQ to remove any sharp
edges, care should be taken in handling to avoid any accidental injury.
• Assembly time: approx. 60 mins.
• Make sure the assembly instructions have been followed correctly.
• Set the Charcoal BBQ in a suitable position, on a level surface away from areas likely to catch fire. The
base of the Charcoal BBQ will get hot so ensure it stands on a suitable surface.
• Always stand your Charcoal BBQ outdoors and on level ground away from trees and wooden fencing.
Ensure there is a least 1 metre clearance around all sides of the Charcoal BBQ. Keep away from
fences, over hanging branches and other combustible materials.
• Use Charcoal and a suitable lighting method.
• Do not cook before the fuel has a coating of ash.
• “WARNING! This barbecue will become very hot , do not move it during operation.”
• “Do not use indoors.”
• “WARNING! Do not use spirit or petrol for lighting or relighting! Use only firelighters complying to
EN1860-3!”
• “WARNING! Keep children and pets away.”
Method 1. Charcoal & Lighting Fluid/ Gel
• Set up your Charcoal BBQ in a safe place. Place enough charcoal in the charcoal grate to a depth of 3
- 5cm.
• Taking care not to spill any liquid/ gel onto your hands or clothes. Apply carefully the lighting fluid/ gel
over the charcoal.
• If using lighting fluid, wait for 30 seconds to allow the liquid to soak into the charcoal.
• Do not light the charcoal if you have spilt fluid or gel onto your clothes. Light the charcoal using a long
taper or safety lighter. The charcoal will then burn for a period with flames.
• When the flames die down, check the charcoal is beginning to glow red. If your coals are going out, you
should open all the vents and allow to cool down before trying to apply more liquid.
CAUTION: Apply carefully lighting fluid/ gel in small amounts. Over application can be
dangerous.
• Do NOT squirt liquid onto burning charcoal.
• After lighting, the fire should be ready for cooking in 30-40 minutes, or when even grey ash is visible by
day, or an even red glow is visible by night.
Method 2. Lighting Blocks
• Place three or four Lighting Blocks in the centre of the Charcoal grate and light with a match.
• Place pieces of charcoal around each burning block. Add more charcoal as required, in a pyramid
formation.
• When burning is established, spread the fuel out evenly. After lighting, the fire should be ready, or when
even grey ash is visible by day, or an even red glow is visible by night.
• Make sure that the cooking grill is fully located into the grill supports so that the cross bar supports lock
behind the retaining edges.
• When the charcoal is alight, the smoke and flames have died down and the charcoal has an even layer
of grey ash, rake the charcoal into a level layer in the hearth.
• Small quantities of charcoal may be added on top of the charcoal layer prior to cooking to extend
cooking time.
• To help prevent food sticking, apply a tin coating of cooking oil on the grill prior to cooking.
• To adjust the airflow using the air vent we recommend to use of a heat resistant glove.
• ALWAYS WEAR OVEN GLOVES WHEN HANDLING THE CHARCOAL BBQ.