Ariel Rider D-Class User manual

Ariel Rider Ebikes
D-Class User’s Manual
Hi!
Thank you for choosing to be part of the Ariel Rider team
We invite you to read through this guide to learn about your bike and what owning an ebike looks like
First and foremost, remember to be safe out there. Your bike is an accessory to your lifestyle and
activities. Always follow the best practices and traffic rules.
Even being an evolving technology, your ebike is a bike at heart, so it will require basic maintenance and
care to always be performing properly.
Preventive maintenance is the name of the game, we invite you to grow with us taking advantage of the
modular design we use for our technology
Instructions, videos and live support are being created to offer all the knowledge you need to know your
Ariel Rider E-bikes and get the best out of it.

Ariel Rider Ebikes
D-Class User’s Manual
Important Warranty Information
Your bike has had an amazing trip before arriving to your doorstep.
Help us give you the best experience following this unboxing guide
Before assembling your Ariel Rider eBike
Perform a visual inspection of your shipping box and your bike to see everything arrived without
shipping issues. Take pictures if you suspect excessively rough handling.
Register your Ariel Rider by sending us e-mail:
Watch our assembly videos and feel free to invite a handy friend or give us a call if there’s something
you have doubts with. Also you can send us an email to info@arielrider.com and we can send you more
specific info as continuous feedback keeps us generating more guides
Before Riding your Ariel Rider eBike
Be sure all the items are properly torqued, tightened and connected.
In particular the items you had to install.
If you have any doubts contact us
And about your warranty...
We stand behind the warranty of our products and can assure you we learn every lesson along the way
bringing it into our services.
Service and support exist because in the real world, there are a lot of variables that will interact with
your bike. So, we want you to be sure that we are here to help you and keep you having the best riding
experience. Your help will always be appreciated as we value your time and attention immensely
Our goal is to be the friend you call when you have a doubt, or when you need to move as you know it’s
always on your side.
So please be invited to read and reach out if any questions

Ariel Rider Ebikes
D-Class User’s Manual
What is Pedal Assist?
Also known as Pedelec, pedal assist refers to the use of a combination of sensors that measure torque
and cadence (force and speed) of your pedaling. This info is passed to the bike's controller, which
generates the power needed to give you a great ride.
We recommend you ride your bike with the power off at first, to get familiar with your D-Class’s braking
and gear shifting. Then, you can start testing the assist levels incrementally to gain familiarity with the
optimal settings for your riding style.
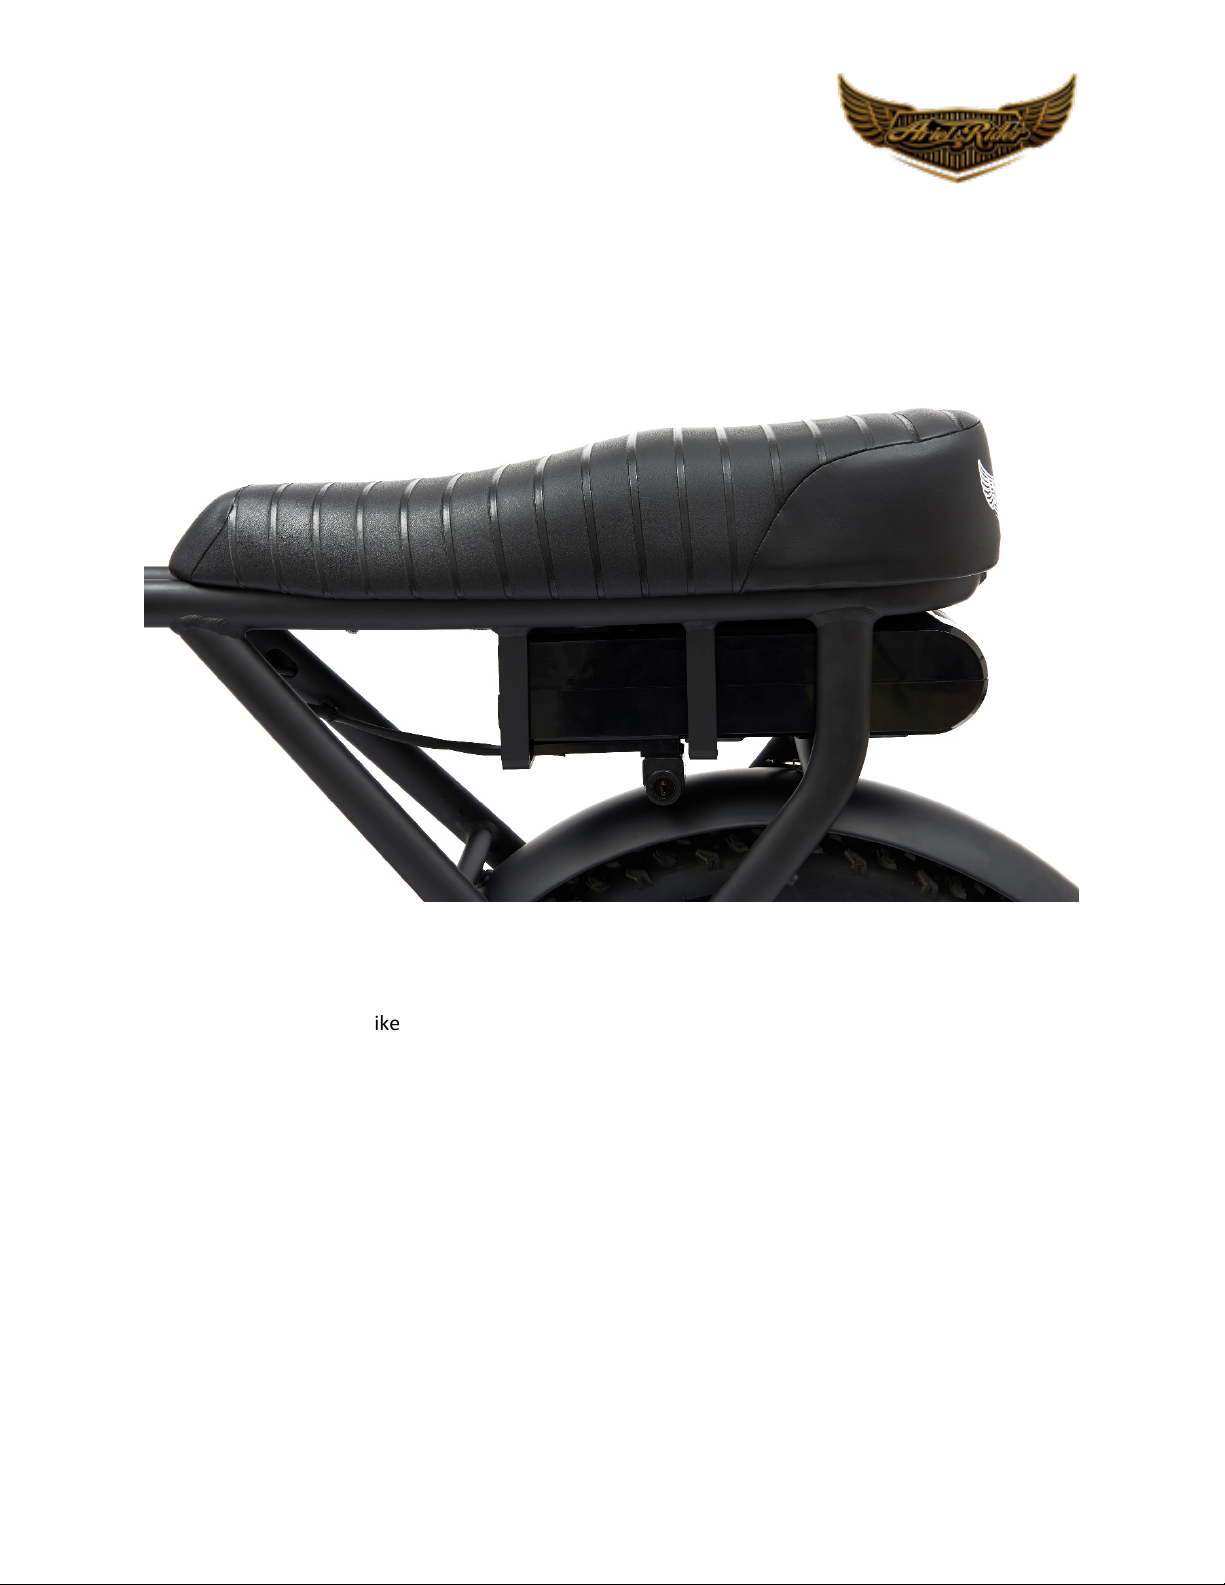
Charging the Battery
The Ariel Rider D-Class features a high-capacity Lithium Ion rechargeable battery. Charge the battery
fully before your first use. The charger that came with your e-bike recognizes the battery pack’s initial
charge and will automatically cease charging when the battery is fully charged; don’t be shy about
topping off your battery before a long trip!
The battery pack can be charged while connected on-board the bike and it can also be charged when
removed off of the bike ( see Removing Battery pack on page 13).
Onboard charging:
• Stand on the left side (non-drive side) and locate the charge port cover on the bottom of the battery
pack.
• Lift the plastic dust cap away to expose the DC charge port.
• Carefully, plug the charger into the charger port
• Connect the AC power cable into the charger and plug the cable into the power outlet.
• The charger will automatically start charging if the battery needs to be charged.
• When the charger is charging the battery, the indicator LED will turn RED. When the charger is
complete, the charger will turn GREEN.
• Charging takes between 1 and 5 hours, depending on battery size and initial charge level.
• When the pack is fully charged, the charger’s light will change from amber to green and automatically
stop charging.
• Disconnect the charger from the wall. Remove the charger plug from battery and close the rubber dust
cap.
• Use your battery often so it exercises the cells and is kept healthy

Ariel Rider Ebikes
D-Class User’s Manual
Caution:
The charger can become warm during charging.
Do not place anything over the charger while it is charging.
Do not use the charger in wet areas.
Do not cover the body of the charger when charging.
Do not charge the battery with any charger which is not supplied or approved to charge your bike.
Do not drop the charger or subject to high vibration.
Notes
If your battery is low, you should choose a lower level of assist if going on stops and hills. The sports
mode will demand enough power for the battery to think is depleted at a point when you can still get
range at a lower assist.

Ariel Rider Ebikes
D-Class User’s Manual
Turning the bicycle ON and OFF
The electric bicycle can be ridden like a normal bicycle with the power turned ON or OFF. However, the
Pedal Assist and Throttle will be active only if the power is turned ON.
Locate the power button on the left side of your handlebar.
• Press and hold the power button for a couple of seconds
• The LCD display panel will will turn on, giving an indication of the battery’s charge level and selected
assist level.
• D-Class can now ride on battery power alone. Throttle and Pedal Assist will be available at the same
time.
• Pressing and holding the power button again will turn off the controller.
• Power should be turned off after each ride to avoid draining the battery. If not, it automatically turns
off within 5 minutes.
Using the Brakes
The bike comes equipped with front and rear Tektro hydraulic disc brakes; the very best available for e-
bikes. The brake's main function is to slow down or to stop the bicycle.
• The brake on the front wheel is controlled by the lever on the left-hand side of the handlebar.
• The brake on the rear wheel is controlled by the lever on the right- hand side of the handlebar.
• When slowing down on slippery surfaces, use the rear brake first before applying the front brake.
• A signal wire from each brake lever automatically cuts power to the motor when either brake is being
used. This prevents undue wear to the electric motor.
Your new brakes go through a “Bedding In” period. Which means that after the first 40 to 50 Full stops,
they will wear down to achieve the 100% grip efficiency, resulting in an adjustment needed

Ariel Rider Ebikes
D-Class User’s Manual
Shifting the gears
Your D-Class comes equipped with a Shimano gear set. The lower gears are useful for starting off from a
stop or when riding slowly or climbing steep hills. Higher gears are most effective when riding at speed.
The mid gears fits into the space between. As a normal bike, you will get used to using the gear settings
that are most comfortable for your ride and trip.
• The shifter is located on the right side of the handlebar.
The gear shifting system and motor assist are entirely independent; neither affects the other’s
performance. Both work toward the goal of propelling the bike, of course, and their contributions are
additive.
Using the Assist Control
The control system can be used to maintain a constant level of pedal assist.
How to use the Assist control feature:
• Turn your bike on.
• Using the + or - Buttons, you can select the Assist levels
• The LCD will indicate the Assist Level you are selecting
• Once you start pedaling, the controller will make the motor turn accordingly.
• The bike will now maintain a constant Pedal Assist until:
1. The brakes are applied, or
2. The + or - buttons are pressed to adjust the Assist level, or
3. You stop pedaling, or
4. The battery runs down completely
Note: If your battery level is low, we recommend selecting a lower assist level as the
Battery Management system can deactivate the assist support to protect the
battery from getting too low. Charge your battery fully before each ride.

Ariel Rider Ebikes
D-Class User’s Manual
Using Dual Motor
Using the red switch your handlebar you can pick the motor you want to use.
You can use only front motor, only rear or both motors at the same time.
When your battery level is low, we recommend using only one of the motors to extend your range.
How to read the battery level
The LCD display which will give you an indication of the battery’s voltage. The battery’s voltage can vary
greatly depending on a variety of conditions.
The voltage will decrease temporarily when using the throttle and/or Assist. It may drop when going
uphill regardless of the charge state.
This is normal operation. The voltage will be lower if the battery has been in a cold environment.
To more accurately read the battery’s charge state, let off the throttle. The display lights will stabilize
after 1 second to give an indication of the battery’s level.
Note:
2 Bars: The battery level is low and should be recharged soon. Select a lower assist level
1 Bar: Stop using the throttle, recharge the battery pack.
Understanding Battery Range
All electric bicycles have a riding range that can vary greatly depending on how it is ridden, terrain, tire
pressure, temperature, payload and wind. After a few rides, you will get a sense of the electric bicycle’s
range capability.
Factors that will decrease your range:
• Rapid accelerations using the motor
• Uphill riding
• Heavy payloads
• Headwinds
• Under-inflated tires
• Extreme hot or cold weather
How to increase your range:
• Start by pedaling instead of only using the motor
• Avoid rapidly accelerating using the throttle
• Pedaling to help the motor up steep hills. Use your gears
• Reduce your average assist level and pedal along with the motor
• Reduce payload weight

Ariel Rider Ebikes
D-Class User’s Manual
• Properly inflating your tires between 50-60 psi
• Coast to a stop and avoid rapid decelerations
Notice: Riding downhill or pedaling when not using the throttle will not recharge the battery pack. Do
not over-inflate the tires.

Ariel Rider Ebikes
D-Class User’s Manual
Battery Information and Safety
About the Lithium battery
Your Lithium battery does not have a “memory effect” associated with older battery technologies. It is
highly recommended you charge the battery after every ride even if the battery is only lightly used.
An on-board circuit prevents the battery from over-charging. The battery can achieve between 500 to
700 full charge cycles. As the battery receives more charge cycles, the capacity will become decreased.
Charging a partially flat battery is not considered a full charge cycle.
Notice: The battery must be recharged at least once every month. A battery left unused for several
months may result in permanent capacity loss.
The battery’s capacity will be temporarily reduced in cold environments. Avoid using the electric bicycle
in very hot weather. Store the electric bicycle in a sheltered place.
Battery Safety Information
• Use only the charger supplied with the bicycle.
• Improper usage can cause explosion or fire.
• Do not short-circuit the battery’s terminals.
• Do not use if the temperature is over 60 C (140 F)
• Do not disassemble the battery pack.
• Do not submerge the battery in liquid or use in wet areas.
• Do not set flame to the battery.
• Do not expose battery freezing temperatures for an extended period.

Ariel Rider Ebikes
D-Class User’s Manual
Removing the battery
The battery can be removed from the bike. This is useful for storing the bike or when the bike is being
transported.
• Turn off the bicycle.
• Locate the keyhole under the left side of the saddle.
• Insert the key into the bike.
• Turn the key counterclockwise and hold.
• Careful get a good grip of the pack from the handle under it and pull the battery out.

Ariel Rider Ebikes
D-Class User’s Manual
Key parts of the electric bicycle
An electric bicycle is a lot like a normal bicycle. The major difference is the inclusion of a motor which
provides a boost when desired. An onboard rechargeable lithium battery supplies the motor with
electric power. The bicycle can be ridden using both pedal power and battery power at the same time.
Controller
The controller regulates how much power is sent from the battery to the motor.
Throttle
The throttle allows the rider to control the bike’s speed. It sends a signal to the controller telling it how
much power to send to the motor.

Ariel Rider Ebikes
D-Class User’s Manual
ASSEMBLING ELECTRIC BIKE
Step 1: Open box gently. Take all the Styrofoam protectors out of the box so you can easily pull your D-
Class out of the box easily.
Step 2: Install handlebars into the fork head. Please pay attention to the embedded lines on the stem,
your stem should go into the fork head until those lines. After handlebars are in place, please tighten the
4 screws on the sides where the stem goes into the fork head.
Step 3: Inflate the tires. Your tires come inflated and assembled. But it is better to check if it has enough
air pressure and if tires are safely assembled in case they get loose during transportation or air pressure
may go down.
Step 4: Install the Pedals. Locate the pedal marked “R” with a smooth exterior of the pedal axle (1, at
right), which is the right pedal. The right pedal goes on the crank on the right side of the bike (which has
the drivetrain gears and is the same as a rider’s right side when riding). The right pedal is threaded so
that it is tightened by turning clockwise. Carefully thread the right pedal on to the crank on the right side
of the bike slowly and by hand. Do not cross thread or damage the threads.
The left pedal is reverse threaded and tightens counterclockwise. Ensure the pedal is marked with an “L”
and has notches on the exterior of the pedal axle (2, at right), indicating it is the left pedal. Carefully
thread the pedal onto the left crank by hand slowly. Do not cross thread or damage the threads. Tighten
each pedal securely using a pedal wrench to avoid damage caused by wider wrenches, as shown in
assembly video.
Step 5: Install the front fender on.
Step 6: Check if battery is locked. Never ride your D-Class with unlocked battery.
Step 7: Install Headlight. The headlight should be adjusted to illuminate the road ahead and not blind on
coming traffic. While installing the headlight, please use the 2 smaller screws in the headlight box to fix
the headlight onto the headlight holder on the fork.
Step 8: Install the foot pegs on. Please note that there are screws and bolts to install the foot pegs in the
box which has your charger in.

Ariel Rider Ebikes
D-Class User’s Manual
BATTERY CHARGING
Basic Charging Procedure Follow these steps for charging your bike from Ariel Rider E-Bikes:
1.Ensure the battery is off by inspecting the switch on the battery. Safely remove the battery as
previous instructions.
2.Remove the rubber cover on the charging port on the opposite side of the battery from the key switch.
3.Plug the charger into the battery’s charging port. With the battery off the bike, place the charger in a
flat, secure place, and connect the DC output plug from the charger (round barrel connector) to the
charging port on the side of the battery.
4.Plug the charger into a power outlet. Connect the charger input plug (110/220-volt plug) to the power
outlet. Charging should initiate and will be indicated by the LED charge status lights on the charger
illuminating as two red lights.
5.Unplug the charger from the outlet, then the charging port. Once fully charged, indicated by one
charging indicator light turning green(and one remaining red),unplug the charger from the wall outlet
first and then remove the charger output plug from the battery charging port.
Always charge your battery in temperatures between 50°F –77°F(10°C –25°C) and ensure the battery
and charger are not damaged before initiating charge. If you notice anything unusual while charging,
please discontinue charging and use of the bike and contact Ariel Rider E-bikes Technical Support for
help.

Ariel Rider Ebikes
D-Class User’s Manual
BATTERY CHARGING BEST PRACTICES
•Check the charger, charger cables, and battery for damage before beginning each charge.
•Always charge in a safe area that is cool*, dry, indoors, away from direct sunlight, dirt, or debris,
in a clear area away from potential to trip on the charging cords, or for damage to occur to the
bike, battery, or charging equipment while parked and/or charging. *Always charge your battery
in temperatures between 50 °F –77 °F (10 °C –25 °C).
•The battery can be charged on or off the bike. To remove the battery, turn the key to the off and
unlocked position (see the Start-Up Procedure section for details) and then carefully pull the
battery forward and up until the battery detaches from the receptacle. See the When the
Battery is Removed section for more information for off-bike battery handling.
•The battery should be recharged after each use, so it is ready to go the full range per charge
next ride. There is no memory effect, so charging the battery after short rides will not cause
damage.
•Charging the battery normally takes 3-7 hours. In rare cases, it may take longer to allow the
battery management system to balance the battery, particularly when the bike is new or after
long periods of storage. Balance the battery during the first three charges. See the Balancing the
Battery section for more information.
•The charge indicator lights will show two red lights while the battery charges. When charging is
complete, one indicator light will turn green, so one green, and one red will be illuminated.
Ensure the lights face upward when charging.
•Remove the charger from the battery within one hour of the green light indicating a complete
charge. The charger is designed to automatically stop charging when the battery is full, but
unnecessary wear of the charging components could occur if the charger is left attached to the
battery and a power source for longer than 12 hours. Detach the charger within one hour, or as
soon as possible, once the green light indicates a complete charge to avoid unnecessary wear of
charging components.
•Never charge a battery for more than 12 hours at a time.
•Do not leave a charging battery unattended
Failure to follow Battery Charging Best Practices could result in unnecessary wear to the
charging components, battery, and or charger, and could lead to an underperforming or
non-functional battery and replacement will not be covered under warranty.

Ariel Rider Ebikes
D-Class User’s Manual
When the Battery Is Removed
•Ensure the battery is turned off whenever it is being removed or off the bike.
•Be careful not to drop or damage the battery when lifting the battery off the frame or while
loose from the bike.
•Do not touch or damage the “+” and “-” terminal contacts on the bottom of the battery and
keep them clear of debris.
•Do NOT operate the bike with the electrical system in the on position, or damage to the
electrical system can occur.
Use caution to avoid damage to battery connector terminals, which are exposed when
the battery is unlocked and removed from the frame of the bike. In the case of damage
to the terminals or battery mounts, please discontinue use and contact Ariel Rider E-
Bikes Technical Support immediately
When Installing the Battery onto the Bike
•Ensure the battery is turned off before sliding the battery onto the frame mount receptacle.
•Do not force the battery onto the receptacle; slowly align and gently push the battery down into
the receptacle.
•Ensure the battery has been properly secured to the bike before each use by carefully pulling
upwards on the battery with both hands to test the security of the attachment of the battery to
the mount once locked.
Charging Time
When the input and output plugs of the charger are connected properly, the two red charging indicator
lights should illuminate; when charging is complete, one red and one green light should illuminate. The
time the charger takes to fully charge the battery is dependent on various factors including distance
traveled, riding characteristics, terrain, payload, and battery age. The following table provides an
estimate of charge time based on most common distances traveled in regular operation:
Notice: The battery may take longer to charge when fully depleted, when very new, and after 3-5 years
of regular use. If your battery does not seem to be charging normally, taking longer to charge than
expected, or you are experiencing substantial reduction in range, please discontinue use and contact
Ariel Rider E-Bikes immediately.

Ariel Rider Ebikes
D-Class User’s Manual
Charger Safety Information
•The charger should only be used indoors in a cool, dry, ventilated area, on a flat, stable, hard
surface.
•Avoid charger contact with liquids, dirt, debris, or metal objects. Do not cover the charger while
in use.
•Store and use the charger in a safe place away from children and where it cannot suffer damage
from falls or impact.
•Fully charge the battery before each use to ensure it is ready to go the full range per charge, to
extend the life of the battery, and help reduce the chance of over-discharging the battery.
•Do not charge the battery with any chargers other than the one originally supplied from Ariel
Rider E-Bikes or a charger designed for use with your specific bike purchased directly from Ariel
Rider E-Bikes.
•The charger works on 110/220 V 50/60 Hz standard home AC power outlets and the charger
automatically detects and accounts for incoming voltage. Do not open the charger or modify
voltage input.
•Do not yank or pull on the cables of the charger. When unplugging carefully remove both the AC
and DC cables by pulling on the plastic plugs directly, not pulling on the cables.
•The charger will get hot when operating as designed. If the charger gets too hot to touch, you
notice a strange smell, or any other indicator of overheating, discontinue charger use
immediately and contact Ariel Rider E-Bikes Technical Support.
Charge the battery only with the charger originally supplied with the bike from Ariel
Rider E-Bikes, or a charger purchased directly from Ariel Rider E-Bikes, designed for use
with your specific bike serial number, as approved by Ariel Rider E-Bikes. Never use an
aftermarket charger, which can result in damage, serious injury, or death.
Please take special care in charging your bike from Ariel Rider E-Bikes in accordance with
the procedures and safety information detailed in this manual. Failure to follow proper
charging procedures can result in damage to your bike, the charger, personal property,
and/or serious injury or death.

Ariel Rider Ebikes
D-Class User’s Manual
Balancing the Battery
When you first receive your bike and for the first three times you change your battery from Ariel Rider E-
Bikes, follow the procedure outlined below to ensure the cells that power the battery are balanced and
operating as efficiently as possible.
Note: Since the battery should arrive with between 50-75% of a charge, it should be able to be ridden
without initially charging once assembled and verified as safe by a certified, reputable bike mechanic.
Charging normally before the first ride is also fine.
1. After the first, second, and third ride, regardless of distance ridden or the amount of battery
used, charge the battery and leave the charger attached to the battery and the outlet for as
close to 12 hours as possible (but not longer than 12 hours).Note: this may require leaving the
charger attached to the battery and outlet even after the charger illuminates one green (and
one red) light indicating the battery is full.
2. Disconnect the charger from the outlet then the battery once the first balance charge (long
charge as close to, but not longer than, 12 hours) is complete and store the bike until you are
ready for your next ride.
3. Ride the bike again with power assistance as normal, and discharge part (or all) of the battery
capacity.
4. Repeat steps 1-3 for a total of three balance charging sessions (as close to, but not longer
than,12 hours).
5. After the third balance charge and fourth ride, begin normal charging procedures including:
•Charging the battery after each ride according to the Battery Charging Best Practices
section.
•Removing the charger from the battery as close to the green charge light indicating the
battery is full, which will typically occur between 3-7 hours.
•Never leaving the battery charging for longer than 12 hours.
•Never leaving the battery/charger unattended while charging
Repeat battery balancing steps 1-5 only after a period of long-term battery storage(see the Long-Term
Battery Storage section), if experiencing noticeable range decline, when instructed to do so by Ariel
Rider E-Bikes Technical Support, or up to once per month with frequent use as proactive battery
maintenance. Do not perform battery balancing more than once per month.

Ariel Rider Ebikes
D-Class User’s Manual
Long-Term Battery Storage
If storing your bike from Ariel Rider E-Bikes for longer than two weeks at a time, follow the instructions
below to maintain the health and longevity of your battery.
•Charge (or discharge) the battery to approximately 75% charged.
•Power off the battery either locked to the frame or unlocked and removed from the frame for
storage (see Start-up Procedure Section for key-position details).
•Store the battery in a dry, climate controlled, indoor location between 50°F –77°F (10°C –25°C).
•Check the battery every month, and if necessary, use the Ariel Rider E-Bikes charger to charge
the battery to 75% charged.
Please follow the above instructions for storing your bike and battery from Ariel Rider E-Bikes.
Failure to follow proper battery storage procedures can result in a non-functional battery and
replacement will not be covered under warranty.
If the battery is physically damaged, non-functional, performing abnormally, or was dropped or
involved in a crash, with or without obvious signs of damage, please discontinue use and
charging and contact Ariel Rider E-Bikes immediately.
Do not cover up the charger when plugged in or charging. The charger air cools and needs to be
on a hard, flat surface in an open space. Use the charger with the indicator light facing upwards.
Do not use with the charger inverted, which can inhibit cooling and reduce charger lifespan.
Do not open the battery housing, which will void the warranty and can result in damage to the
battery, property, serious injury, and/or death.

Ariel Rider Ebikes
D-Class User’s Manual
NOTICE: Do not perform any of the steps in the Operation section of this manual until you have read this
entire manual, since there are important details related to safety in the following sections.
Read and understand all sections of this entire manual before operating the bike for the
first time. There are important safety warnings throughout the whole manual that must
be followed to prevent dangerous situations, accidents, and possible injury and/or
death.
Users must follow the instructions and warnings contained in this manual for safety. Do
not attempt to operate your bike from Ariel Rider E-Bikes until you have adequate
knowledge of its control and operation. Damage caused by failing to follow instructions
is not covered under warranty and could result in personal injury to you and others, and
damage to property and/or your bike from Ariel Rider E-Bikes. Contact Ariel Rider E-
bikes if you have any questions about assembly or operation.
Users must become accustomed to the bike’s power control system before operating.
The throttle mechanism allows full power to be activated from a stop and inexperienced
users should take extra care when first applying the throttle. The pedal assistance
feature is also a powerful option and users should fully research and understand how to
operate it before first use. Not taking care to familiarize yourself and practice the
operation of the power system on your bike from Ariel Rider E-Bikes can lead to
damage, serious injury, and/or death.

Ariel Rider Ebikes
D-Class User’s Manual
Start-Up Procedure
After the bike has been properly assembled following the assembly video, all components are secured
correctly, and you have read this entire manual, you may turn the bike on and select a power level
following the steps outlined below:
1. Familiarize yourself with the key port and key positions.
2. Test the battery lock security. Ensure the key port is aligned with the circle containing an “X,” in
the “OFF, Locked” position (2) indicating the battery is off and locked onto the frame mount. If
needed, insert the key and align with the “OFF, Locked” icon (2). Remove the key and carefully
use both hands to pull up on the battery to test that the lock is secure.
3. Turn the bike on. Once the battery lock has been verified, insert the key and turn clockwise to
the open circle icon or “ON, Locked” position (1). Remove the key by pulling directly backwards
without twisting so the key barrel remains in the “ON, Locked” position. Locate the LCD Display
Remote Hold down the center “mode” button for approximately 2 seconds until power is
delivered to the LCD Display.
4. Select your desired level of pedal assistance (PAS) between level 0 through 5 using the up and
down arrows on the display remote. Level 1 corresponds to the lowest level of pedal assistance,
and level 5 corresponds to the highest level of pedal assistance. Level 0 indicates pedal
assistance is inactive. Start in PAS level 0 or 1 and adjust from there.
5. Use traction button which is the red color switch on your handlebar. If it is in middle position it
turns on dual motor. Switching to right or left you will activate front or rear motor only mode.
6. To turn on the headlight, once the LCD Display is on, hold down the top (plus button) for
approximately 2-3 seconds until the light illuminates
7. Begin riding carefully. With the proper safety gear, rider knowledge, and understanding you may
now proceed to operate your bike from Ariel Rider E-Bikes. You can begin by pedaling the bike in
the appropriate drivetrain gear with pedal assist level 0 or 1. You may also use the throttle to
accelerate and maintain your desired speed. You can choose the front or rear wheel traction
too.
8. The throttle is used by slowly and carefully rotating the throttle backwards towards the rider.
The throttle power switch is a latching type switch, so once depressed, you do not need to hold
it down. With the power switch button depressed, the throttle can be used whenever the bike is
turned on. Do not use the throttle unless you are on the bike.
Table of contents
Other Ariel Rider Scooter manuals