manuals.online logo
Brands
  1. Home
  2. •
  3. Brands
  4. •
  5. ARISTO-CRAFT TRAINS
  6. •
  7. Toy
  8. •
  9. ARISTO-CRAFT TRAINS LIVE STEAM 0-4-0 Engine User manual

ARISTO-CRAFT TRAINS LIVE STEAM 0-4-0 Engine User manual

121809NEW
ARISTO-CRAFT TRAINS
LIVE STEAM 0-4-0 Engine
INSTRUCTION MANUAL ART-84200-01
Page 2
Dear Model Railroader,
Congratulations on your purchase of the Aristo-Craft 1:29 scale Live Steam 0-4-0!
The fun of running a locomotive as they were intended to with real steam power is the key part of this
locomotive and the technical hard work is done by the magic of our technology that takes much work
out of the project and leaves more running time for enjoyment.
Should you have any questions regarding operation, proper usage or maintenance required on this or
any other Aristo-Craft product, please do not hesitate to contact us at the following address:
ARISTO-CRAFT TRAINS / Polk’s Model Craft Hobbies, Inc.
698 South 21st Street, Irvington, NJ 07111 USA
Tel: (973) 351-9800 Fax: (973) 351-9700
e-mail: [email protected]
Our customer service department phones are open from
10:00 AM to 4:00 PM
Eastern time, Monday through Friday.
Visit our website: www.aristocraft.com
© 2009 Polk’s Model Craft Hobbies, Inc.
Page 3
Features
This locomotive has the following features and accessories, which make it look and operate in a
superior manner:
An integrated radio control system for forward speed control, reversing, and to activate several
sound effects. This R/C system operates on the universally accepted 49 mhz frequency and is FCC-
approved in the U.S.
A well for a warm water bath for the Butane gas.
Auto-ignition for the flame using the tender control panel.
Easy-to-use-and-find butane fuel.
Wide-mouth oil access. (Oil not included)
D.C. electric motors for radio-controlled reverse and speed controls.
A wall charger.
A NiCad battery pack to operate these electronic functions.
Tools: such as two syringes for filling and removing the steam oil, a metal funnel to fill the boiler and
Butane bath, two metal screwdrivers for the live steamer locomotive adjustments and others.
Additional mechanical boiler functions to make maintenance as easy as possible.
Insulated wheels for running on electrically powered layouts with other locos.
Page 4
Locomotive History
Around 1870 the 0-4-0 appeared, as a switch engine. These engines were newly designed
locomotives, with horizontal boilers and an improved suspension system capable of handling
irregular track. They readily found a home in railroad yards.
At the height of their popularity over 1,500 were in service.
As trains grew heavier, the 0-4-0 lost favor to another engine with more power, the 0-6-0, which by
the turn of the century had become the standard yard engine. While it could not compete with the
0-6-0 in tractive effort, the 0-4-0 was still very flexible and could accommodate tight curves and
clearances.
It was the ideal engine for switching cars on industrial spurs and waterfront docks. Throughout the
1940s, the Pennsylvania Railroad switched the harbor areas in Philadelphia with 0-4-0s. Reading’s
camelback 0-4-0s also worked the Philadelphia waterfront. One of the Reading engines still exists
today on the Strasburg Railroad in Pennsylvania. Baltimore & Ohio's oil-burning 0-4-0T saddle-
tankers patrolled Pratt Street and the docks in Baltimore.
Smaller locomotive builders such as Porter and Davenport built many 0-4-0 tank engines for short
lines and for private industrial applications. Several of these locomotives lasted late into the Diesel
era.
Page 5
R/C System / Battery Charging Preparation
The very first step is to charge the NiCad battery pack located
inside the tender of the locomotive. There is an included wall
pack that must be plugged into a wall outlet first and has a jack
plug to insert into a receptacle jack on the top of the tender. (See
Figure at right).
First move the “Off-On” switch to the “Off” position (left
direction) and then plug the charger lead into the battery
charging connection power jack at the top. The indicator light
beneath the jack will turn to orange for the approximately
three-hour charge time. The light will change from orange to
green after the charge is reached. The charger will go into a safe
trickle mode once the full charge is reached. The first charge-
up may take overnight, but will re-charge faster the second
time. After a full charge time the charge is complete and you
can begin the testing phase of operation.
Page 6
R/C System Testing Process
To begin the function testing process, link the plug in
front of the tender to the socket at the end of the wire
coming from the rear of the locomotive. (see illustration
at right). This allows all R/C and electronic functions
from the control panel of the tender to function in a
manual mode without the use of the transmitter.
1) Connect the tender’s drawbar to the locomotive.
2) Push the slide switch to the “On” position (right)
and you will see a red indicator light turn on.
3) Now you can test the sound buttons and the headlight button. These remain in operation until
depressed a second time.
PLUG
SOCKET
Page 7
Remote Mode Testing
Now it is time to test the R/C system transmitter and functions . . .
1) Install R/C transmitter’s battery by removing the battery cover screws, and insert the provided
9v alkaline battery.
2) The extendable antenna needs to be screwed into the transmitter through the opening on the
top right of the transmitter. The antenna should be extended during the test phase as well as
during regular operation.
3) There is a six-position dip encoder switch on the tender that must be matched to the encoder switch
order that is located on the inside of your transmitter. This dipswitch encoder allows for up to 620
people operating their Live Steam Train simultaneously without one interfering with the other.
4) Push the slide switch on the tender from “Off” to “On”. The R/C hand-held transmitter will
take over control of your locomotive, allowing you to perform the same functions you just tested
manually.
5) Repeat the same testing functions that you performed in the manual mode.
Note that the transmitter’s speed throttle needs to be in the center position before operation.
Press FAST to the full open position and then press the SLOW button for 8 seconds. This will
center the speed throttle. Pressing the SLOW button a second time will reverse the locomotive.
NOTE! The ignition switch for the butane is not on the transmitter for safety reasons, so that you
do not ignite the flame unintentionally. Please use the switch on the tender's panel for ignition.
Page 8
Adding Lubrication
The next step is adding steam oil to the loco . . .
This locomotive is a steam vapor-propelled device and as such REQUIRES A HIGH-
TEMPERATURE LUBRICATING STEAM OIL ONLY!
The steam oil is not necessarily included in the package, but should be found at the same retailer that
has sold you the locomotive and/or from Aristo-Craft itself.
Two syringes are included with this locomotive for fill and removal of steam oil. Ignore the one-time
use label as this note is for medical use only.
NOTE! The fill of the oil is done in stages and the cover of the oil fill tube needs to be screwed closed
after the oil is inserted each time the process is done. Move the locomotive forward only, not in
reverse, to push the oil into position. Repeat this process two or three times and on the last fill tighten
the access cover securely. A total of 4 ml of oil, as indicated on the syringe side, is the most oil that
should be added at least every second run depending on the lengths of the runs.
The lubrication, after the fill, is continuous and automatic during the operation of the locomotive.
After operation, any used oil remainder needs to be sucked out via the same type of syringe used to
fill the oil reserve shown and needs to be refilled at least every two runs.
DO NOT RUN WITHOUT THE REQUIRED STEAM OIL!
Page 9
SIGHT GLASS
SIGHT GLASS
OIL FILL TUBE
WATER FILL SHOWN
WITH FUNNEL IN PLACE
PRESSURE
GAUGE
Page 10
Adding Water to the Boiler
The next step is adding water into the boiler. At this point, your locomotive should already be placed
on the track at full stop. Please drain all leftover water, so that your new fill can be precise.
NOTE! ONLY DISTILLED WATER IS PERMITTED TO BE USED OR YOU WILL
DAMAGE YOUR 100% COPPER BOILER! Distilled water is easily found at most drug stores
and supermarkets.
Unscrew and remove the cover of the water fill inlet and add 240 ml of the distilled water with a
measuring cup. This will normally be less than one cup (240 ml is suggested) if the boiler is empty.
Re-attach the filler cap and tighten with a wrench until the cap is secure.
We recommend you use a clear water cup with measurements indicated.
This fill should be done while the locomotive is already on the tracks and should be done using the
supplied metal funnel into the opening. (See illustration on Page 9).
Check the boiler water sight glass to make sure the water level is at least 2/3's filled.
NOTE!
You must let the boiling water cool down before removing water or adding more water to run
the engine again. This will normally take about 15 minutes, but removing the cap before it's
cooled is like removing a radiator cap on your car when it's still hot.
DO NOT BYPASS THIS STEP IF REFILLING WITH COLD WATER!
Page 11
The next step is adding butane gas to the tender’s gas tank . . .
Use only Butane gas for cigarette lighters found at most drugstores, camping, asian food markets or
general stores. DO NOT USE PROPANE AS THIS IS NOT SET FOR THE APPROPRIATE
PRESSURES AS IS THE BUTANE! Fill
using the stem valve on the tender and do not
YET open the butane flow valve. Insert the
tender’s butane hose nozzle from the tender
into the locomotive's boiler. Push the nozzle
into the loco so it does not separate
accidentally. NOTE! DO NOT FILL WHILE
SMOKING OR NEAR A FLAME!
There is an enclosed and hidden water well
located under the coal load accessed by
moving the water hatch. Surrounding the
butane tank there is a well that must be filled
with warm water to help rapidly vaporize the
butane. Do not use boiling water, but rather bathtub temperature water.
It is recommended that you use a thermos bottle of water, easily brought to the running sight, and this
water for the well need not be distilled and can come right from a tap. The warm water needs to be
filled in to the warm water bath area with a funnel, after removing the screw in the corner of the
depression at the front of the tender, near the butane insert nozzle.
Reinserting the screw is optional, but if you are going to transport the tender without draining the
water from the side cock, then you need to reinsert the screw and close it using a flat-head
BUTANE HOSE
CONNECTOR
INSERT BUTANE HOSE
CONNECTOR HERE
Page 12
screwdriver (not included). This will keep the water from
spilling out and possibly damaging the electronics. However,
we highly recommend draining the water thoroughly before
transport.
The fill needs to be done while on the track, rather than filling
elsewhere and the carrying to the track. You can remove the
cooled water in the well through the Drain valve before
refilling with warm water again before actually running and
after the steam pressure has indicated that the train is ready to
go.
Filling The Butane Gas Tank
Use a can of butane purchased locally by
putting the nozzle over the filler position
under the coal load. There is a site glass
located nearby to allow you to see when the
butane level is full, though you should notice
some back fill gas escaping when the butane
tank is full.
With all the required liquids in place and your
locomotive on the track, it is time to spark the
ignition flame . . .
Please be sure first that the gas jet tube is
placed in the boiler of the locomotive from
BUTANE
FILL
FUEL FLOW
VALVE
LOCOMOTIVE / TENDER
DRAWBAR CONNECTION
LOCOMOTIVE / TENDER
DRAWBAR CONNECTION
WATER
DRAIN
VALVE
JET
TUBE
JET
TUBE
Page 13
the front of the tender. The tender should be attached by the
drawbar at the back of the locomotive and the front of the
tender to make sure the hose does not pull out of the
locomotive.
Open the butane flow valve on the tender slightly to release the
butane and then press the ignition button manually. You will
hear the rush of the flame ignition. Then you will hear a thump
and a steady whistle once the flame is in progress.
Sparking the Ignition Flame
Open the Butane valve further and slowly until a steady flame
is in use. This can only be determined by trial and error.
The heating process will take about 5 to 7 minutes. Note: the
transmitter throttle must be in the center/neutral position
in order to build pressure.
Please see the warning on page 14 for removing or adding
water!
Continue to heat the water and you will notice the pressure
gauge going up. When it rises to 30 psi (pounds per square
inch) and the top cylinder valves begin to release steam vapor,
the heating process is over and your train is ready to run.
(see
page 7)
IGNITION
BUTTON
IGNITION
BUTTON
Page 14
When the pressure gauge indication shows that the loco is ready to start, move the slide switch on the
tender’s control panel to “On” and you will see the indicator light turn red.
a) Press the FAST button on the transmitter and let the locomotive move forward to expel water
(condensed from steam) from inside the gas cylinder front.
b) Press the SLOW button twice to let the locomotive move backward to expel water from inside the
gas cylinder back.
This locomotive can pull up to 4 freight cars at a high speed and go up 2% grades without
degradation of the pulling power of the locomotive. However, the running time may be shortened
from the normal 15 minutes with heavier loads.
The radio control transmitter can do the following functions wirelessly:
a) Fast-- Increase loco speed d
b) Slow-- Decrease loco speed / Reverse e
c) f
You must let the boiling water cool down before removing water or adding more water to run
the engine again. This will normally take about 15 minutes, but removing the cap before it's
cooled is like removing a radiator cap on your car when it's still hot.
DO NOT BYPASS THIS STEP IF REFILLING WITH COLD WATER!
The Butane can be refilled at any time before or when your engine slows down or stops due to
running out of the water or gas.
Note that the transmitter’s speed throttle needs to be in the center position before operation.
Press FAST to the full open position and then press the SLOW button for 8 seconds. This will center
the speed throttle. Pressing the SLOW button a second time will reverse the locomotive.
) Bell sound
) Whistle sound
Headlight & Class lights-- On/Off ) Chuff sound
Page 15
Getting Help
If you need further assistance with your new Live Steam engine, we have many ways to get your
questions answered!
Visit the Aristo-Craft Trains web site at http://www.aristocraft.com and connect with other live
steamers from around the world!
A special section of our Aristo-Craft Trains Forum is devoted to live steam where you can get help
from Aristo-Craft staff and other live steam railroaders.
Contact us directly at:
ARISTO-CRAFT TRAINS / Polk's Model Craft Hobbies, Inc.
698 South 21st Street, Irvington, NJ 07111 USA
Tel: (973) 351-9800 Fax: (973) 351-9700
e-mail: [email protected]
Our customer service department phones are open from 10:00 AM to 4:00 PM
Eastern Time, Monday through Friday.
Page 16
LIMITED WARRANTY
All ARISTO-CRAFT TRAINS products are under warranty for five (5) years from date of purchase
against defects in workmanship and/or materials. Proof of purchase may be required by
ARISTO-CRAFT TRAINS.
Breakage or damage caused by extended use, and items considered to be normal wear and tear by
normal use may not be covered under this warranty, and coverage is subject to the discretion of
Aristo-Craft Trains.
This warranty is void and does not apply to any product and/or parts and components which have
been improperly installed by the purchase/owner, abused or damaged in any way through improper
operation such as but not limited to derailments, repairs or modifications performed by non-
authorized service centers or technicians.
Page 17
SERVICING
Should your ARISTO-CRAFT TRAINS product require warranty service, please return it in the original box, if
possible, protected by a proper shipping carton. Send the product fully insured and prepaid. ARISTO-CRAFT TRAINS
will not be responsible for any loss or damage incurred during shipping. Be sure to include a brief, but thorough
explanation of the problem, together with your name, street address (no Post Office box please), city state or province
and country, if outside of the United States. Also include a daytime telephone number so that we may contact you if
necessary. Your return address should be clearly marked on the outside of the shipping carton.
Payment for shipping and handling, in U.S. funds, is $20.00 and should be included.Your check or money order should
be made payable to: Polk’s Modelcraft Hobbies, Inc. Do not send cash. If your item is not covered by warranty service,
you will be contacted and a repair estimate given before any work commences. Warranty covers manufacturer defects,
not normal wear and tear.
The shipping address to be used for returns is as follows:
ARISTO-CRAFT TRAINS / Polk’s Modelcraft Hobbies, Inc.
Customer Service Department
698 South 21st Street
Irvington, NJ 07111 USA
Tel: (973) 351-9800
Written confirmation of receipt of returned items will be sent with estimated repair time by the
ARISTO-CRAFT TRAINS Customer Service Department.
Page 18
ARISTO-CRAFT TRAINS
LIVE STEAM 0-4-0 Engine
Page 19
Page 20
Printed in USA

Other ARISTO-CRAFT TRAINS Toy manuals

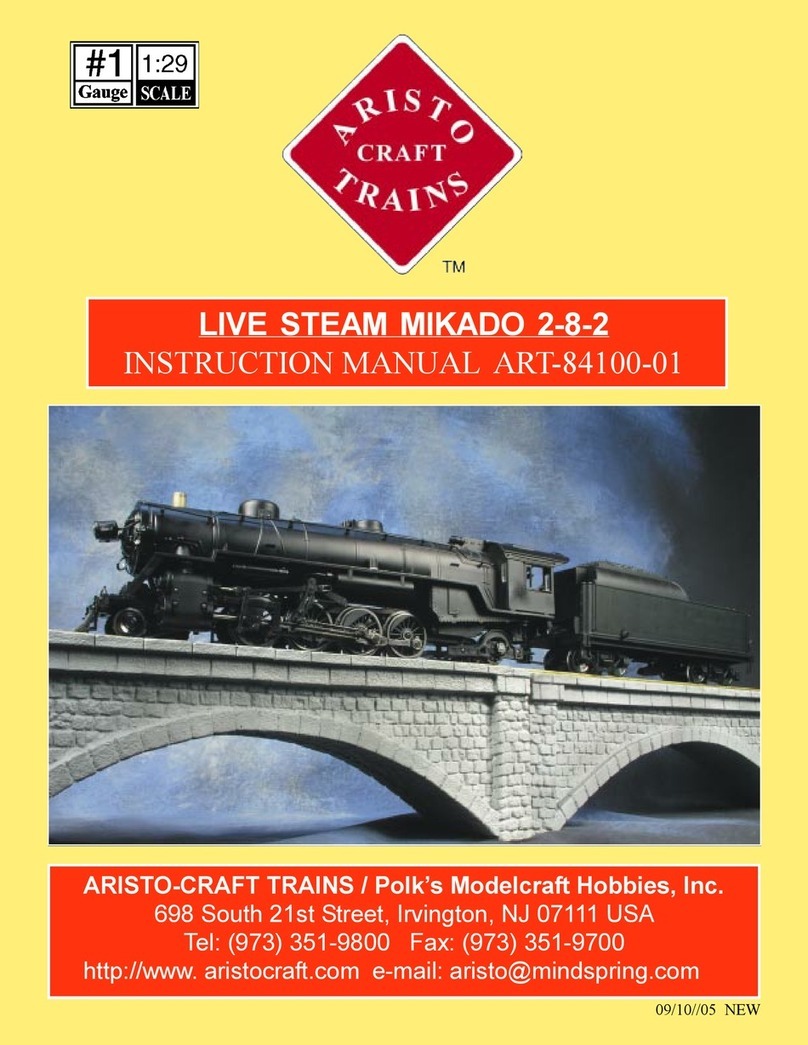
ARISTO-CRAFT TRAINS LIVE STEAM MIKADO 2-8-2 User manual

ARISTO-CRAFT TRAINS

ARISTO-CRAFT TRAINS LIVE STEAM MIKADO 2-8-2 User manual

Popular Toy manuals by other brands

Lionel Lionel owner's manual

Lionel

Lionel Lionel owner's manual

marklin Gattung ptl 2/2 user manual

marklin

marklin Gattung ptl 2/2 user manual

Trix Rlmmps 650 manual

Trix

Trix Rlmmps 650 manual

Hachette ALIEN manual

Hachette

Hachette ALIEN manual

MD Helicopters MDHI MD900 instructions

MD Helicopters

MD Helicopters MDHI MD900 instructions

Banana Hobby BlitzRCWorks P-40N manual

Banana Hobby

Banana Hobby BlitzRCWorks P-40N manual

LEGO Ultra Agents 70169 instructions

LEGO

LEGO Ultra Agents 70169 instructions

REVELL Star Wars Millennium Falcon manual

REVELL

REVELL Star Wars Millennium Falcon manual

Hasbro Xevoz Storm Wing 85524/85500 instruction manual

Hasbro

Hasbro Xevoz Storm Wing 85524/85500 instruction manual

Faller 190060/2 quick guide

Faller

Faller 190060/2 quick guide

Eduard Fw 190 seatbelts self adhesive quick start guide

Eduard

Eduard Fw 190 seatbelts self adhesive quick start guide

M.T.H. Blue Comet operating instructions

M.T.H.

M.T.H. Blue Comet operating instructions

Ripmax WOT4-E instruction manual

Ripmax

Ripmax WOT4-E instruction manual

Seagull Models PERCIVAL MEW GULL Assembly manual

Seagull Models

Seagull Models PERCIVAL MEW GULL Assembly manual

LEGO 41593 Assembly

LEGO

LEGO 41593 Assembly

Carson EasyTyrann 180 instruction manual

Carson

Carson EasyTyrann 180 instruction manual

VTech Baby Swing & Sing Monkey Parents' guide

VTech Baby

VTech Baby Swing & Sing Monkey Parents' guide

TWM UniJet instruction manual

TWM

TWM UniJet instruction manual

manuals.online logo
manuals.online logoBrands
  • About & Mission
  • Contact us
  • Privacy Policy
  • Terms and Conditions

Copyright 2025 Manuals.Online. All Rights Reserved.