Arkbird VTOL User manual

Arkbird VTOL Assembly Manual v1.0 (Beta)
Thank you for purchasing Arkbird product. Before starting with the assembly of the VTOL plane, a few words
regarding the new firmware of Autopilot 2.0:
In vertical mode, newly developed settings are available to be customized including parameters adjustment,
unlock function and OSD interface instruction. Please refer to “Introduction to Upgraded Arkbird V1.3016” or the
latest upgrading files for more details. Please don’t forget to install ESC with BEC or install another BEC 5v to
supply power for the servos, because the autopilot does not supply power for them.
The upgraded firmware (V1.3010) will have an option called “BimoFwing” that needs to be chosen to use
with Arkbird VTOLplane. The default control values are: 15, 12, 110.
In the BimoFwing option is set, the original “Manual Mode”will be replaced by “Hover Mode”. This means that
the plane will entry into “Hover Mode”when you select “Manual Mode”, then 5th channel icon’s will represent the
following:
Return Home Mode
Hover Mode
Balance Mode.
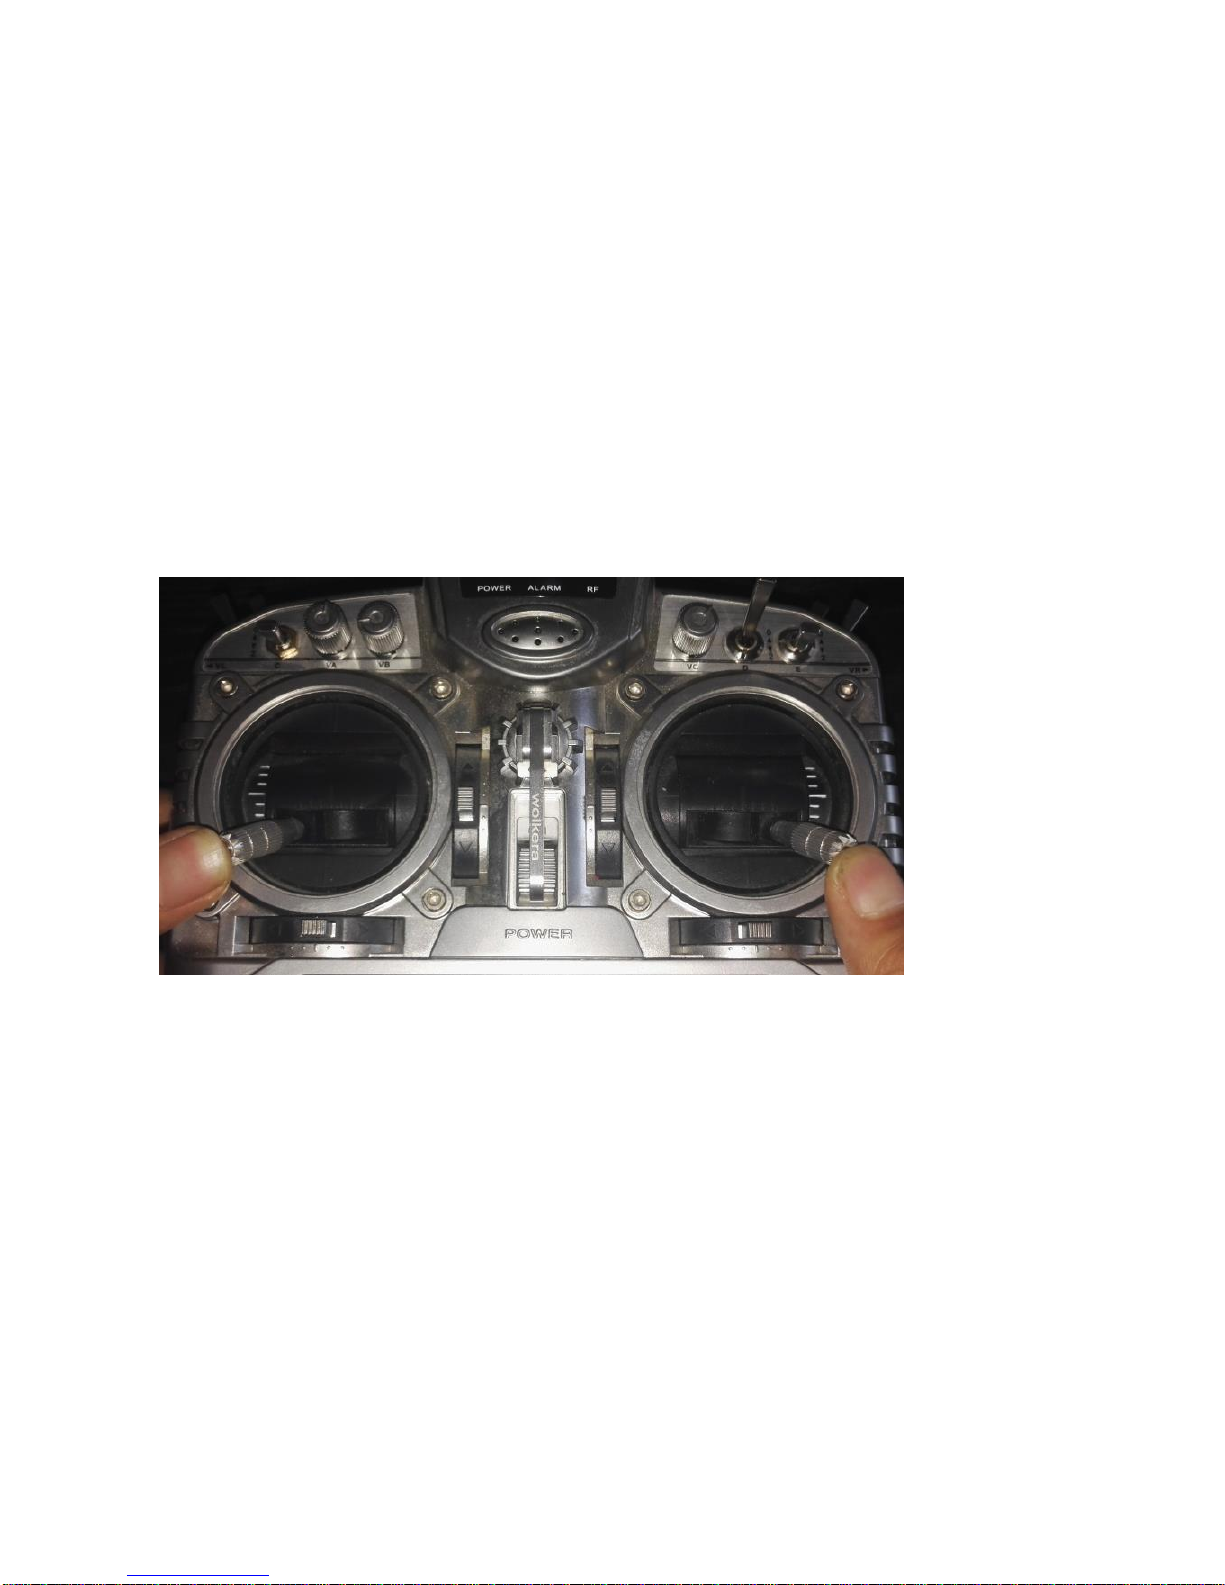
The Autopilot will give you 1500us PWM output when entering the OSD menu. Please ddjust the servo 's midpoint when
display OSD menu.
The firmware V3.1010 has the option “Roll trim” in the CTL menu. In BimoFwing Mode, this option will adjust
the motor speed difference in VTOL mode. Please trim the value if the airplane tilts due to motor speed
difference.
Upon finishing installment, please test the airplane in VTOL mode. The option “Hover Yield” (CTL menu with
a default value of 6 degrees) will help you to keep the plane hovering straight (without leaning forward or
backwards). In VTOL mode, if the airplane leans forward, please reduce the value and if the airplane leans
backwards, please increase the value.
To calibrate the center point you can place the airplane upward and directly calibrate sensor's midpoint
instead of horizontally calibrating the airplane. If the airplane is in normal status, you just place the nose upward
to make sure that the horizon line in OSD is in middle position in VTOL mode. And then you place the nose
forward to make sure that the horizon line is in middle position.

Arkbird VTOL Assembly Manual v1.0 (Beta)
Channel Connections: Channel 1 for left servo, Channel 2 for right servo, Channel 3 for left ESC, Channel 4
for right ESC.
Please switch into balance mode and place the plane horizontally to check whether the auxiliary value and
radio reverse value is correct or not (pushing throttle to check direction of the motors and speed difference,
adjusting compensation value to restore original direction of airplane.) If the airplane is installed with forward
servo, keep default value is fine. (Aileron Roll-positive, Pitch-negative, Control value 15-12-115, the remaining
option maintains default value). When switching mode into VTOL mode, please pay attention that the
compensation value shall be set to restore original position of air-frame. The incorrect set of radio value will
make it impossible to unlock it by splaying out in the VTOLmode.
Unlock method:
Switching between modes:
After finishing assembly of the airplane, you can test the stability of the airplane in VTOLmode. Then fly the
airplane in balance mode. While switching mode the throttle shall be properly controlled: throttling up to switch
from VTOLmode into balance mode and throttling down to switch from balance mode into VTOL mode. You
may want to adjust your throttle curve to have a smoother transition between modes.
In VTOL mode, the airplane may temporarily lost its GPS fix. Therefore, the airplane can't be automatically
stabilized while flying in windy conditions. If the airplane is flying in windy conditions, it may slowly drift, so more
manual control needed. If you want to fly the airplane in windy days, please turn into balance mode and fly to
upwind direction then switch VTOL mode to decrease throttle to land the plane.

Arkbird VTOL Assembly Manual v1.0 (Beta)
Assembling the plane:
Nose
Please locate the wooden parts shown above
Use No. 502 glue (ergo 5400 recommended) to glue each part following the pictures shown above. Beware
of the orientation of the part (colored in red). It should be aligned with the two side panels. Meanwhile be careful
with of the position of the two side panels, don't glue them reversed.
Next, assemble the main fuselage. Follow pictures shown above to stick these parts to the wooden nose.
Ordinary foam glue is alright for this.

Arkbird VTOL Assembly Manual v1.0 (Beta)
Next, due to the need of VTOL mode, we need to cut away some part of the plastic foam to ensure the
upper and lower air holes are under alignment.
Picking out the parts to assemble motor mounting plate as shown above.
Glue each part to assemble motor mounting plate as shown below:
M3 sunk screws, motor mounting base, flat tail tapping screws and shim are packaged in the accessories
bag. Please install them on motor mounting base. The finished assembly is as shown above. There are two set,
one for each motor.

Arkbird VTOL Assembly Manual v1.0 (Beta)
Assembling the fuselage:
Please present the two black wing shoulders and the two carbon rods as shown above. Use glue (B-7000
recommended) to glue the fuselage and the wing shoulder. Remember to keep the glue away from the carbon rods!
Draw a line on the left part of fuselage like in the picture above, then cut the slot for the wires

Arkbird VTOL Assembly Manual v1.0 (Beta)
Preparing the servos cutting off the “ears”.
Then, we use the black wing shoulder to stick to the left side and assemble servo as shown above. Place the
wires into the slot.

Arkbird VTOL Assembly Manual v1.0 (Beta)
Assembling the wing:
Use the carbon sheet and carbon tube of 2mm long. Locating the wooden rudder bar on the airfoil, using carbon
tube of 2mm long to cross through the rudder hole and rudder bar. Making sure the front of rudder bar and the
rudder hole is on the same side. Next, using No. 502 glue to stick carbon tubes and carbon plate as shown
above.
Install servo. Cutting a slit of 5mm long along the front side of servo installment slot, then placing wires of servo
into the slit. Be careful not to stick glue to the servo.
Next, Marking line on the plastic foam as shown above, then digging slot for wires of servo.
Fix the ESC into motor mounting plate, except for the wires. Be careful to place the wires of power and motor on
different side. Glue b-7000, is recommended. Put some glue between motor mount and the wing, then inserting
airfoil into the plastic foam. Be careful to leave the wires out. Next, stick glue to the carbon tubes, inserting them
into the wing and the fuselage, daubing glue on the contact part. Making sure that the motor plate is aligned with
the fuselage and the wires of servo go through the reserved slot of foam as shown above.
Marking lines on belly stretching to the reserved hole as shown above. Cutting a slit of 7-8mm deep for wires of
power and control.
Assembling wing elevons:
Placing the airplane close to a flat surface such as that of one side of desk to check whether the position of the
elevons is correct.
Assemble push rod and control horns as shown above. They are assembled into the elevons hole at the
outermost side.

Arkbird VTOL Assembly Manual v1.0 (Beta)
Assemble battery mount.
Assemble hatch mount.
Using spare screws for servo to fix the camera to camera mount and handle the rocker as shown above. The
screw type is M1.6X12mm. You'll need a screw driver to tighten the screw crossing the hole on right side.
Finally, assemble cover plate as shown above. Beware of its back and front.
The wire of camera servo should be connected to channel 7 (output). In balance mode and VTOL mode, the
airplane can automatically control the camera and keep it horizontal. And the camera can move up and down by
setting the value of channel 7 to a dial in your transmitter.
The position of the Flight controller and battery should be as is shown above. It's better to place the VTX
somewhere behind battery. We recommend a 4s 2200 to 3000mah battery. A 4s 2200mah battery will look like
the one shown above. The position of a 3000mah battery should be about 1cm closer to the nose of the plane
Center of gravity is about 5.6 cm behind the wooden board (the one that holds the flight controller).
We use aerosol paint to spray different color on the airplane to distinguish front and back side. Users can
choose stickers or aerosol paint.

Arkbird VTOL Assembly Manual v1.0 (Beta)
Wingtip device, made of EPP material (EPO material will be used), may be too soft. Please use some carbon
sheet to the outside and extending 3mm carbon tube to support the wingtip.
Other manuals for VTOL
1
Other Arkbird Toy manuals
Popular Toy manuals by other brands

Barbie
Barbie Fairytopia instructions

Tamjets
Tamjets A4 Skyhawk Assembly and Flight Set-up Manual

LEGO
LEGO CITY 4440 Building instructions

Educational Insights
Educational Insights Laser Line Maker manual

Fisher-Price
Fisher-Price BABY SMARTRONICS Counting Sheep instructions

E-FLITE
E-FLITE UMX PT-17 instruction manual