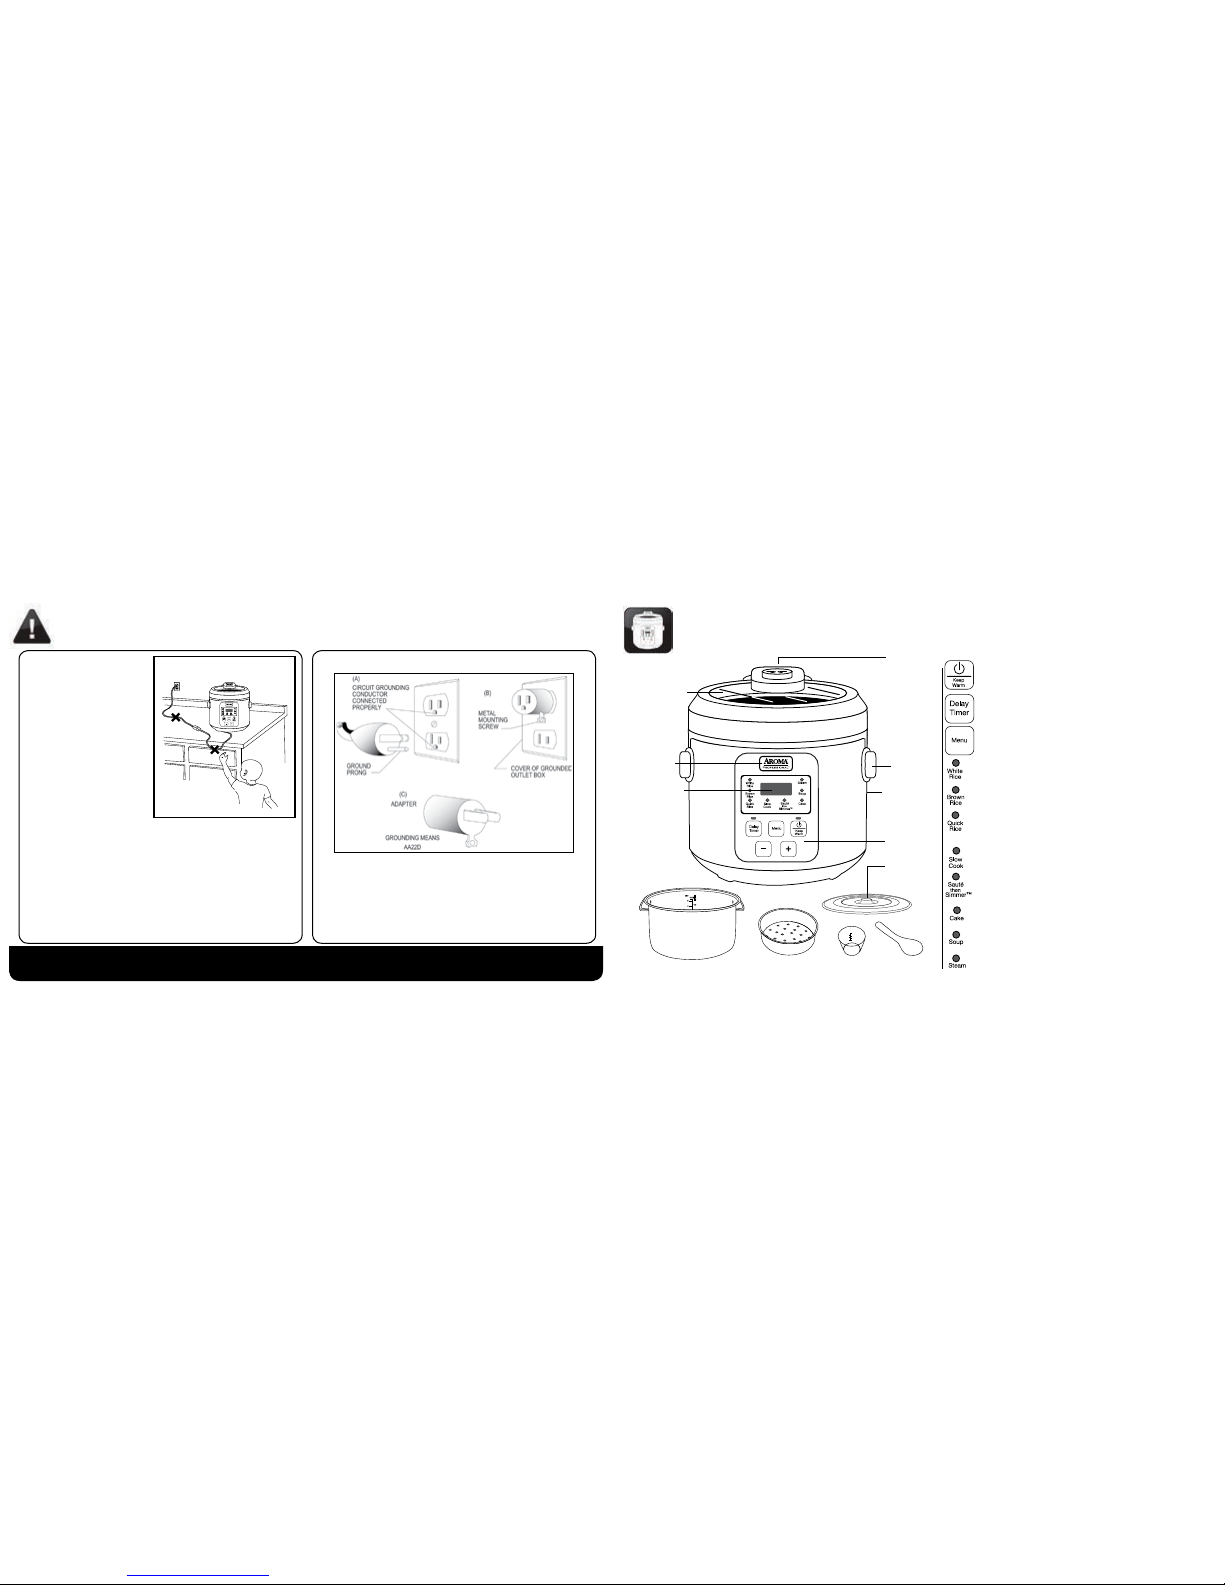
Inner Cooking Pot Steam
Tray
Measuring
Cup
Serving
Spatula
Condensation
Collector
(on back)
Handle
Clear Glass Lid
Steam Vent
Control Panel
Storage Lid
Digital Display
Lid Release
Button
PARTS IDENTIFICATION
3
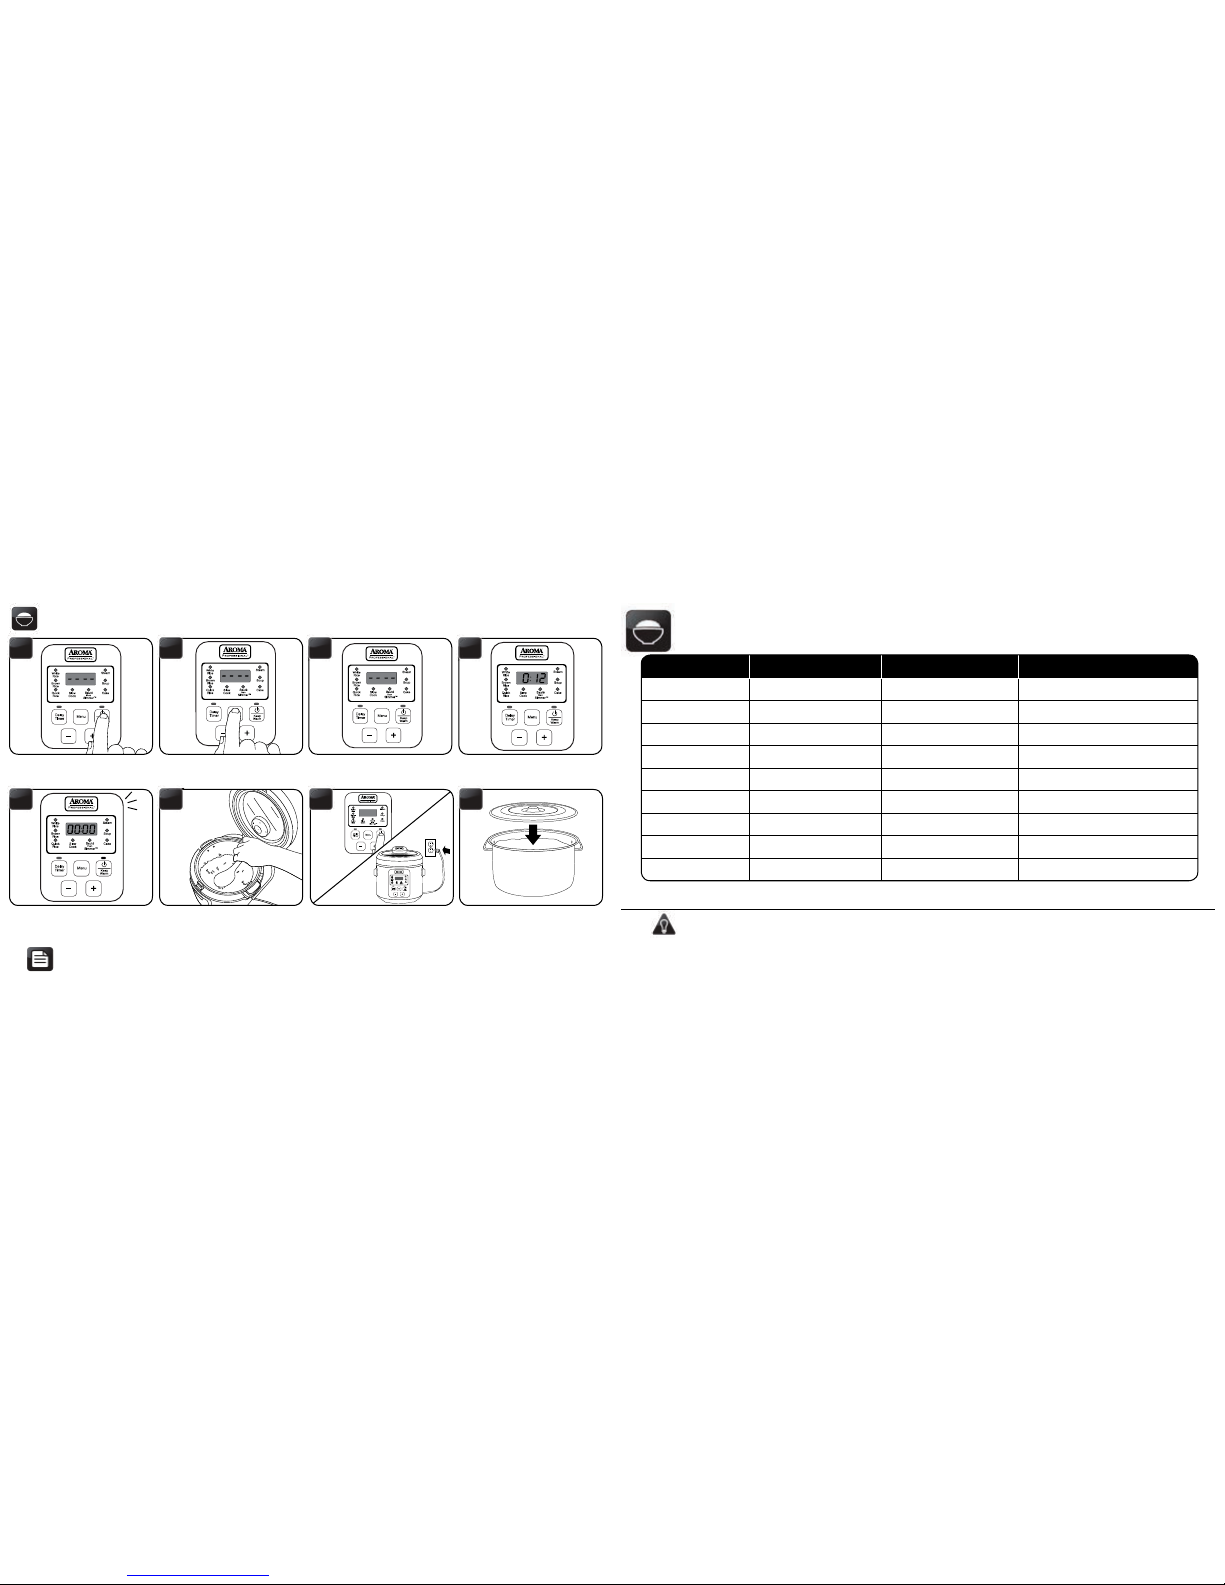
Digital Controls
The QUICK RICE function is a great time-saving option for rice in a pinch.
This setting foregoes the rice cooker’s Sensor Logic™ for faster cooking
times, although cooked rice will not be to the same quality of the White Rice
and Brown Rice functions.
THIS APPLIANCE IS FOR HOUSEHOLD USE ONLY.
2
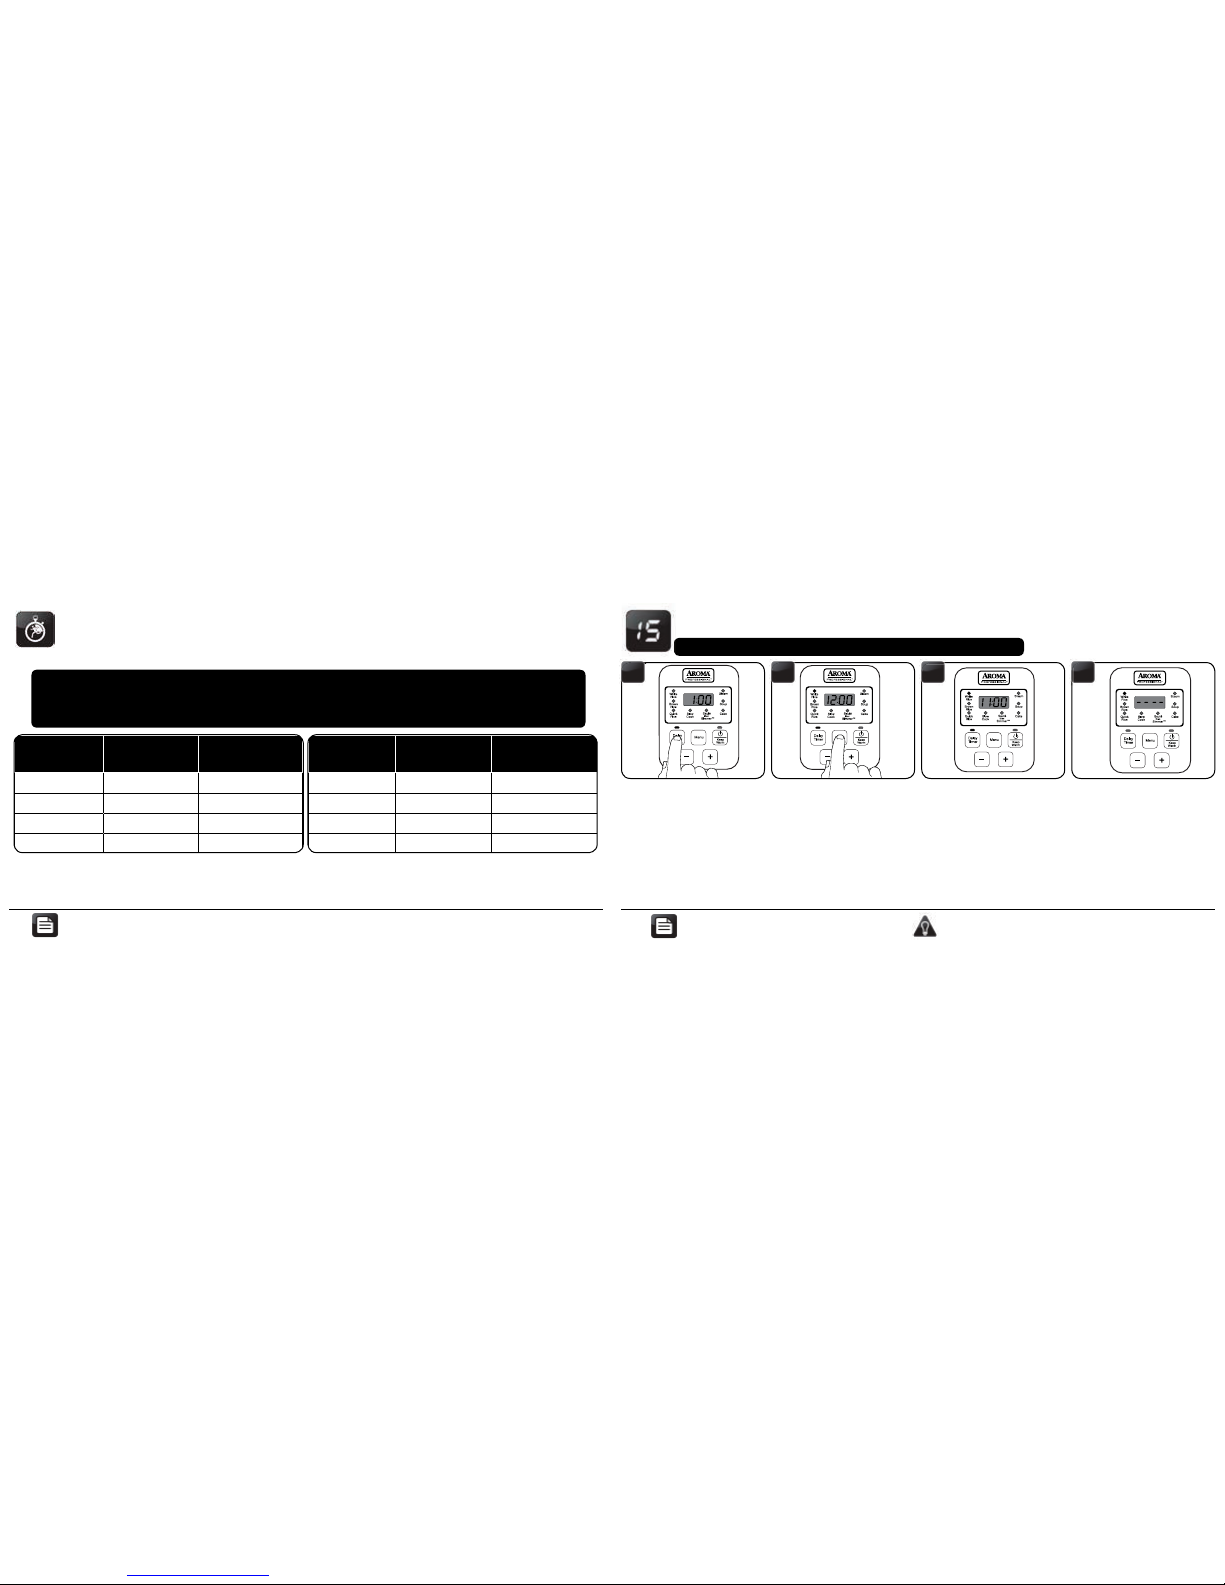
DELAY TIMER
The DELAY TIMER sets up to 15 hours for rice ready when it’s needed. Add
rice and water in the morning and set the timer for mealtime at night.
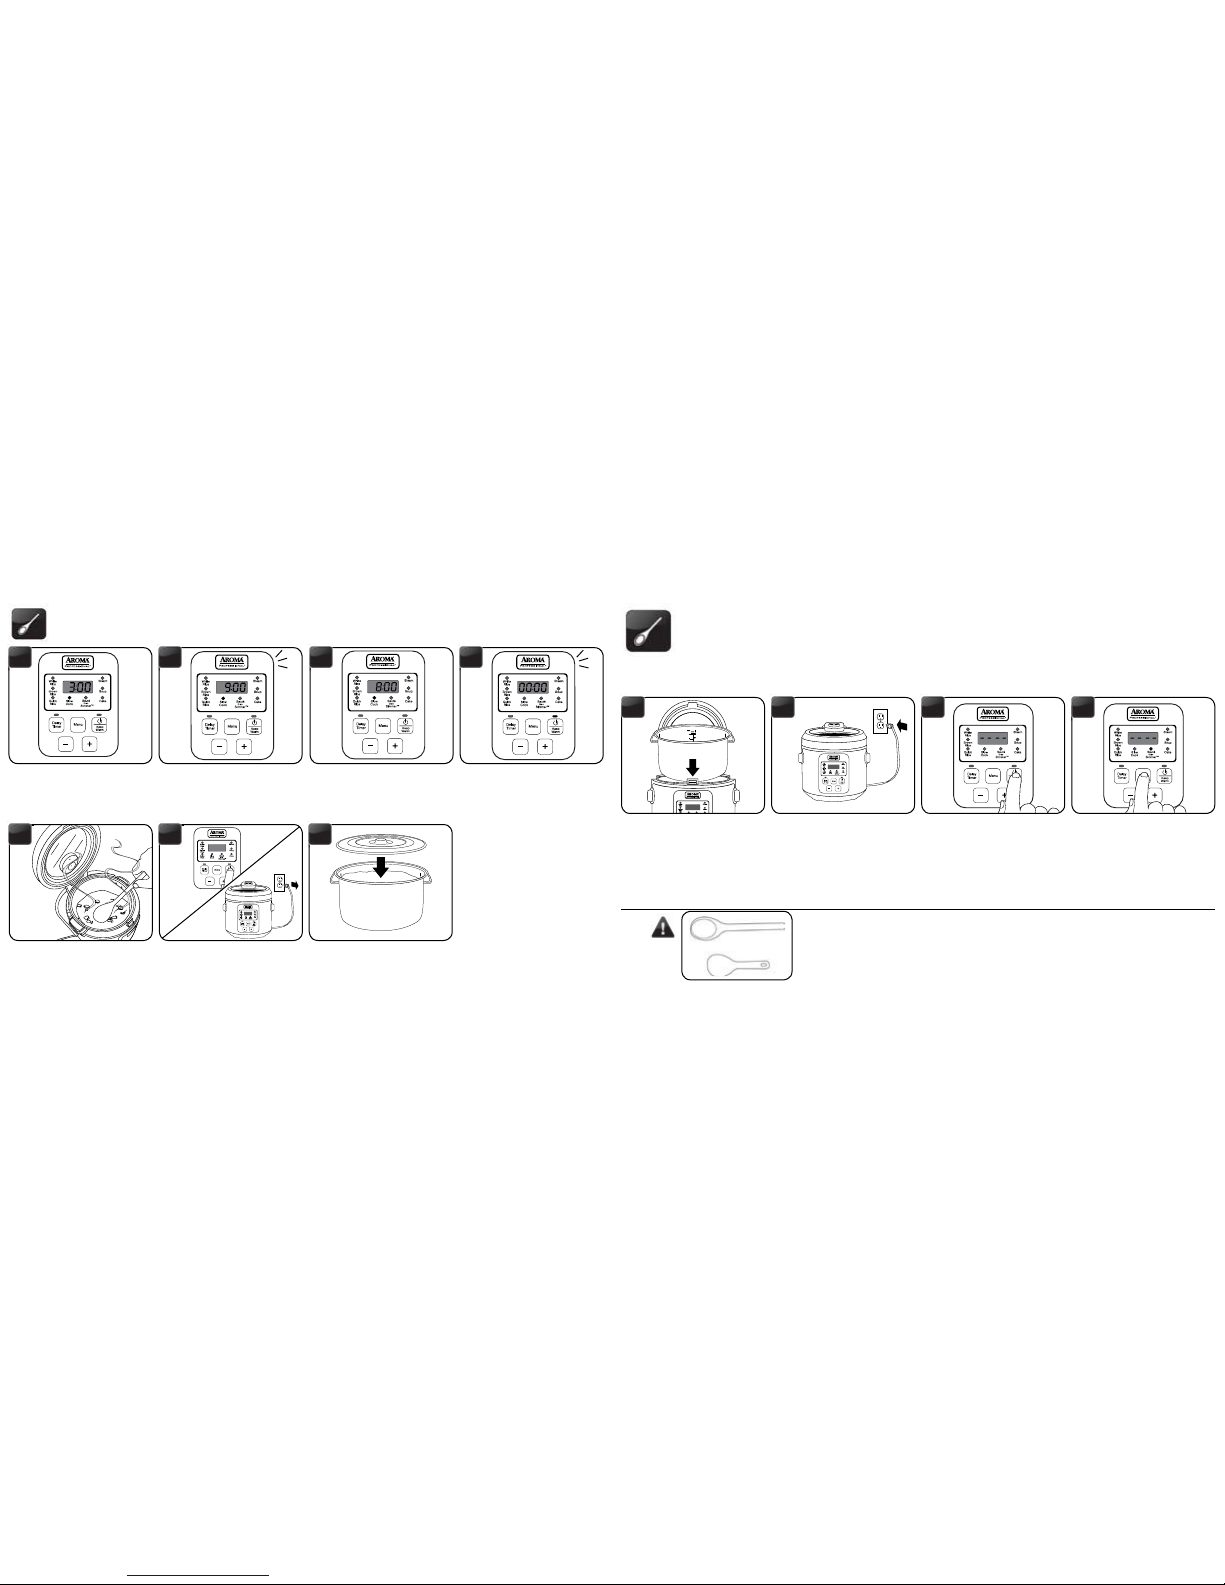
The STEAM function is perfect for healthy sides and main courses. Set the
time food needs to steam, it will begin to countdown once water
reaches a boil and shut off once time has elapsed.
The MENU button allows the rice cooker to be set to one of its 8 specialized
cooking functions: White Rice, Brown Rice, Quick Rice, Slow Cook,
Sauté-Then-Simmer™, Cake, Soup and Steam.
The WHITE RICE function cooks restaurant-quality white rice automatically.
The SOUP function is great for preparing savory soups and delicious stews.
The CAKE function “bakes” cakes and other treats.
Aroma’s patent-pending Sauté-Then-Simmer™ (STS™) Technology will
sauté foods at a high heat and automatically switch over to its simmer mode
once liquid is added.
The BROWN function is ideal for cooking brown rice and other tough-to-
cook whole grains to perfection.
The SLOW COOK function sets to slow cook from 2 to 10 hours and is
great for homemade roasts and stews.
POWER/KEEP-WARM
The POWER/KEEP WARM button serves two purposes. One press of the
POWER/KEEP WARM button will turn the rice cooker on. A second press will
set the rice cooker to its Keep-Warm setting.
IMPORTANT SAFEGUARDS
1. A short power-supply cord is
provided to reduce the risks
resulting from becoming
entangled in or tripping over
a longer cord.
2. Longer extension cords are
available and may be used if
care is exercised in their use.
3. If a longer extension cord is
used:
a. The marked electrical
rating of the extension
cord should be at least as great as the electrical rating of the
appliance.
b. The longer cord should be arranged so that it will not drape over the
countertop or tabletop where it can be pulled by children or tripped
over unintentionally.
c. The extension cord should be a grounding-type 3-wire cord.
Short Cord
Instructions
Grounding Instructions
This appliance must be grounded while in use to protect the operator from
electrical shock. The appliance is equipped with a 3-conductor cord and a
3-prong grounding-type plug to t the proper grounding-type receptacle. The
appliance has a plug that looks like sketch A. An adapter, sketch B, should be
used for connecting sketch-A plugs to two-prong receptacles. The grounding
tab, which extends from the adapter, must be connected to a permanent
ground such as a properly grounded outlet box as shown in sketch C using a
metal screw.
DO NOT DRAPE CORD!
KEEP AWAY
FROM CHILDREN!