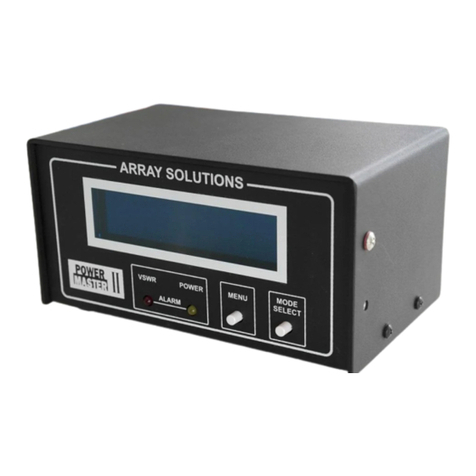
Array Solutions PowerMaster Series User manual

PowerMaster Series RF Wattmeter Array Solutions Rev 3.5 Feb 20, 2007
2
Coupler Calibration Table
Forward Power 30MHz
Reverse Power 30 MHz
Forward Power 50 MHz
Reverse Power 50 MHz
INTRODUCTION
Thank you very much for purchasing the Array Solutions PowerMaster
Series RF Power/VSWR Indicator. The PowerMaster represents a
breakthrough in features for measurement of the performance of your
transmitting system. Microprocessor control insures fast capture time and
low power consumption. With the ability to monitor your VSWR and
power levels at all times, you will know that your transmitter, RF source,
and load, or antenna systems are operating effectively and safely. In
addition, the power and VSWR relay alarms can quickly shut down your
power amplifier system and alert you to the alarm condition. This places
an additional layer of protection in your transmitting system to help
preserve expensive tubes and finals. The PowerMaster also features the
ability to be monitored and controlled from a PC via the bundled
software, and the unique ability to be monitored and controlled over a
LAN or from the internet. PowerMaster firmware updates will be made
available for download from the Array Solutions website as they become
available. This means that the user can take full advantage of features or
enhancements just by installing the firmware update. No need to return
the meter to the factory for updates.
There are many features introduced in the PowerMaster that have not
been seen before! We are very proud of our product and are interested in
learning about your experiences with this meter. We also want to know
if you have ideas about new features we can bring forth for the meter.
We have built in the ability to enhance the meter with software updates
that you can download from the internet. We think you will agree that
this is a totally new concept in an RF Wattmeter, and one that should
extend its lifetime for a long time to come.
IF YOU HAVE PROBLEMS
We want you to be satisfied with your purchase. If you have any type of
problem, please check the Trouble Shooting section of this manual. If
your problem persists, call our Customer Service Department at
972 203 2008. Please have the PowerMaster and this manual at hand
when you call.
Write your new PowerMaster serial number and calibration data for your coupler here (see coupler sticker)
Serial Number _________________
Date of purchase _________________

PowerMaster Series RF Wattmeter Array Solutions Rev 3.5 Feb 20, 2007
3
Note: This equipment has been tested and found to comply with the
limits for Class B digital devices, pursuant to Part 15 of the FCC Rules.
These limits are designed to provide reasonable protection against
harmful interference in a residential installation. This equipment
generates, uses, and can radiate radio frequency energy, and if not
installed and used in accordance with the instructions may cause
harmful interference to radio communications. However, there is no
guarantee that interference will not occur in a particular installation. If
this equipment does cause harmful interference to radio or television
reception, which can be determined by turning the equipment off and
on, the user is encouraged to try to correct the interference by one or
more of the following measures:
•Reorient or relocate the receiving antenna.
•Increase the separation between the equipment and receiver.
•Connect the equipment into an outlet on a circuit different
from that to which the receiver is connected.
•Consult a qualified radio/TV technician for help.
Properly shielded and grounded cables and connectors must be used
in order to meet FCC emission limits. Array Solutions is not
responsible for any radio or television interference caused by using
other than recommended cables or connectors or by unauthorized
changes or modifications to this equipment. Unauthorized changes or
modifications could void the user's authority to operate the
equipment.
This device complies with Part 15 of the FCC Rules. Operation is
subject to the following two conditions: (1) this device may not
cause harmful interferences, and (2) this device must accept any
interference received, including interference that may cause
undesired operation.
Responsible Party: Array Solutions, Telephone 972 203 2008
Industry Canada Compliance Statement
This Class B digital apparatus meets the requirements of the Canadian
Interference-Causing Equipment Regulations.
Avis de conformité à la réglementation d'Industrie Canada
Cet appareil numérique de la classe B respecte toutes les exigences du Réglement
sur le matériel brouilleur du Canada.
Federal Communications Commission
(FCC) Statement

PowerMaster Series RF Wattmeter Array Solutions Rev 3.5 Feb 20, 2007
4
PowerMaster RF Wattmeter Series
Council Directive --- 89/336/EEC; EMC Directive
Standards: EN 55022 Class B
EN61000-4-2
EN61000-4-3
TYPE OF EQUIPMENT: ITE
EQUIPMENT CLASS: B
WE, THE UNDERSIGNED, HEREBY DECLARE THAT THE EQUIPMENT SPECIFIED
ABOVE CONFORMS TO THE ABOVE STANDARDS PER 89/336/EEC:
Array Solutions Date of testing May 3, 2005
Copyright and Trademark Disclosure
Array Solutions and PowerMaster RF Power/VSWR Wattmeter are trademarks of Array Solutions
The firmware for the PowerMaster series is copyrighted. ©2005 by Array Solutions. All rights reserved.
The application software for the PowerMaster is copyrighted. ©2005 by D. Kinsell, All rights reserved.
European Union Declaration of Conformity

PowerMaster Series RF Wattmeter Array Solutions Rev 3.5 Feb 20, 2007
5
TABLE OF CONTENTS
Unpacking and Setup Page 6
Quick Setup Page 7
Installation Page 8
Using the PowerMaster – Front Panel Page 9
Rear Panel Connections Page 18
Remote Coupler Mounting Page 19
Accuracy and Calibration Page 20
Options Page 22
In Case of Trouble Page 23
Specifications Page 24
Warranty Page 25

PowerMaster Series RF Wattmeter Array Solutions Rev 3.5 Feb 20, 2007
6
UNPACKING AND SETUP
INITIAL SETUP
Unpack the PowerMaster. The box should contain:
One Display Head – Black enclosure
One Directional Coupler – Gold colored box with connectors
One shielded interconnect cable for the coupler and display enclosure – 6 feet long
One DC 2.1mm coaxial plug power cable – 6 feet long
One CD Rom with the LITE version of software, and optionally the PRO version if ordered
Manual
If anything is missing, give us a call and we'll remedy the problem.
The PowerMaster consists of two major components: The Display Unit and the Directional Coupler. The Directional Coupler is installed in
series with the output of your transmitter and antenna. A six-foot (1.8m) cable is provided for connection between the Display Head and the
Directional Coupler. You may use a longer cable if you wish (consult the Special Applications section later in this manual).
•The PowerMaster uses a standard 2.1mm coaxial power plug, center pin is + V.
•Make sure your power source can supply at least 600 ma of current.
•Please do not use a cheap wall wart. These devices are usually not regulated and may cause RFI.

PowerMaster Series RF Wattmeter Array Solutions Rev 3.5 Feb 20, 2007
7
Quick Setup
If you are currently using a wattmeter in your setup, you have everything
you need for a test. If you are not using a wattmeter, then you will need
a suitable jumper to connect the Directional Coupler to your station.
Connect the Directional Coupler as follows:
Using RG-8, RG213, or RG-58 or other 50 ohm coaxial cables
SOURCE goes to your transmitter or linear amplifier (directly)
ANTENNA goes to your antenna (or tuner)
For the 3 or 10 KW HF PowerMaster, plug the ¼” connector into the
Directional Coupler and Display Enclosure. Supply 12V DC power by
connecting a standard 2.1 mm coaxial plug to the DC jack in the back of
the Display Enclosure. The center pin is “+” 12V DC.
The PowerMaster is protected against polarity reversals, but be careful
just the same. Apply 12-15 volt DC power. You should observe that the
Vacuum Fluorescent Display becomes active and the firmware version
number will be displayed for a few seconds, then the unit will display
the operational mode screen. You are now ready for a test.
Simply use your normal procedure to transmit. The PowerMaster will
give you an instant indication of your power and VSWR. If your
transmitter has an internal tuner, you might want to turn it off. The
internal tuner will cause a 50 ohm impedance to be presented to the
finals of your transmitter, thereby changing the characteristic impedance
present at the antenna jack on the transmitter. This will affect the
accuracy of the PowerMaster (just as it would any other measuring
device).
If the PowerMaster is functioning with a display of your forward power
and VSWR number with a bar graph to indicate relative power, you may
now proceed to program it from the front panel buttons or the control
software.
If you are having other problems, refer to the Trouble Shooting
section of this manual.

PowerMaster Series RF Wattmeter Array Solutions Rev 3.5 Feb 20, 2007
8
INSTALLATION DETAILS - DISPLAY HEAD AND
COUPLER LOCATION
The Display Enclosure is designed to be either table-top or 19-inch rack
mounted with the optional rack mounting plates. You can mount one or
two meters side by side in a standard 19-inch rack with the available
mounting plates in a 2U high space. If using the Display Enclosure as a
table top or shelf mount, simply place it into a position that is easily
seen, but be careful not to place it on top of an amplifier in a way that it
blocks the cooling of your amplifier. Choose a suitable location for the
Directional Coupler and mount it as well. We suggest mounting it with
an adapter right at the output of your amplifier. Be sure that you mount
the Directional Coupler close enough to the Display Head so that the
supplied cable can reach. If you require a longer cable, any shielded ¼”
“Stereo” jumper cable will suffice. If you use a longer cable, test it for
accuracy and RF immunity.
Connect a 12-15V DC power supply cable with 2.1mm plug to the
Display Head. The center pin is the “+” side of the DC power plug. Wire
your cable to a clean DC power source. Remember that some switch
mode or cheap wall warts are RF “noisy”. The Display Head is protected
against polarity reversal.
DIRECTIONAL COUPLER WIRING - Since the purpose of the
PowerMaster is to provide an indication of the match of your antenna
system to your transmitter, it is critical that the Directional Coupler be
installed as the first element after the antenna jack on your transmitter or
amplifier and before a tuner. Connect from your transmitter's antenna
jack to the SOURCE connector on the Directional Coupler.
The standard Directional Coupler comes with SO-239 connectors. You
can order optional “N” connectors or 7/16 Din connectors for very high
power operation.
If you are using an amplifier, install the Directional Coupler after your
amplifier. Connect the cable that goes to your antenna system to the
ANTENNA jack on the Directional Coupler. You may use the VSWR
protection circuitry if desired.
Recheck your cables/adapters and fasten them down appropriately. Turn
on the power to the Display Head. You should see the firmware version
number displayed, and then the PowerMaster will go to its normal
operational state.
Note that the display will become dimmer after 2 minutes of not
sensing power, and completely dark after 10 minutes of not sensing
power. This feature allows you to keep the meter on all the time and
not reduce the lifetime of the display.

PowerMaster Series RF Wattmeter Array Solutions Rev 3.5 Feb 20, 2007
9
USING THE POWERMASTER – Front Panel Controls
GENERAL OPERATION
In addition to the large vacuum fluorescent display, there are two buttons on
the front of the PowerMaster: “Menu” and “Mode Select.”
These buttons are used to select the operational mode, and to program the
meter’s several functions such as VSWR Alarm, Power Monitor Alarm,
Auto Ranging Scales, etc.
The following discussion shows you how to operate the meter. As we add
more features, you will be able to download more options for your meter
from the Array Solutions Website. You are invited to join the Array
Solutions User’s Group which can be found on the Array Solutions
website.
Note the Pictures used in the following text are of the previous meter box mixed with the new meter box. The functions are all the same.
Operation Menus - A tour of how to program from the front panel buttons
After Power-Up the meter enters the Normal Operation
Mode – see upper left character selection
Push the mode select button to choose from:
F – Fast hold of peak power, .2 second
M – Medium hold, 1 second
S – Slow hold of peak power, 2 seconds
L - Long 5 seconds
V – VSWR is displayed on Bar Graph – see next page

PowerMaster Series RF Wattmeter Array Solutions Rev 3.5 Feb 20, 2007
10
Pushing the menu button again takes us to the first menu item.
Pushing the menu button again takes us to the next menu.
VSWR Bargraph Mode
Used to allow easy adjustment of a tuner for minimum VSWR.
Dip it for minimum VSWR.
VSWR Alarm Menu
Push the mode select button to select the VSWR alarm trip point:
Off
1.5
2.0
2.5
3.0
Push the mode select button to reset the
VSWR alarm and LED

PowerMaster Series RF Wattmeter Array Solutions Rev 3.5 Feb 20, 2007
11
Pushing the menu button again takes us to the next menu.
Alarm Polarity Menu
(This option only displays if VSWR Alarm Limit is not set to off)
Select by pushing the mode select button:
ALARM OPENS Relay
ALARM CLOSES Relay
This applies to the PTT/ALC relay only – not the Power Monitor
relay.
Low Power Alarm Menu
Push the mode select button to choose trip point in watts:
Off
5
50
100
250
500
1,000
2,000
If the peak power remains below this setting for a few
seconds the power alarm LED will light and the power
monitor relay will actuate.
Push the mode select button to reset the alarm and LED
High Power Alarm Menu
Push the mode select button to choose trip point in watts:
0 ( off)
175
225
700
1,100
1,600
2,600
3,000
If the peak power exceeds this setting the power alarm LED
will flash and the power monitor relay will cycle on and off. If
the “Alarm Trips Amp”, next menu, option is selected then the
VSWR alarm LED will also flash and the PTT/ALC relay will
actuate but will not cycle.
P h th d l t b tt t t th l d LED

PowerMaster Series RF Wattmeter Array Solutions Rev 3.5 Feb 20, 2007
12
Pushing the menu button again takes us to the next menu.
Alarm Trips Amp Menu
Select with mode select button:
Yes
No
This menu option allows the high power alarm to actuate the
PTT/ALC relay just like a VSWR alarm does.

PowerMaster Series RF Wattmeter Array Solutions Rev 3.5 Feb 20, 2007
13
Pushing the menu button again takes us to the next menu.
Alarm Polarity Menu
(This option only displays if High Power Alarm Limit is not set to
off, 0)
Select by pushing the mode select button:
ALARM OPENS Relay
ALARM CLOSES Relay
This applies to the PTT/ALC relay only – not the Power Monitor
relay
Auto Alarm Reset Menu
This will automatically reset the both the VSWR and Power
Alarms or if “Off” will force a manual reset only.
Select by pushing the mode select button:
Off
5 seconds
10 seconds
20 seconds

PowerMaster Series RF Wattmeter Array Solutions Rev 3.5 Feb 20, 2007
14
Pushing the menu button again takes us to the next menu.
Show Call Text Menu
Select with mode select button:
Yes
No
This will display your call letters or any other text you
programmed into the meter via the software application program.
You must use the software to program the call text.
Display Intensity Menu
Select with mode select button:
1
2
3
4 (brightest)

PowerMaster Series RF Wattmeter Array Solutions Rev 3.5 Feb 20, 2007
15
Pushing the menu button again takes us to the next menu.
Bargraph Ranges Menu
Select with mode select button:
50 250 1250
100 500 2500
200 1000 3000
400 2000 3000
Forward Power Trim Menu
Select with mode select button to scroll from
+15% to -10%.
Set the Forward Power Trim factor to the settings
indicated on your coupler for HF (30MHz setting). It is
now possible to get better than 5% accuracy at 50 MHz if
you use the setting in the calibration table for 50 MHz.

PowerMaster Series RF Wattmeter Array Solutions Rev 3.5 Feb 20, 2007
16
Pushing the menu button again takes us to the next menu.
Reverse Power Trim Menu
Select with mode select button to scroll from
+15% to -10%.
Set the Reverse Power Trim factor to the settings indicated on
your coupler for HF (30MHz setting). It is now possible to get
better than 5% accuracy at 50 MHz if you use the setting in the
calibration table for 50 MHz.
Power Display Menu
Select with mode select button:
Net Power ( Forward Power – Reverse Power)
Forward Power only ( Reverse power is not subtracted)
Selects your preferred way you chose to display power and is
shown on the digital power readout and bar graph.

PowerMaster Series RF Wattmeter Array Solutions Rev 3.5 Feb 20, 2007
17
Pushing the menu button one last time will evoke the Display Refresh Screen. This is used to completely fill the display with bright refresh pixels to
restore display fluorescents of the display.
Screen fills with dots when “YES” is selected
RS232 Port Baud Rate Menu
Select with mode select button:
9,600
19,200
38,400
We recommend the highest speed.
Refresh Display Menu
Select with mode select button:
No – do not refresh the screen
Yes – Refresh the screen
Then push the menu button and screen will fill with
bright dots for approximately 19 minuets.
We recommend doing this about every 6 months or when
you notice some dots are weaker then others.

PowerMaster Series RF Wattmeter Array Solutions Rev 3.5 Feb 20, 2007
18
Other useful aspects of the meter:
VSWR is not displayed if the forward power is less than 5 watts.
VSWR alarm function is disabled if the forward power is less than 10 watts in normal modes or less than 50 watts in VSWR dipping mode.
The minimum displayed power is 1 watt. The maximum displayed power is 3005 watts (3 KW HF coupler).
Under 100 Watts the meter will display power in tenths of a watt
The call sign/message which you can program into the display can be up to16 characters long.
The bar graph has 80 segments and auto ranges in 3 ranges.
Display will auto dim after 2 minutes and automatically turn off after 10 minutes if no power is detected. Display lifetime is 35,000 hours at
maximum intensity before it will reach 50% brightness. This is a lifetime display in normal use.
The meter can have its internal firmware updated from the serial port connected to your PC. Just download the latest revision of firmware from
the Array Solutions web site at www.arraysolutions.com. See the LITE or PRO software manuals on the CD for the procedure.
The meter can be used on the internet via the PRO version of the control software.
The PRO version of the software will allow rig control and auto VSWR testing of your antennas, as well as other automatic functions combined
with your radio or amplifier.
.
See the help files in the LITE and PRO software packages for detailed information on the features of these software options.

PowerMaster Series RF Wattmeter Array Solutions Rev 3.5 Feb 20, 2007
19
REAR PANEL CONNECTIONS
From left to right
•Coupler – plug for coupler cable.
•Power Monitor Alarm – 1/8” stereo jack, relay will close or open depending on how you program it, these are .5 amp 50V contacts.
Tip Normally Open
Ring Normally Closed
Sleeve Common
•DC 12-15V – 2.1 mm coaxial DC power jack used to supply meter with DC power, center pin is “+V.”
•PTT IN and PTT OUT – Route PTT through this connector. or an ALC voltage to the amplifier to shut it down fast. .5 amp 50V
contacts.
•RS232 – connect a DB9 cable to a PC com. port to program and read the meter with the application software.

PowerMaster Series RF Wattmeter Array Solutions Rev 3.5 Feb 20, 2007
20
REMOTE COUPLER MOUNTING, RFI, and REMOTE SITE INSTALLATIONS
A remote mountable directional coupler vs. a
Power/VSWR meter that is all in one box is ideal since
the remote coupler can be placed very close to the
amplifier or source output. The effects of coaxial
transmission line losses are then minimized, and you get
a more accurate reading of the status of your antenna and
power being delivered. It also keeps possible RFI
troublesome cables away from your transmitter, audio,
data and CW circuits, therefore reducing the chance of
RFI and distortion to your signal.
A Power/VSWR meter that requires you to run coax to it
since it has no remote coupler means you have to mount
the meter very close to your operating position. Since
you’re routing your coaxial cables through it, you are
also bringing in possible RFI that can affect your audio,
CW tone, modulation, and also your PC. The
PowerMaster eliminates this possible source of RFI since
the signals passed to its display head are merely DC
voltages from the remote coupler.
The remote mounting capability is perfect for multiple
transmitter sites, remote power sensing for tuners, PA
stages, broadcast towers, etc. The ability to have the
meter report alarms via the relay closures or the software
makes it a very flexible instrument for remote sites as
well.
Remotely controlled radio applications over the internet
should find this meter readily adaptable with the PRO
application software.
.
DIRECTIONAL COUPLER CONNECTORS
•You may order the unit with SO239 (standard) connectors, Type-N, or 7/16 Din.
•The connectors are field replaceable if you should need to do so.
Table of contents
Other Array Solutions Measuring Instrument manuals
Popular Measuring Instrument manuals by other brands

Keysight Technologies
Keysight Technologies N77 Series user guide

SLOPE INDICATOR
SLOPE INDICATOR Digitilt DataMate manual

Sine Systems
Sine Systems ACM-1 manual

Niigata seiki
Niigata seiki D IP67S Series instruction manual

Hanna Instruments
Hanna Instruments HI 8730 instruction manual

E+H
E+H Micropilot S FMR533 manual