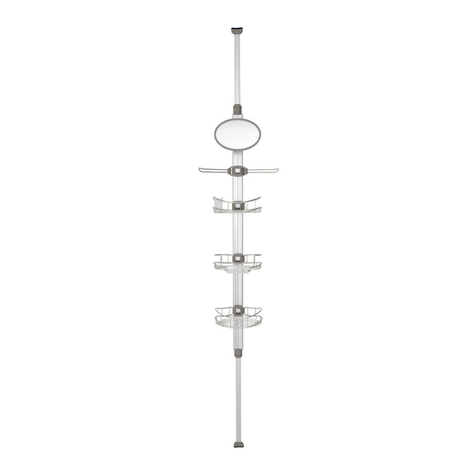
Artika Poseidon SC-P03 User manual

Made in China
Residential use only
Indoor use only
Fabriqué en Chine
Usage résidentiel seulement
Usage intérieur seulement
Hecho en China
Uso residencial solamente
Uso interiores solamente
Shower caddy - PoseidonTM
INSTRUCTION MANUAL
IMPORTANT,KEEP FOR
FUTURE REFERENCE:
PLEASE READ CAREFULLY.
Tour de rangement - PoseidonMC
MANUEL D’INSTRUCTIONS
IMPORTANT:À LIRE
ATTENTIVEMENTETÀ
CONSERVER.
Estante de ducha - PoseidonMR
MANUAL DE INSTRUCCIONES
IMPORTANTE,GUARDAR
PARAFUTURA REFERENCIA:
POR FAVOR,LEER
DETENIDAMENTE.
Rev. 26.05.2020
Model / Modèle / Modelo: SC-P03

2
INSTRUCTION MANUAL/ MANUEL D’INSTRUCTIONS / MANUAL DE INSTRUCCIONES
Item
Pièce
Pieza
Description
Description
Descripción
Quantity
Quantité
Cantidad
Support pole with safety clip
Pôle de support avec support de sécurité
Poste de soporte con clip de seguridad
× 1
Adjustable basket with hooks
Panier ajustable avec crochets
Estante ajustable con ganchos
× 1
Adjustable basket for soap holder
Panier ajustable pour porte-savon
Estante ajustable para jabonera
× 1
Adjustable basket
Panier ajustable
Estante ajustable
× 1
Soap holder
Porte-savon
Jabonera
× 1
Mirror with clip
Miroir avec l'attache
Espejo con clip × 1
Q-CupTM /MC/MR × 1
EN
INCLUDED
FR
INCLUS
ES
INCLUIDO

3
Item
Pièce
Pieza
Description
Description
Descripción
Quantity
Quantité
Cantidad
Suction cup support (non-permanent installation)
Support à ventouse (installation non permanente)
Montaje con ventosa (instalación no permanente) × 2
Adhesive support (permanent installation)
Support adhésif (installation permanente)
Soporte adhesivo (instalación permanente)
× 2
IMPORTANT
The installer and/or user must
read,understand and follow these
instructions before installing the
product.This product must be
properly installed before it is used.
If instructions are not followed,
the manufacturer will not be held
responsible for any problems or
product malfunction. Failure to
follow installation and/or operating
instructions voids the warranty.
IMPORTANT
Avant l’installation de ce produit,
l’utilisateur et/ou l’installateur doit
avoir lu et compris ces instructions.
Cet appareil doit être installé
convenablement avant usage.
Si ces instructions ne sont pas
respectées, le fabricant ne
pourra être tenu responsable
d’aucun problème ou de
dysfonctionnement du produit.
Le non-respect des instructions
d’installation et/ou d’utilisation
annulera la garantie en vigueur.
IMPORTANTE
El instalador o usuario deben
leer,comprender y seguir estas
instrucciones antes de instalar
el producto.El producto debe
estar correctamente instalado
antes de su uso.Si no se respetan
las instrucciones, el fabricante
no se hará responsable de
ningún problema o fallas en el
funcionamiento del producto.
Si no sigue las instrucciones de
instalación o de operación, se
anulará la garantía.
EN
INCLUDED
FR
INCLUS
ES
INCLUIDO

4
INSTRUCTION MANUAL/ MANUEL D’INSTRUCTIONS / MANUAL DE INSTRUCCIONES
SMOOTH AND NON-POROUS
SURFACE
SURFACE LISSE ET NON POREUSE
SUPERFICIE SUAVE Y NO POROSA
POROUS AND UNEQUAL SURFACE
SURFACE POREUSE ET INÉGALE
SUPERFICIE POROSA Y DESIGUAL
fig. 1
Adhesive support
Support adhésif
Soporte adhesivo
Suction cup support
Support à ventouse
Montaje con ventosa
Safety clip
Support de sécurité
Clip de seguridad
1. Place the two (2) suction cups on
the safety clip.
or
Place the two (2) plastic supports
with the adhesive film on the safety
clip (fig. 1).
For better adhesion,install on
a clean and suitable surface for
the support used.
1. Placer les deux (2) ventouses sur
le support de sécurité.
ou
Placer les deux (2) supports en
plastique avec la pellicule adhésive
sur le support de sécurité (fig. 1).
Pour une meilleure adhérence,
installer sur une surface propre
et adaptée au support utilisé.
1. Coloque las dos (2) ventosas en
el clip de seguridad.
o
Coloque los dos (2) soportes de
plástico con la película adhesiva en
el clip de seguridad (fig. 1).
Para una mejor adhesión,
instalar en una superficie
limpia y adecuada para el
soporte utilizado
INSTALLATION
1. SUPPORT CLIP
COMPONANTS
INSTALLATION
1. COMPOSANTS DU
SUPPORT DE SÉCURITÉ
ES
INSTALACIÓN
1. COMPONENTES DE
APOYO DE SEGURIDAD
WARNING:
Risk of serious injury.
The shower caddy is not
designed to exceed 30
pounds of total weight,
or 10 pounds per baskets.
Do not hang on it.
AVERTISSEMENT :
Risque de blessure grave.
La tour de rangement n'est
pas conçue pour excéder
13.6 kg (30 lb) de charge totale,
ou 4.5 kg (10 lb) par paniers.
Ne pas s'y suspendre.
ADVERTENCIA:
Riesgo de lesiones graves.
El organisador de ducha no
está diseñada para exceder
13.6 kg (30 lb) de carga total,
o 4.5 kg (10 lb) por cesta.
No te cuelgues.
! !!
FREN

5
EN
2. SUPPORT POLE
2. Place the pole at the desired
location (shower or bath) and
attach the suction cups and/or
adhesive supports to the walls to
secure the shower caddy.(fig. 2).
Note: Respect the minimum
and maximum height for a safe
installation.
FR
2. PÔLE DE SUPPORT
2. Placer la pôle de support à
l'endroit de votre choix (douche
ou bain) puis fixer les ventouses
et/ou les supports adhésifs sur les
parois pour sécuriser le support de
rangement de douche. (fig. 2).
Note: Respecter la hauteur
minimale et maximale pour
une installation sécuritaire.
ES
2. POSTE DE SOPORTE
2. Coloque la varilla de soporte en
el lugar deseado (ducha o baño)
y fije las ventosas y/o películas
adhesivas a las paredes para
asegurar el organizador de ducha.
(fig. 2).
Nota: Respete la altura mínima
y máxima para una instalación
segura.
fig. 2
Safety clip
Support de sécurité
Clip de seguridad
Minimum height: 59 in
Hauteur minimale: 59 po
Altura mínima: 59 plg
Maximum height: 102 in
Hauteur maximale: 102 po
Altura máxima: 102 plg
Safety clip
Support de sécurité
Clip de seguridad
Bath
Bain
Baño
Shower
Douche
Ducha

6
INSTRUCTION MANUAL/ MANUEL D’INSTRUCTIONS / MANUAL DE INSTRUCCIONES
EN
3. Hold the support pole with one
hand (1).
Extend the extension pole with the
other hand (2).
Make sure to apply enough force
to hide the minimum line (3).
Make sure the system is secured
properly.
FR
3. Maintenir la pôle d'extension
d'une main (1).
Déployer la pôle d'extension avec
l'autre main (2).
Appliquer suffisamment de force
pour masquer la ligne minimale
(3).
S'assurer que le système soit
correctement sécurisé.
ES
3. Sostenga el poste de extensión
con una mano (1).
Empuje la varilla interna hacia
arriba con la otra mano (2).
Debe forzar los clics del
mecanismo (3).
Asegúrese de que el sistema esté
bien asegurado.
fig. 3
3.
2.
1.

7
EN
4. BASKET AND MIRROR
4. Lift the clip latch (basket only)
(fig. 5).
Slightly Slide the left end side of
the clip into the groove. (fig. 6).
5. Snap the right side of the clip
onto the support pole. Push until
the accessory is properly secured
into place. Make sure the clip is
properly installed on both sides.
(fig. 7).
FR
4. MIROIR ET PANIERS
4. Soulevez la languette (panier
uniquement) (fig. 5).
Faites glisser légèrement le côté
gauche de l'attache dans la rainure.
(fig. 6).
5. Enclenchez le côté droit de
l'attache sur la pôle de support.
Poussez jusqu'à ce que l'accessoire
soit correctement fixé en place.
S'assurer que l'attache est
correctement installé des deux
côtés. (fig.7).
ES
4. ESPEJO Y CESTAS
4. Levante la pestaña del clip (solo
la canasta) (fig. 5).
Deslice ligeramente el lado del
extremo izquierdo del clip en la
ranura. (fig. 6).
5. Encaje el lado derecho del clip
en el poste de soporte. Empuje
hasta que el accesorio esté bien
asegurado en su lugar.Asegúrese
de que el clip esté instalado
correctamente en ambos lados.
(fig. 7).
6. Close the latch to fix the basket
on the pole (fig. 8).
6. Fermer la languette pour fixer le
panier sur la pôle (fig.8).
6. Cierre la pestaña para fijar la
canasta en el poste (fig. 8).
fig. 5 fig. 6
fig. 8
fig. 7 Grooves
Rainures
Ranuras

8
INSTRUCTION MANUAL/ MANUEL D’INSTRUCTIONS / MANUAL DE INSTRUCCIONES
fig. 10
fig. 11
EN
5. ACCESSORIES
ADJUSTMENT
7. Pull the latch (basket only)
(fig. 10).
8. Slide the accessory on the
support pole until it reaches the
desired position.
3. Close the latch (basket only)
(fig. 11).
FR
5. AJUSTEMENT DES
ACCESSOIRES
7. Lever la languette de
verrouillage (panier uniquement)
(fig. 10).
8. Glisser l’accessoire jusqu’à
la position désirée sur la pôle
de support.
Fermer la languette de verrouillage
(panier uniquement) (fig. 11).
ES
5. AJUSTE DE LOS
ACCESORIOS
7.Tire de la lengüeta de bloqueo
(solo la canasta) (fig. 10).
8. Deslice el accesorio en la polo de
soporte hasta que alcance la
posición deseada.
Cierre la lengüeta de bloqueo (solo
la canasta) (fig. 11).

9
fig. 12
fig. 13
EN
6. Q-CUPTM AND SOAP
HOLDER INSTALLATION
9. Install the Q-CupTM onto the
basket. Clip it over the metal wire
(fig. 12).
10.To install the soap holder,clip it
over the wire on the basket(fig. 13).
FR
6. INSTALLATION DU
Q-CUPMC ET DU PORTE-
SAVON
9. Installer le Q-CupMC sur le coin
rond du panier. Poussez-le en place
sur la tige du panier (fig.12).
10. Pour installer le porte-savon,
fixez-le sur le panier (fig.13).
ES
6. INSTALACIÓN DE Q-CUPTM
Y JABONERA
9. Instale el Q-CupTM en la
esquina redondeada del estante.
Engánchelo sobre el tallo de la
cesta (fig. 12).
10. Para instalar la jabonera,
sujétela en la canasta (fig.13).

10
INSTRUCTION MANUAL/ MANUEL D’INSTRUCTIONS / MANUAL DE INSTRUCCIONES
EN
7. MIRROR
MAINTENANCE
1. Mirror
WARNING:
Do not use ammonia-based
cleaning agents
FR
7. ENTRETIEN
DU MIROIR
1. Miroir
AVERTISSEMENT :
Ne pas utiliser de produits
nettoyants contenant de
l’ammoniac
ES
7. MANTENIMIENTO
DEL ESPEJO
1. Espejo
AVISO:
No use agentes de limpieza con
amoniaco.
2. Plastic components
Clean the plastic components with
mild soap and cloth.
Do not put in the dishwasher
2. Composants en plastique
Nettoyer les composants de
plastique avec un savon doux et
un chiffon.
Ne pas mettre au lave-vaisselle
2. Componentes de plástico
Limpie los componentes de
plástico con un jabón suave y un
paño.
No poner en el lavavajillas.

EN
REPLACEMENT PARTS
FR
PIÈCES DE RECHANGE
ES
PIEZAS DE REPUESTO
Item
Pièce
Pieza
Description
Description
Descripción
Artika #
Numéro Artika
Artika #
Q-CupTM/MC/MR SC-NEP/Q
Basket clip
Attache pour panier
Clip para estante
SC-NEP/BCP
Soap holder
Porte-savon
Jabonera
SC-NEP/SHTP
Mirror clip
Attache pour miroir
Clip para espejo
SC-NEP/MCP
Rubber feet
Pied en caoutchouc
Pata de goma
SC-NEP/RF
Suction cup support
Support à ventouse
Montaje con ventos
SC-ALL/SC
Adhesive support
Support adhésif
Soporte adhesivo
SC-ALL/AS

Artika For Living Inc.
1756, 50th ave, Lachine
Quebec, Canada H8T 2V5
1-866-661-9606
www.artika.com
Customer Service
Monday to Friday
9 a.m. - 5 p.m. EST
Service à la clientèle
du lundi au vendredi
de 9 h à 17 h, heure de l’Est
Atención al cliente
Lunes a viernes
9 a.m. - 5 p.m. hora del Este
INSTRUCTION MANUAL/ MANUEL D’INSTRUCTIONS / MANUAL DE INSTRUCCIONES
EN
WARRANTY
Artika For Living Inc. is proud to offer you a one
(1) year warranty on manufacturing defects of
your shower caddy from the date of purchase for
residential use only.The warranty is extended
to the original owner in USA and Canada and is
non-transferable.It does not apply to retailers,
commercial applications or establishments.The
original sales receipt is required for all warranty
claims.The remedy under this limited warranty
shall be product or part replacement at Artika’s
discretion as provided herein and cannot exceed
the original purchase price.
This warranty is valid only on products installed in
accordance with the provided instruction manual.
It does not cover products installed incorrectly
or subjected to abnormal use. Product(s) or
component(s) may be required to be returned for
inspection and verification.
Normal wear and tear (including but not limited
to chips, scratches, stains or impact damages),
misuse, negligence, vandalism, improper
maintenance (surface damage due to chemical
interaction or cleaning agents including,but
not limited to,scouring pads, use of cleaners
containing abrasives,alcohol or other organic
solvents) improper handling, accident, abuse, fire,
flood, theft, acts of God, neglect, or alteration of
the product will not be covered under this limited
warranty.
The warranty does not cover handling,labor,
transportation,or any other cost associated with
the installation or replacement of the product.This
limited warranty is valid in the country of purchase
and by Artika authorized retailers only.
Artika for Living Inc. will not be held responsible
for any direct or consequential damages or injuries
related to the use of this product arising from
improper use or installation of this product.
Please visit www.artika.com to discover more
about Artika for Living Inc.
FR
GARANTIE
Artika For Living Inc.est fière de vous offrir
une garantie d’un (1) an contre tout défaut de
fabrication du porte-accessoires de douche,
à compter de la date d’achat, pour un usage
domestique uniquement. Cette garantie n’est
valide que pour le propriétaire d’origine aux
États-Unis et au Canada et est incessible.Elle ne
s’applique pas aux détaillants, ni aux applications
ou établissements commerciaux.Le reçu de vente
original est exigé pour toute demande de garantie.
Le recours prévu par cette garantie limitée est
le remplacement du produit ou d’une pièce du
produit,à la discrétion d’Artika conformément au
présent document,et ne peut pas excéder le prix
d’achat original.
Cette garantie couvre uniquement les produits
installés conformément avec le code du bâtiment
et les lois en vigueur dans la région où ils sont
utilisés, et les produits utilisés conformément
au mode d’emploi fourni. Elle ne couvre pas les
produits mal installés ou soumis à un usage
anormal. Le ou les éviers ou pièces peuvent
vous être demandés aux fins d’inspection et de
vérification.
Une usure normale (incluant sans s’y limiter
les ébréchures,rayures,taches ou dommages
causés par un choc), une mauvaise utilisation,la
négligence, le vandalisme,un mauvais entretien
(surface endommagée à cause d’une interaction
chimique ou de produits nettoyants,incluant sans
s’y limiter les éponges métalliques, l’utilisation de
produits nettoyants contenant des agents abrasifs,
de l’alcool ou d’autres solvants organiques),
une manipulation inadéquate, un accident,un
abus, un incendie, une inondation, un vol, une
catastrophe naturelle ou la modification du
produit ne sont pas des motifs couverts par cette
garantie limitée.
Cette garantie ne couvre pas la manutention, la
main-d’œuvre, le transport,ou tout autre coût lié
à l’installation ou au remplacement du produit.
Cette garantie limitée est valide uniquement
dans le pays où l’achat a été effectué auprès de
détaillants autorisés Artika.
Artika For Living Inc. ne pourra être tenue
responsable en cas de blessure ou de dommage
direct ou indirect causé par l’utilisation du produit
si le produit a été mal installé ou mal utilisé.
Visiter le www.artika.com pour en savoir plus sur
Artika for Living Inc.
ES
GARANTÍA
Artika For Living Inc. se enorgullece de ofrecerle
una garantía limitada de un (1) año en defectos
de manufactura de este sistema de ducha
desde la fecha de compra para uso residencial
únicamente. Esta garantía cubre al dueño original
en EE. UU.y en Canadá, y no es transferible.No se
aplica a minoristas, aplicaciones comerciales ni a
establecimientos. Se deberá presentar el recibo
de venta original para todas las reclamaciones
de garantía.La compensación ofrecida por esta
garantía limitada será el reemplazo del producto
o de la pieza a entera discreción de Artika como
aquí se indica, y no puede exceder el precio de
adquisición original.
Esta garantía solo es válida en productos
instalados de acuerdo con el código de
construcción y la legislación en vigor en la región
donde se use esta unidad, así como el manual de
instrucciones provisto.Nuestra garantía no incluye
productos instalados incorrectamente o que hayan
tenido un uso anormal. Es posible que se pida la
devolución de los productos o componentes para
su inspección o verificación.
El desgaste normal, uso incorrecto,negligencia,
vandalismo,mantenimiento incorrecto (daños en
la superficie por interacción química o agentes
de limpieza incluyendo,entre otros,paños
abrasivos,sustancias de limpieza abrasivas,
alcohol o solventes orgánicos),manejo incorrecto,
accidente, abuso, incendio, inundación, robo,
causas de fuerza mayor,negligencia o alteración
del producto no serán cubiertos bajo esta
garantía limitada.No cubre ningún accesorio que
acompañe al producto,incluyendo entre otros
bombillas o baterías.
La garantía no cubre gastos de manejo,gastos
laborales,de transporte ni cualquier otro coste
asociado con la instalación o reemplazo del
producto.Esta garantía limitada es válida en el país
de adquisición, siempre que se haya adquirido en
un minorista autorizado por Artika.
Artika For Living Inc. no se hará responsable de
ningún daño directo,consecuente o resultante, ni
de lesiones que puedan resultar de un mal uso o
instalación de este producto.
Visite www.artika.com para saber más sobre Artika
For Living Inc.
Table of contents
Other Artika Bathroom Fixture manuals

Artika
Artika MONSOON2 User manual
Artika
Artika O2 Shower caddy User manual

Artika
Artika Ulysse CAD2U-C1 User manual

Artika
Artika Allegro SC-AL3 User manual

Artika
Artika Mistra MIST-C1 User manual

Artika
Artika Balneo DSH2-C1 User manual

Artika
Artika U7 User manual
Artika
Artika NeptuneTM User manual

Artika
Artika Monsoon 2 User manual
Popular Bathroom Fixture manuals by other brands

ProFlo
ProFlo PFSH314CP installation instructions

Roca
Roca ETERNAL A5A978B 0 Series manual

THE BOLD LOOK OF KOHLER
THE BOLD LOOK OF KOHLER K-705788 Homeowner's guide

Hans Grohe
Hans Grohe AXOR Starck 10615000 Instructions for use/assembly instructions

Mirabelle
Mirabelle St. Martin MIRSM3RTCP quick start guide

Glacier bay
Glacier bay 2190SSHD Use and care guide