9
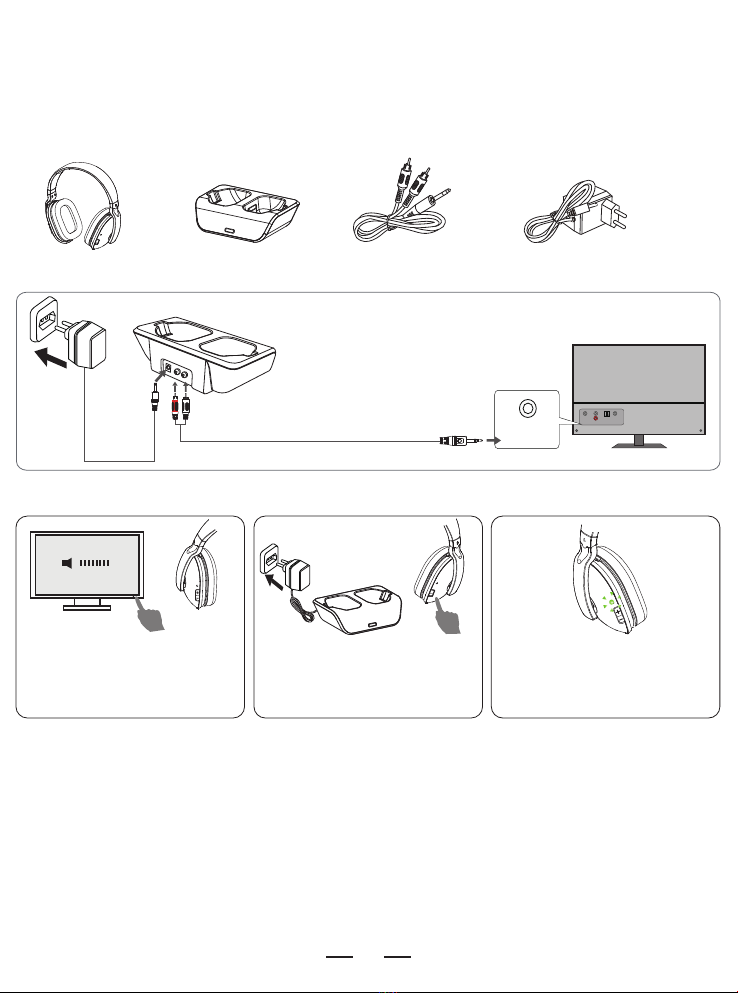
You need to use after hookup:
Note:
1.Please remember to turn the volume down before put them on, since the default
sound is high.
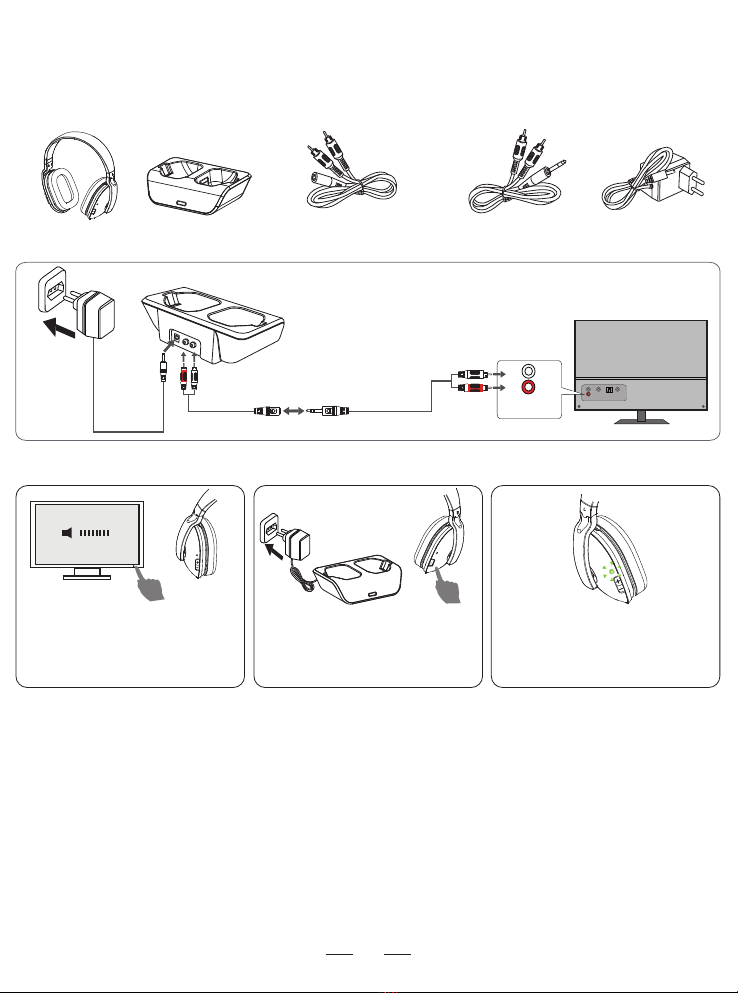
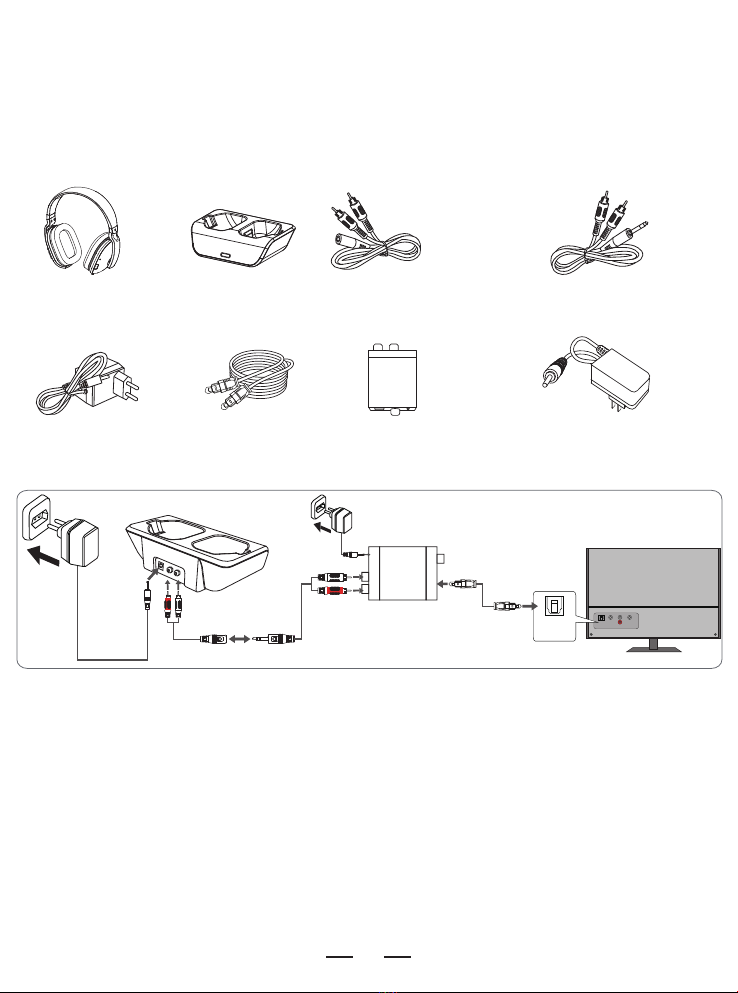
2.If you still can not receive audio on the headphones while at the same time hearing
audio from the television speakers: connect the transmitter to your Cable
Box/Satel
lite Box RCA audio out rather than your television.
3.Please plug cables into port completely and correctly, If the plug is only half
inserted or not completely, there maybe noise.
If no sound,please check the TV setting,refer to “5.TV SETTING”
+
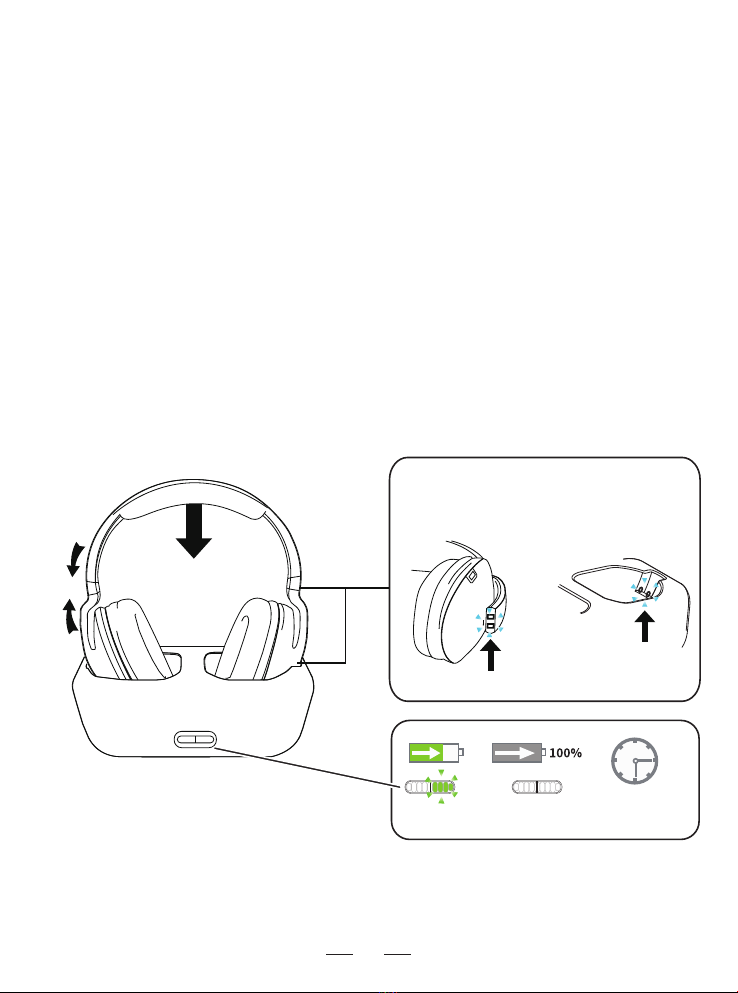
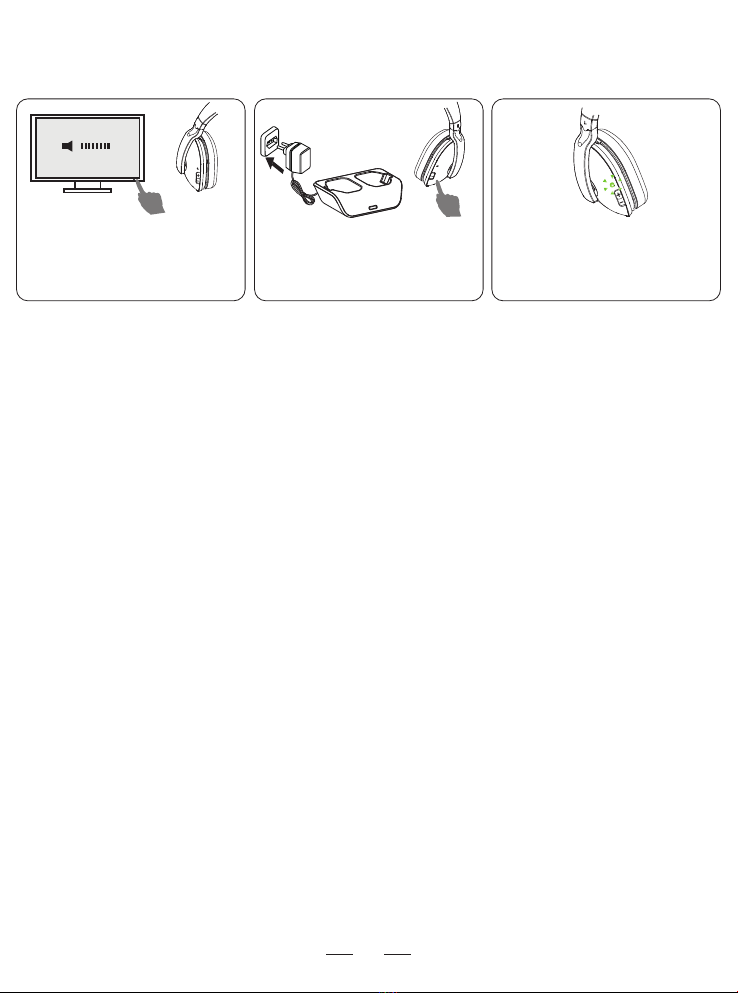
2.Turn on
Connect transmitter to power
and turn on headset
3.Green light on
Wait until the green light is on
the left earmuff , you will hear
sound
1.Play
Turn on TV and play sound