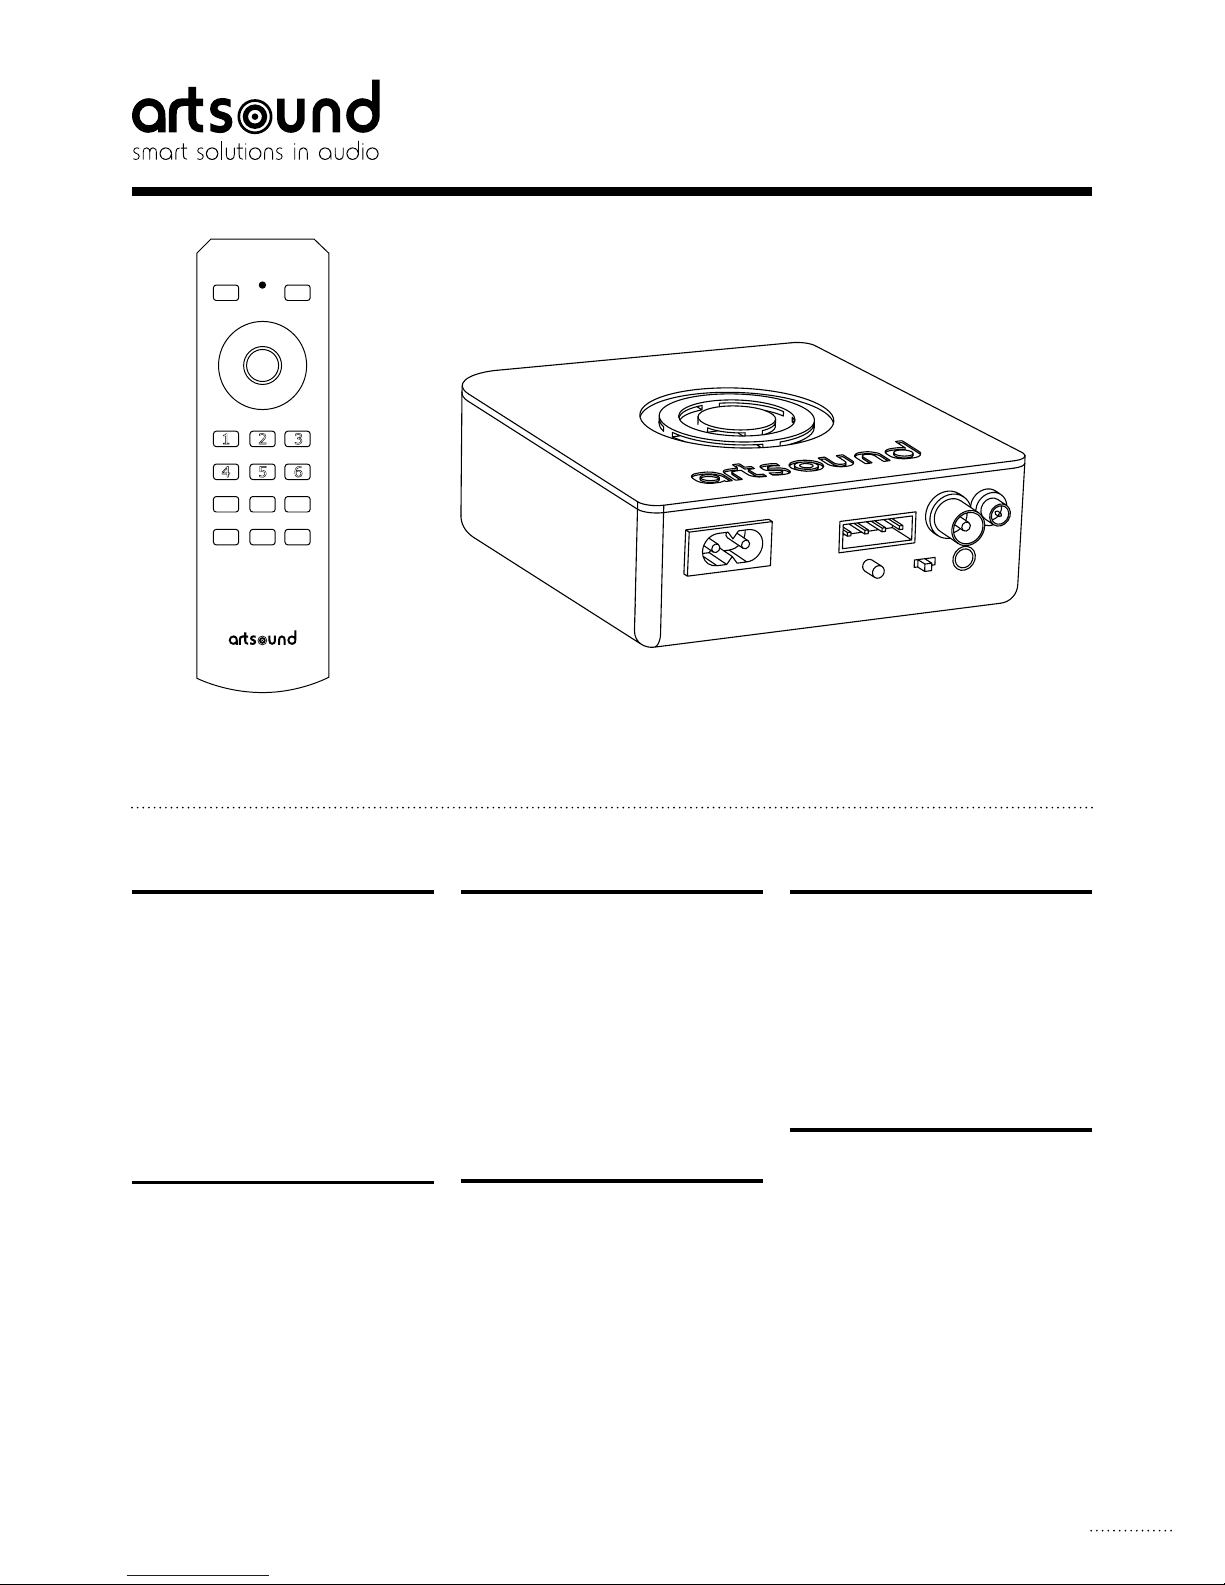
ART+SOUND ART3.1BT User manual

HANDLEIDING
ART3.1BT
1
WAARSCHUWINGEN EN
VEILIGHEID!
• Om brand of elektrische schokken te voorko-
men, mag u dit apparaat niet aan regen of vocht
blootstellen.
• Voor uw veiligheid: om elektrische schokken
te voorkomen, mag de behuizing niet worden
verwijderd.
• Repareer zelf geen onderdelen in het apparaat,
maar laat alle reparaties over aan deskundig
servicepersoneel.
• Zolang het netsnoer van het apparaat op een
wandcontactdoos is aangesloten, staat het
apparaat onder spanning, zelfs als het apparaat
is uitgeschakeld.
INHOUD VAN DE DOOS
Controleer of volgende onderdelen in de doos zit-
ten:
• ART3.1BT
• RF afstandsbediening + houder
• FM antenne
• BT antenne
• Netsnoer
• Handleiding
AVERTISSEMENTS ET SÉCURITÉ
• Pour éviter tout risque d’incendie ou d’électro-
cution, n’exposez pas l’appareil à la pluie ou à
l’humidité.
• Pour votre sécurité : pour éviter tout risque
d’électrocution, ne retirez pas le panneau
extérieur.
• Ne réparez pas de composants de l’appareil,
mais confiez toutes les réparations à du person-
nel qualifié.
• Tant que le cordon d’alimentation de l’appareil
est branché à une prise secteur, l’appareil est
sous tension, même s’il est éteint.
CONTENU DE LA BOÎTE
Vérifiez si les éléments suivants se trouvent bien
dans la boîte :
• Le système ART3.1BT
• Télécommande à RF + support
• Antenne FM
• Antenne BT
• Cordon d'alimentation
• Mode d'emploi
WARNINGS AND SAFETY!
• To prevent fire or electric shocks, the device
must not be exposed to rain or humidity.
• For your own safety: to prevent electric shocks
do not remove the housing.
• Do not try to repair any malfunctioning parts of
the device yourself. Ask a professional expert to
do this for you.
• When plugged into the mains, the device re-
mains electrically charged even when switched
off.
CONTENTS OF THE PACKAGING
Check that the packaging contains the following
parts:
• The ART3.1BT unit
• RF remote control + holder
• FM antenna
• BT antenna
• Power cord
• User guide
USER GUIDEMODE D’EMPLOI
1 2
Pair
3
4 5 6
FM DAB BT
ON OFF
HI AUX LO
+
>>
>>
—
NL FR UK

INSTALLATIE
Volg de stappen hieronder om tot een correcte installatie te komen.
1. Plaatsing
Het toestel is voorzien van 4 voetjes om vrij geplaatst te worden. Daarnaast is er
een uitsparing compatibel met DIN rail, waarbij de module op een stukje rail kan
geschoven worden.
2. Aansluiten van een externe geluidsbron
Om het even welke analoge geluidsbron kan via de 3,5 mm stereo ingang verbon-
den worden.
3. Aansluiten van de luidsprekers
Er kunnen 2 luidsprekers op de ART3.1BT aangesloten worden. Respecteer hier-
bij de polariteit van de luidspreker in overeenstemming met de aanduiding op de
schroefconnectie van de ART3.1BT. De luidspreker mag van het type 4 of 8 ohm zijn.
4. FM antenne
Je kan gebruik maken van de meegeleverde FM antennekabel. Plug deze in in de
daarvoor bestemde connector.
5. BT antenne
Schroef de BT antenne op de daartoe voorziene connector om een optimale Blue-
tooth ontvangst te genereren.
CONFIGURATIE
Zorg er eerst voor dat beide luidsprekers zijn aangesloten, optioneel een actieve
geluidsbron op de aux-ingang (RCA-kabel).
1. Instellen adres afstandsbediening
• Druk op AUX tot de RF led permanent rood oplicht.
• Vorm een 3-cijferige combinatie met de numerieke toetsen op de afstandsbe-
diening. (111 tot 666).
• Druk kort op AUX om de gevormde combinatie te bewaren.
• Herhaal eventueel bovenstaande procedure om tot 10 bedieningen met een
afwijkend adres te koppelen.
2. Koppeling met ART3.1BT
• Druk gedurende 5 s. op de setup-knop van de unit tot de RF led knippert.
• Druk op OFF van de afstandsbediening. De led knippert tijdens het inlezen.
3. Mono/Stereo
Plaats de mono/stereo switch in de mono positie wanneer:
• slechts één enkele speaker wordt aangesloten,
• meerdere speakers verder uit elkaar gepositioneerd worden,
• meerdere speakers over 2 ruimtes verdeeld worden.
4. DAB sets
Druk éénmalig lang op DAB om de DAB sets vast te leggen. Een geluidssignaal
weerklinkt tijdens deze instelling. Nadien kan er net zoals bij FM gezocht worden
via << en >>.
r Bij gebruik van meerdere ART3.1BT units in hetzelfde project is het vereist
afwijkende adressen in te stellen om interferentie te vermijden.
GEBRUIK
1. Bronkeuze
Aan de hand van de toetsen FM, DAB, AUX of BT kunnen elke van deze bronnen
geselecteerd worden.
2. Bluetooth
Bij BT dient het compatibele apparaat de eerste maal gekoppeld te worden via de
PAIR toets. Druk kort op << of >> om de volgende track te selecteren, druk lang
op << of >> om snel achterwaarts of voorwaarts doorheen de track te scrollen.
Bij het selecteren van een andere bron tijdens het afspelen wordt de huidige track
gestopt.
3. Opslaan voorkeurzenders / toonregeling
Na een manuele zoekopdracht kunnen voorkeurzenders opgeslagen worden door
gedurende 2 s. op een numerieke toets van de afstandsbediening te drukken.
Druk kort op << of >> om de vorige of volgende preset te selecteren, druk lang
op << of >> om de band te scannen. Door respectievelijk op de HI/LO toetsen en
INSTALLATION
Procédez comme suit pour réaliser une installation correcte.
1. Pose
L'appareil est doté de quatre pieds, pour être posé librement. Par ailleurs, il dis-
pose d'une rainure compatible avec les rails DIN, pour glisser le module sur un rail.
2. Connexion d’une source audio externe
N'importe quelle source audio analogique peut être connectée à l'entrée stéréo
3,5 mm.
3. Connexion des enceintes
L'ART3.1BT peut être raccordé à deux enceintes. Respectez bien la polarité des
enceintes indiquée sur le connecteur à vis de l'ART3.1BT. Les enceintes peuvent
être de type 4 ou 8 ohms.
4. Antenne FM
Vous pouvez employer le câble pour antenne FM fourni. Branchez-le dans le
connecteur prévu à cet effet.
5. BT antenne
Vissez l'antenne BT sur le connecteur prévu afin de bénéficier d'un signal Blue-
tooth optimal.
CONFIGURATION
Veillez d'abord à ce que les deux enceintes soient connectées; alternativement,
connectez une source audio active à l'entrée AUX (câble RCA).
1. Réglage de l'adrresse de la télécommnande
• Appuyez sur AUX jusqu'à ce que la LED RF soit constamment allumée en rouge.
• Saisissez une combinaison de 3 chiffres à l'aide des touches numériques de la
télécommande (111 à 666).
• Appuyez brièvement sur AUX pour enregistrer cette combinaison.
• Éventuellement, répétez la procédure pour associer jusqu'à 10 commandes
avec une adresse différente.
2. Association à l'ART3.1BT
• Appuyez pendant 5 secondes sur le bouton setup de l'unité jusqu'à ce que la
LED RF clignote.
• Appuyez sur le bouton OFF de la télécommande. La LED clignote durant la
mise en mémoire.
3. Mono/Stéréo
Placez le commutateur mono/stéréo en position mono :
• si une seule enceinte est connectée ;
• si les enceintes sont éloignées ;
• si les enceintes ne sont pas placées dans la même pièce.
4. Réglages DAB
Appuyez une fois longuement sur DAB pour définir les réglages DAB. Un signal
sonore retentit durant ce réglage. Ensuite, vous pouvez chercher avec les touches
<< et >> comme avec la FM.
r Si vous utilisez plusieurs unités ART3.1BT dans le même projet, vous devez
configurer des adresses différentes pour éviter les interférences.
UTILISATION
1. Choix de la source
Appuyez sur la touche FM, DAB, AUX ou BT pour choisir une de ces sources.
2. Bluetooth
Pour la source BT, l'appareil compatible doit d'abord être associé à l'aide de la
touche PAIR. Appuyez brièvement sur << ou >> pour sélectionner la chanson
précédente/suivante ; maintenez la touche << ou >> pour reprendre ou avancer
rapidement la chanson en cours. En sélectionnant une autre source la lecture en
cours sera arrêtée automatiquement.
3. Enregistrement des présélections/réglages de tonalité
Après une recherche manuelle, mémorisez la station en appuyant pendant 2 se-
condes sur une touche numérique de la télécommande.
Appuyez brièvement sur << ou >> pour sélectionner la présélection précédente/
suivante ; maintenez la touche << ou >> pour scanner la bande. Appuyez sur les
ART3.1BT
2
NL FR

3
ART3.1
123 4
5
1. voeding, 230 AC / alimentation, 230 CA / power, 230 AC
2. aansluiting luidsprekers / connexion des enceintes / speaker connection
3. FM antenne / Antenne FM / FM antenna
4. BT antenne / Antenne BT / BT antenna
5. setup knop / bouton setup / set-up button
. Mono/Stereo switch / commutateur mono/stéréo / Mono/Stereo switch
. 3,5 mm stereo input / entrée stéréo 3,5 mm / 3.5 mm stereo input
1 2
Pair
3
4 5 6
FM DAB BT
ON OFF
HI AUX LO
+
>>
>>
—
INSTALLATION
To install correctly follow the steps listed below.
1. Positioning
The device has 4 feet so that it can be freely positioned. In addition it has a
DIN-rail-compatible notch, so that the module can be fixed onto a rail.
2. Connection to an external audio source
Any kind of analogue audio source can be connected via the 3.5 mm stereo input.
3. Connecting the loudspeakers
2 loudspeakers can be connected to the ART3.1BT. Remember that the polarity of
the loudspeaker must correspond to what is indicated on the screw connection on
the ART3.1BT. The loudspeaker should be type 4 or 8 ohm.
4. FM aerial
You can use the FM aerial supplied. Plug this into the connector intended.
5. BT antenne
Screw the BT antenna to the connector supplied for this purpose in order to gene-
rate the very best Bluetooth reception.
CONFIGURATION
First, make sure both speakers are connected; alternatively, connect an active
audio source to the AUX input (RCA cable).
1. Programming the remote control address
• Press AUX until the RF LED lights up continuously.
• Make a 3-digit combination on the numeric keypad on the remote control. (111
to 666).
• Press briefly AUX to save the combination.
• Repeat the aforementioned procedure if necessary to connect up to 10 con-
trols with different addresses.
2. Connecting to the ART3.1BT
• Press and hold the set-up button on the unit for 5 seconds until the RF LED
starts to flash.
• Press OFF on the remote control. The LED will flash during the scanning
process.
3. Mono/Stereo
Put the mono/stereo switch in the mono setting if:
• only one speaker is connected,
• several speakers are positioned at a distance away from each other,
• several speakers are distributed in 2 or more rooms.
4. DAB sets
Press and hold down DAB once only to programme the DAB sets. You will hear an
audio signal during the programming. Afterwards you can search in the same way
as for FM via << and >>.
r When using more than one ART3.1BT unit in the same project you must
programme different addresses to avoid interference.
USE
1. Choice of source
Using the FM, DAB, AUX or BT keys, one of these sources can be selected.
2. Bluetooth
For BT, a compatible device first needs to be connected via the PAIR key. Press
briefly on << or >> to select the previous or next track, press for longer on << or >>
to go backward or forward in the song.
While selecting another source the current song will be stopped.
3. Saving preset channels / tone control
After a manual search, preset channels can be saved by pressing a numeric key on
the remote control for 2 seconds.
Press briefly on << or >> to select the previous of the next preset, press for longer
on << or >> to scan the waveband. By pressing the HI/LO keys and +/- respec-
tively, a higher/lower tone can be programmed. Pressing on the HI or LO key for
longer will restore the settings to their default value.
UK

ART3.1BT
4
+/- in te drukken worden de hoge/lage tonen inge-
steld. Langer drukken op de HI of LO toets herstelt
de regeling naar originele waarden.
4. Instellen max. volume
Druk op AUX tot een geluidssignaal weerklinkt.
Vorm de 3-cijferige combinatie (cfr. afstandsbe-
diening) met de numerieke toetsen. Huidig volume
wordt maximaal ingesteld volume. Herhaal deze
stappen om het maximaal volume te annuleren
waarbij een ander geluidsignaal weerklinkt.
5. Spanningsval
Bij het heropstarten van het toestel na een span-
ningsval herstelt deze zich naar de laatste preset
of aux in.
6. Resetten van het toestel
Voor het opnieuw configureren van de afstandsbe-
diening moet het toestel eerst gereset worden. Dit
gebeurt door de setup-knop ingedrukt te houden
terwijl je de stekker in het stopcontact steekt. Na
enkele seconden dooft de LED uit. Het apparaat
staat nu klaar om opnieuw geconfigureerd te wor-
den.
TECHNISCHE KENMERKEN
beschrijving
• lokaal audioverdeelsysteem
• Klasse D versterker
• 2 x 15 W RMS (4Ω)
bronnen
• ingebouwde FM/DAB+ tuner (2 x 6 presets)
• AUX input (3,5 mm)
• Bluetooth
bediening
• RF-afstandsbediening + houder
• ingebouwde RF-receiver 434 MHZ
diverse
• externe antenne ingang
• compacte behuizing
• mono-stereo keuzeschakelaar
• temperatuurbeveiliging
• bass & treble regeling
voeding
• 110 V - 230 V
afmeting
• (b x d x h) 120 x 118 x 46 mm
gewicht
• 0,3 kg
GARANTIE VOORWAARDEN
2 jaar garantie vanaf fabricatiedatum. De garantie
beperkt zich tot herstelling of omruiling van het de-
fecte materiaal voor zover het defect een gevolg is
van normaal gebruik en het toestel niet werd be-
schadigd. Artsound is niet verantwoordelijk voor
eventuele andere kosten die uit het defect voort-
vloeien. (bvb. transport) Voor details verwijzen we
naar de algemene verkoopsvoorwaarden.
touches HI/LO et +/- pour régler respectivement
les tonalités aiguës et graves. Maintenez la touche
HI ou LO enfoncée pour revenir aux valeurs par
défaut.
4. Configurer le niveau de volume max.
Appuyez sur AUX suivi par un signal sonore.
Saisissez la combinaison de 3 chiffres (cfr. télé-
commande) à l’aide des touches numériques. Le
niveau de volume actuel est sauvegardé comme le
niveau de volume maximale. Répétez ces étapes
pour annuler le niveau maximale.
5. Chute de tension
Au redémarrage après une chute de tension, l'ap-
pareil rétablit la dernière présélection ou AUX IN.
6. Réinitialisation de l'appareil
Pour reconfigurer la télécommande, vous devez
d'abord réinitialiser l'appareil : maintenez le bou-
ton setup enfoncé en retirant la fiche d'alimenta-
tion de la prise. Au bout de quelques secondes,
la LED s'éteint. L'appareil peut maintenant être
reconfiguré.
CARACTÉRISTIQUES
description
• système de répartition audio locale
• amplificateur de classe D
• 2 x 15 W RMS (4 Ω)
sources
• tuner FM/DAB+ intégré (2 x 6 préréglages)
• entrée AUX (3,5 mm)
• Bluetooth
commande
• télécommande RF + support
• récepteur RF intégré 434 MHZ
divers
• entrée pour antenne externe
• boîtier compact
• commutateur mono/stéréo
• protection contre les températures extrêmes
• réglage des graves et des aigus
alimentation
• 110 V - 230 V
dimensions
• (l x p x h) 120 x 118 x 46 mm
poids
• 0,3 kg
CONDITIONS DE GARANTIE
Deux ans de garantie à partir de la date de fabri-
cation. La garantie se limite à la réparation ou à
l’échange du matériel défectueux, pour autant
que sa défaillance soit la conséquence d’une
utilisation normale et que l’appareil n’ait pas été
endommagé. ArtSound décline toute responsa-
bilité à l’égard d’autres frais éventuels associés à
la défaillance (p.ex. frais de transport). Pour plus
d’informations, reportez-vous à nos conditions gé-
nérales de vente.
4. Set maximum volume level
Press AUX until you hear sound signal. Make the
3-digit combination (remote control) on the nu-
meric keypad. The actual volume is set as the
maximum volume level. Repeat these steps to
cancel the maximum volume level.
5. Power failure
When the device reboots after a power outage, it
will revert to its most recent preset or aux-in.
6. Resetting the device
In order to reconfigure the remote control, the
device must first be reset. The is done by hold-
ing down the set-up button whilst plugging in the
device at the mains. After a few seconds the LED
will go out. The device is now ready for reconfig-
uration.
TECHNICAL SPECIFICATIONS
description
• local audio distribution system
• Class D amplifier
• 2 x 15W RMS (4Ω)
sources
• inbuilt FM/DAB+ tuner (2 x 6 presets)
• AUX input (3,5mm)
• Bluetooth
operation
• RF remote control + holder
• inbuilt RF receiver 434 MHZ
various features
• external aerial input
• compact housing
• mono-stereo switch
• temperature safety device
• bass & treble regulation
power supply
• 110V - 230V
dimensions
• (w x d x h) 120 x 118 x 46mm
weight
• 0,3kg
WARRANTY CONDITIONS
2 year warranty from the date of manufacture. The
warranty is limited to the repair of replacement of
the defective material insofar as this defect is a
result of normal use and the device has not been
damaged. ArtSound is not responsible for any oth-
er costs that ensue as a result of the defect (e.g.
transport). For details, please consult our general
terms and conditions of sale.
NL FR UK
House of Music nv
Ronse, Belgium
+32 9 380 81 80
+32 9 386 12 35
info@houseofmusic.be
www.artsound.be
@Art_Sound
ArtSound.Audio
Ontdek het volledige aanbod op www.artsound.be
Découvrez la gamme complète sur www.artsound.be
Discover the complete range at www.artsound.be
Other ART+SOUND Radio manuals