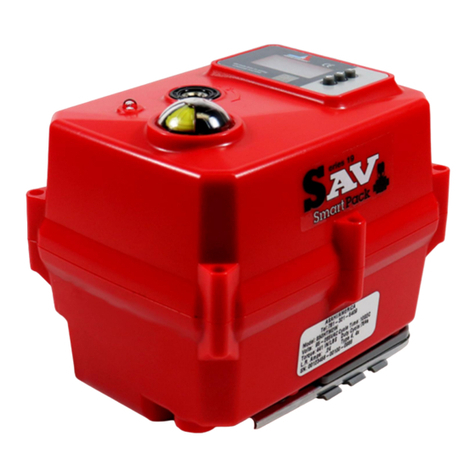
Asahi/America 94 Series User manual

ASAHI/AMERICA, INC 655 ANDOVER STREET LAWRENCE, MA. 01843 TELEPHONE 800-343-3618
File: assembly/manuals/Series 94 Gen II A/C Modulating Svc Manual Rev. A 11/19/19
Page 1 of 27
Series 94 Actuator For
A/C Modulating Service
Installation, Operation
and
Maintenance Manual

ASAHI/AMERICA, INC 655 ANDOVER STREET LAWRENCE, MA. 01843 TELEPHONE 800-343-3618
File: assembly/manuals/Series 94 Gen II A/C Modulating Svc Manual Rev. A 11/19/19
Page 2 of 27
Table of Contents
DHC-100 Introduction ...........................................................................................3
FEATURES .......................................................................................................3
Series 94 Electric Actuator Introduction ................................................................4
Description ........................................................................................................4
Electrical Requirement ......................................................................................4
Installation.............................................................................................................5
Electrical............................................................................................................5
Type 21 Ball Valve ............................................................................................6
Type 23 Ball Valve (3-way) ...............................................................................6
Type 56 Butterfly Valves ...................................................................................6
Actuator Mounting Dimensions..........................................................................7
Operation ..............................................................................................................8
Manual Override Operation ...............................................................................8
Setting Limit Switches .......................................................................................8
Calibration .........................................................................................................9
Outline Diagram.............................................................................................9
QuickCal Procedure ........................................................................................10
Aux Open/Close Option Setup.....................................................................11
Aux Position Option Setup...........................................................................11
Power / Signal (J2)...................................................................................12
Actuator (J1).............................................................................................12
Override (J7) ............................................................................................12
Mode ........................................................................................................13
Adjust up and Adjust down.......................................................................13
Override Mode .........................................................................................13
Auto..........................................................................................................14
Manual/FB Pot Cal ...................................................................................15
Close........................................................................................................15
Open ........................................................................................................15
Auxiliary Close Output..............................................................................16
Auxiliary Open Output ..............................................................................16
Command Type........................................................................................16
Loss of Command ....................................................................................17
Position Out Cal .......................................................................................17
Fault Indicators.........................................................................................18
Command Out of Range ..........................................................................19
Stall Detection Feature.............................................................................19
Electronic Brake Feature..........................................................................20
Duty Cycle Control ...................................................................................20
Option Modules ...............................................................................................21
Series 94 Options Codes for Serial # Tags..................................................22
Specifications ..................................................................................................22
DHC-100 Specs...........................................................................................22
Series 94 Specs...........................................................................................23
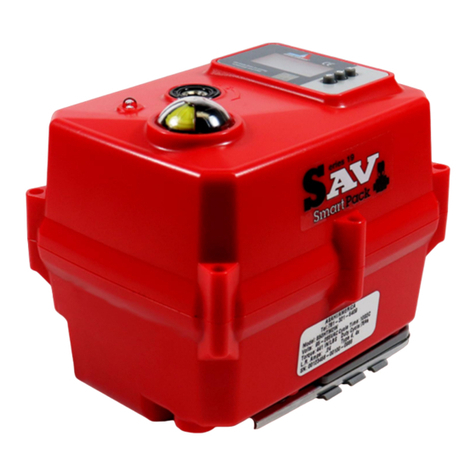
ASAHI/AMERICA, INC 655 ANDOVER STREET LAWRENCE, MA. 01843 TELEPHONE 800-343-3618
File: assembly/manuals/Series 94 Gen II A/C Modulating Svc Manual Rev. A 11/19/19
Page 3 of 27
Troubleshooting...............................................................................................24
Maintenance .......................................................................................................27
Spare Parts .....................................................................................................27
DHC-100 Introduction
The DHC-100 is a high performance digital positioner intended to control AC
actuators, providing 450 points of resolution with quarter turn actuators ranging
from 2 sec to 120 sec and rated for 25% duty or more. The DHC-100 has many
automatic advanced features that will enhance any actuator while making it easy
to install and set up.
The simple three button control is used to configure all parameters the unit needs
for a wide variety of applications, and allows the open and closed positions to be
easily set for direct or reversing acting without any rewiring. The unit can be
configured for various command types (4-20mA, 1-5V, 0-5V, 0-10V, or a digital
command) and its default operation upon loss of command.
Various option modules are easily plugged into the unit, providing other features
such as a position feedback signal (current or voltage), auxiliary switches, fault
relay contact, or digital communications. A wide range of data is accessible
through a digital communications module, providing additional control or
information.
The unit is of single solid construction and is easily mounted with two screws.
FEATURES
Positions to ±0.1with quarter-turn actuators ranging from 2 sec to 90 sec.
Three button control provides easy setup and eliminates the need for
instrumentation.
Polarity Detection feature allows direct or reverse acting operation without
re-wiring.
Electronic Brake feature can eliminate need for a mechanical brake in
many applications, and extends mechanical brake life when used.
Stall Detection feature protects actuator motor from a stall condition.
Automatic Duty Cycle Control feature prevents shutdown of a process
due to a thermal overload of the actuator motor, and allows actuators rated
for 25% duty or more to be safely used.
Operating temperature range of 0 to 60

ASAHI/AMERICA, INC 655 ANDOVER STREET LAWRENCE, MA. 01843 TELEPHONE 800-343-3618
File: assembly/manuals/Series 94 Gen II A/C Modulating Svc Manual Rev. A 11/19/19
Page 4 of 27
Series 94 Electric Actuator Introduction
Description
The Series 94 electric actuators feature a reversing,capacitor run motor, and a
permanently lubricated gear train. These actuators are equipped with integral
thermal overload protection (AC models) with automatic reset, independently
adjustable limit switches, declutchable manual override, visual position indication,
Zytel FR50 enclosure with stainless steel trim, ISO bolt circle, and 2 (two) ½”
NPT conduit entries.
Standard models are offered in 120 VAC, feature a Nema Type 4X enclosure,
and provide up to 300 in-lbs. of output torque.
The DHC-100 is easily mounted with 2 screws and is equipped with removable
screw terminals that provide for easy field wiring.
A simple three button control allows the user to perform a complete set-up from
the unit itself without the need for any instrumentation. The adaptive control
feature of the DHC-100 eliminates the need for any calibration steps. In the
simplest application, only the closed and open positions need to be set and the
unit automatically and continuously sets all other parameters when placed in the
AUTO mode.
CAUTION: These units are intended to be mounted in an appropriate enclosure
to avoid electrical shocks. High voltages are present on the outside of the unit
when power is applied. AC power should be disconnected prior to any wiring of
these units. A heater and thermostat should be used where condensation may
occur.
Electrical Requirement
CAUTION: Proper voltage must be supplied to actuator/positioner package or
the result could be a damaged positioner, a damaged actuator, or both.
NOTE: To conform to various electrical codes, a green grounding screw has
been installed (on the baseplate) inside of actuator.
The DHC-100 is rated for motors with up to 5A running currents and comes in
three versions to accommodate different voltage applications. The DHC-100 is
rated for 117 VAC 10%; the DHC-100A is rated for 234 VAC 10%, and the
DHC-100B is rated for 24 VAC 10%.

ASAHI/AMERICA, INC 655 ANDOVER STREET LAWRENCE, MA. 01843 TELEPHONE 800-343-3618
File: assembly/manuals/Series 94 Gen II A/C Modulating Svc Manual Rev. A 11/19/19
Page 5 of 27
Installation
Electrical
Reference Drawing #297QM
1. To gain access to terminal strip (Part #8 & 9) it is necessary to remove
manual override handle (Part #34) by loosening slotted setscrew (Part #35).
Remove 8 cover screws and cover.
2. Make electrical connections to terminal strip as shown on wiring schematic
located inside the cover (per various electrical codes there is a green screw
on the actuator base plate for grounding purposes). All units are completely
calibrated prior to shipment, and no internal adjustments should be required.
3. Install 1/2" NPT conduit fitting(s) to actuator base. Please ensure that proper
conduit fitting is used to maintain NEMA 4X enclosure rating.
NOTE: We recommend sealing conduit openings on units installed outdoors or
exposed to large temperature swings (15ºF or more).
We also recommend the heater and thermostat option in these applications.
4. Replace actuator (gasket if removed) cover, and install 8 cap screws supplied
and tighten securely. For outdoor or wet locations it is recommended prior to
replacing the cover that the top shaft seal be cleaned and coated with silicone
grease. Also clean shaft and lightly coat seal area of shaft with silicone
grease. Unit is now ready for operation.
120 Vac 220 Vac 12 Vdc 24 Vdc 24 Vac Cycle
Time per
90
Degrees
(Seconds)
Weight
(lbs)
Model Torque
(in/lbs)
Amp
Draw
Duty
Cycle
Amp
Draw
Duty
Cycle
Amp
Draw
Duty
Cycle
Amp
Draw
Duty
Cycle
Amp
Draw
Duty
Cycle
A94 150 0.5 100% 0.4 100% 2.0 75% 4.0 75% 4.0 75% 5 3.5
B94 300 0.8 75% 0.6 75% 2.0 75% 4.0 75% 4.0 75% 5 3.5
Note: Amp rating is considered locked rotor
Duty cycles are for ambient temperature (73º F)

ASAHI/AMERICA, INC 655 ANDOVER STREET LAWRENCE, MA. 01843 TELEPHONE 800-343-3618
File: assembly/manuals/Series 94 Gen II A/C Modulating Svc Manual Rev. A 11/19/19
Page 6 of 27
Type 21 Ball Valve
Position the valve and the actuator to corresponding positions (either OPEN or
CLOSED). The flats on the actuator shaft extension indicate valve position
Type 21 Ball Valves (See Drawing #0106BV sizes ½” – 2”)
Install mounting bracket #3 to actuator #2 using bolts #8 and washers #9. Insert
coupling #4 on stem of valve #1 and then bolt valve #1 to mounting bracket #3
using bolts #5, nuts #7, and washers #6.
Note: All bolts should be snug and not excessively over tightened.
Type 21 Ball Valves (See Drawing #0112BV sizes 2-1/2” - 3")
Install mounting bracket #3 to actuator #2 using bolts #8 and washers #9. Insert
coupling #4 on stem of valve #1 and then bolt valve #1 to mounting bracket #3
using bolts #5, nuts #7, and washers #6.
Note: All bolts should be snug and not excessively over tightened.
Type 23 Ball Valve (3-way)
Position the valve and the actuator to corresponding positions (either OPEN or
CLOSED). The flats on the actuator shaft extension indicate valve position
Type 23 Ball Valves (3-way): (See Drawing #0129BV, sizes ½” - 3”)
Install mounting bracket #3 to actuator #2 using bolts #8 and washers
#9. Insert coupling #4 on stem of valve #1 and then bolt valve #1 to
mounting bracket #3 using bolts #5, nuts #7, and washers #6.
Type 56 Butterfly Valves
CAUTION: If valve is in line, system must be shut down and have no line
pressure before removing throttle plate and retaining washer.
Position the valve and the actuator to corresponding positions (either OPEN or
CLOSED). The flats on the actuator shaft extension indicate valve position
Butterfly Valves (See Drawing # 0203BF sizes 1-1/2” - 4”)
No specially machined stem or valve body drilling required. Remove handle
(remove handle cap and hex head bolt) to expose throttle plate screws. Remove
throttle plate and retaining washer to expose existing bolt pattern.
Mount bracket #3 to actuator #2 with bolts #8 and washers #9 and tighten evenly.
Insert coupling #4 into actuator #2.Install valve #1 onto mounting bracket #3 and
align stem of valve to engage with coupling. (Line scribed on top of stem

ASAHI/AMERICA, INC 655 ANDOVER STREET LAWRENCE, MA. 01843 TELEPHONE 800-343-3618
File: assembly/manuals/Series 94 Gen II A/C Modulating Svc Manual Rev. A 11/19/19
Page 7 of 27
indicates disc orientation). Install bolts #5, washers #6 and nuts #7 and tighten
evenly. Flats on actuator shaft indicate valve position. (Disc Orientation)
CAUTION: If mounted unit is installed other than straight up, the actuator should
be supported independently to prevent side loading and loosening up of
fasteners.
Actuator Mounting Dimensions

ASAHI/AMERICA, INC 655 ANDOVER STREET LAWRENCE, MA. 01843 TELEPHONE 800-343-3618
File: assembly/manuals/Series 94 Gen II A/C Modulating Svc Manual Rev. A 11/19/19
Page 8 of 27
Operation
Manual Override Operation
Reference Drawing #279QM
Push down on handle (Part #34) and rotate within labeled limits.
To re-engage simply rotate actuator handle in opposite direction until it moves up
and re-engages.
CAUTION: The manual override should only be used when there is no power
applied to actuator. When power is restored the actuator will automatically
resume normal operation.
Setting Limit Switches
Reference Drawing #279QM
Disconnect power!
Open Travel Limit Switch (SW-2 Part #14):
Using declutchable manual override, move the valve approximately 2 degrees
beyond the full open position. Then loosen set screws on top cam (Part #21) and
rotate cam (CCW) into limit switch arm until a click is heard, this designates the
switch circuit has opened and defines a full open position. Tighten 2 set screws
(Part #22) on cam.
Close Travel Limit Switch (SW-1 Part #14):
Using declutchable manual override, move the valve approximately 2 degrees
beyond the full closed position, loosen set screws on bottom cam (Part #21) and
rotate cam (CW) into limit switch arm until a click is heard, this designates the
switch circuit has opened and defines a full closed position. Tighten 2 set screws
(Part #22) on cam.
CAUTION: The limit switches inside of the unit are for loss of signal conditions;
NOT for normal operation of the modulating actuator.
Manually position valve to midstroke. Reapply power to actuator and drive to
open or closed position. Actuator motor will run. The shaft will not turn until
internal gearing re-aligns with drive gear. This could take up to 10 seconds.

ASAHI/AMERICA, INC 655 ANDOVER STREET LAWRENCE, MA. 01843 TELEPHONE 800-343-3618
File: assembly/manuals/Series 94 Gen II A/C Modulating Svc Manual Rev. A 11/19/19
Page 9 of 27
Calibration
Outline Diagram

ASAHI/AMERICA, INC 655 ANDOVER STREET LAWRENCE, MA. 01843 TELEPHONE 800-343-3618
File: assembly/manuals/Series 94 Gen II A/C Modulating Svc Manual Rev. A 11/19/19
Page 10 of 27
QuickCal Procedure
The following is a quick calibration procedure. For more details regarding the
calibration and features of your DHC-100, please see the pages following this
procedure.
General
The MODE button selects a particular function, or mode, and the indicator for the
selected mode turns on steady. Pushing the MODE button saves any new setting
of the current mode before switching to the next mode. The adjust up () and
adjust down () buttons are used to make adjustments to current mode.
1. Apply power to the actuator on Connector J2: terminal #1 (neutral), terminal
#2 (line), and terminal #3 (earth). There is no need for a signal connection during
calibration.
2. Push the MODE button until the yellow “MANUAL/FB POT CAL” LED is
illuminated. The LED may be flashing (at different speeds) through the next
several steps. This is expected and will be explained.
3. Use the adjust buttons (and ) to move the actuator and verify that the
limit switches are set past the desired open and closed positions; then move the
actuator to mid stroke.
4. If LED is solid, proceed to step 7.
5. If LED is flashing, loosen the gear on the actuator shaft and rotate the
potentiometer gear until the LED is no longer flashing, but on solid - this indicates
the center of the potentiometer’s travel. Note that the LED will flash at a slower
rate the farther away from the mid position it gets. Once the LED is on solid
tighten all gears.
6. Push the MODE button until the “CLOSE” LED is illuminated. Use the adjust
buttons (and ) to drive the actuator to the desired closed position. Ensure
that the close limit switch does not engage.
7. Push the MODE button until the “OPEN” LED is illuminated. Use the adjust
buttons (and ) to drive the actuator to the desired open position. Ensure that
the open limit switch does not engage.
8. Please skip to Aux Open/Close Setup if optional Transmitter with Relays is
installed; otherwise continue to the next step.
9. Push the MODE button until the “COMMAND TYPE” LED is illuminated. Use
the adjust buttons (and ) to select appropriate input signal (4-20mA, 1-
5VDC, 0-5VDC, 0-10VDC, 2-10VDC or Digital). If 0-5VDC or 0-10VDC is

ASAHI/AMERICA, INC 655 ANDOVER STREET LAWRENCE, MA. 01843 TELEPHONE 800-343-3618
File: assembly/manuals/Series 94 Gen II A/C Modulating Svc Manual Rev. A 11/19/19
Page 11 of 27
selected, the LOSS OF COMMAND feature is not available, so proceed to step
12.
10. Push the MODE button until the “LOSS OF COMMAND” LED is illuminated;
this sets the actuator to a predetermined position upon loss of command. Use the
adjust buttons (and ) to select appropriate position (OPEN, CLOSE, or LAST
POSITION).
11. Please skip to Aux Position Setup if optional Transmitter, or optional
Transmitter with Switches is installed, otherwise continue to the next step.
12. Push the MODE button until the “AUTO” LED is illuminated. Your calibration
is now COMPLETE. Connect the command signal wires to connector J2:
terminal #4 (signal ground) and terminal #5 (mA input) OR terminal #6 (voltage
input), depending on the application. If a signal input was already connected, the
actuator should have moved to that position.
Aux Open/Close Option Setup
1. Push the MODE button until the “AUX CLOSE OUTPUT” LED is illuminated.
Use the adjust buttons (and ) to drive the actuator to the desired auxiliary
close position.
2. Push the MODE button until the “AUX OPEN OUTPUT” LED is on. Use the
adjust buttons (and ) to drive the actuator to the desired auxiliary open
position.
3. Continue with Step 9 in the Quick Calibration Procedure (see above).
Aux Position Option Setup
1. Push the MODE button until the green “AUX POSITION OUT CAL” LED
illuminates while the “CLOSE” LED flashes.
2. Use the adjust buttons (and ) to set the desired output voltage or current
(mA) on the option module output for the closed position.
3. Push the MODE button so the “AUX POSITION OUT CAL” LED remains
steady while the “OPEN” LED flashes. Use the adjust buttons (and ) to set
the desired output voltage or current (mA) on the option module output for the
open position.
4. Continue with Step 12 in the Quick Calibration Procedure (see above).

ASAHI/AMERICA, INC 655 ANDOVER STREET LAWRENCE, MA. 01843 TELEPHONE 800-343-3618
File: assembly/manuals/Series 94 Gen II A/C Modulating Svc Manual Rev. A 11/19/19
Page 12 of 27
Please read the following pages to ensure that ALL of the
selectable features are understood and selected if required.
Power / Signal (J2)
Power is connected to pins 1, 2, & 3 as shown in the wiring schematic. The fuse
installed on the unit is rated for maximum output current that can be safely
delivered by the AC outputs. Replacement fuses must not exceed the maximum
rating to prevent damage to the unit. Smaller fuse sizes can be used with smaller
motors – consult the factory for appropriate fuse size and type.
An appropriate command signal, either 0-5V, 0-10V, 1-5V, 2-10V or 4-20mA,
should be connected to pin 5 or 6 (as shown in the Block Diagram) while using
pin 4 as the return signal ground. The DHC-100 must be configured for the type
of command signal that is to be used (see COMMAND TYPE).
Pin 7 of J2 provides an auxiliary +5V output which can be used to connect a
command potentiometer. By connecting one end of a potentiometer to pin 7, the
other end to pin 4, and the wiper to pin 6, a local control knob can be
implemented. Pin 8 provides an auxiliary +15VDC output which can be used to
power an input or outpur 4-20mA transmitter.
Actuator (J1)
The actuator motor and feedback potentiometer are connected to J1 as shown in
the wiring schematic. The motor neutral wire must be connected to pin 2, while
one motor winding is connected to pin 1 and the other winding is connected to
pin 3. The feedback potentiometer wiper must be connected to pin 5, while one
end is connected to pin 4 and the other end is connected to pin 6. The Polarity
Detection feature of the DHC-100 automatically determines which motor winding
to control based on where the open and closed positions are set; this feature
also eliminates the need to rewire the unit for direct or reverse acting
applications.
When the and buttons are used to control the actuator, the button will
turn on the motor winding connected to pin 1, while the button will turn on the
motor winding connected to pin 3. See MANUAL/FB POT CAL for more details.
Override (J7)
J7 provides a simple 2-wire connection that can override the DHC-100 to perform
a variety of external control functions. Using an appropriate interface module,
commonly used auto/manual station switches are easily implemented with low
voltage/low current switches. The factory-installed jumper between pins 1 and 2

ASAHI/AMERICA, INC 655 ANDOVER STREET LAWRENCE, MA. 01843 TELEPHONE 800-343-3618
File: assembly/manuals/Series 94 Gen II A/C Modulating Svc Manual Rev. A 11/19/19
Page 13 of 27
enables normal operation of the DHC-100 and must be installed if the external
override functions are not used.
Mode
The MODE button is used to select the desired function of operation. When the
MODE button is pressed, the unit will switch to the next function and the
appropriate LED indicator will turn on to let the user know which function is
selected. Except for the MANUAL/FB POT CAL mode, the associated mode
indicator will be steady on; for some of the modes other indicators will flash to
indicate specific settings associated with the mode. Each of the modes are
described in more detail in the following sections.
If a 0-5V or 0-10V command signal is used, the LOSS OF COMMAND function
cannot be used. The MODE button will skip over the LOSS OF COMMAND
mode when the unit is configured for a 0-5V or 0-10V command signal (see
COMMAND TYPE). When the OVERRIDE mode is enabled (see OVERRIDE
MODE), the MODE button is disabled and the Manual/Pot Cal indicator will turn
on steady.
Adjust up and Adjust down
The adjust up and adjust down buttons are used to adjust the setting of any
given function. When a function is selected by the MODE button, the adjust
buttons will affect that function only. Note, that the AUTO mode does not have
any adjustable settings, and therefore, the adjust up and adjust down buttons
have no effect. Also, the adjust buttons are disabled in the OVERRIDE mode.
Override Mode
The OVERRIDE mode is not selected by the MODE button and can be enabled
at anytime by connecting a resistance greater than 250 ohms to the Override
Input (J7 pin 1 and pin 2). While the OVERRIDE mode is enabled, the MODE
button and adjust buttons are disabled, and the Manual/Pot Cal indicator will turn
on steady to indicate that the unit is being controlled by the Override Input.
Shorting J7 pin 1 to pin 2 returns the unit to normal operation and the previously
selected mode.
Controlling the DHC-100 from the Override Input is accomplished by connecting
a specific resistance to select a specific operation. The table below defines the
operations and their associated resistance.

ASAHI/AMERICA, INC 655 ANDOVER STREET LAWRENCE, MA. 01843 TELEPHONE 800-343-3618
File: assembly/manuals/Series 94 Gen II A/C Modulating Svc Manual Rev. A 11/19/19
Page 14 of 27
RESISTANCE OPERATION
> 4.3K ohms OFF
3.3K ohms ±5% LATCH
2K ohms ±5% OPEN
1.2K ohms ±5% CLOSE
510 ohms ±5% STOP
The OPEN function will operate the motor in the open direction as set by the
OPEN mode, while the CLOSE function operates the motor in the closed
direction as set by the CLOSE mode. The LATCH function will maintain the
previously selected function; this allows momentary switches to be used for the
OPEN and CLOSE functions. The OFF and STOP functions turn the motor off,
which also unlatches the OPEN or CLOSE functions.
Note that the OPEN and CLOSE functions may work in reverse until the open
and closed positions are set by the OPEN and CLOSE modes. The DHC-100
will automatically turn the motor off when the open or closed positions are
reached. However, if a feedback fault occurs (see FAULT INDICATOR), the
motor will be turned on for a period of 15 minutes in the selected direction. For
this reason, limit switches should be used when using the OVERRIDE mode, and
should be set to a position acceptable for the application. The 15 minute period
can also be terminated using the OFF or STOP function.
The motor is also turned off if the DHC-100 detects a stall (see STALL
DETECTION). An OPEN or CLOSE operation can be attempted again after
switching to the OFF, LATCH, or STOP functions first.
Auto
The AUTO function is the normal mode of operation for the DHC-100; all the
other functions are used to set up the unit. While in AUTO, the unit can be
controlled by various external signals, some of which can be selected by the
COMMAND INPUT function. When the unit is not in the AUTO mode, all external
controls described below will be disabled.
Once the open and closed positions have been set, the AUTO mode will control
the position of the actuator according to the command input signal. For an input
signal of 0V (for 0-5V or 0-10V input), 1V (for 1-5V input), 2V (for 2-10V input),
4.0 mA (for 4-20mA input), or 0% (for a digital input), the DHC-100 will position
the actuator to the closed position as set by the user. Conversely, an input of 5V,
10V, 20mA, or 100% will position the actuator to the defined open position.
When the DHC-100 is configured to use a 0-5V, 0-10V, 1-5V, 2-10V, or 4-20mA
command, the command signal should be connected to the appropriate pin on
J2. When the DHC-100 is configured for a Digital command type, an appropriate
communications option module must be installed. A communications module
may be installed when using one of the analog command types and can be used

ASAHI/AMERICA, INC 655 ANDOVER STREET LAWRENCE, MA. 01843 TELEPHONE 800-343-3618
File: assembly/manuals/Series 94 Gen II A/C Modulating Svc Manual Rev. A 11/19/19
Page 15 of 27
to override the analog command. The AUTO indicator will flash whenever the unit
is being controlled by the communications module.
Manual/FB Pot Cal
The MANUAL/FB POT CAL function allows manual operation of the actuator by
using the adjust buttons (and ) without affecting any other settings within the
DHC-100. Whether the actuator moves toward the open or closed position dep-
ends on which motor wire is connected to J1-1 and J1-3.
The FB POT CAL feature provides an indication of the feedback potentiometer's
setting. When the MANUAL/POT CAL function is selected, the Manual/Pot Cal
indicator will turn on - it may flash or be on steady, depending on the actuator
position. The indicator will be on steady whenever the DHC-100 detects that the
feedback potentiometer is at midrange of its rotation. As the actuator moves,
causing the feedback potentiometer to move away from midrange, the indicator
will begin to flash, and the indicator will flash at a decreasingly slower rate as the
actuator moves further away from midrange.
By using the adjust buttons to position the actuator to midstroke (half way point
between the desired open and closed positions), the feedback potentiometer can
then be adjusted until a steady light occurs. This insures that the feedback
potentiometer has maximum range to reach the open and closed positions.
Close
The CLOSE function is used to set the desired closed position; however, prior to
doing this, the feedback potentiometer should be checked for optimum position
(see MANUAL/POT CAL), and the limit switches should be set outside of the
operating range (see STALL DETECTION FEATURE). In the CLOSE function,
the adjust buttons are used to set the actuator to any desired position, and upon
pressing the MODE button (to select the next function, OPEN), the DHC-400 will
retain the setting as the defined closed position.
Upon selecting the CLOSE function, the DHC-100 will begin moving the actuator
to the previously set closed position; it is not necessary to make an adjustment if
the unit has been previously set to the desired position. A command signal input
of 0V, 1V, 2V, 4mA, or 0% automatically corresponds to the defined closed
position.
Open
The OPEN function works the same way as the CLOSE function with the
exception that the adjust buttons are used to set the desired open position. As

ASAHI/AMERICA, INC 655 ANDOVER STREET LAWRENCE, MA. 01843 TELEPHONE 800-343-3618
File: assembly/manuals/Series 94 Gen II A/C Modulating Svc Manual Rev. A 11/19/19
Page 16 of 27
with the CLOSE function, upon selecting the OPEN function, the actuator will
move to the previously set open position. Once the desired position is set, the
DHC-100 will automatically associate a command signal input of 5V, 10V, 20mA,
or 100% to the open position.
Auxiliary Close Output
The AUX CLOSE OUTPUT function is used to set an optional output setting that
is associated with the closed position - an appropriate relay option module is
required to use this output. The adjust buttons are used to set the actuator to a
desired position. Whenever the actuator position falls between the defined
closed position and the Aux Close position, the Aux Close Output indicator will
flash. Additionally, the DHC-100 will turn on a relay output on the optional relay
module - the output can be used to drive an alarm or merely act as an auxiliary
limit switch. Relay is rated for 1 amp @ 24VDC or .5 amp @ 115VAC.
Upon selecting the AUX CLOSE OUTPUT function, the DHC-100 will begin
moving the actuator to the previously set position. It is not necessary to make an
adjustment if the unit has been previously set to the desired position.
Auxiliary Open Output
The AUX OPEN OUTPUT function is used to set an optional output setting that is
associated with the open position - an appropriate relay option module is
required to use this output. The adjust buttons are used to set the actuator to a
desired position. Whenever the actuator position falls between the defined open
position and the Aux Open position, the Aux Open Output indicator will flash.
Additionally, the DHC-100 will turn on a relay output on the optional relay module
- the output can be used to drive an alarm or merely act as an auxiliary limit
switch. Relay is rated for 1 amp @ 24VDC or .5 amp @ 115VAC.
Upon selecting the AUX OPEN OUTPUT function, the DHC-100 will begin
moving the actuator to the previously set position. It is not necessary to make an
adjustment if the unit has been previously set to the desired position.
Command Type
The COMMAND TYPE function is used to configure the command signal input
for either 4-20mA, 1-5V, 0-5V, 0-10V, 2-10V, or Digital so as to match the type of
command signal being used. Upon selecting the COMMAND TYPE function, the
Command Input indicator will turn on steady, while the indicator for the selected
type will flash. Use the adjust buttons (and ) to select the desired input type.
The selection will be saved when the MODE button is pressed, which will also
advance the unit to the LOSS OF COMMAND function.

ASAHI/AMERICA, INC 655 ANDOVER STREET LAWRENCE, MA. 01843 TELEPHONE 800-343-3618
File: assembly/manuals/Series 94 Gen II A/C Modulating Svc Manual Rev. A 11/19/19
Page 17 of 27
Loss of Command
When using 1-5V, 2-10V, 4-20mA, or a Digital input type for the command signal,
the DHC-100 will detect when the command signal is lost or out of range. A loss
of command condition is detected whenever the input is disconnected, the input
becomes less than 0.75V (for 1-5Vinput), 1.5V (for 2-10V input), or 3mA, or if the
input is connected backwards. An out of range condition is detected whenever
the input becomes greater than 5.25V (for 1-5V input), 10.5V (for 2-10V input), or
21mA. If the DHC-100 detects a loss of command , a fault will be indicated (see
FAULT INDICATORS), and the actuator will be moved to one of three preset
positions: the open position, the closed position, or the position last attained prior
to losing the command signal. The LOSS OF COMMAND function is used to set
the desired default position.
When the LOSS OF COMMAND function is selected, the adjust buttons and
are used to set the default position. The DHC-100 indicates the selected
default setting by flashing the Open function indicator for the open default posi-
tion, or it will flash the Close function indicator for the closed default position.
When neither indicator is on, then the "last position" default is selected.
When a 0-5V or 0-10V command signal is used, a loss of command signal
cannot be detected. Therefore, if the unit is configured for a 0-5V or 0-10V
command signal (see COMMAND TYPE), the MODE button will not select the
LOSS OF COMMAND function. However, the DHC-100 can detect when a 0-5V
or 0-10V command signal is out of range (i.e., greater than 5.25V or greater than
10.5V), or connected backwards. When an out of range condition is detected for
a 0-5V or 0-10V input, the motor is turned off (leaving the actuator is its “last
position”) and a fault will be indicated (see FAULT INDICATORS).
Position Out Cal
The POSITION OUT CAL function is used to calibrate an optional feedback
transmitter output. An appropriate transmitter option module is required to use
this feature. When the POSITION OUT CAL function is first selected (by pressing
the MODE button while in the LOSS OF COMMAND function), the CLOSE
indicator will flash, and the voltage or current associated with the closed position
will appear at the option module output. If desired, the output can be adjusted
(using the adjust buttons and ) to any value from 0-10V (for a voltage
output) or 4 to 20mA (for a current output). The new setting is then saved when
the MODE button is pressed.
Pressing the MODE button again will leave the unit in the POSITION OUT CAL
function except that the OPEN indicator will flash, and the output voltage or
current associated with the open position will appear at the option module output.
Like the closed setting, the output can be adjusted to any voltage (from 0-10V) or
current (from 4-20mA), and the new setting is then associated with the open
position.

ASAHI/AMERICA, INC 655 ANDOVER STREET LAWRENCE, MA. 01843 TELEPHONE 800-343-3618
File: assembly/manuals/Series 94 Gen II A/C Modulating Svc Manual Rev. A 11/19/19
Page 18 of 27
Fault Indicators
The DHC-100 detects various fault conditions that prohibit the unit from
controlling the actuator. A combination of the three Fault indicators (red, yellow,
and green) will turn on or flash to indicate a specific detected fault. If an
appropriate relay option module is installed, the Fault relay output on the option
module will turn off (indicating a fault) when any of the Fault indicators turn on or
flash. A communications option module can also read the specific conditions
causing a fault. Note that a fault condition DOES NOT disable the motor outputs
when manually controlling the actuator with the adjust buttons; while useful in
troubleshooting, care should be exercised when operating the motor under a fault
condition. The OVERRIDE mode can also operate the motor when a fault
condition exists – see OVERRIDE MODE for details.
Note that the indicators may not indicate ALL the fault conditions that may exist.
This means that when the indicated fault is corrected, the unit may display
another fault that has not been corrected. The table below provides a summary
of the Fault indications which is followed by a description of each fault.
RED YEL GRN FAULT
ON flash OFF Motor 1 No Motion (stall)
ON OFF flash Motor 2 No Motion (stall)
On flash flash Double No Motion (stall)
OFF OFF flash Feedback Alarm
OFF flash OFF Loss of Command
OFF ON OFF Command out of Range
OFF flash flash Feedback Alarm and
Loss of Command
OFF ON flash Feedback Alarm and
Command out of Range
Motor 1 No Motion (stall)
A fault condition is detected when no actuator motion is detected while the Motor
1 output is turned on. The fault condition will disable the Motor 1 output only, and
the fault is cleared when the DHC-100 detects a motion greater than 1.5in
either direction. The fault can be cleared if 1) the command signal commands a
Motor 2 operation, 2) manual operation with the adjust buttons results in a motion
greater than 1.5, or 3) a mechanical manual override forces the 1.5motion,
provided the mechanical motion is monitored by the feedback pot.

ASAHI/AMERICA, INC 655 ANDOVER STREET LAWRENCE, MA. 01843 TELEPHONE 800-343-3618
File: assembly/manuals/Series 94 Gen II A/C Modulating Svc Manual Rev. A 11/19/19
Page 19 of 27
Motor 2 No Motion (stall)
A fault is detected when no actuator motion is detected while the Motor 2 output
is turned on. The fault can be cleared in the same manner as a Motor 1 Stall
(see above).
Double No Motion (stall)
If the DHC-100 detects no actuator motion in either direction, both motor outputs
will be disabled. The command signal cannot clear this condition; only manual
operation or a mechanical override can clear the fault. Alternatively, the DHC-
100 can be powered off and then on to temporarily clear the fault; however, this
practice should be avoided without permanently correcting the cause of such a
fault.
Feedback Alarm
A fault condition is detected whenever the feedback signal is out of range (that is,
less than 5% of potentiometer value or more than 95% of the potentiometer
value), or when any of the potentiometer connections are broken. Normal
operation resumes when the potentiometer is reconnected or back in range.
Loss of Command
If the command signal is disconnected, the fault indication will remain on until the
signal is reconnected. See LOSS OF COMMAND for details.
Command Out of Range
If the command signal goes out of range, the fault indication will remain on until
the signal is back in range. See LOSS OF COMMAND for details.
Stall Detection Feature
The Stall Detection feature of the DHC-100 (see FAULT INDICATORS)
essentially performs a similar function as commonly used torque switches;
however, the differences should be considered before eliminating torque switches.
The DHC-100 feature does not measure torque, but rather motion; if the load is
sensitive to excessive torque, the torque switches may be desirable. Since
common torque switches are mechanical devices, they can provide a fail safe
feature in the event of electrical failures (such as shorted wires or damage to the
DHC-100).
The Stall Detection feature is useful for detecting when any of the motOr wires
become disconnected. However, limit switches employed in actuators essentially
disconnect one of the motor windings. The DHC-100 will detect this as a motor

ASAHI/AMERICA, INC 655 ANDOVER STREET LAWRENCE, MA. 01843 TELEPHONE 800-343-3618
File: assembly/manuals/Series 94 Gen II A/C Modulating Svc Manual Rev. A 11/19/19
Page 20 of 27
stall. To avoid this condition, the limit switches must be set outside of the
operating range set by the CLOSE and OPEN functions.
Electronic Brake Feature
The Electronic Brake feature of the DHC-100 provides highly reliable and
accurate braking of the motor, and it is a key element in achieving high resolution.
A mechanical brake can still be implemented without interfering with the DHC-100
operation. A mechanical brake can still be implemented without interfering with
the DHC-100 operation. Mechanical brakes can be useful for providing a holding
brake in the event power to the actuator is lost.
Since the Electronic Brake feature provides the primary braking of the motor, the
life of a mechanical brake is dramatically extended. Additionally, the Adaptive
Control feature of the DHC-100 automatically compensates for changes in the
mechanical brake’s performance due to temperature or age.
Note that the actuators limit switches should be set outside of the operating range
set by CLOSE and OPEN functions. The Electronic Brake feature degrades in
performance if a limit switch is engaged. Limit switches exhibit wide variations,
and the DHC-100 can position the actuator more precisely at closed and open
than the limit switches. A limit switch serves better as a fail safe device to protect
against electrical failures in the actuator.
Duty Cycle Control
The Duty Cycle Control feature of the DHC-100 allows actuators rated at 25%
duty or more to be safely used in automated valve applications. The DHC-100
accurately monitors the relative heating of the motor and automatically duty cycles
the unit at a safe level when a process becomes unstable, or if a control loop is
not properly set. While the thermal switch in the motor protects the motor from
overheating, thermal switches can shut down the actuator for ten minutes or
more. Further, typical thermal switches do not activate until temperatures inside
the actuator become too high for other components in the actuator.
The Duty Cycle Control feature allows continuous operation of the motor until it
detects an excess heat buildup in the motor (usually well below the limit of the
thermal switch). At that time, duty cycle operation is automatically enabled and
continues until the motor cools enough to resume continuous operation. The duty
cycle period is approximately 2 seconds with an on time that automatically various
depending on the heating of the motor. While this operation slows down the
actuator's operation, it does not impact the resolution performance of the DHC-
100, and it prevents disruption of a process due to a thermal switch shutdown.
This manual suits for next models
2
Table of contents
Other Asahi/America Controllers manuals

Asahi/America
Asahi/America S20HC1C3W User manual

Asahi/America
Asahi/America 19 Series User manual

Asahi/America
Asahi/America 19 Series User manual

Asahi/America
Asahi/America 19 SMART Series User manual

Asahi/America
Asahi/America 19 SMART Series User manual

Asahi/America
Asahi/America 19 SMART Series User manual
Popular Controllers manuals by other brands

NAVITAS
NAVITAS TAC 1.0 Installation & service manual

SenseAir
SenseAir tSENSE VAV No Disp user manual

Promation Engineering
Promation Engineering P2 Series Installation & operation manual

Resol
Resol deltasol bx plus manual

SGC
SGC MAC-200 operating manual

Circutor
Circutor Computer SMART III FAST 12Vdc instruction manual