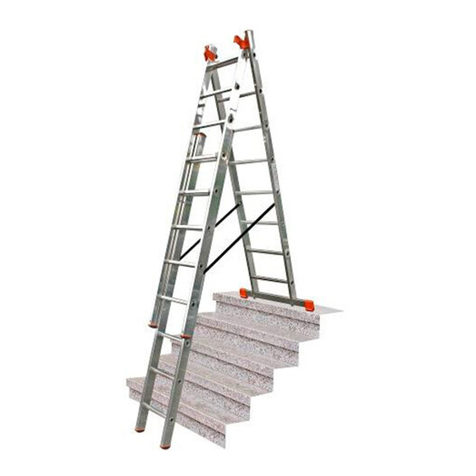
Ascent MIGHTY MULTI User manual

!
!
!
!
!
!
!
!
!
!
!
!
!
!
!
!
!
!
!
!
!
!
!
!
!
!
!
!
!
!
!
!
!
!
!
!
!
!
!
!
!
!
!
!
OWNER’S
MANUAL

!
!
!
!
!
! !
!
!
!
!
!
!
!
!
!
!
!
!
!
!
!
!
!
₊₊!
Index 2
Page 2 – Index
Page 3– Model Info and Product Specifications
Page 4 – General Operating Instructions
Page 5 – Hazard Warnings
Page 6 – Safety Basic Instruction
Page 7 – Adjusting the Hinge Locks
Page 8 – Adjusting the J-Locks
Page 9 – Storage and Care for Your Mighty Multi™
Page 10-12 – Configuring Your Mighty Multi™
Page 13 – Product Warranty
Page 14 – Replacement Parts
Page 15 – Notes
!

!!
!
! ! !!!!!!!!
!
!
! !
!
!
!
!
!
!
!
!
!
!
!
!
!
!
!
!!!!!!!!!!!!!
!!!!!!!!!!!!!
!!!!!!!!!
!
!
!
!
!
!
!
!
!
!
!
!
!
!
!
!
!
!
Model Information/Product Specifications 3
!
Product Features
MIGHTY MULTI
Model # AMT013
MIGHTY MULTI
Model # AMT017
MIGHTY MULTI
Model # AMT022
Height - Stepladder
13 ft
17 ft
22 ft
Standing level Highest -
Stepladder
3 ft. to 5 ft.
4 ft. to 7 ft.
5 ft. to 9 ft.
Reach Height - Stepladder
9 ft. 4 in.
11 ft. 3 in.
13 ft. 2 in.
Standing Level Highest -
Extension Ladder
2 ft. 10 in.
4 ft. 10 in.
6 ft. 8 in.
Height - Extension
7 ft. 11 ft.
9 ft. 15 ft.
11 ft. 19 ft.
Standing Level Highest -
Extension Ladder
7 ft. 7 in.
11 ft. 8 in.
15 ft. 6 in.
Reach Height - Extension
Ladder
14 ft. 3 in.
18 ft. 1 in.
22 ft.
Storage Height (closed position)
3 ft. 5 in.
4 ft. 5 in.
5 ft. 5 in.
Possible Ladder Positions
17
24
31
Stairway Position Height
3 ft. to 5 ft.
4 ft. to 7 ft.
5 ft. to 9 ft.
Scaffold Height
1 ft. 11 in.
2 ft. 11 in.
2 ft. 11 in.
Ladder Width at Base
20 in
23 in
27 in
Type of Rung
Multi-Directional
Multi-Directional
Multi-Directional
Load Rating
300 lbs
300 lbs
300 lbs
Type
Type 1A Duty
Rating
Type 1A Duty
Rating
Type 1A Duty
Rating
Material
Aluminum
Aluminum
Aluminum
Construction
Riveted & Welded
Rungs
Riveted & Welded
Rungs
Riveted & Welded
Rungs
Weight
25 lbs
34 lbs
41 lbs
!

! !
!
!
!
!
!
!
!
!
!
!
!
!
!
!
!
!
!
!
!
!
!
!
!!!!!!!!!!!!!
!!!!!!!!!!!!!
!!!!!!!!!!!!!
!!!!!!!!!!!!!
!!!!!!!!!!!!!
!!!!!!!!!!!!!
!!!!!!!!!!!!!!
!
!
!
!
!
!
!
!
!
!
!
!
!
!
General Information 4
The Ascent Mighty Multi® is a multitask ladder made up of two
primary components - the fixed INNER SECTION with two
permanently mounted Hinge Locks, and the two movable OUTER
SECTIONS with four J-Locks.
This system can be configured into 24 different positions to make
these five types of ladders:
!!
!
!
!
1. A-Frame Ladder
2. Extension Ladder
3. Trestle (Trestle-and-Plank Scaffolding System)
4. 90-Degree Ladder (only use against a secure wall)
5. Staircase Ladder
!

!
!
!
!
!
!
!
!
!
!
!
!
!
!
!
!
!
!
!
!
!
!
!
!
!
!
!
!
!
!
!
!
!
!
!
!
!
!!!!!!!!!!!!!
!!!!!!!!!!!!!
!!!!!!!!!!!!!
!!!!!!!!!!!!!
!!!!!!!!!!!!!
!!!!!!!!!!!
!
WARNING! 5
!!!!!!!!!!!!!!!!!!!!!!!!!!!!!!!!!!!!
!
!
!!!!
!
Read and understand these instructions completely and
thoroughly before attempting to use this product.
Serious injury can result from failing to comply with these
strict safety instructions.
If there are any signs of damage to this product,
DO NOT CLIMB!
If questions arise, please call us directly at
1-866-538-8118 before
attempting to use this product.
!
! !
! !
!
! !
!
!
!
!
WARNING
!

!
!
!
!
!
!
!
!
!
!
!
!
!
!
!
!
!
!
!
!
!
!
!
!
!
!
!
!
!
!
!
!
!
!
!
!
!
!
!
!
!
!
!
!
Safety Basics 6
!
13’!
!
! ! ! ! !
!
!
• Do not attempt to use any tools to move or unlock the Hinge Locks or
J-Locks. This may cause permanent damage to the hinge mechanism and make the ladder
unsafe.
• Do not attempt to unlock the Hinge Lock if there is pressure or weight on it. Open and close
the ladder slightly to take pressure off the lock if you feel resistance when trying to open the
Hinge Locks.
• Each J-Lock should be fully engaged before attempting to climb the ladder. Failure to fully
engage J-Locks may result in injury.
• When attempting to climb the ladder, each rung must be level side-to-side and front to back.
The rungs are designed to climb from one side only. This is clearly marked on the ladder for
your safety.
• Always keep clothing and body parts out of all moving mechanisms, including the Hinge
Locks and J-Locks to avoid pinching.
• Keep clothing and body parts away from rungs when telescoping the OUTER SECTION over
the INNER SECTION.
• Use caution when using the ladder around any source of electricity. Aluminum is highly
conductive and should never come in contact with electrical devices or wiring.
• The Mighty Multi™ has a load rating of 300 lbs.
• Do not stand above the third rung from top.
• Ascent Products, LLC assumes no liability for damage or injury that may result from failing to
correctly follow all instructions.
• Keep your Mighty Multi clean and free from dirt and debris.
• Do not lean too far over the side of the ladder and keep three points of contact with the
ladder at all times! Keep your body centered between the rails.
• Always inspect ladder for condition before using; replace feet if there is unusual wear and
tear.
• Safety labels are located on the ladder. Thoroughly read all safety labels and the Owner’s
Manual before using this ladder!
!
!

!
!
!
!
!
!
! ! ! ! ! ! ! !
!
!
!
!
!
!
!
!
!
!
!
!
!
!
!
!
!
!
!
!
!
!
!
!
!
!
!
!
!
!
!
!
!
!
!
!
!
Adjusting the Hinge Locks 7
!
13’!
To store the Mighty Multi Ladder, and to put it into use, it is
necessary to utilize the two Hinge Locks which are located on
the top of the INNER SECTION.
Pushing inwards on the Hinge Lock UNLOCKS the hinge to
allow adjusting.
When the ladder is in the selected position (Storage position,
A-Frame position or Extension Ladder position) the Hinge
Lock automatically seats itself into the locked position.
!
!
!
UNLOCK
Note:
When the position of the
ladder is selected, visually
verify AND physically test
that the ladder is locked
before attempting to climb.
!
!!!! !
!
!
LOCK
!

!
!
!
!
!
!
!
!
!
!
!
!
!
!
!
!
!
!!!!!
!
!
!
!
!
!
!
!
!
!
!
!
!
!
!
!
!
!
!
!
!
!
!
!
!
!
Adjusting the J-Locks 8
!!!!!
!
13’!
To adjust the height of the ladder, it is necessary to utilize the J-
Locks. When adjusting the J-Locks, lock and unlock just one
at a time, using your free hand to guide the OUTER SECTION.
Visually confirm that each J-Lock is fully seated within the
ladder rung to ensure it is in the locked position.
!
!
!
Note:
When extending ladder to the Extension Ladder position,
it is recommended the ladder be flat on the ground.
Once you have verified that all the J-Locks are locked,
place ladder into the upright position.
!
!
!
!
!
!
LOCKED
UNLOCKED
!

!
!
!
!
!
!
!
!
!
!
!
!
!
!
!
!
!
!
!
!
!
!
!
!
!
!
!
!
!
!
!
!
!
!
!
!
!
!
!
!
!
!
!
!
Storage - The Mighty Multi can be stored quite compactly.
To do this you must first unlock the J-Locks (if necessary, refer to
the J-Lock instructions on page 8), lower the INNER SECTION to
the ground and then lock the J-Locks back into place.
Next unlock the Hinge Lock and fold the ladder to the fully closed
position. At this point, the J-Locks should lock and the ladder is
now ready for storage.
Care - Inspect your ladder before each use. Be sure it is free of
dirt and debris. Occasionally use a light lubricant on the hinges to
ensure years of dependable operation.
Never store your Mighty Multi outdoors. The Mighty Multi should
be stored indoors to prevent rust and oxidation.
Storage and Care of the 9
!
!
!

!
!
!
!
!
!
!
!
!
!
!
!
!
!
!
!
!
!
!
!
!
!
!
!
!
!
!
!
!
!
!
!
!
!
!
!
!
!
!
!
!
!
!
!
!
Configuring the 10
!
!!!!!!A-Frame Ladder
• To configure the Mighty Multi into the A-Frame (Step Ladder
position) follow instructions for adjusting the Hinge Lock on page
7.
• After placing the ladder into the Step Ladder configuration, you
may then adjust the height of the Step Ladder by utilizing the J-
Locks
(see page 8).
• Check that all locks are securely seated into
the locked position before attempting to
climb.
• Always face ladder while on it and maintain a
good grip on the rails while working and
climbing.
• Never stand on or above the second rung from
the top, regardless of proximity to the ground.
Extension Ladder
• To configure the Mighty Multi to the Extended position,
begin by unlocking the Hinge Locks and straightening the
ladder (see page 7).
• The ladder may then be lengthened by unlocking the J-Locks
(see page 8) and sliding the OUTER SECTION to the desired
length.
• When positioning the Extension Ladder, the angle to the vertical
plane of support should be 75 degrees (see Diagram 1).
!
!
!
!
Diagram 1

!
!
!
!
!
!
!
!
!
!
!
!
!
!
!
!
!
!
!
!
!
!
!
!
!
!
!
!
!
!
!
!
!
!
!
!
!
!
!
!
!
!
!
!
Configuring the 11
!
!!!!!Trestle-and-Plank Scaffolding System
• Unlock all four J-Locks and slide out the INNER SECTION
completely.
• Set aside the two OUTER SECTIONS.
• Open the INNER SECTION into the A-Frame Ladder
configuration. This now becomes Trestle #1.
• Create Trestle #2 by taking the two OUTER SECTIONS
and locking them together with two of the J-Locks. The
two outer J-Locks are not used (see Diagram 2).
!
!!!!!90-Degree Ladder
• Position the ladder in the A-Frame Ladder configuration.
• Reduce the height on the rear section by one rung.
• Position the ladder against the wall.
• Always be sure to place the shorter side against the wall.
• Be sure the ladder is standing on a flat and level surface.
!
!
!
Diagram 2
!

!
!
!
!
!
!
!
!
!
!
!
!
!
!
!
!
!
!
!
!
!
!
!
!
!
!
!
!
!
!
!
!
!
!
!
!
!
!
!
!
!
!
!
!
Configuring the 12
!
!!!!!Staircase Ladder
• Place the ladder into the shortest A-Frame Ladder
configuration.
• Position the ladder on the stairway.
• Lower the downhill section to the correct step utilizing the
J-Locks and sliding the INNER SECTION to the required
length.
• Only when the ladder rungs are level is it safe to climb.
!
!

!
!
!
!
! !
!
!
!
!
!
!
!
!
!
!
!
!
!
!
!
!
!
!
!
!
!
!
!
!
!
!
!
!
!
!
!
!
!
!
!
!
!
!
!
Product Warranty 13
!
!
!
!
!
!
!
!
!
!
1. The first is an exchange-only transaction. Return the product
to the retailer from whom it was purchased (provided they are
a participating retailer). Returns must be made within the time
period of the retailer's policy for exchanges. Proof of purchase
may be required. Please check with the retailer for its specific
return policy regarding time limits for returns or exchanges.
2. The second is to return the product, freight prepaid, to
Ascent Products, LLC, for repair or replacement at our
discretion.
!
!
3 Year Limited Warranty!
!
!
Ascent Products, LLC warranties this product to be free from
defects in material or workmanship for a period of three (3)
years following the date of purchase, provided that the product
is used in a manner as described within this manual and used in
accordance with all safety and warning labels. This limited
warranty does not cover failures due to abuse, accidental
damage or when repairs have been made or attempted by
anyone other than Ascent Products, LLC.
A defective product meeting the warranty conditions set forth
herein will be replaced or repaired at no charge in either of two
ways:
!
!

!
!
!
!
!
!
!
!
!
!
!
!
!
!
!
!
!
!
!
!
!
!
!
!
!
!
!
!
!
!
!
!
!
!
!
!
!
!
!
!
!
!
!
!
Replacement Parts 14
!
!

!
!
!
!
!
!
!
!
!
!
!
!
!
!
!
!
!
!
!
!
!
!
!
!
!
!
!
!
!
!
!
!
!
!
!
!
!
!
!
!
!
!
!
!
Notes 15
!
!
!Notes:
_____________________________________________________
_____________________________________________________
_____________________________________________________
_____________________________________________________
_____________________________________________________
_____________________________________________________
_____________________________________________________
_____________________________________________________
_____________________________________________________
_____________________________________________________
_____________________________________________________
_____________________________________________________
_____________________________________________________
_____________________________________________________
!
!
!
!
!

!
!
!
!
!
!
!
!
!
!
!
!
!
!
!
!
!
!
!
!
!
!
!
!
!
!
!
!
!
!
!
!
Contact Information: 16
!
Ascent Products LLC
P. O. Box 311
Island Lake, IL 60042
Toll Free 866-538-8118
Find us at www.ascent-products.com
Table of contents
Popular Ladder manuals by other brands

Sealey
Sealey ACL3.V4 quick start guide

GÜNZBURGER STEIGTECHNIK
GÜNZBURGER STEIGTECHNIK 11153 instruction manual

Leroy Merlin
Leroy Merlin AL040 SKY Operating and maintenance instructions

MetalTech
MetalTech I-CAIRC Alu series OPERATIONAL SAFETY AND ASSEMBLY INSTRUCTIONS

ehleva
ehleva OPTIMA Assembly instructions

Powerfix Profi
Powerfix Profi PBT-TL012 Assembly, operating and safety instructions