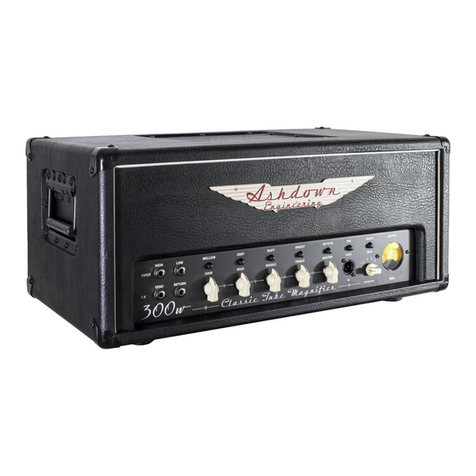
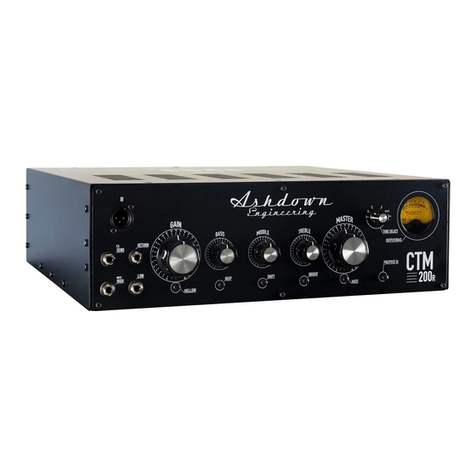
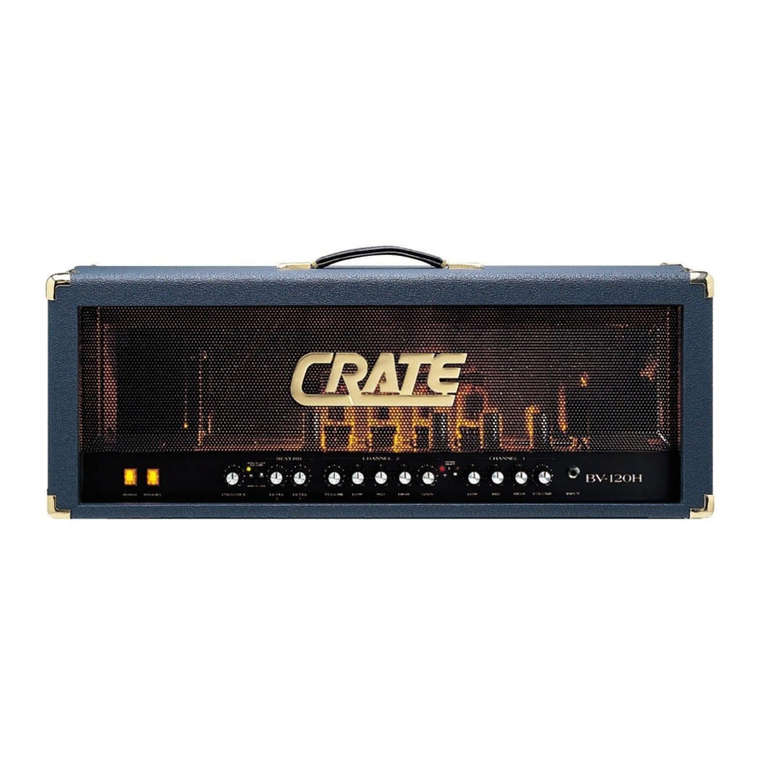
Ashdown CTM 100 User manual

USER MANUAL
ENGLISH / FRANÇAIS / DEUTSCH / ESPAÑOL

ASHDOWN ENGINEERING - CTM-100 USER GUIDE
INTRODUCTION
Like it’s big brother, the CTM-300, our CTM-100 takes it’s sonic cues from the classic
valve heads of the past and pairs its 100W all-valve design with modern features,
construction and reliability.
Built tough the CTM-100 head is housed within an 18mm Marine grade birch ply
cabinet that features heavy duty ip style handles and an internal fan to keep things
cool. This is an amplier that is built to last using only the nest components to
ensure years of trouble-free performance night after night.
Thank you for purchasing your Ashdown Engineering Amplier and welcome to
the family! We really think you’ve made the right choice and know that this
amplier will give you years of great tone and service.
It is a machine though and needs to be looked after, please read
through this user manual which will help you get the most out of
your new Amp and keep it running as long as some of our
happiest and very famous customers.
Please register this product online so we can make sure we give you years of
customer support through our friendly in-house service centre.
Here is where you need to visit to register your product:
http://www.ashdownmusic.com/pages/register-your-product
THANK YOU
REGISTER ONLINE
FRONT PANEL
BACK PANEL
USER GUIDE

ASHDOWN ENGINEERING - CTM-100 CTM-100
FACILITIES AND CONTROLS (NOTE THAT THESE VARY ACCORDING TO THE MODEL)
INPUTS
There are two instrument inputs marked LOW and HIGH. The LOW input is
highly sensitivity and also high impedance to suit the output from PASSIVE (Low
Output) basses - The HIGH input is low sensitivity and lower impedance to suit
the output from ACTIVE (High Output) basses. Plugging an active (High Output)
bass into the LOW input will overload the input, creating a fatter, warmer and
more distorted sound. Experiment by plugging your bass into either input to
achieve the desired sound. On models with a single input this will be suitable for
both Passive and Active basses.
EFFECTS SEND AND RETURN
These 1/4” jack sockets should be used to connect to an external eects device
or pedal board. The EFFECTS SEND output should connect to the INPUT of
the eects unit, and the output of the eects unit should be connected to the
EFFECTS RETURN input Note that the signal level is at instrument level so this
loop is suitable for eects pedals.
EQ CONTROLS
Use the MIDDLE, BASS and TREBLE controls to eect the overall tone of the
sound.
MID SHIFT
Causes the MIDDLE control to operate at dierent points in the frequency
spectrum dependant on the button being either in or out.
BASS SHIFT
Causes the Bass control to operate at dierent points in the frequency spectrum
dependant on the button being either in or out.
BRIGHT
Adds an overall brightness to the sound when in the up position. (Note: The
BRIGHT switch is not eective when the GAIN control is set to full).
MELLOW
Softens the overall tone slightly
GAIN
This controls the level of the signal sent to the MASTER section. To achieve a
cleaner sound, turn the GAIN control down and the MASTER up. To achieve a
richer, more distorted sound, turn the GAIN control up and the MASTER down.
MASTER
This controls the overall output volume of the amplier.
MUTE
In the in position, this switch mutes the out put of the amplier (useful for
tuning, etc.).
USER GUIDEUSER GUIDE

ASHDOWN ENGINEERING - CTM-100 CTM-100
PRE/POST
This switch determines whether the signal from the DI OUTPUT (see Rear Panel
Facilities) is taken before/PRE the EQ section (down position) or after/POST (up
position).
VU METER
The VU meter provides a visual indication of the output level of the amplier. It
also acts as a bias meter, please see the following page for more details.
SPECIFICATIONS:
Inputs
High Input Impedance - 3.9M ohms Input range 150mv to 20v p - p
Low Input Impedance - 10k ohms Input range 300mv to 40v p - p
Effects Return Impedance - 22k ohms Input level 0dbu nominal
Line Input Impedance - 22k ohms Input range 300mV
Outputs
Effects Send Impedance - 22k ohms Level 0dbu nominal
D.I.Output 420 ohms balanced pre ground lift Level -20dbu nominal
Speaker Outputs Minimum Impedance - 2 ohms
Frequency Response -3db at 22hz and 25khz
Equalisation
Bass +/- 15db @ 100hz
Middle +/- 15db @ 660hz
Treble +/- 15db @ 7khz shelving
Shape + 8db @ 50hz + 10db @ 10khz
Signal to Noise Better than 80db (E.Q. Flat)
Distortion Less than 0.5% Thd
Output Power 100watts into 4 ohms
USER GUIDEUSER GUIDE

ASHDOWN ENGINEERING - CTM-100 CTM-100
THE VU METER
The VU meter tted to the CTM is a dual function meter detailed as follows:
By using the push button selector switch marked “AUDIO / BIAS” the functions are
accessed in the following manner:
1/ “AUDIO” - In audio mode the meter is set to read the audio output of each of the
six power tubes and each can be measured by utilising the rotary selector switch
on the front panel. Whilst playing this is the normal mode of operation of the meter
and the reading obtained will be a direct indication of the power being produced
by each output tube, the meter is calibrated so that when the needle reaches the
start of the red section the power tube being measured will be producing maximum
clean volume.
The switch can be rotated to select any of the power tubes and its relative output
will be indicated on the meter, note that when performing this test you will need to
play at equal volume for each test.
2/ “BIAS” - In this mode the meter will glow RED.
To check the bias of the output tubes proceed as follows:
Run the amplier for at least 10 mins to allow the output tubes to fully heat up with
the amplier set to mute. Standby on. Select.. Tube 1 and with an insulated jewelers
screwdriver gently adjust the trimmer situated on the rear panel. The reading to aim
for is the needle just at the start of the red ie 0db.
Note that although each tube can be adjusted individually it is possible to get tubes
that cannot be adjusted to the correct reading, these can still be used providing the
reading is not in the red, a lower reading is acceptable and will note impact audibly
on the power output or sound quality of the amplier.
Please also note that the trimmers are 25 turn types to make adjustment easy, This
type of adjuster has no end stop so if you reach a point where the adjuster will
not give any more adjustment then the output tube will have to be replaced if the
reading is to high ie in the RED.
Repeat this for each of the four output tubes in turn.
RETURN THE METER TO “audio” MODE AFTER BIASING. DO NOT RUN THE
AMPLIFIER IN BIAS MODE WHILST PLAYING.
Note there is a protection fuse tted to each of the output tubes and if no reading
is obtained on the meter this fuse will have failed. The protection fuses are situated
next to the output they are protecting the correct rating is 315Ma quick blow, in the
event of a blown fuse they MUST be replaced with fuses of the correct rating and
type.
A continually blowing fuse would indicate either an incorrectly biased output tube
or a defective output tube.
WILL STILL WORK
AT REDUCED
POWER
IDEAL SETTING KEEP OUT!
DO NOT SET ANY
TUBE THIS HIGH
USER GUIDEUSER GUIDE

ASHDOWN ENGINEERING - CTM-100 MODE D’EMPLOI
INTRODUCTION
Comme son grand frère, le CTM-300, notre CTM-100 prend ses repères sonores des
têtes de soupapes classiques du passé et associe sa conception 100W à toutes les
soupapes avec des caractéristiques, une construction et une abilité modernes.
De construction robuste, la tête CTM-100 est logée dans une armoire à plis de bou-
leau de qualité marine de 18 mm dotée de poignées robustes de style rabattable
et d’un ventilateur interne pour garder les choses au frais. Il s’agit d’un amplicateur
conçu pour durer en utilisant uniquement les meilleurs composants an de garantir
des années de performances sans problème nuit après nuit.
Merci d’avoir acheté votre amplicateur Ashdown Engineering et bienvenue dans
la famille! Nous pensons vraiment que vous avez fait le bon choix et nous savons
que L’amplicateur vous donnera des années de son et de service exceptionnels.
C’est une machine et doit être entretenue, veuillez lire
à travers ce manuel d’utilisation qui vous aidera à tirer le meilleur parti de
votre nouvel ampli et faites-le fonctionner aussi longtemps que certains de nos
les clients les plus heureux et les plus célèbres.
Veuillez enregistrer ce produit en ligne an que nous puissions nous assurer que
nous vous offrons des années d’assistance à la clientèle grâce à notre centre de
service interne convivial.
Voici où vous devez vous rendre pour enregistrer votre produit:
http://www.ashdownmusic.com/pages/register-your-product
MERCI
INSCRIVEZ-VOUS EN LIGNE
PANNEAU AVANT
PANNEAU ARRIÈRE

ASHDOWN ENGINEERING - CTM-100 CTM-100
INSTALLATIONS ET COMMANDES (notez que ceux-ci varient selon le modèle)
CONTRIBUTIONS
Il y a deux entrées d’instrument marquées LOW et HIGH. L’entrée LOW a une
sensibilité élevée et une impédance élevée pour s’adapter à la sortie des basses
PASSIVE (Low Output) - L’entrée HIGH est une faible sensibilité et une impédance
inférieure pour s’adapter à la sortie des basses ACTIVE (High Output). Brancher
une basse active (High Output) dans l’entrée LOW surchargera l’entrée, créant
un son plus gros, plus chaud et plus déformé. Expérimentez en branchant
votre basse sur l’une ou l’autre des entrées pour obtenir le son souhaité. Sur les
modèles avec une seule entrée, cela conviendra aux basses passives et actives.
ENVOI ET RETOUR D’EFFETS
Ces prises jack 1/4 ”doivent être utilisées pour se connecter à un appareil d’eets
externe ou à un pédalier. La sortie EFFECTS SEND doit être connectée à l’entrée
INPUT de l’unité d’eets et la sortie de l’unité d’eets doit être connectée
à l’entrée EFFECTS RETURN. Notez que le niveau du signal est au niveau de
l’instrument, cette boucle convient donc aux pédales d’eets.
COMMANDES EQ
Utilisez les commandes MIDDLE, BASS et TREBLE pour aecter la tonalité
générale du son.
CHANGEMENT MOYEN
Fait fonctionner la commande MIDDLE à diérents points du spectre de
fréquences, selon que le bouton est soit à l’intérieur soit à l’extérieur.
BASSE CHANGEMENT
Fait fonctionner la commande des graves à diérents points du spectre de
fréquences selon que le bouton est soit à l’intérieur soit à l’extérieur.
BRILLANT
Ajoute une luminosité globale au son lorsqu’il est en position haute. (Remarque:
le commutateur BRIGHT n’est pas ecace lorsque la commande GAIN est réglée
sur pleine).
MOELLEUX
Adoucit légèrement le ton général
GAIN
Ceci contrôle le niveau du signal envoyé à la section MASTER. Pour obtenir un
son plus clair, tournez la commande GAIN vers le bas et le MASTER vers le haut.
Pour obtenir un son plus riche et déformé, tournez la commande GAIN vers le
haut et le MASTER vers le bas.
MAÎTRE
Ceci contrôle le volume de sortie global de l’amplicateur.
MUET
En position in, ce commutateur coupe la sortie de l’amplicateur (utile pour
l’accord, etc.).
MODE D’EMPLOIMODE D’EMPLOI

ASHDOWN ENGINEERING - CTM-100 CTM-100
PRÉ / POST
Ce commutateur détermine si le signal de la sortie DI OUTPUT (voir Fonctions
du panneau arrière) est pris avant / PRE la section EQ (position basse) ou après /
POST (position haute).
VU MÈTRE
Le VU-mètre fournit une indication visuelle du niveau de sortie de l’amplicateur.
Il agit également comme un compteur de biais, veuillez consulter la page
suivante pour plus de détails.
CARACTÉRISTIQUES:
Contributions
Entrée élevée Impédance - 3.9M ohms Plage d’entrée 150mv to 20v p - p
Faible entrée Impédance - 10k ohms Plage d’entrée 300mv to 40v p - p
Retour d’effets Impédance - 22k ohms Niveau d’entrée 0dbu nominal
Ligne d’entrée Impédance - 22k ohms Plage d’entrée 300mV
Les sorties
Envoi d’effets Impédance - 22k ohms Niveau 0dbu nominal
D.I.Production 420 ohms équilibré Niveau de pré-élévation au sol
-20dbu nominal
Sorties haut-parleurs Le minimum Impédance - 2 ohms
Fréquence de réponse -3db at 22hz and 25khz
Égalisation
Basse +/- 15db @ 100hz
Milieu +/- 15db @ 660hz
Tripler +/- 15db @ 7khz rayonnage
Forme + 8db @ 50hz + 10db @ 10khz
Signal au bruit Mieux que 80db (E.Q. Plat)
Distorsion Moins que 0.5% Thd
Puissance de sortie 100watts dans 4 ohms
MODE D’EMPLOIMODE D’EMPLOI

ASHDOWN ENGINEERING - CTM-100 CTM-100
LE VU METER
Le VU-mètre installé sur le CTM est un compteur à double fonction détaillé comme
suit:
En utilisant le sélecteur à bouton-poussoir marqué «AUDIO / BIAS», les fonctions sont
accessibles de la manière suivante:
1 / “AUDIO” - En mode audio, le compteur est réglé pour lire la sortie audio de
chacun des six tubes de puissance et chacun peut être mesuré en utilisant le sélecteur
rotatif sur le panneau avant. Pendant la lecture, c’est le mode de fonctionnement
normal du compteur et la lecture obtenue sera une indication directe de la puissance
produite par chaque tube de sortie, le compteur est calibré de sorte que lorsque
l’aiguille atteint le début de la section rouge, le tube de puissance en cours de mesure
produira un volume propre maximal.
Le commutateur peut être tourné pour sélectionner l’une des lampes de puissance
et sa sortie relative sera indiquée sur le compteur, notez que lors de l’exécution de ce
test, vous devrez jouer à volume égal pour chaque test.
2 / “BIAS” - Dans ce mode, le compteur deviendra ROUGE.
Pour vérier la polarisation des tubes de sortie, procédez comme suit:
Faites fonctionner l’amplicateur pendant au moins 10 minutes pour permettre aux
tubes de sortie de chauffer complètement avec l’amplicateur réglé pour couper le
son. Veille activée. Sélectionnez .. Tube 1 et avec un tournevis bijoutier isolé, ajustez
doucement la tondeuse située sur le panneau arrière. La lecture à viser est l’aiguille
juste au début du rouge, c’est-à-dire 0db.
Notez que bien que chaque tube puisse être ajusté individuellement, il est possible
d’obtenir des tubes qui ne peuvent pas être ajustés à la lecture correcte, ceux-ci
peuvent toujours être utilisés à condition que la lecture ne soit pas dans le rouge,
une lecture inférieure est acceptable et notera l’impact de manière audible sur le
puissance de sortie ou qualité sonore de l’amplicateur.
Veuillez également noter que les trimmers sont de 25 types de tours pour faciliter le
réglage.Ce type de réglage n’a pas de butée de n de course, donc si vous atteignez
un point où le régleur ne donnera plus de réglage, le tube de sortie devra être
remplacé si la lecture est trop élevé c’est-à-dire dans le ROUGE.
Répétez cette opération pour chacun des quatre tubes de sortie à tour de rôle.
REVENEZ LE COMPTEUR EN MODE «audio» APRÈS LE BIASING. NE PAS FAIRE
FONCTIONNER L’AMPLIFICATEUR EN MODE BIAS PENDANT LA JOUER.
Notez qu’un fusible de protection est installé sur chacun des tubes de sortie et si
aucune lecture n’est obtenue sur le compteur, ce fusible aura échoué. Les fusibles de
protection sont situés à côté de la sortie qu’ils protègent le calibre correct est 315Ma
à fusion rapide, en cas de fusible grillé, ils DOIVENT être remplacés par des fusibles
de calibre et de type corrects.
Un fusible qui saute continuellement indiquerait soit un tube de sortie mal polarisé,
soit un tube de sortie défectueux.
FONCTIONNERA
TOUJOURS
À RÉDUIT
POUVOIR
CADRE IDÉAL EXCLURE!
NE DÉFINISSEZ
AUCUN
TUBE AUSSI
HAUT
MODE D’EMPLOIMODE D’EMPLOI

ASHDOWN ENGINEERING - CTM-100 BENUTZERHANDBUCH
EINFÜHRUNG
Wie sein großer Bruder, der CTM-300, orientiert sich unser CTM-100 an den
klassischen Ventilköpfen der Vergangenheit und kombiniert sein 100-W-Allventil-
Design mit modernen Funktionen, Konstruktion und Zuverlässigkeit.
Der CTM-100-Kopf ist robust gebaut und bendet sich in einem 18-mm-
Birkenlagenschrank in Marinequalität, der über robuste Flip-Style-Griffe und einen
internen Lüfter verfügt, um die Dinge kühl zu halten. Dies ist ein Verstärker, der für
eine lange Lebensdauer ausgelegt ist und nur die besten Komponenten verwendet,
um jahrelange störungsfreie Leistung Nacht für Nacht zu gewährleisten.
Vielen Dank für den Kauf Ihres Ashdown Engineering Amplier und herzlich
willkommen in der Familie! Wir glauben wirklich, dass Sie die richtige Wahl
getroffen haben und wissen, dass dieser Verstärker Ihnen jahrelang großartigen
Klang und Service bietet.
Es ist jedoch eine Maschine und muss gepegt werden, bitte lesen
durch dieses Benutzerhandbuch, das Ihnen hilft, das Beste aus Ihnen
herauszuholen Ihren neuen Verstärker und lassen Sie ihn so lange laufen wie
einige unserer glücklichste und sehr berühmte Kunden
Bitte registrieren Sie dieses Produkt online, damit wir Ihnen durch unser
freundliches internes Servicecenter jahrelangen Kundensupport bieten können.
Hier müssen Sie besuchen, um Ihr Produkt zu registrieren:
http://www.ashdownmusic.com/pages/register-your-product
VIELEN DANK
ONLINE REGISTRIEREN
FRONTBLENDE
RÜCKSEITE

ASHDOWN ENGINEERING - CTM-100 CTM-100
EINRICHTUNGEN UND KONTROLLEN
(beachten Sie, dass diese je nach Modell variieren)
EINGÄNGE
Es gibt zwei Instrumenteneingänge, die mit LOW und HIGH gekennzeichnet
sind. Der LOW-Eingang ist hochempndlich und auch hochohmig, um dem
Ausgang von PASSIVE-Bässen (Low Output) zu entsprechen. Der HIGH-Eingang
ist niedrigempndlich und hat eine niedrigere Impedanz, um dem Ausgang von
ACTIVE-Bässen (High Output) zu entsprechen. Wenn Sie einen aktiven Bass (High
Output) an den LOW-Eingang anschließen, wird der Eingang überlastet und ein
dickerer, wärmerer und verzerrterer Klang erzeugt. Experimentieren Sie, indem
Sie Ihren Bass an einen der Eingänge anschließen, um den gewünschten Klang
zu erzielen. Bei Modellen mit einem einzigen Eingang ist dies sowohl für passive
als auch für aktive Bässe geeignet.
EFFEKTE SENDEN UND RÜCKGABE
Diese 1/4 ”-Buchsenbuchsen sollten zum Anschluss an ein externes Eektgerät
oder eine Pedalplatine verwendet werden. Der EFFECTS SEND-Ausgang
sollte mit dem INPUT der Eekteinheit verbunden sein, und der Ausgang
der Eekteinheit sollte mit dem EFFECTS RETURN-Eingang verbunden sein.
Beachten Sie, dass der Signalpegel auf Instrumentenebene liegt, sodass diese
Schleife für Eektpedale geeignet ist.
EQ-STEUERUNGEN
Verwenden Sie die Regler MIDDLE, BASS und TREBLE, um den Gesamtklang des
Sounds zu beeinussen.
MITTLERE SCHALTUNG
Bewirkt, dass der MIDDLE-Regler an verschiedenen Punkten im
Frequenzspektrum arbeitet, abhängig davon, ob die Taste entweder ein- oder
ausgeht.
BASS VERLAGERN
Bewirkt, dass der Bass-Regler an verschiedenen Punkten im Frequenzspektrum
arbeitet, je nachdem, ob die Taste ein- oder ausgeht.
HELL
Fügt dem Klang in der oberen Position eine Gesamthelligkeit hinzu. (Hinweis:
Der BRIGHT-Schalter ist nicht wirksam, wenn der GAIN-Regler auf voll gestellt ist.)
MILD
Weicht den Gesamtton leicht auf
DAZUGEWINNEN
Dies steuert den Pegel des an die MASTER-Sektion gesendeten Signals. Um
einen saubereren Klang zu erzielen, drehen Sie den GAIN-Regler nach unten
und den MASTER nach oben. Drehen Sie den GAIN-Regler nach oben und den
MASTER nach unten, um einen satteren, verzerrteren Klang zu erzielen.
MEISTER
Dies steuert die Gesamtausgangslautstärke des Verstärkers.
BENUTZERHANDBUCHBENUTZERHANDBUCH

ASHDOWN ENGINEERING - CTM-100 CTM-100
STUMM
In der Ein-Position schaltet dieser Schalter den Ausgang des Verstärkers stumm
(nützlich zum Stimmen usw.).
VOR / POST
Dieser Schalter bestimmt, ob das Signal vom DI-AUSGANG (siehe
Rückwandeinrichtungen) vor / PRE des EQ-Abschnitts (untere Position) oder
nach / POST (obere Position) empfangen wird.
VU METER
Das VU-Messgerät zeigt visuell den Ausgangspegel des Verstärkers an. Es
fungiert auch als Bias-Messgerät. Weitere Informationen nden Sie auf der
folgenden Seite.
SPEZIFIKATIONEN:
Eingänge
Hoher Eingang Impedanz - 3.9M ohms Eingabebereich 150mv to 20v p - p
Niedrige Eingangs Impedanz - 10k ohms Eingabebereich 300mv to 40v p - p
Effekte kehren zurück Impedanz - 22k ohms Eingangspegel 0dbu nominal
Leitungseingang Impedanz - 22k ohms Eingabebereich 300mV
Ausgänge
Effekte senden Impedanz - 22k ohms Niveau 0dbu nominal
D.I.Ausgabe 420 ohms ausgewogen vor Bodenlift Niveau -20dbu nominal
Lautsprecherausgänge Minimum Impedanz - 2 ohms
Frequenzgang -3db at 22hz and 25khz
Ausgleich
Bass +/- 15db @ 100hz
Mitte +/- 15db @ 660hz
Verdreifachen +/- 15db @ 7khz Aufschieben
Gestalten + 8db @ 50hz + 10db @ 10khz
Signal-Rausch Besser als 80db (E.Q. Eben)
Verzerrung Weniger als 0.5% Thd
Ausgangsleistung 100watts in 4 ohms
BENUTZERHANDBUCHBENUTZERHANDBUCH

ASHDOWN ENGINEERING - CTM-100 CTM-100
DAS VU-METER
Das an der Gemeinschaftsmarke angebrachte VU-Messgerät ist ein
Doppelfunktionsmessgerät, das wie folgt beschrieben wird:
Mit dem mit „AUDIO / BIAS“ gekennzeichneten Druckknopfwahlschalter wird auf
folgende Weise auf die Funktionen zugegriffen:
1 / „AUDIO“ - Im Audiomodus ist das Messgerät so eingestellt, dass es die
Audioausgabe jeder der sechs Leistungsröhren anzeigt. Jede Messung kann mithilfe
des Drehwahlschalters an der Vorderseite gemessen werden. Während des Spielens
ist dies die normale Betriebsart des Messgeräts und der erhaltene Messwert ist eine
direkte Anzeige der von jeder Ausgangsröhre erzeugten Leistung. Das Messgerät
ist so kalibriert, dass die Leistungsröhre erreicht wird, wenn die Nadel den Anfang
des roten Abschnitts erreicht Wenn gemessen wird, ergibt sich ein maximales
Reinigungsvolumen.
Der Schalter kann gedreht werden, um eine der Leistungsröhren auszuwählen. Die
relative Leistung wird auf dem Messgerät angezeigt. Beachten Sie, dass Sie bei der
Durchführung dieses Tests für jeden Test mit gleicher Lautstärke spielen müssen.
2 / „BIAS“ - In diesem Modus leuchtet das Messgerät ROT.
Um die Vorspannung der Ausgangsröhren zu überprüfen, gehen Sie wie folgt vor:
Lassen Sie den Verstärker mindestens 10 Minuten lang laufen, damit sich die
Ausgangsröhren bei stummgeschaltetem Verstärker vollständig erwärmen können.
Standby ein. Wählen Sie .. Rohr 1 und stellen Sie mit einem isolierten Juwelier-
Schraubendreher den Trimmer auf der Rückseite vorsichtig ein. Der zu zielende
Messwert ist die Nadel direkt am Anfang der roten dh 0db.
Beachten Sie, dass, obwohl jede Röhre einzeln eingestellt werden kann, es möglich ist,
Röhren zu erhalten, die nicht auf den richtigen Messwert eingestellt werden können.
Diese können jedoch weiterhin verwendet werden, sofern der Messwert nicht im
roten Bereich liegt. Ein niedrigerer Messwert ist akzeptabel und stellt einen hörbaren
Einuss auf den Messwert fest Ausgangsleistung oder Klangqualität des Verstärkers.
Bitte beachten Sie auch, dass die Trimmer 25 Umdrehungen haben, um die Einstellung
zu vereinfachen. Diese Art von Einsteller hat keinen Endanschlag. Wenn Sie also einen
Punkt erreichen, an dem der Einsteller keine weitere Einstellung mehr vornimmt, muss
die Ausgangsröhre ersetzt werden, wenn der Messwert angezeigt wird ist zu hoch dh
in der ROTEN.
Wiederholen Sie dies nacheinander für jede der vier Ausgangsröhren.
Schalten Sie das Messgerät nach dem BIASING wieder in den Audio-Modus. LAUFEN
SIE DEN VERSTÄRKER NICHT IM BIAS-MODUS, WÄHREND SIE SPIELEN.
Beachten Sie, dass an jeder Ausgangsröhre eine Schutzsicherung angebracht ist.
Wenn am Messgerät kein Messwert angezeigt wird, ist diese Sicherung ausgefallen.
Die Schutzsicherungen benden sich neben dem Ausgang, den sie schützen. Die
richtige Nennleistung beträgt 315 mA. Im Falle einer durchgebrannten Sicherung
MÜSSEN sie durch Sicherungen mit der richtigen Nennleistung und dem richtigen Typ
ersetzt werden.
Eine kontinuierlich durchbrennende Sicherung würde entweder eine falsch
vorgespannte Ausgangsröhre oder eine defekte Ausgangsröhre anzeigen.
WIRD NOCH
ARBEITEN
BEI REDUZIERTEN
MACHT
IDEALE
EINSTELLUNG
HALTEN SIE
SICH RAUS!
SETZEN SIE KEINE
TUBE DAS HOCH
BENUTZERHANDBUCHBENUTZERHANDBUCH

ASHDOWN ENGINEERING - CTM-100 GUÍA DEL USUARIO
INTRODUCCIÓN
Al igual que su hermano mayor, el CTM-300, nuestro CTM-100 toma las señales sónicas
de los cabezales de válvula clásicos del pasado y combina su diseño de 100 vatios con
todas las válvulas con características, construcción y conabilidad modernas.
Construido resistente, el cabezal CTM-100 está alojado dentro de un gabinete de
capa de abedul de grado marino de 18 mm que cuenta con manijas estilo abatible
de alta resistencia y un ventilador interno para mantener las cosas frescas. Este es un
amplicador que está construido para durar utilizando solo los mejores componentes
para garantizar años de rendimiento sin problemas noche tras noche.
¡Gracias por comprar su amplicador de ingeniería Ashdown y bienvenido a la
familia! Realmente creemos que ha tomado la decisión correcta y sabemos que
este amplicador le brindará años de excelente tono y servicio.
Sin embargo, es una máquina y debe cuidarse, lea a través de este manual
de usuario que lo ayudará a aprovechar al máximo su nuevo amplicador y
manténgalo funcionando mientras algunos de nuestros
clientes más felices y muy famosos.
Registre este producto en línea para que podamos asegurarnos de brindarle años
de atención al cliente a través de nuestro amigable centro de servicio interno.
Aquí es donde debe visitar para registrar su producto:
http://www.ashdownmusic.com/pages/register-your-product
GRACIAS
REGISTRO EN LÍNEA
PANEL FRONTAL
PANEL POSTERIOR

ASHDOWN ENGINEERING - CTM-100 CTM-100
INSTALACIONES Y CONTROLES (tenga en cuenta que estos varían según el modelo)
ENTRADAS
Hay dos entradas de instrumento marcadas LOW y HIGH. La entrada LOW
es de alta sensibilidad y también alta impedancia para adaptarse a la salida
de los bajos PASIVOS (salida baja) - La entrada ALTA es de baja sensibilidad e
impedancia más baja para adaptarse a la salida de los bajos ACTIVOS (salida
alta). Conectar un bajo activo (salida alta) a la entrada LOW sobrecargará la
entrada, creando un sonido más grueso, cálido y distorsionado. Experimente
conectando su bajo en cualquiera de las entradas para lograr el sonido deseado.
En modelos con una sola entrada, esto será adecuado tanto para bajos pasivos
como activos.
EFECTOS ENVIAR Y DEVOLVER
Estos conectores jack de 1/4 ”deben usarse para conectar a un dispositivo
de efectos externo o una pedalera. La salida EFFECTS SEND debe conectarse
a la INPUT de la unidad de efectos, y la salida de la unidad de efectos debe
conectarse a la entrada EFFECTS RETURN. Tenga en cuenta que el nivel de la
señal está al nivel del instrumento, por lo que este bucle es adecuado para
pedales de efectos.
CONTROLES DE EQ
Utilice los controles MIDDLE, BASS y TREBLE para afectar el tono general del
sonido.
CAMBIO MEDIO
Hace que el control MIDDLE opere en diferentes puntos del espectro de
frecuencias dependiendo de que el botón esté dentro o fuera.
CAMBIO DE GRAVES
Hace que el control de graves opere en diferentes puntos del espectro de
frecuencias dependiendo de que el botón esté dentro o fuera.
BRILLANTE
Agrega un brillo general al sonido cuando está en la posición hacia arriba. (Nota:
El interruptor BRIGHT no es efectivo cuando el control GAIN está ajustado al
máximo).
MELOSO
Suaviza ligeramente el tono general
GANAR
Controla el nivel de la señal enviada a la sección MASTER. Para lograr un sonido
más limpio, baje el control GAIN y suba MASTER. Para lograr un sonido más rico y
distorsionado, suba el control GAIN y baje MASTER.
MAESTRO
Esto controla el volumen de salida general del amplicador.
GUÍA DEL USUARIOGUÍA DEL USUARIO

ASHDOWN ENGINEERING - CTM-100 CTM-100
SILENCIO
En la posición de entrada, este interruptor silencia la salida del amplicador
(útil para sintonizar, etc.).
PRE / PUESTO
Este conmutador determina si la señal de DI OUTPUT (ver Instalaciones del panel
trasero) se toma antes / PRE de la sección EQ (posición hacia abajo) o después /
POST (posición hacia arriba).
MEDIDOR VU
El medidor de VU proporciona una indicación visual del nivel de salida del
amplicador. También actúa como un medidor de sesgo; consulte la página
siguiente para obtener más detalles.
ESPECIFICACIONES:
Entradas
Entrada alta Impedancia - 3.9M ohms Rango de entrada 150mv to 20v p - p
Bajos insumos Impedancia - 10k ohms Rango de entrada 300mv to 40v p - p
Retorno de efectos Impedancia - 22k ohms Nivel de entrada 0dbu nominal
Entrada de línea Impedancia - 22k ohms Rango de entrada 300mV
Salidas
Envío de efectos Impedancia - 22k ohms Nivel 0dbu nominal
D.I.Producción 420 ohms equilibrada Nivel previo a la elevación del suelo
-20dbu nominal
Salidas de altavoz Mínima Impedancia - 2 ohms
Respuesta frecuente -3db at 22hz and 25khz
Igualdad
Bajo +/- 15db @ 100hz
Medio +/- 15db @ 660hz
Triplicar +/- 15db @ 7khz arrinconamiento
Forma + 8db @ 50hz + 10db @ 10khz
Señal a ruido Mejor que 80db (E.Q. Plana)
Distorsión Menos que 0.5% Thd
Potencia de salida 100watts dentro 4 ohms
GUÍA DEL USUARIOGUÍA DEL USUARIO

ASHDOWN ENGINEERING - CTM-100 CTM-100
EL MEDIDOR VU
El medidor de VU instalado en el CTM es un medidor de función dual que se detalla
a continuación:
Utilizando el interruptor selector de botón pulsador marcado como “AUDIO / BIAS”,
se accede a las funciones de la siguiente manera:
1 / “AUDIO” - En el modo de audio, el medidor está congurado para leer la salida
de audio de cada uno de los seis tubos de potencia y cada uno se puede medir
utilizando el interruptor selector giratorio en el panel frontal. Mientras se reproduce,
este es el modo normal de funcionamiento del medidor y la lectura obtenida será
una indicación directa de la potencia producida por cada tubo de salida, el medidor
se calibra de modo que cuando la aguja llegue al inicio de la sección roja, el tubo de
potencia que se esté midiendo producirá un volumen limpio máximo.
El interruptor se puede girar para seleccionar cualquiera de los tubos de potencia
y su salida relativa se indicará en el medidor, tenga en cuenta que al realizar esta
prueba deberá tocar al mismo volumen para cada prueba.
2 / “BIAS” - En este modo, el medidor se iluminará en ROJO.
Para comprobar la polarización de los tubos de salida, proceda de la siguiente
manera:
Haga funcionar el amplicador durante al menos 10 minutos para permitir que los
tubos de salida se calienten completamente con el amplicador en silencio. Espera
encendido. Seleccione .. Tubo 1 y con un destornillador de joyero aislado ajuste
suavemente el recortador situado en el panel trasero. La lectura a la que se debe
apuntar es la aguja justo al comienzo del rojo, es decir, 0db.
Tenga en cuenta que aunque cada tubo se puede ajustar individualmente, es posible
obtener tubos que no se pueden ajustar a la lectura correcta, estos aún se pueden
usar siempre que la lectura no esté en rojo, una lectura más baja es aceptable y
notará un impacto audible en la lectura. potencia de salida o calidad de sonido del
amplicador.
Tenga en cuenta también que los recortadores son de 25 vueltas para facilitar el
ajuste.Este tipo de ajustador no tiene tope nal, por lo que si llega a un punto en el
que el ajustador no dará más ajuste, entonces el tubo de salida deberá reemplazarse
si es demasiado alto, es decir, en ROJO.
Repita esto para cada uno de los cuatro tubos de salida uno por uno.
DEVUELVA EL MEDIDOR AL MODO “audio” DESPUÉS DE LA SEÑALIZACIÓN. NO
HAGA FUNCIONAR EL AMPLIFICADOR EN MODO DE SESGO MIENTRAS SE JUEGA.
Tenga en cuenta que hay un fusible de protección instalado en cada uno de los tubos
de salida y si no se obtiene una lectura en el medidor, este fusible habrá fallado.
Los fusibles de protección están situados junto a la salida que están protegiendo, la
clasicación correcta es 315Ma de acción rápida, en caso de que se queme un fusible
DEBEN ser reemplazados por fusibles de la clasicación y tipo correctos.
Un fusible que se quema continuamente indicaría un tubo de salida con polarización
incorrecta o un tubo de salida defectuoso.
FONCTIONNERA
TOUJOURS
À RÉDUIT
POUVOIR
CADRE IDÉAL EXCLURE!
NE DÉFINISSEZ
AUCUN
TUBE AUSSI
HAUT
GUÍA DEL USUARIOGUÍA DEL USUARIO

This manual suits for next models
1
Table of contents
Languages:
Other Ashdown Musical Instrument Amplifier manuals

Ashdown
Ashdown Fallen Angel 40 User manual

Ashdown
Ashdown Fallen Angel 50 DSP Combo User manual

Ashdown
Ashdown After Eight User manual

Ashdown
Ashdown THE NEWT User manual

Ashdown
Ashdown CTM-200-RACK User manual

Ashdown
Ashdown ROOTMASTER EVO II Series User manual

Ashdown
Ashdown Studio Jnr User manual

Ashdown
Ashdown MF 484 2.N User manual

Ashdown
Ashdown MARK KING MK500 User manual

Ashdown
Ashdown Ashdown Acoustic Series User manual