6
uSb jack
mp3/cd player
The USB jack can be used to connect the keyboard to a PC
or other USB devices that support USB audio.
For devices with a USB cable, after the driver is installed
and initialization is finished, you can choose USB Audio Device
in the device menu of the software to begin transfering MIDI
data.
To avoid damage, turn the power switch on this keyboard and
all related devices OFF if you want to plug or unplug devices
into/out of this instrument.
Connect the audio output of an MP3/CD player or other
audio source to the stereo AUX IN jack through the rear
panel. The input signal will be mixed with the piano signal,
allowing you to play along to a song on the external device.
adjuSting the volume
Rotate the [VOLUME] knob in a clockwise manner to increase
the volume, or a counter-clockwise manner to decrease it.
Connections
Connecting a pair of Headphones
A standard pair of stereo headphones can be plugged in here for
private practice or late-night playing.
Jack1:
stereo speaker system is automatically shut off . The sound can
be heard from headphones.
Jack2: When a pair of headphones is plugged into the Jack 2, the
sound can be heard from headphones and speakers of the
instrument.
Note:
Do not listen with the headphones at high volume for long periods of
time. Doing so may cause hearing loss.
When a pair of headphones is plugged into Jack 1, the internal
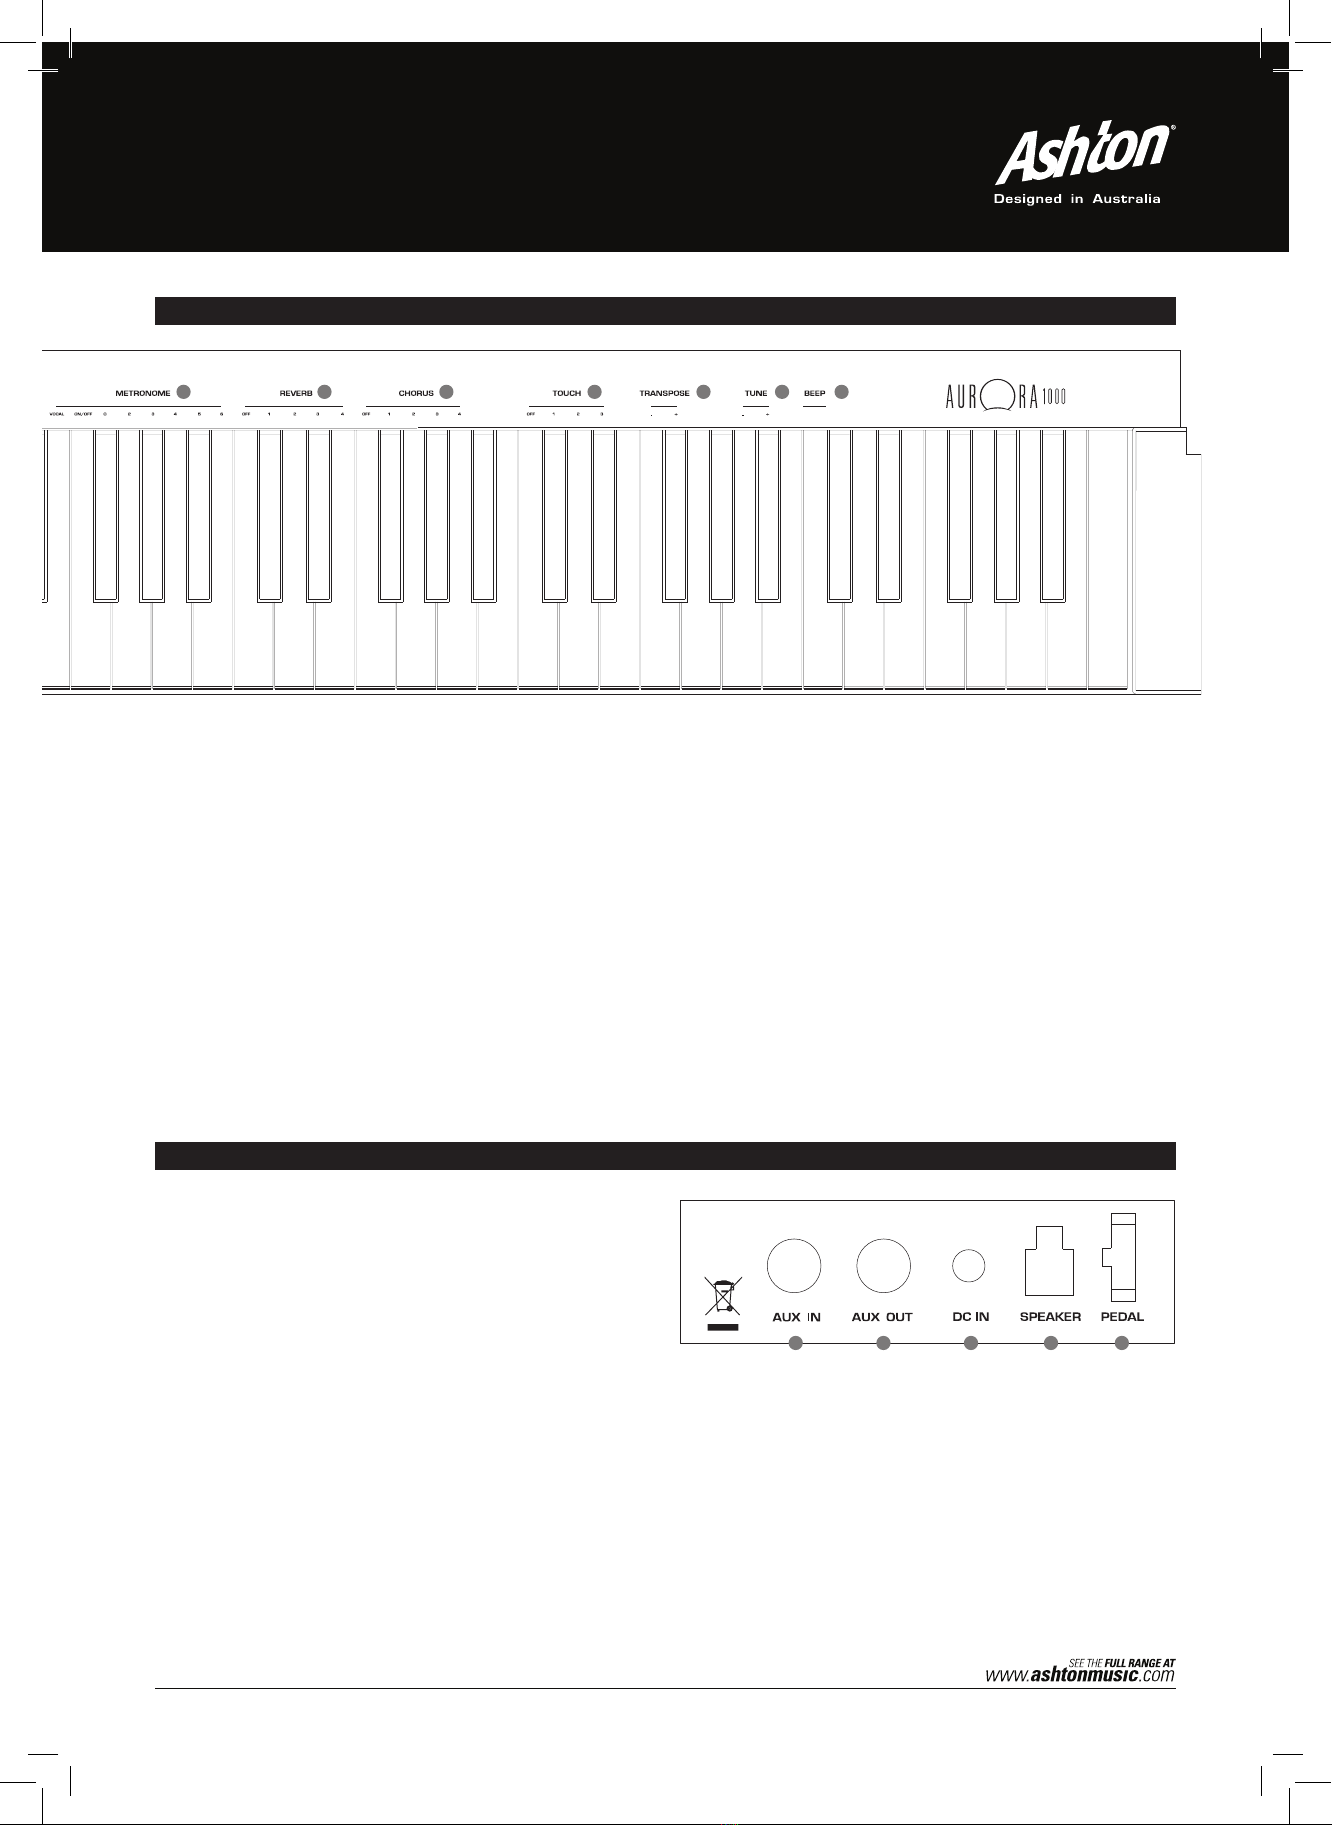
Connecting an Audio Equipment
The rear-panel AUX.OUT jack delivers the output of the instrument for
connection to a keyboard amplifier, stereo sound system, a mixing
console, or tape recorder. Use an audio cord to plug into the AUX.OUT
jack located on the rear board then plug the other end of the cord into
AUX.IN of the amplifier.
Note:
To avoid damaging the speakers, please ensure that the volume has
been set to the minimum level before connecting the power and other
devices.
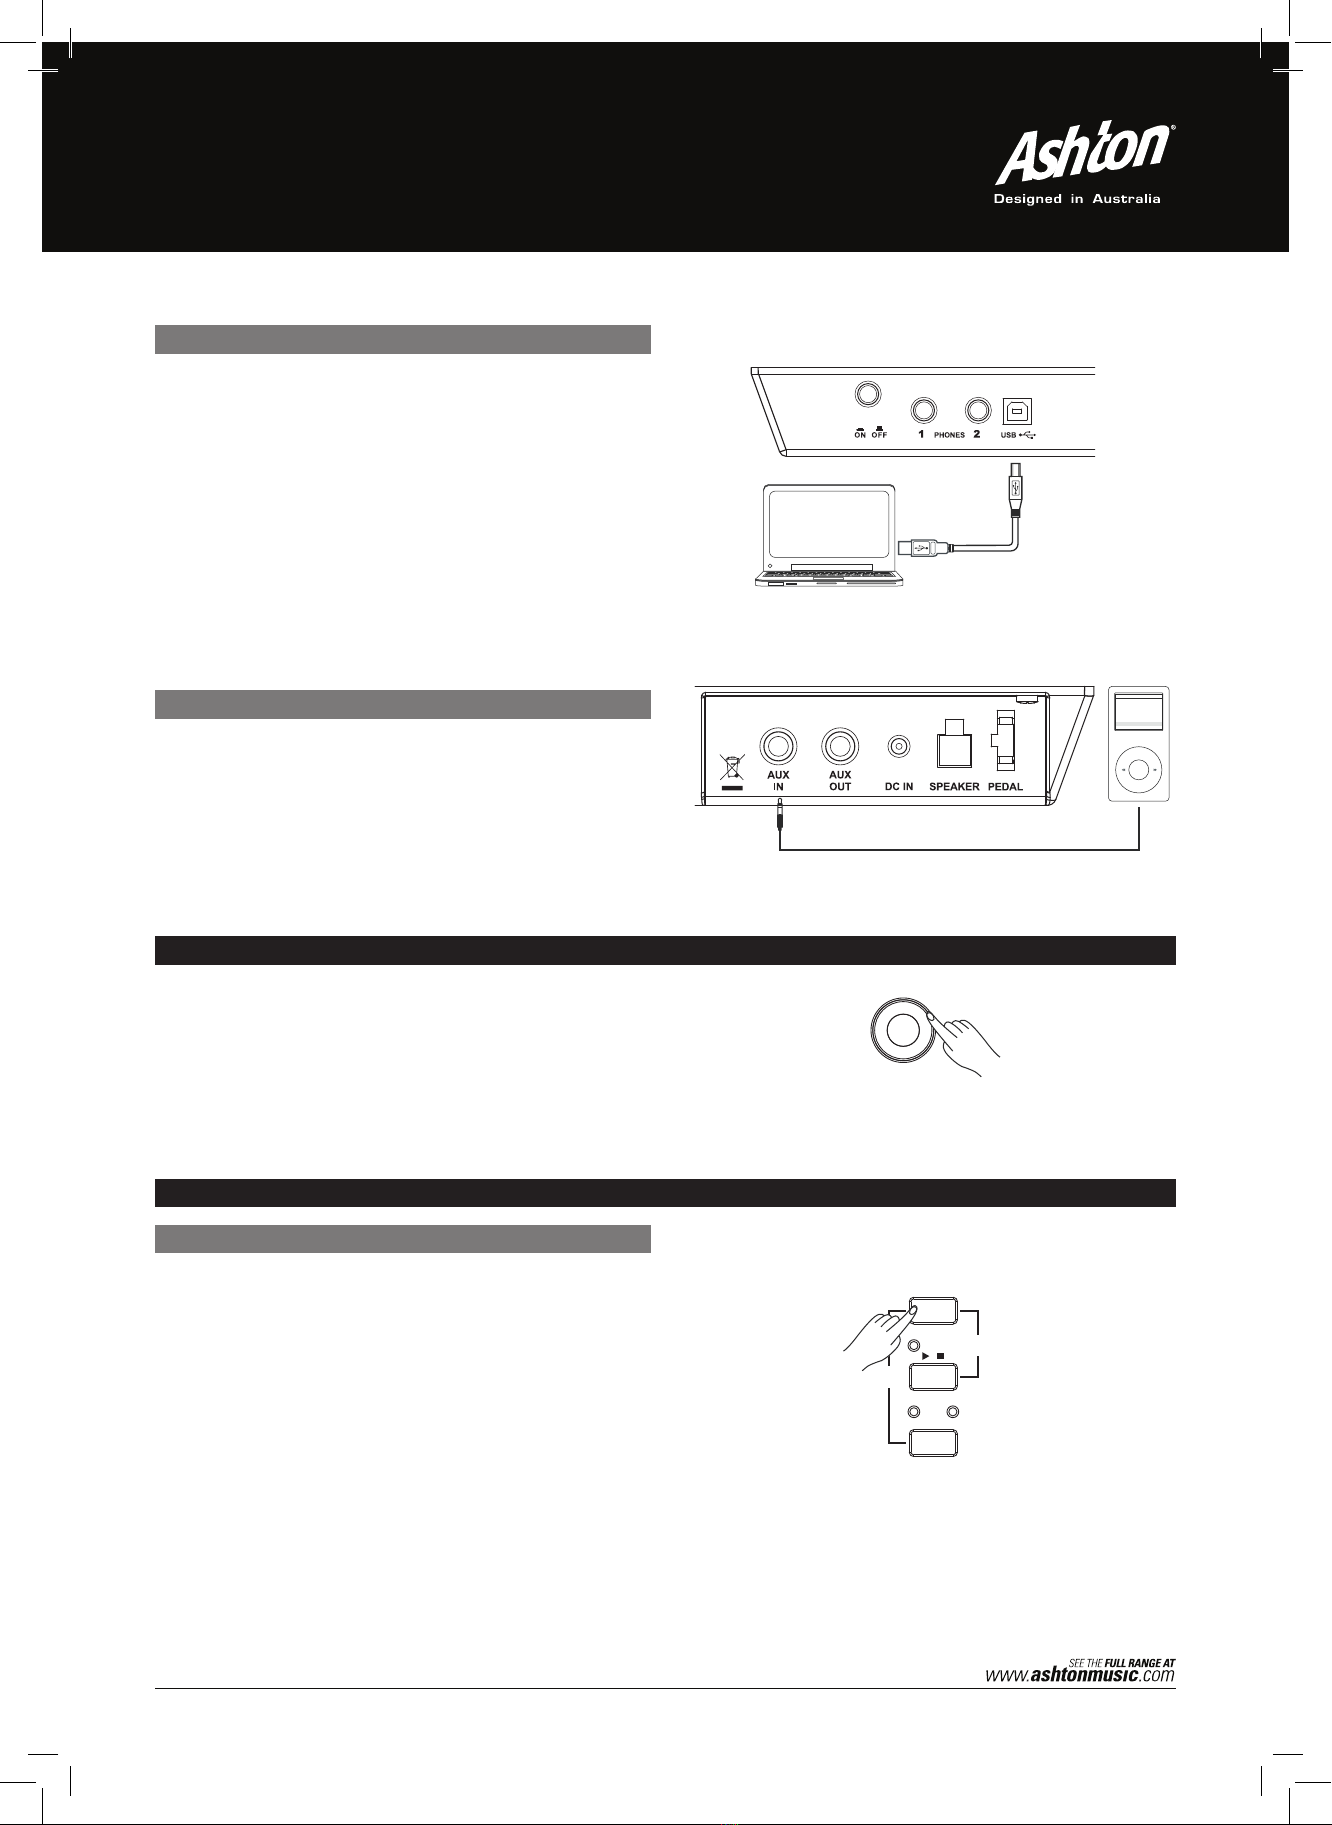
Connecting a Computer
Connect PC or other USB host devices that support USB audio.
For devices with USB cable, you can simply connect the MIDI/USB
converter to your USB connector on the device and plug the USB cable
into the piano, after the driver is installed and initialization is finished,
you can choose USB Audio Device in the device menu of the software
to transfer midi data.
Note:
Do not select USB audio device in both of input and output setting
together, otherwise the sound overlaps.
9
Connecting an MP3/CD Player
Connect the audio output of an MP3/CD player or other audio source
to the stereo AUX. IN jack on the rear panel.
The input signal is mixed with the piano signal, allowing you to play
along.
0
5
25
75
95
100
aw_CDP6000_Manual_G03_120423
2012� � 4� � 23� � 15:34:16
Connections
Connecting a pair of Headphones
A standard pair of stereo headphones can be plugged in here for
private practice or late-night playing.
Jack1 :
stereo speaker system is automatically shut off . The sound can
be heard from headphones.
Jack2: When a pair of headphones is plugged into the Jack 2, the
sound can be heard from headphones and speakers of the
instrument.
Note :
Do not listen with the headphones at high volume for long periods of
time. Doing so may cause hearing loss.
When a pair of headphones is plugged into Jack 1, the internal
Connecting an Audio Equipment
The rear-panel AUX.OUT jack delivers the output of the instrument for
connection to a keyboard amplifier, stereo sound system, a mixing
console, or tape recorder. Use an audio cord to plug into the AUX.OUT
jack located on the rear board then plug the other end of the cord into
AUX.IN of the amplifier.
Note:
To avoid damaging the speakers, please ensure that the volume has
been set to the minimum level before connecting the power and other
devices.
Connecting a Computer
Connect PC or other USB host devices that support USB audio.
For devices with USB cable, you can simply connect the MIDI/USB
converter to your USB connector on the device and plug the USB cable
into the piano, after the driver is installed and initialization is finished,
you can choose USB Audio Device in the device menu of the software
to transfer midi data.
Note:
Do not select USB audio device in both of input and output setting
together, otherwise the sound overlaps.
9
Connecting an MP3/CD Player
Connect the audio output of an MP3/CD player or other audio source
to the stereo AUX. IN jack on the rear panel.
The input signal is mixed with the piano signal, allowing you to play
along.
0
5
25
75
95
100
Adjusting the Volume
[] , [/]
.
.
Note:
.
Listening to the Song
10
[] ,
.
MIN MAX
VOLUME
Playing Demo song
Playing Song
Start Song
Loop
Stop Song
Select Song
Note:
1.
2.
Practice Song
R
FUNCTION
DEMO
SONG
/
L
R
FUNCTION
DEMO
SONG
/
L
056 7 8 9
1 2 34
SONG
RL
R RL L
Adjusting the Volume
[] , [/]
.
.
Note:
.
Listening to the Song
10
[] ,
.
MIN MAX
VOLUME
Playing Demo song
Playing Song
Start Song
Loop
Stop Song
Select Song
Note:
1.
2.
Practice Song
R
FUNCTION
DEMO
SONG
/
L
R
FUNCTION
DEMO
SONG
/
L
056 7 8 9
1 2 34
SONG
RL
R RL L
demo Song
While holding down the [FUNCTION] button, press the [L/R]
button to play the demo song. All the LEDs on the panel will
flash simultaneously. Repeat, or press the [START/STOP]
button, to stop playing. The LEDs will stop flashing to indicate
this mode has stopped.
Note:
The keyboard will be disabled when the demo song is playing.
liStening to a Song