General
2
GB
Contents
1 General
1.1 For your information...
Please read this manual carefully before using your
appliance. It contains important safety advice; it explains
how to use and look after your appliance so that it will
provide you with many years of reliable service.
Should a fault arise, please fi rst consult the section on
“What to do if trouble occurs?”.
You can often rectify minor problems yourself, thus
saving unnecessary service costs.
Please keep this manual in a safe place and pass it on to
new owners for their information and safety.
1.2 Intended use
The hob is to be used solely for preparing food in the
home or in other environments. Similar environments:
• Use in shops, offi ces and other similar working
environments
• Use in agricultural enterprises
• Use by customers in hotels, motels and other typical
living environments
• Use in breakfast buff ets
• It may not be used for any other purpose and may
only be used under supervision.
1 General ...................................................................... 2
1.1 For your information... .......................................... 2
1.2 Intended use ......................................................... 2
2 Safety Instructions and Warnings .......................... 3
2.1 For connection and operation ............................... 3
2.2 General information about the hob ....................... 3
2.3 For persons .......................................................... 4
2.4 Explanation for symbols and indications .............. 5
3 Appliance description .............................................. 6
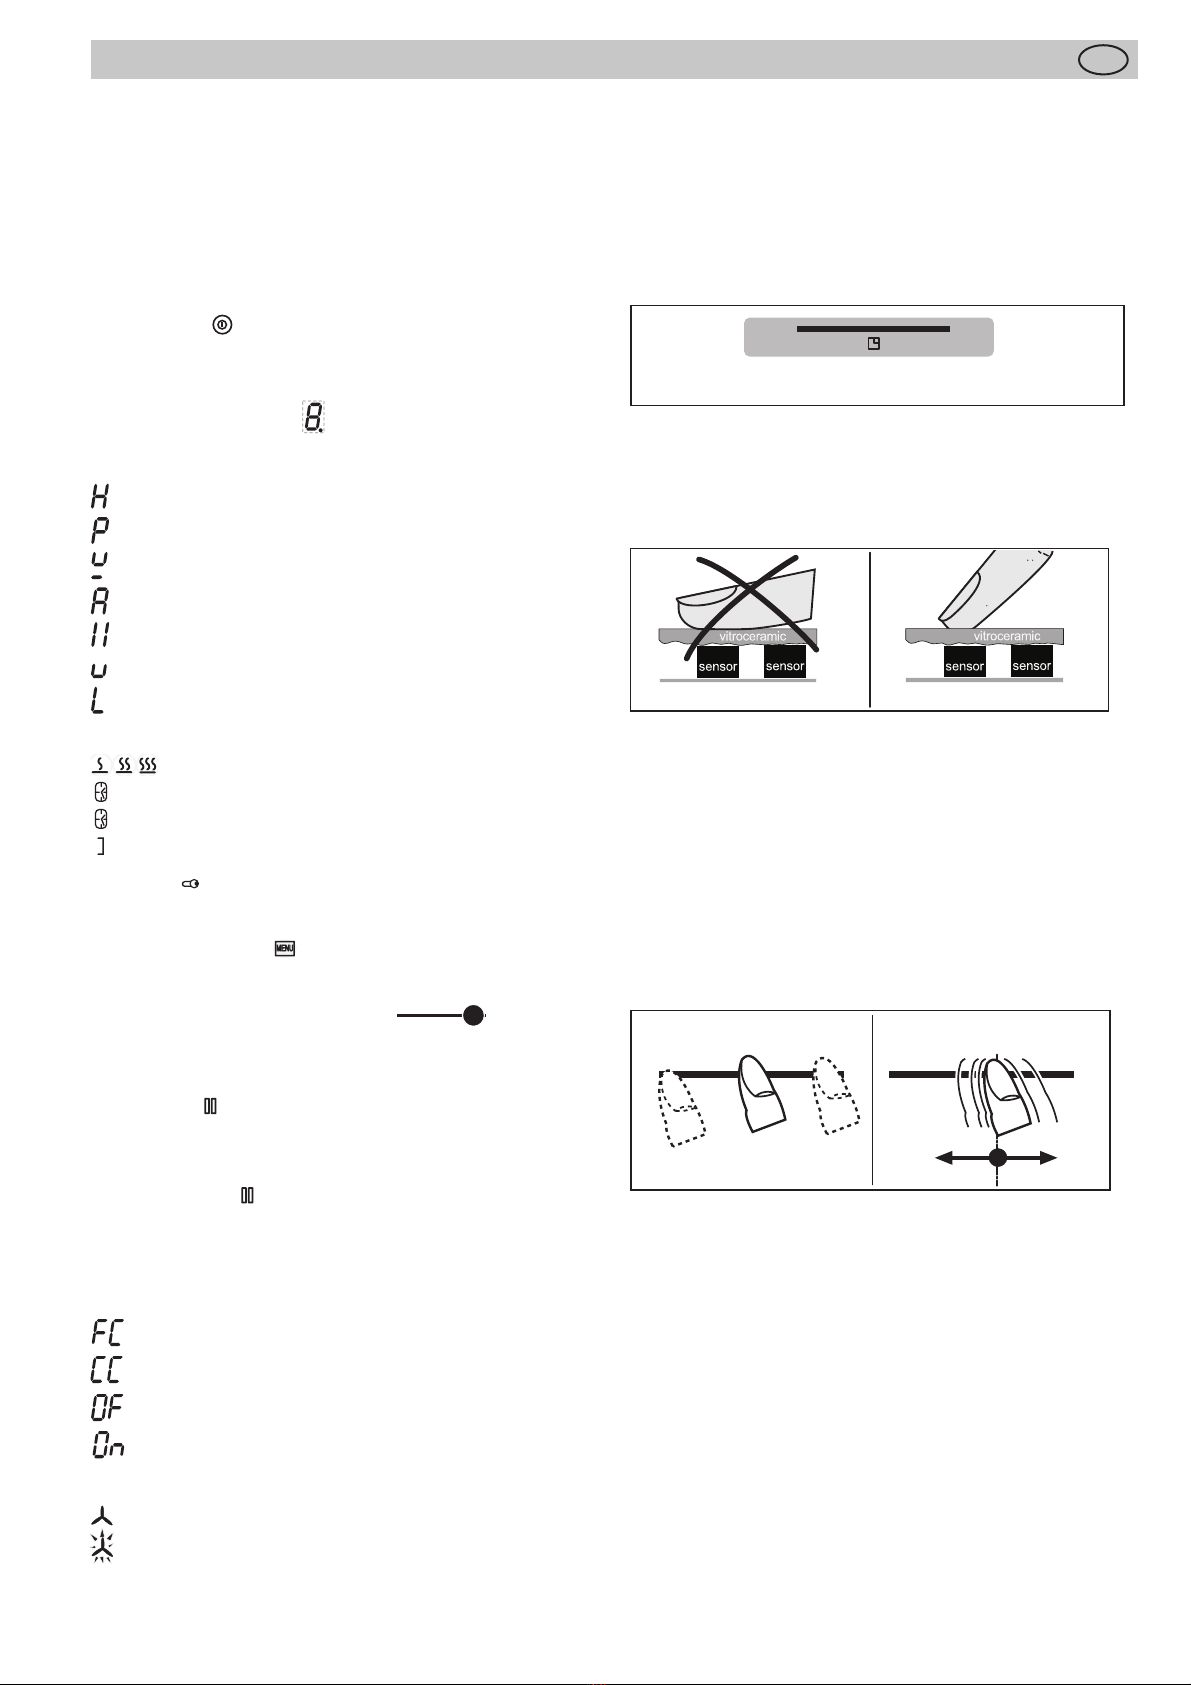
3.1 Operating the hob with the sensor keys ............... 7
3.2 Worth knowing about the slider (sensorfi eld) ....... 7
4 Operation................................................................... 8
4.1 The induction hob ................................................. 8
4.2 Pan recognition ................................................... 8
4.3 Operation time limit .............................................. 8
4.4 Other functions ..................................................... 8
4.5 Protection against overheating (induction) ........... 8
4.6 Cookware for induction hobs ................................ 9
4.7 How to cut power consumption ............................ 9
4.8 Power levels ......................................................... 9
4.9 Residual heat display .......................................... 9
4.10 Operating the keys ........................................... 10
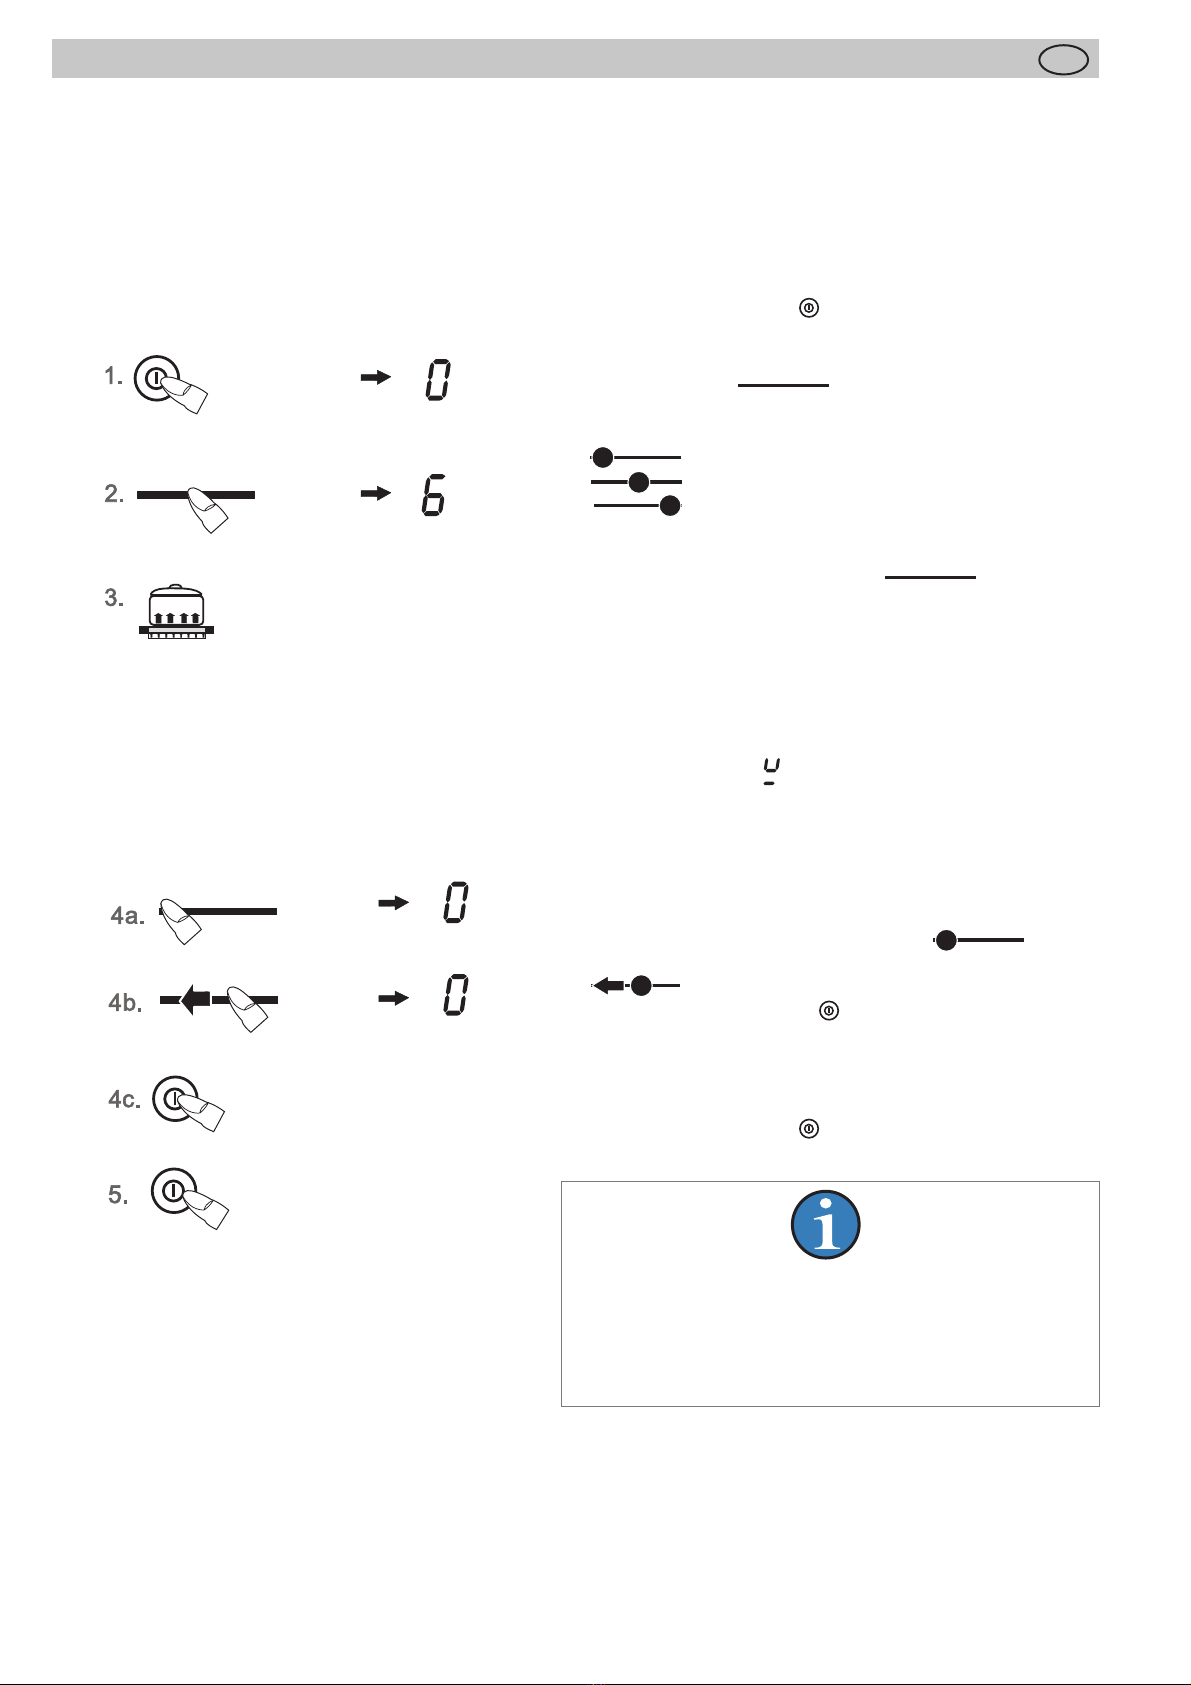
4.11 Switching on the induction hob
and cooking zone ............................................. 10
4.12 Switching off a cooking zone ............................ 10
4.13 Switching off the induction hob ......................... 10
4.14 PAUSE function .................................................11
4.15 Recall function ...................................................11
4.16 Childproof lock .................................................. 12
4.17 Bridging function ............................................... 12
4.18 Automatic switch-off (timer) .............................. 13
4.19 Minute minder (egg timer) ................................13
4.20 Automatic boost function .................................. 14
4.21 Keep-warm function ........................................ 14
4.22 Locking ............................................................. 15
4.23 Power boost ..................................................... 15
4.24 Power management .........................................15
4.25 Use extraction system ...................................... 16
4.25.1 Switching the fan on and off .......................... 16
4.25.2 Adjustable after-run of the extraction system 16
4.25.3 Notes on runtime .......................................... 17
4.25.4 Indication: Clean the grease fi lters .................... 17
4.25.5 Indication: Replace the charcoal fi lter .............. 17
4.25.6 Turn off the carbon fi lter operating hours
counter during the operation of the air exhaust .. 17
5 Cleaning and care................................................... 18
5.1 Glass ceramic plate ............................................ 18
5.2 Extraction ........................................................... 19
6 What to do if trouble occurs? ................................ 20
7 Instructions for assembly ...................................... 21
7.1 Safety instructions for kitchen unit fi tters ............ 21
7.2 Ventilation ........................................................... 21
7.3 Installation .......................................................... 21
7.4 Variable installation possibilities:
Overlying installation .......................................... 22
7.5 External dimensions ........................................... 22
7.6 Installation of the extraction system ................... 26
7.7 Electrical connection .......................................... 27
7.8 Putting the appliance into operation ................... 27
8 Technical Data ........................................................ 27
9 Effi cient Measurement Data Sheet ........................ 28
10 ECO data information ........................................... 28
11
Decommissioning and disposal of the appliance 29
11.1 Switching the appliance off completely ............. 29
11.2 Disposing of the packaging............................... 29
11.3 Disposing of old appliances ..............................29