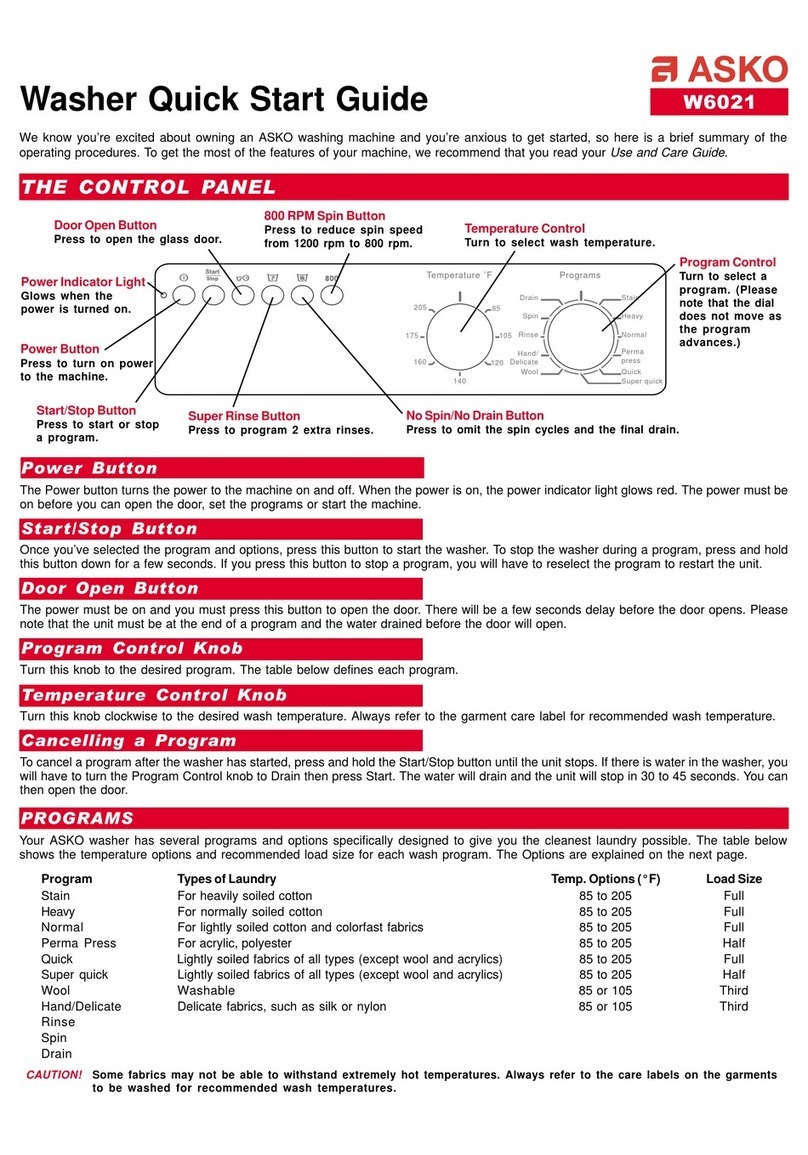
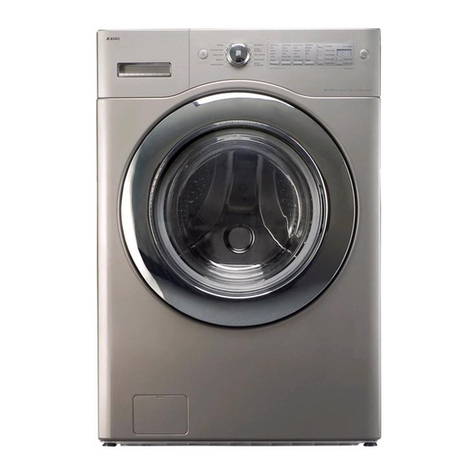
Asko W6022 User manual

Use & Care Guide
Washing Machine
Dear ASKO customer,
Thank you for choosing this quality product from Scandina-
via, made in Vara, Sweden.
We want you to feel assured that the inside of your new ma-
chine is just as good as the outside and that the ethics and
standards that went into the production of this machine are
just as high as the quality and performance that you will
receive from it. We hope that this product will give you many
years of pleasure.
To get the most out of your new machine, we recommend that
you read the operating instructions before using the machine.
ASKO W6022
Save these instructions for future reference

2
Custumer Care Center
1-800-898-1879
www.askousa.com
Contents
Contents 2
Before using your machine for the first time 3
Child safety 6
Parts of the washing machine 7
Detergent compartment 7
Front panel 8
Option buttons 8
Advice and tips before washing 9
Operating instructions 13
Care and maintenance instructions 16
Troubleshooting 18
Technical data 20
Transport protection 21
Installation instructions 22
Service and guarantee 25
Search words 27
Quick guide 28

3
Custumer Care Center
1-800-898-1879
www.askousa.com
Before using your machine for the first time
Transport protection
Has the transport protection been re-
moved? If not, see the “Transport Protec-
tion” chapter.
Packing material
Sort waste in accordance with local guide-
lines.
Washer door
The washer door cannot be opened until
the machine is connected to the electricity
supply.
To open the door manually, see the sec-
tion entitled “The door will not open” in the
“Troubleshooting” chapter.
It is not possible to start the machine with
the door open.
To open the door during an ongoing pro-
gram, see the section entitled “Ending a
Program”.
Checking water hardness
The required detergent dosage depends
on water hardness, among other things.
Phone your local authorities to check the
water hardness in your area.

4
Custumer Care Center
1-800-898-1879
www.askousa.com
Important safety instructions
To reduce the risk of fire, electric shock, or injury to persons when using your appliance, follow
basic precautions, including the following:
• Read all instructions before using the appliance.
• Do not run appliance while you are out of the home.
• Do not wash or dry articles that have been previously cleaned in, washed in, soaked in, or
spotted with gasoline, dry-cleaning solvents, cooking oils, or other flammable or explosive
substances because they give off vapors that could ignite or explode.
• Do not allow children to play on or in the appliance. Close supervision of children is neces-
sary when the appliance is used near children.
• Before the appliance is removed from service or discarded, remove the door to the washing
compartment.
• Do not reach into the appliance if the drum is moving.
• Do not install or store this appliance where it will be exposed to the weather.
• Do not tamper with controls.
• Do not repair or replace any part of the appliance or attempt any servicing unless specifically
recommended in the user-repair instructions or in published user-repair instructions that you
understand and have the skills to carry out.
• Do not add gasoline, dry-cleaning solvents, or other flammable or explosive substances to
the wash water. These substances give off vapors that could ignite or explode.
• Under certain conditions, hydrogen gas may be produced in a hot water system that has not
been used for 2 weeks or more. HYDROGEN GAS IS EXPLOSIVE. If the hot water system
has not been used for such a period, before using a washing machine or combination wash-
er-dryer, turn on all water faucets and let the water flow from each for several minutes. This
will release any accumulated hydrogen gas. As the gas is flammable, do not smoke or use an
open flame during this time.
Warning!
This appliance must be properly grounded.
This manual does not cover every possible condition and situation that may occur. Use com-
mon sense and caution when installing, operating, and maintaining any appliance.

5
Custumer Care Center
1-800-898-1879
www.askousa.com
Grounding instructions
A) Grounding instructions for a grounded, cord-connected appliance:
In the event of malfunction or breakdown, grounding will reduce the risk of electric shock by
providing a path of least resistance for electric current. This appliance is equipped with a cord
having an equipment-grounding conductor and a grounding plug. The plug must be plugged
into an appropriate outlet that is properly installed and grounded in accordance with all local
codes and ordinances.
Warning!
Improper connection of the equipment-grounding conductor can result in a risk of electric
shock. Check with a qualified electrician or service representative or personnel if you are in
doubt as to whether the appliance is properly grounded.
Do not modify the plug provided with the appliance. If it will not fit the outlet, have a proper
outlet installed by a qualified electrician.
B) Grounding instructions for a permanently connected appliance:
This appliance must be connected to a grounded metal, permanent wiring system, or an equip-
ment-grounding terminal or lead on the appliance.
Note: This manual does not cover every possible condition and situation that may occur. Use
common sense and caution when installing, operating, and maintaining any appliance.
Installation
See the “Installation instructions” section.
Overflow guard function
If the machine’s water level rises above the normal level, the overflow guard function begins to
pump water out and shuts off the water intake. If the water level has not dropped within 60 sec-
onds, the program is terminated.
Transport/ winter storage
If the machine is to be transported or stored in unheated premises where the temperature can
fall below freezing, do as follows:
• Empty the filter and drain pump (see the “Care and Cleaning” chapter).
• Shut off the water to the washing machine, loosen the supply hose to the intake valve and let
the water run out from the valve and hose.
Disposal
When the machine has reached the end of its service life and is to be disposed of, it should im-
mediately be made unusable by removing the door to the washing compartment. Contact your
local authorities for information about where your machine should be disposed of and recycled
in the proper way. The machine is manufactured and labeled for recycling.

6
Custumer Care Center
1-800-898-1879
www.askousa.com
Child safety
Watch out for children!
• Laundry detergents are corrosive, so al-
ways keep them out of reach of children.
• Should a child swallow detergent, give
plenty to drink immediately, i.e., one or
two glasses of milk or water. Do not try
to induce vomiting. Seek medical advice
immediately: The National Poison center
phone number is 1-800-222-1222.
• Always close the door and start the appli-
ance as soon as you put in the detergent.
• Always turn the power off to the machine
when it is not in use.
• Always keep small children away from
the machine when it is open. There may
be some detergent residue left inside the
machine.
• If laundry detergent gets in someone’s
eyes, rinse them with plenty of water for
at least 15 minutes.
Automatic door opening
The machine comes with an automatic
door opening function, which means that
the door opens automatically once the pro-
gram has finished.
If you wish to prevent small children or pets
from climbing into the machine, you can
deactivate the automatic door opening
function.
1. Turn off the machine using the main
power switch.
2. Press the Door Open button while simul-
taneously pressing the main power switch.
Release the buttons.
3. Press the Key button and the red fields
go out. Automatic door opening is now
deactivated.
4. Press the Start/Stop button to store the
setting.
If you want to reactivate the function, follow
the instructions above, but when you press
the Key button (point 3) the red fields light
up. Store the setting by pressing the Start/
Stop button.

7
Custumer Care Center
1-800-898-1879
www.askousa.com
Parts of the washing machine
1. Detergent compartment - pre-wash
2. Detergent compartment - main wash
3. Fabric softener compartment
4. Divider (used when using liquid detergent)
Detergent compartment
1. Detergent Compartment
2. Main power switch
3. Control panel
4. Serial number tag and rating plate
5. Coin trap door
6. Drain pump (behind coin trap door)
7. Washer door
8. Outer door (not all models)
5
4
23
1
6
7
8
1
23
4
The detergent drawer on ASKO washers
automatically dispenses the detergent and
fabric softener at the appropriate times.
Simply pour the measured amounts of
detergent and softener into the proper
compartments (as illustrated) and close
the drawer.
Control Button Definitions
Inside the detergent drawer is a plate that
illustrates the buttons on the control panel
and defines each button. Refer to the “Op-
erating Instructions” in this guide for your
specific model for more details regarding
the control buttons.
Note
To avoid oversudsing, do not put de-
tergent in the prewash compartment
unless you are using one of the Heavy
wash programs which has a prewash
cycle.

8
Custumer Care Center
1-800-898-1879
www.askousa.com
Front panel
1. Main power switch
2-3. Option Buttons
4. Program buttons
5. Start/Stop button
6. Door open button
Color
Stain
Extra rinses
Perma press
Hand/WoolWhite
Power
W 6 0 2 2
Q U A T T R O
1 2 0 0 R P M
15
6
Option buttons
2. Stain option button
3. Extra Rinse option button
4
2
2
3
3
Stain
Extra rinses

9
Custumer Care Center
1-800-898-1879
www.askousa.com
Wool and silk
These fabrics are sometimes labeled as
machine washable and sometimes as hand
wash. The machine’s Wool/Hand wash
program is at least as gentle as washing by
hand.
Artificial fibers and synthetic
fibers
These materials require plenty of room to
avoid becoming wrinkled. Only fill the drum
half way when washing artificial or synthet-
ic fibers. Select the synthetics program.
Note!
Viscose and acetates are fragile when wet.
Reducing allergic reactions
The washing machine is equipped with a
Super Rinse option. Use this for the benefit
of people with sensitive skin, such as those
with allergies and small children.
Dyeing fabrics
If you want to dye fabrics in the machine,
select the White program with the Super
Rinse option On.
Note!
Add the dye directly to the washing drum
- not to the detergent compartment. After
dyeing, you should run the machine empty
using the same program. Use the normal
amount of detergent.
Note!
When using agents for bleaching or stain
removal, there is a risk of rust (corrosion)
and discoloration of the machine.
Environmental concerns also lead us to
discourage the use of strong chemicals.
Advice and tips before washing
Advice and tips before washing.
Sorting your laundry
Sort items according to:
• how soiled they are
• color
• material
Clothing
• Close zippers so that they don’t harm
fabrics.
• New colored items
may contain excess dye
and should therefore be
washed separately the first
few times.
• Turn delicate items in-
side out. This reduces the
risk of burling and fading.
• Empty pockets and wash
them inside out if possible!
Laundry labels
Look at the item’s laundry label. The table
below indicates suitable wash programs for
various materials and wash loads.
Colored cotton
Colored cotton items labeled for hot wash-
ing (60°C or 140°F) should be washed at
60°C the first time in order to remove any
excess dye. If you do not do so, there is a
risk that the color will run. Use detergent
without bleach in order to preserve the
color of the fabric.
Delicates
Unbleached linen
Unbleached linen fabrics should be washed
at 60°C (140°F), using detergent contain-
ing no bleach or optical whiteners. Heav-
ily-soiled linen can occasionally be washed
at higher temperatures, but not too often
since the heat can destroy the linen’s shine
and strength.
10
Custumer Care Center
1-800-898-1879
www.askousa.com
Laundry label symbols
Ironing instructions
Special drying instructions
Tumble dry heat setting
Tumble dry cycle
Dry clean symbol
Bleach instructions
Wash water temperature
Wash cycle

11
Custumer Care Center
1-800-898-1879
www.askousa.com
Detergents
Laundry detergents are available in low-
, normal- and high-sudsing formulas. A
detergent´s ability to clean is not relative
to the amount of suds it produces. Excess
suds in a front-loading washer actually
interfere with the cleaning because they
cushion the tumbling action. Also, high-
sudsing detergents are more difficult to
completely rinse out.
The use of anything other than a low-suds-
ing detergent can cause severe oversuds-
ing, which could cause suds to backup
through the detergent compartment and
run down the front of the washer onto the
floor. If oversudsing occurs, run the wash
through one or more rinse programs until
all items are thoroughly rinsed. Remove
the laundry then run the washer through
a Normal wash program to get rid of any
remaining detergent.
We recommend that you don’t use bleach
in your ASKO washer. The tumbling wash
action, temperature control options, ex-
tended wash times and proper amount of
detergent are sufficient to remove most
stains.
Liquid detergents
We don’t recommend
liquid detergents because
they tend to produce more
suds than powder deter-
gents when used in water
temperatures of 150° F or
higher. If you should try a
liquid detergent, start with
a very small amount, such as 1 to 2 table-
spoons. Also, liquid detergent can be used
for all programs without prewash, so add it
into the main wash compartment.
Should you prefer to use a liquid detergent,
we have provided a partition piece with the
detergent drawer specifically for use with
liquid detergents. Insert the partition in the
Recommended powder detergents
ASKO washers use 50% to 75% less
detergent than most other washers. This
is because of their low water consump-
tion and the fact that all the wash water is
repeatedly circulated through the laundry,
ensuring that all the detergent is fully uti-
lized. We recommend that you use powder
detergents made specifically for front-load-
ing washers. These are sometimes called
HE (High-Efficiency) detergents. Listed
below are some low-sudsing powder deter-
gents that have been successfully tested in
ASKO washers:
We recommend that you do not use any
powder detergent that doesn’t wash com-
pletely out of the detergent drawer.
Amount of detergent to use
The amount of detergent needed varies
among the different brands, but for most
detergents, you need only one or two
tablespoons. Using too much detergent
can result in detergent residue being left
in your clothes, which can cause them to
appear gray or dingy. You should start with
a small amount of detergent and increase
it only if the cleaning results are unsatisfac-
tory.
Additionally, you should never put deter-
gent in the prewash compartment unless
you are using a wash program that has a
prewash cycle. This could cause excess
foaming, which could damage the machine.
The amount of detergent needed can also
depend on the hardness of the water in
your area. See the “Detergent Amounts
Based on Water Hardness” section on the
next page for more details.
slot at the back of the main wash compart-
ment before you pour in the liquid deter-
gent.

12
Custumer Care Center
1-800-898-1879
www.askousa.com
Detergent Amounts Based on Water Hardness
The amount of detergent needed can
vary due to differences in water hardness.
To determine the water hardness in your
area, contact your local water utility or area
water softening company. The harder the
water, the more detergent you may need.
Refer to the chart below for the recom-
mended detergent amounts based on
water hardness. Remember, you should
adjust the amount of detergent you use
by small amounts until you find the correct
amount.
Note that 12 grains and higher is extremely
hard water and detergent alone may not
be enough. You may need to use a water
softener to maximize the performance of
your washer. Also, in areas with extremely
hard water (9+) you may need to wash at
lower temperatures to prevent hard water
deposits from forming in the tank and wash
system.
Different brands of detergent have differ-
ent amounts of phosphorous for softening
water. If you have hard water and use a
detergent with less than 8.7% phospho-
rous content, you may need to use more
detergent or use a detergent with a higher
phosphorous content.
Recommended Detergent Amounts Based on Water Hardness
Detergent amounts
Water hardness Pre-wash Main wash
Soft (0-3 grains per gal.) 1 teaspoon 1 to 1-1/2 tablespoons
Medium (4-8 grains per gal.) 1 teaspoon 1 to 2 tablespoons

13
Custumer Care Center
1-800-898-1879
www.askousa.com
Operating instructions
Sorting laundry
See the Advice and Tips section be-
fore washing.
Note!
Empty pockets. Coins, nails and the like
can cause damage to the machine and
fabrics.
Turn on the main power switch
Open the washer door and
load the laundry
If the door is closed, press the Key
button (door open). The red field lights up
and the door opens after a few seconds.
Load the laundry. The laundry program
chart shows how much laundry can be
washed with each program.
Add detergent and fabric
softener, as required
The detergent packaging will have
recommendations for how much detergent
you should use. If you only have a small
amount of laundry in the machine, you can
reduce the amount of detergent used.
The accompanying divider must only be
used for liquid detergent.
Powder detergent
Pour the powder into the compartment for
the main wash, and pre-wash as well if
desired.
Liquid detergent
In the accompanying Use and Care pack-
age there is a divider for liquid detergent.
Place this in the slit at
the back of the deter-
gent compartment as
shown in the illustration.
Pour the detergent di-
rectly into the compart-
ment for the main wash.
Wash ball or net
If you use a wash ball or net, place it di-
rectly in the drum and select a program
without pre-wash.
Note!
Detergent overdosing does not give bet-
ter washing results, but merely causes a
greater impact on the environment.
Try to use less detergent, and increase
only if you are not satisfied with the results.
Fabric softener
Pour the fabric softener into the compart-
ment with the symbol. Use the dosage
given in the recommendations on the fabric
softener package.
Note!
Do not fill above the compartment’s maxi-
mum fill level. Otherwise fabric softener will
be dispensed too early, which impairs the
washing effect.
Fabric softener
Pre-wash
Main wash
1
2
3
4
Divider
WARNING!
To reduce the risk of electric shock or in-
jury to persons, read the ”Important Safety
Instructions” section on page 4 before
operating this appliance.

14
Custumer Care Center
1-800-898-1879
www.askousa.com
Program Temp. °F
Rinses
(number)
Short
spin
(number)
End-
spin cycle
Max
rpm
Max
load
Water
consumption
(approx. liter)
Energy
consumption
(approx. kWh)
Program
time
(approx.
min)
White 140 5 2 Long 1200 1/1 14 gal (54 l) 1.00 90
Color 105 5 2 Long 1200 1/1 14 gal (54 l) 0.50 70
Perma press 105 3 0 Short 800 1/2 8 gal (30 l) 0.30 65
Hand/Wool 85 3 0 Short 800 1/2 14 gal (54 l) 0.30 40
5
Select program
You can select a program by turning the program selector. A red field lights up beside
the selected program, and the estimated program time is shown in the display window.
Start by pressing the Start/Stop button, or go on to Options and Settings.
Guidelines as to what specific programs can be used for.
White 60°C (140°F), 1200 rpm Spin cycle
Used for normally soiled sheets, pillowcases, and sheets.
Color 40°C (105°F), 1200 rpm spin
Lightly-soiled laundry can be washed at 40°C (105°F). Most
detergents today clean even at 40°C (105°F).
Perma press 40°C (105°F), 800 rpm spin
This program is used for shirts and blouses of synthetic and blended materials.
Hand/Wool 30°C (85°F), 800 rpm spin
This program is used for Wool clothing marked as handwash only. The program has a short
spin.
Color Perma press
Hand/WoolWhite
Program table

15
Custumer Care Center
1-800-898-1879
www.askousa.com
If you want to stop or change a
program
You can also stop a program by pressing
the Start/Stop button for three seconds. To
restart the machine, select a new program,
add any new detergent needed and press
the Start/Stop button .
Once the program has finished
The door opens automatically once the
program has finished. If you want to
deactivate “automatic door opening”,
see the “Child safety” chapter.
• Remove the laundry
• Turn off the main power switch.
If you have small children or pets at home,
close the washer door once you have re-
moved the laundry.
Select options
and settings
Stain
The Stain option raises the temperature
and lengthens the time of the main wash
cycle. When the red field by the button
lights up, the higer temperature is acti-
vated.
White: 60°C (140°F)/ 77°C (170°F) + ap-
prox. 40 min.
Color: 40°C (105°F) 49°C (120°F) + ap-
prox. 40 min.
Perma press: 40°C (105°F) 49°C (120°F) +
approx. 15 min.
Extra rinses
Selecting Super Rinse gives you 2 extra
rinses in all programs except Wool/Hand
wash and the rinse program.
A lighted red field indicates that the option
has been activated.
The machine remembers which settings
and options you choose for each program
and uses these (with the exception of
Delayed start) the next time you select the
program in question. Naturally, you can
change the selection if you wish.
Close the door and press the
Start/Stop button
To add or remove laundry after the
program starts
If you want to add or remove items after
the program has started, you can stop the
program by pressing and holding the Key
button (door open) for three seconds. The
red field flashes. When restarting, add any
extra detergent needed and close the door.
The machine starts automatically from the
point where the program was interrupted.
8
7
6
Stain
Extra rinses

16
Custumer Care Center
1-800-898-1879
www.askousa.com
Checking the filter and drain
pump
The washing machine has a filter, where
coins, hairpins and the like can get caught.
To clean the filter and drain pump:
1. Make sure the machine is empty of
water and that it is switched off at the main
power switch.
2. Open the hatch for the drain pump. Use
the divider for the detergent compartment
as shown in the illustration.
3. Drain out the water, into a bowl, for ex-
ample, by unhooking the drain hose from
the pin inside the hatch.
4. Open the pump by unscrewing the cover
counterclockwise. Remove the cover with
the filter.
5. Remove any objects or debris from the
pump housing. Check to see that the pump
impellers at the back will rotate.
6. Screw on the cover and filter, replace
the drain hose on the coin trap hatch pin
and close the hatch.
Care and maintenance instructions
Cleaning the detergent
compartment
Pull the detergent compartment out as far
as it will go.
Then pull it up and out as shown in the
illustration.
Rinse the compartment and brush it clean.
Replace the compartment.
Note!
Do not wash the detergent compartment in
the dishwasher!
Cleaning the outside of the
machine
Clean the outside of the machine and the
panel with a mild cleaner. Do not use any
solvents, as these can damage the machine.
Note!
Do not hose down or spray the machine
with water.

17
Custumer Care Center
1-800-898-1879
www.askousa.com
2
1
Rinse holes under the paddle
If you think that objects such as nails,
paper clips, needles or the like may have
fallen into the wash drum, you should
check under the paddle. Such objects can
rust and cause spots on clothing. Nails and
other sharp objects can cause holes in
fabrics.
Do as follows
1. Use a screwdriver or similar tool.
2. Insert the screwdriver into the center
hole on the paddle and twist the screw-
driver handle gently to the left.
3. With your other hand, grasp the paddle
and pull it towards you as shown in the il-
lustration.
4. Lift the paddle.
5. Remove any objects.
6. Place the paddle in the mounting hole
with the F-mark towards you. Ensure that
all the paddle fasteners are in their holes
in the drum. Push it away from you until it
catches.
If you have hard water
If you live in an area with hard water (lime
heavy), the washer drum may develop a
grayish-white coating. To get rid of this,
empty 20 grams (3/4 ounce) of citric acid
into the washer drum and run a white pro-
gram. You can find citric acid in stainless
steel dishwasher cleaning products in the
dishwasher detergent aisle in your local
supermarket.

18
Custumer Care Center
1-800-898-1879
www.askousa.com
Troubleshooting
The washer door will not open
1. Check that the main power switch is on.
2. Is there power? Check your home’s
fuses (circuit breakers). The washer door
cannot be opened with the Key button if
power is off.
3. If nothing else works, the washer door
can be opened as follows:
• First check that there is no water left in
the machine. If there is any water left and
you are unable to run the Drain program,
empty the machine by detaching the drain
hose. This is described under the heading
“Checking the Filter and Drain pump”, in
chapter 11, “Care and Cleaning”.
• Ensure that main power switch is off.
• Open the hatch to the drain pump on the
bottom left as shown in the illustration. Use
the divider for the detergent compartment
as shown in the illustration.
• Remove the screws holding the red plas-
tic handle in place.
• Pull the handle and the door opens.
• Insert the handle back into its slot and
screw it tight. Close the hatch to the drain
pump.
If the washer door still will not open in the
normal way, contact the Customer Care
Center at the number listed at the bottom
of this page.
The machine will not start
1. Is the washer door properly closed?
Push it firmly.
2. Is there power? Check your home’s
fuses.
Error messages
If an error has occurred during operation
the red fields around the buttons will blink
in various ways. In order
to exit error message
status after implementing
the measures below, turn
off the machine.
The error messages that
may be shown are:
The door is not closed
If L1 blinks you tried to start a program
with the washer door open. Close the door
and the program will start.
Drainage error.
If L3 blinks, there is something wrong with
the drain pump, check:
- that no objects are stuck in the drain hose
outlet.
- that the drain pump is not blocked by
foreign objects. Clean the pump (see the
“Care and cleaning” chapter).
- that there are no kinks in the drain hose.
After implementing corrective action, run
the Drain program or press the Key button
(door open) to empty the machine. If this
does not help, contact the Customer Care
Center at the number listed at the bottom
of this page.
L1
L2
L3L4
L5
L6

19
Custumer Care Center
1-800-898-1879
www.askousa.com
Water intake error
If L4 is flashing, there is a fault with water
supply. Check:
- that the tap on the water pipe is open.
- that the filter in the machine’s water in-
take is not blocked.
1. Shut off the water tap.
2. Unscrew the hose
3. Clean the filter in the intake valve on the
machine.
4. Screw the hose back on.
5. Turn on the water tap.
6. Run the program again to check if the
error has been fixed.
7. If the error remains, contact the Custom-
er Care Center at the number listed at the
bottom of this page.
Door opening error.
If L6 is flashing, contact Customer Care
Center at the number listed at the bottom
of this page.
Overflow.
If all the red fields around the Start/Stop and
Key Button (door opening) are blinking,
there is too much water in the machine.
1. Shut off the water tap.
2. Contact the Customer Care Center at the
number listed at the bottom of this page.

20
Custumer Care Center
1-800-898-1879
www.askousa.com
Technical data
Technical data
Height: 33.5" (850 mm)
Width: 23,4" (595 mm)
Depth: 23" (585 mm)
Weight: 161 (172) lb / 73 (78) kg (with outer door)
Cylinder volume: 13.2 gal (50 l)
Max. washing capacity: 13 lb (6.0 kg)
Spin speed: 800/1200 rpm
Rated power: See serial number tag and rating plate.
Element power: See serial number tag and rating plate.
Water pressure: 0.1 - 1 MPa
1 - 10 kp/cm2
10 - 100 N/cm2
Wash drum and liquid compartment material: Stainless steel
Outer casing material: Powder-coated and ParaStyle:Technical
information: hot-galvanized sheet steel or
stainless steel.
Setup: Stationary on four adjustable, rubber-clad
feet
Water connection: 5’ (1.5 m) PEX tubing
Drain: 5’ 7" (1.7 m) polypropylene tubing
Other manuals for W6022
3
Table of contents
Other Asko Washer manuals

Asko
Asko 10505 - User manual

Asko
Asko WM55A User manual

Asko
Asko WMC67 P Series User manual

Asko
Asko ASWADREW2083 User manual

Asko
Asko W6022 Assembly instructions

Asko
Asko W6222 User manual

Asko
Asko W6884 User manual

Asko
Asko WT6332 User manual

Asko
Asko WL6532 XXL Instruction Manual

Asko
Asko WM75.B User manual