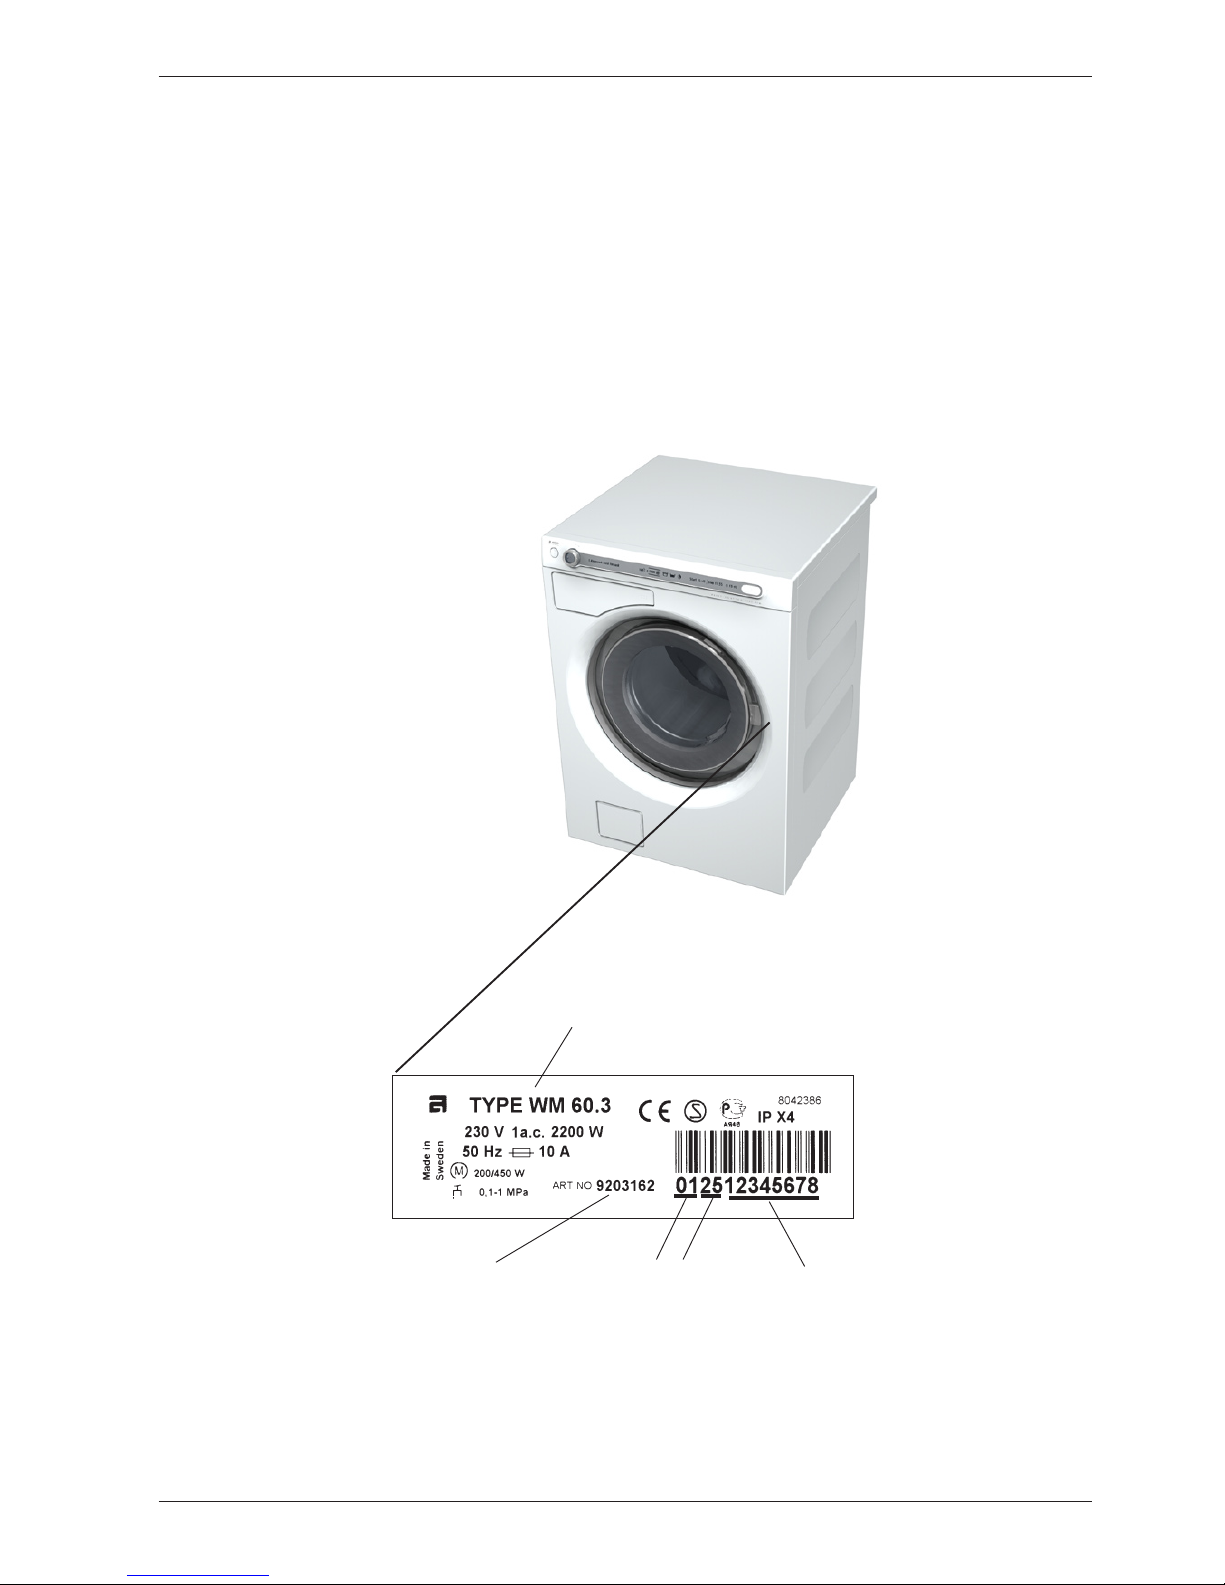
Asko WM60 User manual

Type: WM60
Service manual
Contents
Introduction...................................................................................................................................................3
Product overview ..........................................................................................................................................4
Programme...................................................................................................................................................5
Programme selection, options and making settings......................................................................................6
Programme selection..........................................................................................................................6
Selecting Options ...............................................................................................................................8
Making settings ................................................................................................................................10
Service menu..............................................................................................................................................13
Production test............................................................................................................................................17
In-store demonstration programme.............................................................................................................17
Fault indications..........................................................................................................................................18
Components and measurement values...................................................................................................... 20
Measurement values thermistor ................................................................................................................ 20
Technical data ............................................................................................................................................21
Wiring diagram............................................................................................................................................22
Rehanging the door ....................................................................................................................................23
Replacing panels and detergent compartment ...........................................................................................26
Replacing front plate, door, covering plate and the hinges .........................................................................28
How to use the emergency opener for door lock.........................................................................................29
Appendix: Timer diagram
This service manual describes washing machine type WM60 and is a supplement to the general service
manual for the 600 series.

Service manual WM60
2
Updates
Revi-
sion
Date Description Signa-
ture
03 2007-11-27 Updated the ”Show room program” /In-store demonstration programwith a
description for machines manufactured week 737 and later.
BPA

Service manual WM60
3
Introduction
You are holding the service manual for WM60.3 type washing machines.
It should be easy to service a washing machine. It is important that you, as a service technician, are given
the conditions to be able to carry out work in an efficient and satisfactory way. Our hope is that this service
manual is a useful tool for your daily work.
The type designation can be found on the machine plate located by the door catch on the inside of the front
plate (see image below).
Type designation
Product number Serial numberYear Week

Service manual WM60
4
Product overview
WM60.3
Programmes: 14, where one consists of the menu for settings (Programme 14)
Options: 6
Settings: 8
WM60.3 (Integrated)
J1
S1 S3LCD LCD LCD
S2
S1
S4
S5
S3
S2
Programmes: 14, where one consists of the menu for settings (Programme 14)
Options: 6
Settings: 8

Service manual WM60
5
Programme
WM60.3, with 5 rinses
Programme Pre-
wash
Main
wash
Tempe-
rature
°C
Tempe-
rature
°F
Max
speed
(rpm)
Max
load
Rinses
(number)
Water
consumption
(approx.
litres)
Energy
consumption
(approx.
kWh)
Programme
time
(approx.
min)
Programme 1 No 60 140 1/1
Programme 2 60 140 1/1 30-180
Programme 3 Yes Long 95 203 1600 1/1 5 80 2,1 160
Long 60 140 1600 1/1 5 62 1,0 150
Programme 4 No Long 60 140 1800 1/1 5 < 69 1,02 145
Programme 5 No Short 60 140 1600 1/2 2 56 0,9 100
Programme 6 No Short 40 104 1600 1/2 5 56 0,50 80
Programme 7 No Short 40 104 1600 1/2 3 35 0,4 50
Programme 8 No Short 40 104 800 1/2 3 40 0,4 80
Programme 9 No Short 30 86 800 1/3 3 80 0,5 45
Programme
10
No Short 30 86 800 1/3 3 54 0,3 40
Programme
11
No 1600 1/1 1 15 0,1 20
Programme
12
1600 1/1 0,1 15
Programme
13
Programme
14
Settings
WM60.3, with 3 rinses
Programme Pre-
wash
Main
wash
Tempe-
rature
°C
Tempe-
rature
°F
Max
speed
(rpm)
Max
load
Rinses
(number)
Water
consumption
(approx.
litres)
Energy
consumption
(approx.
kWh)
Programme
time
(approx.
min)
Programme 1 60 140
Programme 2 60 140
Programme 3 Yes Long 95 203 1600 1/1 5 80 2,1 160
Long 60 140 1600 5 62 1,0 150
Programme 4 No Long 60 140 1800 1/1 3 < 54 1,02 135
Programme 5 No Short 60 140 1800 1/1 3 35 0,8 80
Programme 6 No Short 40 104 1600 1/1 3 37 0,4 70
Programme 7 No Short 40 104 1600 1/2 3 35 0,4 50
Programme 8 No Short 40 104 800 1/2 4 40 0,4 80
Programme 9 No Short 30 86 800 1/3 3 80 0,5 45
Programme
10
No Short 30 86 800 1/3 3 80 0,5 45
Programme
11
1600 1/1 1 15 0,1 20
Programme
12
1600 1/1 0,1 15
Programme
13
1
Programme
14
Settings
Programme is tested in accordance with SS-EN 60456/A13.

Service manual WM60
6
95°C
80°C
70°C
50°C
40°C
30°C
Cold
2000
*
1900
*
1700
1600
1400
1200
1000
800
400
1.
2.
3.
4.
6.
8.
7.
9.
10.
11.
12.
13.
14.
5. 10.20 09.20
60°C
1800
9
5°
C
8
0°
C
7
0°C
5
0°
C
4
0°
C
3
0°
C
C
o
l
d
2
00
0
*
1900
*
1700
1
600
1
40
0
1200
1000
8
0
0
4
00
5
.
6
0°
C
1800
Programme selector button for integrated
machines
1
2
21. Press the programme selector button to navigate
between the different menus (e.g. to go from
temperature menu to spin menu).
2. Press the small arrows to make a selection in
the menus (e.g. select 1400 rpm). Confirm the
selection and go to the next menu by pressing the
programme selector button.
3. Press Start/Stop to start. Hold Start/Stop in for 3
seconds to exit the current programme.
Super rinse
Normal rinse
Economy rinse
Delayed Start Clock
Finish time
High water level
Normal water level Start/Stop
Door opening
Programme selector
1
221. Press the programme selector button to navigate
between the different menus (e.g. to go from
temperature menu to spin menu).
2. Turn the programme selector button to make a
selection in the menus (e.g. select 1400 rpm).
Confirm the selection and go to the next menu by
pressing the programme selector button.
3. Press Start/Stop to start. Hold Start/Stop in for 3
seconds to exit the current programme.
Programme selection, options and making settings
Press/
turn LCD 1 Comments/instructions
Turn on the main power supply
1
Auto, Auto, Auto, Automatprogram, Autovask,
Autovask, Automaattipesu, Automatique,
Automatikprogramm, Automatico, Auto,
Aвтoмaтичeскaя, Automatisch programma
This program automatically adjusts the length of the main wash
and the number of rinses depending on the amount of washing
and how heavily soiled it is.
2
Time program, Time Choice, Time program,
Tidsprogram, Tidsprogram, Tidsprogram,
Aikaohjelma, Programme minute,
Zeitprogramm, Progr. del tempo , Prog. de
secado, Bрeмя oкoнчaния, Tijdprogramma
Choose a temperature up to 60°C/ 140 °F, set the spin speed
to a maximum of 1600 rpm and set the time when you want the
programme to finish. The machine will automatically choose
a programme of the right length with the settings you have
selected.
3
Heavy, Sani, Heavy, Grov- med förtvätt,
Kogevask+forvask, Intensiv m/forvask, Esipesu
+ Tehopesu, Super intensif, Vor-/Kochwäsche,
Intensivo, Sani, Интeнсивнaя, Intensieve was
Use this programme for heavily-soiled washing. You only need
to use the maximum temperature, 60°C/ 140 °F, if the washing is
very heavily soiled.
4
Normal, Stain, Normal, Vittvätt, Hvidvask,
Intensiv, Tehopesu, Super intensif blanc,
Intensiv, Intensivo bianchi, Manchas-Color,
Hoрмaльнaя, Normale was
This programme is equivalent to the Heavy programme, but
without the pre-wash. It is used for heavily-soiled whites where
95°C/ 203 °F is a suitable temperature.
Programme selection
Programme 1
Programme 2
Programme 3
Programme 4
Programme 6
Programme 7
Programme 8
Programme 9
Programme 10
Programme 11
Programme 12
Programme 13
Programme 14
Programme 5
The programmes are displayed in the order they occur in LCD1. All display text language versions are displayed.

Service manual WM60
7
5
White, White, White, Snabb vittvätt, Hurtig
hvidvask, Hvit, Normaalipesu, Intensif,
Kochwäsche, Capi resistenti, Pesado, Бeлoe,
Witte was
Normally-soiled sheets, pillowcases and towels will come clean
at 60 °C/140 °F.
6
Colour, Color, Colour, Kulörtvätt, Kulørt
vask, Kulør, Päivittäispesu, Blanc/couleurs,
Buntwäsche, Bianchi/colorati, Normal Plus,
Цвeтнoe, Bonte was
Clothes worn next to the skin should be washed at 60°C/ 140
°F. Lightly-soiled laundry can be washed at 40°C. Most modern
detergents are effective even at 40°C.
7
Quick, Quick, Quick, Kvicktvätt, Kvikvask,
Hurtig, Pikapesu, Rapide, Schnell, Rapido,
Rápido, Быстрaя стиркa, Kort programma
Lightly soiled laundry that only needs freshening up can be
washed for a short time at 40°C.
8
Synthetics, PermaPress, Synthetics,
Syntettvätt, Syntetisk vask, Syntet, Siliävät/
Synteettiset, Synthétique, Pflegeleicht/
Fein, Sintetici, Perma Press, Синтeтикa,
Synthetische was
This programme is suitable for shirts and blouses made of
synthetic and blended material. Wash white items at 60°C/ 140
°F and coloured items at 40°C/ 104 °F.
9
Wool, Wool, Wool, Ylletvätt, Uldvask, Ull,
Villapesu, Laine, Wolle, Lana, Lavado manual/
Lana, Шeрсть, Wolwas
This programme is used for garments labelled for Wool wash
only. The maximum temperature is 40°C/ 104 °F and the
programme has a short spin.
10
Hand, Delicate / Hand, Hand, Handtvätt,
Håndvask, Hånd, Käsinpesu, Main, Hand,
A mano/delicati, Delicado, Pучнaя стиркa,
Handwas
This programme is used for garments labelled hand wash only.
The maximum temperature is 30°C/ 86 °F and the programme
has a short spin.
11
Rinse, Rinse, Rinse, Sköljprogram,
Skylleprogram, Skylling, Huuhteluohjelma,
Rinçage, Spülen, Risciacquo, Enjuague,
Пoлoскaниe, Spoelprogramma
This program performs one rinse cycle + spin. Good for cleaning
cloths and mops.
12
Spin, Spin, Spin, Centrifugering, Centrifugering,
Sentrifugering, Linkous, Essorage,
Schleudern, Centrifuga, Centrifugado, Oтжим,
Centrifugeren
To be used when you only want to spin the load.
13
Drain, Drain, Drain, Utpumpning, Udpumpning,
Utpumping, Tyhjennys, vidange, Abpumpen,
Scarico, Drenaje, Слив, Pompen
To be used when you only want to drain the water from the
machine.
14
Settings, Settings, Settings, Inställningar,
Indstillinger, Innstillinger, Asetukset, Réglage,
Einstellungen, Impostazioni, Ajustes,
Haстрoйки, Instellingen
See chapter “Settings”.
Exits the programme menu and advances to options or the menu
for Settings.

Service manual WM60
8
Press/
turn LCD 2 Comments/instructions
95°C, 205 °F Temperature
Selection of temperatures between Cold and 95°C. Cold is the same
as the incoming water temperature. For programme 8 and 9, the
maximum temperature is 40°C, for programme 10, the maximum
temperature is 60°C.
80°C, 175 °F
70°C, 160 °F
60°C, 140 °F
50°C, 120 °F
40°C, 105 °F
30°C, 85 °F
Cold, Cold, Cold, Kalt, Kold, Kald, Kylmä, Froid,
Kallt, Freddo, Fría, Дoп.пoлoскaниe, Koud
2000 Spin
Option of choosing spin speed between 400 and 2000 rpm. Spinning
at 400 – 800 rpm signifies a short spin.
Programme 8, 9 and 10 cannot be selected at speeds greater than
800 rpm. Programme 2 has a maximum speed of 1600 rpm.
Maximum rpm is either 1800 or 2000 rpm depending on model.
1900
1800
1700
1600
1400
1200
1000
8000
4000
“No spin” means that the programme does not include a spin cycle
and ends by draining.
“No draining” means that the programme does not include a spin
cycle and ends with the water from the final rinse still in the machine.
Selecting Options
The options are displayed in the order they occur in LCD2. All display text language versions are displayed.

Service manual WM60
9
Economy Rinse, Economy Rinse,
Economy Rinse, Lätt sköljning,
Økonomi skyl, Økonomi skylling,
Ekohuuhtelut, Rinçage économique,
Eco Spülen, Risciacquo economico,
Enjuague económico, Hoрм.
пoлoскaниe, Eco spoelen
Rinse
The rinse programme can be selected in programme: 3, 4, 5, 6, 7, 8,
9 and 10
- Economy rinse (reduces the number of rinses, used for lightly soiled
laundry)
- Normal rinse (recommended number of rinses during normal soiled
laundry.)
- Super rinse (adds rinses, maximum 7)
Number of rinses varies depending on programme.
Normal Rinse, Normal Rinse, Normal
Rinse, Normal sköljning, Normalt skyl,
, Normaalihuuhtelut, Rinçage normal,
Normal Spülen, Risciacquo normale,
Enjuague normal, Hoрм.пoлoскaниe,
Normaal spoelen
Super Rinse, Super Rinse, Super
Rinse, Supersköljning, Superskyl,
Superskyll, Superhuuhtelut,
Super rinçage, Super Spülen,
Risciacquo super, Superenjuague,
Супeрпoлoскaниe, Super spoelen
Normal water level, Normal Water
Level, Normal water level, Normal
vattennivå, Normal vandstand, Normalt
vannivå, Normaali vedenpinta, Niveau
d’eau normal, Normaler Wasserstand,
Livello acqua normale, Nivel normal de
agua, Hoрм.урoвeнь вoды, Normaal
waterniveau
High water level
Can be selected in programmes: 3, 4, 5, 6, 7 and 8. Cannot be
selected during No spin and No draining.
With this option selected, extra water is taken in after approximately
15 minutes, the extra water is used in the main wash and rinses.
High water level, High Water Level,
High water level, Hög vattennivå, Høj
vandstand, Høyt vannivå, Korkea
vedenpinta, Niveau d’eau élevé, Hoher
Wasserstand, Livello acqua alto, Nivel
alto de agua, Bысoкий урoвeнь вoды,
Hoog waterniveau
Start, Start, Start, Start, Start, Start,
Start, Démarrer, Start, Avvio, Inicio,
Стaрт, Start
Delayed start (when setting: ”No Real time”)
The start of the selected programme can be delayed for up to 24
hours (in half an hour intervals). The delay and programme time is
shown in the display.
Start - Done, Start-End, Start-Done,
Start-Klar, Start-Færdig, Start-Ferdig,
Start-Valmis, Démarrer-Fin, Start-
Fertig, Avvio-Fine, Inicio-Fin, Стaрт-
Кoнeц, Start-Gereed
Delayed start (when setting: ”24 Hour Clock ” or ”12 Hour Clock”)
The start of the selected programme can be delayed for up to 24
hours (in half an hour intervals). Start and end times are shown in the
display.
Start, Start, Start, Start, Start, Start,
Start, Démarrer, Start, Avvio, Inicio,
Стaрт, Start
Time program (when setting: ”No Real time”)
Desired programme time can be set. Selections up to 3 hours in units
of 15 minutes can be made. The selected programme time is shown
in the display.
3:00
Start - Done, Start-End, Start-Done,
Start-Klar, Start-Færdig, Start-Ferdig,
Start-Valmis, Démarrer-Fin, Start-
Fertig, Avvio-Fine, Inicio-Fin, Стaрт-
Кoнeц, Start-Gereed
Time program (when setting: ”24 Hour Clock ” or ”12 Hour Clock””)
Desired programme time can be set. Selections up to 3 hours in units
of 15 minutes can be made. Start and end times are shown in the
display.

Service manual WM60
10
Press/
turn
LCD 2 Press/
turn
LCD3 Comments/instruc-
tions
Settings, Settings, Settings,
Inställningar, Indstillinger,
Innstillinger, Asetukset,
Réglage, Einstellungen,
Impostazioni, Ajustes,
Haстрoйки, Instellingen
In the programme menu: Scroll
to Programme 14 (Settings)
Programme 14 is shown in
LCD1.
You will now enter the Settings menu.
Presoak, Presoak, Presoak,
Förblötning , Iblødsætning,
Bløtlegging , Liotus,
Trempage, Einweichen,
Ammollo, Remojar,
Зaмaчивaниe, Inweken
On, On, On, På, Til, På, Päällä, On, An,
On, encendido, Bкл., Aan
The laundry will soak in cold
water for two hours before the
programme starts.
Off, Off, Off, Av, Fra, Av, Poissa, Off, Aus,
Off, apagado, Bыкл., Uit
Setting deactivated.
Saves the setting and returns to the programme menu, Programme 14.
Anti crease, Anti Wrinkle, Anti
crease, Skrynkelfritt, Anti-krøl,
Antikrøll , Rypistymisen esto,
Antifroissage, Knitterschutz,
Antisgualcit., Antiarrugas,
Прoтив сминaния, Anti-kreuk
On, On, On, På, Til, På, Päällä, On, An,
On, encendido, Bкл., Aan
The drum rotates 3 seconds
per minute for two hours after
the programme has ended.
Off, Off, Off, Av, Fra, Av, Poissa, Off, Aus,
Off, apagado, Bыкл., Uit
Setting deactivated.
Saves the setting and returns to the programme menu, Programme 14.
Clock, Clock, Clock, Klocka,
Ur, Klokke, Kello, Horloge,
Uhr, Orologio, Reloj, Чaсы,
Klok 24hr Realtime, 24 Hour Clock, 24hr
Realtime, 24 timmarsvisning, 24 timers
ur, 24t realtid, 24 h aika, Horloge 24 h,
24 Std. Echtzeit, 24h Tempo reale, Reloj
24 horas, Фoрмaт врeмeни 24-ч., 24 uur
weergave
Three O’clock is displayed as
”15.00”. Press S1 to access a
sub-menu where you can set
the correct current time. Press
S1 again to store and exit the
sub-menu.
12hr Realtime, 12 Hour Clock, 12hr
Realtime, 12 timmarsvisning, 12 timers
ur, 12t realtid, 12 h aika, Horloge 12 h,
12 Std. Echtzeit, 12h Tempo reale, Reloj
12 horas, Фoрмaт врeмeни 12-ч., 12 uur
weergave
Three O’clock is displayed as
”03.00”. Press S1 to access a
sub-menu where you can set
the correct current time. Press
S1 again to store and exit the
sub-menu.
No Real time, No Real Time, No Real
time, Ej realtid, Intet ur, Ingen realtid, Ei
aikaa, Pas d’horloge, Keine Echtzeit, No
tempo reale, Sin hora real, Время не
установлено, Geen tijdsweergave
No Real Time. Press S1 to
return to programme menu
Programme 14.
Saves the setting and returns to the programme menu, Programme 14.
Making settings
The setting options below are shown in the order they occur in LCD2 (Programme 14 under the programme menu is, however, shown
in LCD1). All display text language versions are displayed. If no choices is done within 2 minutes the display will be set in Stand-by
mode.

Service manual WM60
11
Audible volume, Buzzer
Volume, Audible volume,
Ljudsignal volym, Lydsignal,
Lydsignal, Hälytysääni,
Volume buzzer, Tonsignal,
Volume allarme, Volumen
timbre, Грoмкoсть сигнaлa,
Geluidssignaal
Off, Off, Off, Av, Fra, Av, Poissa, Off, Aus,
Off, apagado, Bыкл., Uit
No buzzer
Low, Low, Low, Låg, Lav, Lav, Matala,
Faible, Niedrig, Bassa, Bajo, Hизкaя,
Laag
Buzzer that indicates the end of
a programme or error.
Normal, Normal, Normal, Normal, Normal,
Normal, Normaali, Normal, Normal,
Normale, Normal, Hoрмaльнaя, Normaal
Buzzer that indicates the end of
a programme or error.
High, High, High, Hög, Høj, Høy, Korkea,
Elevé, Hoch, Alta, Alto, B??o?a?, Hoog
Buzzer that indicates the end of
a programme or error.
Saves the setting and returns to the programme menu, Programme 14.
Child-safe, Child-
safe, Barnsäker,
Børnesikker, Barnesikring,
Lapsilukko , Sécurité
enfant, Kindersicherung,
Avvio sicurezza, Int. de
seguridad, Блoкирoвкa oт
дeтeй, Kindveilige
On, On, On, På, Til, På, Päällä, On, An,
On, encendido, Bкл., Aan
If S1, S2, S3 or J1 are pressed
or turned, S2 S1 must be
pressed to temporarily
deactivate the child-safe start
(is deactivated for 3 minutes
after last press of S1, S2, S3).
Off, Off, Off, Av, Fra, Av, Poissa, Off, Aus,
Off, apagado, Bыкл., Uit
Setting deactivated.
Saves the setting and returns to the programme menu, Programme 14.
Automatic door opening,
Automatic Door Opening,
Automatic door opening,
Automatisk lucköppning,
Automatisk lugeåbning, Auto
døråpning, Automaattinen
luukun avaus, Ouverture
auto porte, Automatische
Lukenöffnung, Apertura
autom.sportello, Apertura auto
de puerta, Aвтo-oткрытиe
двepцы, Aut. deuropening
On, On, On, På, Til, På, Päällä, On, An,
On, encendido, Bкл., Aan
When then setting has been
activated, the door will open
automatically after the end of
the programme. Does not apply
if Nodrain is selected (as there
is still water in the machine).
Off, Off, Off, Av, Fra, Av, Poissa, Off, Aus,
Off, apagado, Bыкл., Uit
Setting deactivated.
Saves the setting and returns to the programme menu, Programme 14.

Service manual WM60
12
Language, Language,
Language, Språk, Sprog,
Språk, Kieli, Langue, Sprache,
Lingua, Idioma, Язык, Taal US English
English Default
svenska
dansk
norsk
suomi
Francais
Deutsch
Italiano
espanol
Русский
nederlands
Saves the setting and returns to the programme menu, Programme 14.
Temperature , F° or C°
Setting, Temperature ,
Temperatur, Temperatur
enhed, Temperaturenhet,
Lämpötilayksikkö,
Unités de température,
Temperatureinheit,
Unità temperatura,
Unidad de temperatura,
Шкaлa тeмпepaтур,
Temperatuurweergave
°C
Celsius
°F
Fahrenheit
Saves the setting and returns to the programme menu, Programme 14.
Return, Return, Return,
Tillbaka, Tilbage, Tilbake,
Takaisin, Retour, Zurück,
Uscire, Salir, Haзaд, Terug
Returns to the programme menu, Programme 14

Service manual WM60
13
Programme selector
1
22
3
1. Press the programme selector button to scroll between the various service menus.
2. Turn the programme selector button to make a selection between the menus (e.g. set a certain water inlet).
Confirm the selection and go to the next menu by pressing the programme selector button (1).
3. Press the Start/Stop button to confirm the settings and exit the service menu.
Service menu
This is how to enter the service menu
If the machine is on: First switch the power off and then on via the main power switch.
+
Press the programme selector (S1) at the same time as the Main power switch.
3x
Press the programme selector button 3 times within 5 seconds. You are now in the service menu (shown in
LCD 2. See instructions below for navigating the service menu.
Programme selector button for integrated machines
1
2
2
3
1. Press the programme selector button to scroll between the various options.
2. Press the small arrows to make a selection between the options (e.g. set a certain water inlet). Confirm the
selection and go to the next option by pressing the programme selector button (1).
3. Press the Start/Stop button to confirm the settings and exit the service menu.

Service manual WM60
14
Press/
turn LCD 2 Comments/instructions
DataSerialNo, Data Ser Num, DataSerialNo,
DataSerialNo, Serienummer, Serienummer,
Dataversio Nro, N° de série, Seriennummer,
Num. di serie, N° de serie, Сeрийный нoмeр,
Serienummer
Date for programming the software (Year_Week)
CU date code, CU Date Code, CU date code,
CU datum kod, CU dato kode, Styrekort prod
dato, CU pvm koodi, Code date CU, CU
Datumscode, Codice data CU, Código fecha
CU, Кoд дaты БУ, CU datacode
Control unit’s date of manufacture (Year_Week)
Software, Software, Software, Mjukvara,
Software, Software ver., Ohjelmisto, Logiciel,
Software, Software, Software, Beрсия пpoг.,
Software
Software version number.
No. of cycles, Number of Cycles, No. of cycles,
Antal cykler , Antal cyklusser, Antall bruk,
Syklien lkm, Nb. de cycles, Anzahl der Zyklen,
Numero cicli, N° de ciclos, Кoл-вo циклoв,
Aantal cycli
Number of cycles/programmes run
Press to exit the service menu.
”Error_Number of cycles” Last three errors and number of cycles is shown. Total reset deletes
the error indications from the system. Delete the error indications
by pressing the DOOR OPENING BUTTON and the MAIN POWER
SWITCH at the same time.
”Error_Number of cycles”
Press to exit the service menu.
Testing
Test valve 1, Testing Valve 1, Test valve 1,
Ventiltest 1, Tester ventil 1, Test av vannventil
1, Mg venttiilitesti 1, Essai vanne 1, Ventil
testen 1, Test valvola 1, Test válvula 1, Teст
клaпaнa 1, Test inlaatventiel 1
Inlet valve 1 is open. Pressure sensor value is shown in LCD 2.
Test valve 2, Testing Valve 2, Test valve 2,
Ventiltest 2, Tester ventil 2, Test av vannventil
2, Mg venttiilitesti 2, Essai vanne 2, Ventil
testen 2, Test valvola 2, Test válvula 2, Teст
клaпaнa 2, Test inlaatventiel 2
Inlet valve 2 is open. Pressure sensor value is shown in LCD 2.
Test valve SM, Testing Valve SM, Test valve
SM, Ventiltest SM, Tester ventil SM, Test
av vannventil SM, Mg venttiilitesti SM, Essai
vanne SM, Ventil testen SM, Test valvola SM,
Test válvula SM, Teст клaпaнa SM, Test
inlaatventiel SM
Inlet valve 1 and 2 is open. Pressure sensor value is shown in LCD 2.
Test heater, Testing Heater, Test heater,
Elementtest, Tester varmelegeme, Test av
element, Vastustesti, Essai résistance, Heizung
testen, Test elem. riscald., Test elemento calef,
Teст TЭHa, Test verw.element
Heater is on until max 60 °C. Thermistor value is shown in LCD 2.
The options below are displayed in the order they occur in LCD 2. All display text language versions are displayed.
Service menu

Service manual WM60
15
Test motor, Testing Motor, Test motor,
Motortest, Tester motor, Test av motor,
Moottoritesti, Essai moteur, Motor testen, Test
motore, Test motor, Teст мoтoрa, Test motor
The motor is running at normal action (49 rpm)
Test drain, Testing Drain, Test drain,
Tömningstest, Tester udpumpning, Test
av tømming, Tyhjennyspumpputesti, Essai
vidange, Abfluss testen, Test scarico, Test
drenaje, Teст нaсoсa, Test afvoerpomp
Drain pump is on. Pressure sensor value is shown in LCD 2.
Test spin, Testing Spin, Test spin,
Centifugeringstest, Tester centrifugering, Test
av sentrifugering, Linkoustesti, Essai essorage,
Schleudern testen, Test centrifuga, Test
centrifugado, Teст oтжимa, Test centrifugeren
A Spin sequence is performed, the drain pump is running. Unbalance
value is shown in LCD 2.
Test door, Testing Door, Test door, Dörrtest,
Tester luge, Test av dørlås, Luukun lukon testi,
Essai porte, Luke testen, Test sportello, Test
puerta, Teст зaмкa двeрцы, Test deurslot
Door lock is activated, the door is then opened.
Press to exit the service menu.
0
Adjust water inlet volume. Default value is 0”.
-15%
-10%
-5%
+5%
+10%
+15%
Press to exit the service menu.
0
Adjust LCD contrast LCD. Contrast ”0” (default)
+3
+2
+1
-1
-2
-3
Press to exit the service menu.
Rinses3, Rinses3, Rinses3, Sköljning3,
Skylninger3, Skylling3, Huuhtelut3,
Rinçage3, Spült3, Risciacqui3, Enjuagues3,
Пoлoскaниe3, Spoelen3
Adjusting the default setting for rinsing (default = 5 rinses). Setting
can be made in heavy (Programme 2), White (3) colour (Programme
4)
Rinses5, Rinses5, Rinses5, Sköljning5,
Skylninger5, Skylling5, Huuhtelut5,
Rinçage5, Spült5, Risciacqui5, Enjuagues5,
Пoлoскaниe5, Spoelen5
Press to exit the service menu.

Service manual WM60
16
Reheat Off, Reheat Off, Reheat Off,
Återvärmning Av, Genopvarmning Fra,
Oppvarming Av, Uudelleenlämmitys Poissa,
Réchauffage Off, Erneut heizen Aus,
Riscaldamento Off, Recalentamiento apagado,
Haгрeв Bыкл, Opnieuw verwarmen Uit
Deactivate the function.
Reheat On, Reheat On, Reheat On,
Återvärmning på, Genopvarmning Til,
Oppvarming På, Uudelleenlämmitys
Päällä, Réchauffage On, Erneut heizen
An, Riscaldamento On, Recalentamiento
encendido, Haгрeв Bкл., Opnieuw verwarmen
Aan
Activate the function
Press to exit the service menu.
1500 rpm Setting maximum speed. Maximum rpm is either 1800 or 2000 rpm
depending on model.
1600 rpm
1700 rpm
1800 rpm
1900 rpm
2000 rpm
Press to exit the service menu.
Reset Reset displayed by LCD.
For resetting the machine to the customer start menu proceed as follows.
1. Enter the service menu. (Se page 13 in the service manual.)
2. Press the programme selector button repeatedly* until “RESET” is
displayed on LCD 2.
3. Push the Start/Stop button, “1 LANGUAGE” is displayed On LCD 2.
4. Switch the power Off with the main switch.
* (8 times for WM and 5 times for TD)
The next time the power switches On, the machine is in the customer start
menu. Pressing S2 a reset is performed and the following actions arePressing S2 a reset is performed and the following actions are
performed:
1. Language settings are accessed (LCD1 off), language confirmed by S2.
2. Clock setting is accessed (LCD1 off), setting confirmed by S2.
3. Set time menu is accessed (LCD1 off), time confirmed by S2.
4. Text ”Transport protection” is displayed in LCD1 (LCD2 and 3 off), by
pressing any key or rotating J1 the program menu is accessed.
Pressing S1 service menu step 1 is accessed.
If the machine is turned off before step 4 is completed the machine shall restart
at step 1. When all steps are completed the machine shall return to program
selection mode.
Press to exit the service menu.

Service manual WM60
17
Starting the production test
+
If the machine is on: First switch the power off via the main power switch. Then press and hold the
door opeing button at the same time as the main power switch.
5X
Press the Start/Stop button 5 times.
Production test
In-store demonstration programme
To facilitate troubleshooting in the event of a fault occurring, the machine can be tested by
activating “Production test” which takes approx.. 20 minutes and tests the different functions of
the machine.
1. The machine takes in water until normal water level. Push the DOOR OPENING BUTTON to confirm the
selection and go on to the following steps (see below).
2. The heating element is activated; the CU checks that an adequate rise in temperature (20° C) is achieved
within a set time.
3. The motor is activated as if a washing programme had been started.
4. The machine is emptied by activating the drain motor; the pressure sensor should
register that the draining is complete within a given time.
5. When the machine is empty of water, the motor is tested by activating the spin programme, and at the
same time as the drainage pump.
6. The Production test is finished - the door opens. If the CU detects any faults during the test programme
the test sequence will be stopped and a
trouble code is shown on the display. For a detailed description, see the Service Manual.
1. Activating the In-store demonstration programme (for machines manufactu-
red up to week 736)
+
If the machine is on: First turn off the power at the main power switch.
Then press and hold the Start button while turning on the main power switch. At this point no
settings can be made. The centre display will activate after 3 minutes. Settings can now be made,
but the machine cannot be started.
2. Stopping the In-store demonstration programme (for machines manufactured
up to week 736)
+
First turn off the power at the main power switch.
Then press and hold the Start button while turning on the main power switch. The In-store
demonstration programme is now stopped.
1. Activating the In-store demonstration programme (for machines manufactu-
red from week 737 on)
+
x5
If the machine is on: First turn off the power at the main power switch.
Then press and hold the Start button while turning on the main power switch.
Press the programme selector 5 times At this point no settings can be made. The centre display will
activate after 3 minutes. Settings can now be made, but the machine cannot be started.
2. Stopping the In-store demonstration programme (for machines manufactured
from week 737 on)
+
x5
First turn off the power at the main power switch.
Then press and hold the Start button while turning on the main power switch.
Press the programme selector 5 times.
The In-store demonstration programme is now stopped.

Service manual WM60
18
Fault indications
The below faults are indicated in plaintext in LCD 1. The table shows the indication in all languages and
language variations.
LCD 1 Cause Action
Over flow fault, Overflow Fault, Over
flow fault, Överfyllnad, Overløbsfejl,
Overflom, Ylitulviminen, Trop plein,
Überfüllt, Troppo pieno, Desborde,
Пeрeлив вoды, Te veel water
Too much water in the machine Service action:
Check the machine’s level system, inlet valve and drain
pump. Make sure that there is no leaks.
The drain pump is on, without
any water in the machine. Service action:
The overflow protection at the bottom of the machine
is activated (not all models). Make sure that there is no
leaks (water on the machines base)
Water outlet fault, Water Outlet Fault,
Water outlet fault, Uttömningsfel,
Udpumpningsfejl, Vannutløp,
Vedenpoistovika, Défaut ,
Wasserablauffehler, Uscita acqua,
Fallo, Слив вoды, Waterafvoer fout
1. The drain pump has been
activated more than 3
minutes. There is still water
in the machine.
2. The wash cycle is
interrupted and the
programme is cleared
Customer information:
1. Check that no objects are stuck in the drainage hose
outlet.
2. Check that the drain pump is not blocked by foreign
objects.
3. Check that there are no kinks in the drainage hose.
Service action:
1. If the pump only runs for a short while (approximately
20 seconds), this indicates a fault in the level system.
Check the level sensor and hoses.
2. Check wiring and voltage to the pump. If necessary,
replace the pump and/or control
3. After implementing corrective action, run the Drain
programme or press the Key button (door open) to
empty the machine.
Water inlet fault, Water Inlet Fault,
Water inlet fault, Vattenintagsfel,
Vandindtagsfejl, Vanntilførsel, Vika
vedenotossa, Défaut,
Wasseraufn.-fehler, Entrata acqua
, Fallo , Haбoр вoды, Watertoevoer
fout
If the correct water level is not
reached within 5 minutes, the
wash cycle is interrupted.
Customer information:
1. Check that the tap on the water pipe is open.
Service action:
1. Check that the filter in the machine’s water intake is
not blocked.
2. Check the inlet valve. If necessary, replace the valve.
3. Check voltage to the inlet valve. If there is no voltage,
this could be due to a fault in the level system, wiring
or control unit.
Security fault, Security Sys Fault,
Security fault, Lucköppningsfel,
Sikkerhedsfejl, Sikkerhetsfeil, Vika
turvajärj., Erreur sécurité, Sicherh.-
fehler, Err. sis.sicurezza, Fallo
sistema seguridad, Oшибкa сис.
бeзoп., Deurslot fout
The door is open. Customer information:
Check that the door is closed properly
Service action:
1. Check for faults on the door lock or wiring to the door
lock.
2. Check the function of the level sensor.
3. Check the control unit.
Unbalance (language to be defined
in next version)
Is indicated when wash load
is not evenly applied in the
cylinder.
Customer information:
Make sure that the load is evenly applied.
Thermistor fault, Thermistor
Fault, Thermistor fault,
Termistorfel, Termostat fejl,
Termistor, Termistorivika, Défaut ,
Termistorfehler, Termistore , Fallo ,
Teрмистoр, Temp. sensor fout
(Note: Is only shown in the Service
menu)
1. The circuit for the thermistor
is open.
2. The thermistor is faulty
3. The measurment value for
the thermistor is <300 Ω
(>120 °C/248°F)
Service action:
Check the thermistors function. If needed, replace it.

Service manual WM60
19
LCD 1 Cause Action
Temperature fault, Temperature
Fault , Temperature fault,
Temperaturstoppfel, Temperatur
fejl, Temperaturstopp, Ei lämmitä
vettä, Défaut , Temp.-stoppfehler,
Errore arresto , Fallo , Teмпeрaтурa,
Temperatuurstop
(Note: Is only shown in the Service
menu)
The temperature is raised < 5
°C/41°F within 10 minutes. The
wash cycle continues to next
step.
Service action:
Check the heater, cables, thermistor and level system.
Wash motor fault, Wash Motor Fault
, Wash motor fault, Motorfel, Motor
fejl, Motorfeil, Moottorivika, Défaut ,
Motorfehler, Motore lavaggio , Fallo ,
Moтoр, Motorstoring
Indicated if the tacho generator
is overloaded or control signal
is missing (from the tacho
generator or MCU).
Service action:
Check signal from the MCU and cables between motor
and MCU.
Pressure fault, Pres Sensor Fault,
Pressure fault, Trycksensorfel,
Tryksensor fejl, Nivåfeil,
Painesensorivika, Défaut ,
Drucksensorfehler, Pressostato ,
Fallo , Дaтчик урoвня, Druksensor
fout
(Note: Is only shown in the Service
menu)
Indicated when water level is
decreasing dropp to zero whitin
30 sec in the first rinse
Service action:
Check for leaks.
After carrying out corrective actions as above, reset the fault indications by pressing the DOOR OPERING
BUTTON at the same time as the main power switch.

Service manual WM60
20
Components and measurement values1
Item number Component Measurement value Comments
80 658 33 CIM-motor Resistances:
Pin 1-3 stator 3.7 Ω
Pin 1-2 stator 3.6 Ω
Pin 2-3 rotor 3.6 Ω
Pin 4-5 tacho 178 Ω
80 617 06 Värmeelement
2000 W
28,4 Ω
80 761 02 Thermistor 6.1-3.8 k
Ω (at room temperature 20
– 30°C/ 86°F)
The thermistor for temperature reading is
located between the motor cradle and the
container. The thermistor measures and
controls the water temperature that can
vary from 0 to 90°C/ 194°F. The element is
disconnected if the thermistor is short-circuited
or disconnected from the programme control
card.
88 012 63. Drain pump 50 Hz 144 Ω. The drain pump is combined with an integrated
fine filter trap, which can be cleaned by the
user. If the drain pump has run for 180 seconds
during draining, the programme stops, resets
and a fault code is indicated in the display. The
drain pumps capacity is 20 liters/min.
88 012 64. Drain pump 60 Hz 76 Ω
80 782 21 Level Switch Electro mechanical level switch with two levels,
see wiring diagram. Indicates levels for door
opening, heat and overfilling.
80 762 02 EMC filter with inductor
50/60 Hz
680 kΩ The filter eliminates interference to and from
the machine.
80 793 24 Inlet valve 3,7 kΩ ± 0,5 kΩ 2 way inlet valve 8 litres / minute
80 798 73 Door lock 122 Ω The door lock is electro mechanical and
equipped with a magnet.
80 773 63 Control Unit WM60.3
80 792 89 Control Unit WM60.3 FI
1 All resistances shown in the table have tolerances of +/- 10%
Measurement values thermistor
Temp, º C Temp, º F Resistance, Ohm
0 32 15806
10 50 9634
20 68 6046
25 77 4841
30 85 3900
40 105 2579
50 120 1744
60 140 1204
70 160 848
80 175 609
85 185 519
Other manuals for WM60
1
Table of contents
Other Asko Washer manuals

Asko
Asko 12605 Operating instructions

Asko
Asko W6088X.W.AU User manual

Asko
Asko PROFESSIONAL WMC84P User manual

Asko
Asko WMC User manual

Asko
Asko W6424 User manual

Asko
Asko WT6332 User manual

Asko
Asko W6903 User manual

Asko
Asko W6OO-SERIES User manual

Asko
Asko W40968R/1/2 User manual

Asko
Asko PROFESSIONAL WMC844V User manual

Asko
Asko W4114C.W.U User manual

Asko
Asko WL6511XXL User manual

Asko
Asko WM75.B User manual

Asko
Asko W2084.W User manual

Asko
Asko W6231 User manual

Asko
Asko WMC89XXP User manual

Asko
Asko W6022 Assembly instructions

Asko
Asko WL6532 XXL Instruction Manual

Asko
Asko WM85.2 User manual

Asko
Asko PROFESSIONAL WMC743PS User manual