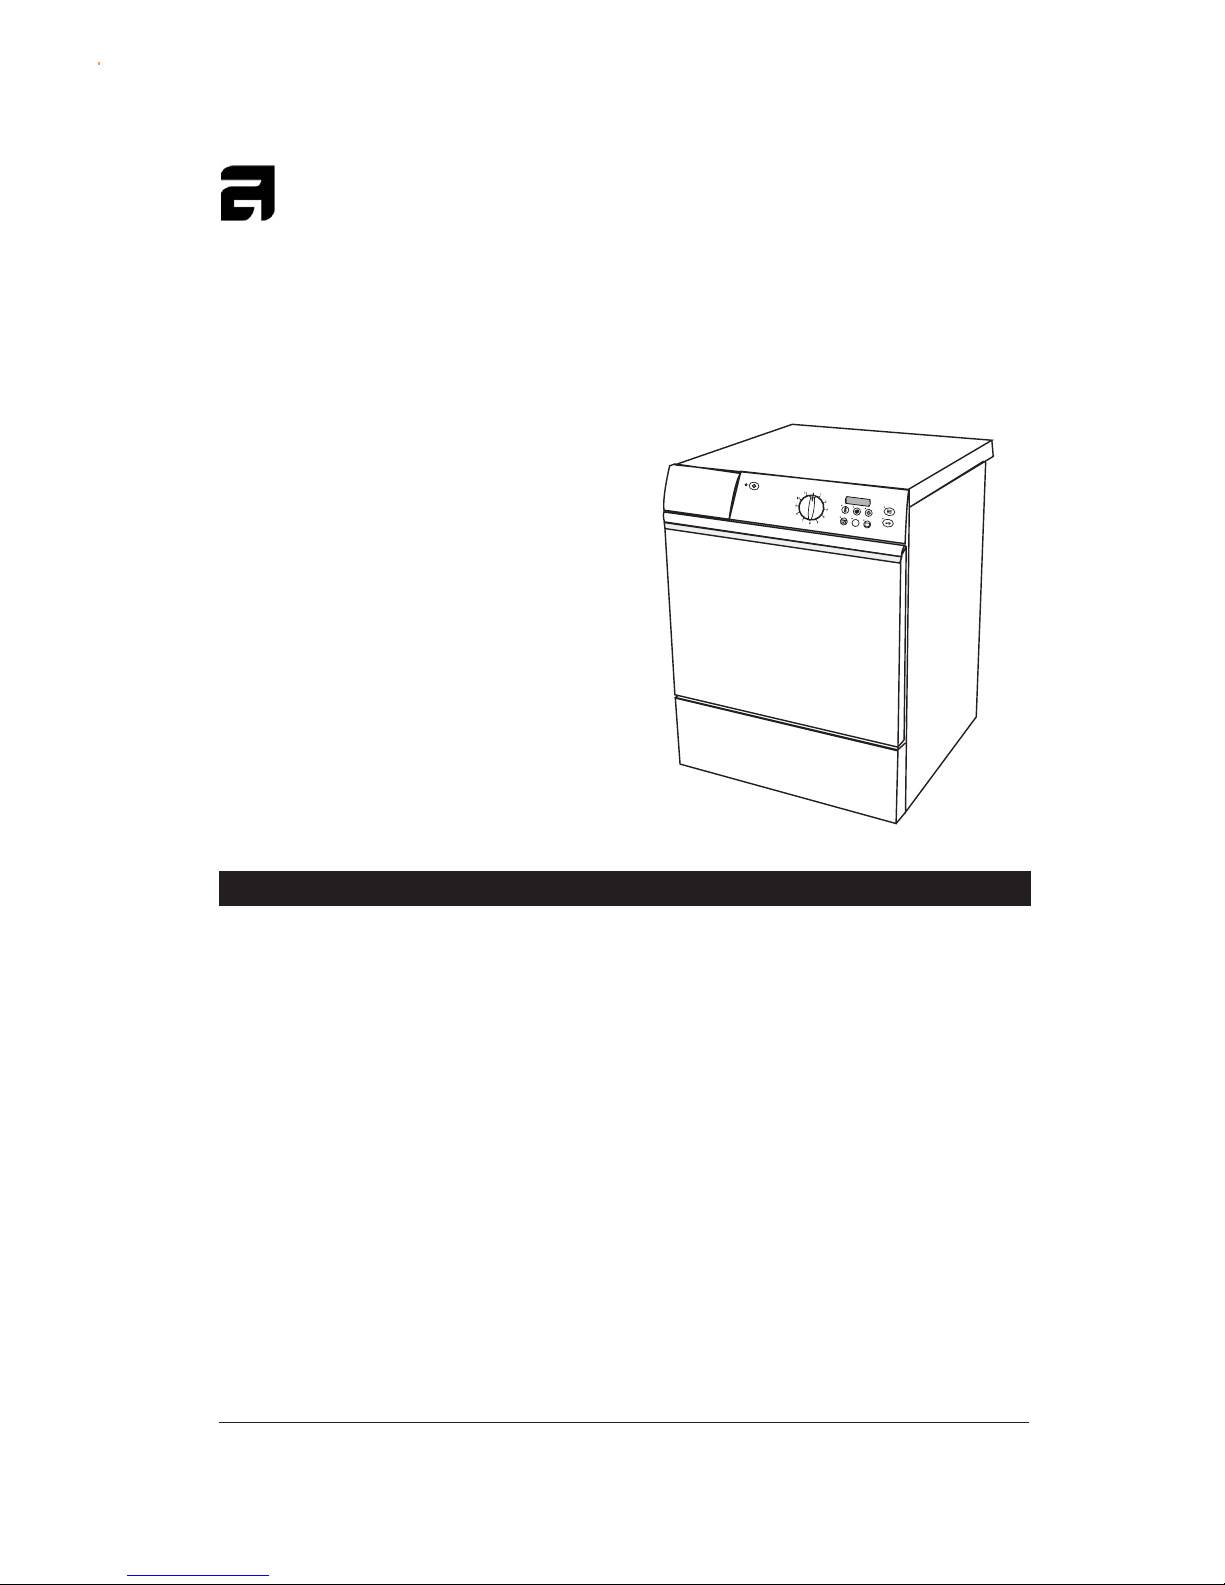
Asko W6441 User manual

Page 1
W6441 WASHER
USE AND CARE GUIDE
ASKO
IMPORIMPOR
IMPORIMPOR
IMPORTT
TT
TANT!ANT!
ANT!ANT!
ANT!
TT
TT
To go g
o go g
o get the best perfet the best perf
et the best perfet the best perf
et the best perforor
oror
ormance frmance fr
mance frmance fr
mance fromom
omom
om
yy
yy
yourour
ourour
our ww
ww
washerasher
asherasher
asher,,
,,
,rr
rr
read all operead all oper
ead all operead all oper
ead all operaa
aa
atingting
tingting
ting
instrinstr
instrinstr
instructions befuctions bef
uctions befuctions bef
uctions befor
or
oror
ore using it fe using it f
e using it fe using it f
e using it for theor the
or theor the
or the
ff
ff
firir
irir
irst timest time
st timest time
st time..
..
.
SAVE THESE INSTRUCTIONS FOR FUTURE REFERENCE
CONTENTS
IMPORTANT SAFETY INSTRUCTIONS 2
CHILD SAFETY FEATURES 2
ASKO WASHER FEATURES 3
INSTALLATION INSTRUCTIONS 4
PREPARING THE LAUNDRY 6
THE DETERGENT DRAWER 8
DETERGENTS 8
FABRIC SOFTENERS 9
FABRIC DYEING 9
RECOMMENDED WASH TEMPERATURES 9
OPERATING INSTRUCTIONS 10
CARE AND MAINTENANCE INSTRUCTIONS 12
TROUBLESHOOTING 13
COMMON LAUNDRY PROBLEMS 15
ASKO PRODUCT WARRANTY 16
INDEX 17
QUICK START INSTRUCTIONS 20
E
2
2h

Page 2
WARNING!
To reduce the risk of fire, electric shock,
orinjurytopersonswhenusingyourappliance,follow
basic precautions, including the following:
♦Read all instructions before using the appliance.
♦Do not run appliance while you are out of the home.
♦Donot washor dryarticles thathave beenpreviously
cleaned in, washed in, soaked in, or spotted with
gasoline, dry-cleaning solvents, cooking oils, other
flammable or explosive substances as they give off
vapors that could ignite or explode.
♦Do not allow children to use or play on or in the
appliance.Close supervision of children isnecessary
when the appliance is used near children.
♦Before the appliance is removed from service or
discarded, remove the door to the washing
compartment.
♦Donot reachinto the appliance if the drum is moving.
♦Do not install or store this appliance where it will be
exposed to the weather.
♦Do not tamper with controls.
♦Do not repair or replace any part of the appliance or
attempt any servicing unless specifically
recommended in this guide.
♦Do not add gasoline, dry-cleaning solvents, or other
flammable or explosive substances to the wash
water. These substances give off vapors that could
ignite or explode.
♦Under certain conditions, hydrogen gas may be
produced in a hot water system that has not been
used for 2 weeks or more. HYDROGEN GAS IS
EXPLOSIVE. If the hot water system has not been
used for such a period, before using a washing
machine or combination washer-dryer, turn on all
water faucets and let the water flow from each for
several minutes. This will release any accumulated
hydrogen gas. As the gas is flammable, do not
smoke or use an open flame during this time.
CHILD-SAFE DETERCHILD-SAFE DETER
CHILD-SAFE DETERGENTGENT
GENTGENT
GENT
DRADRA
DRADRA
DRAWERWER
WERWER
WER
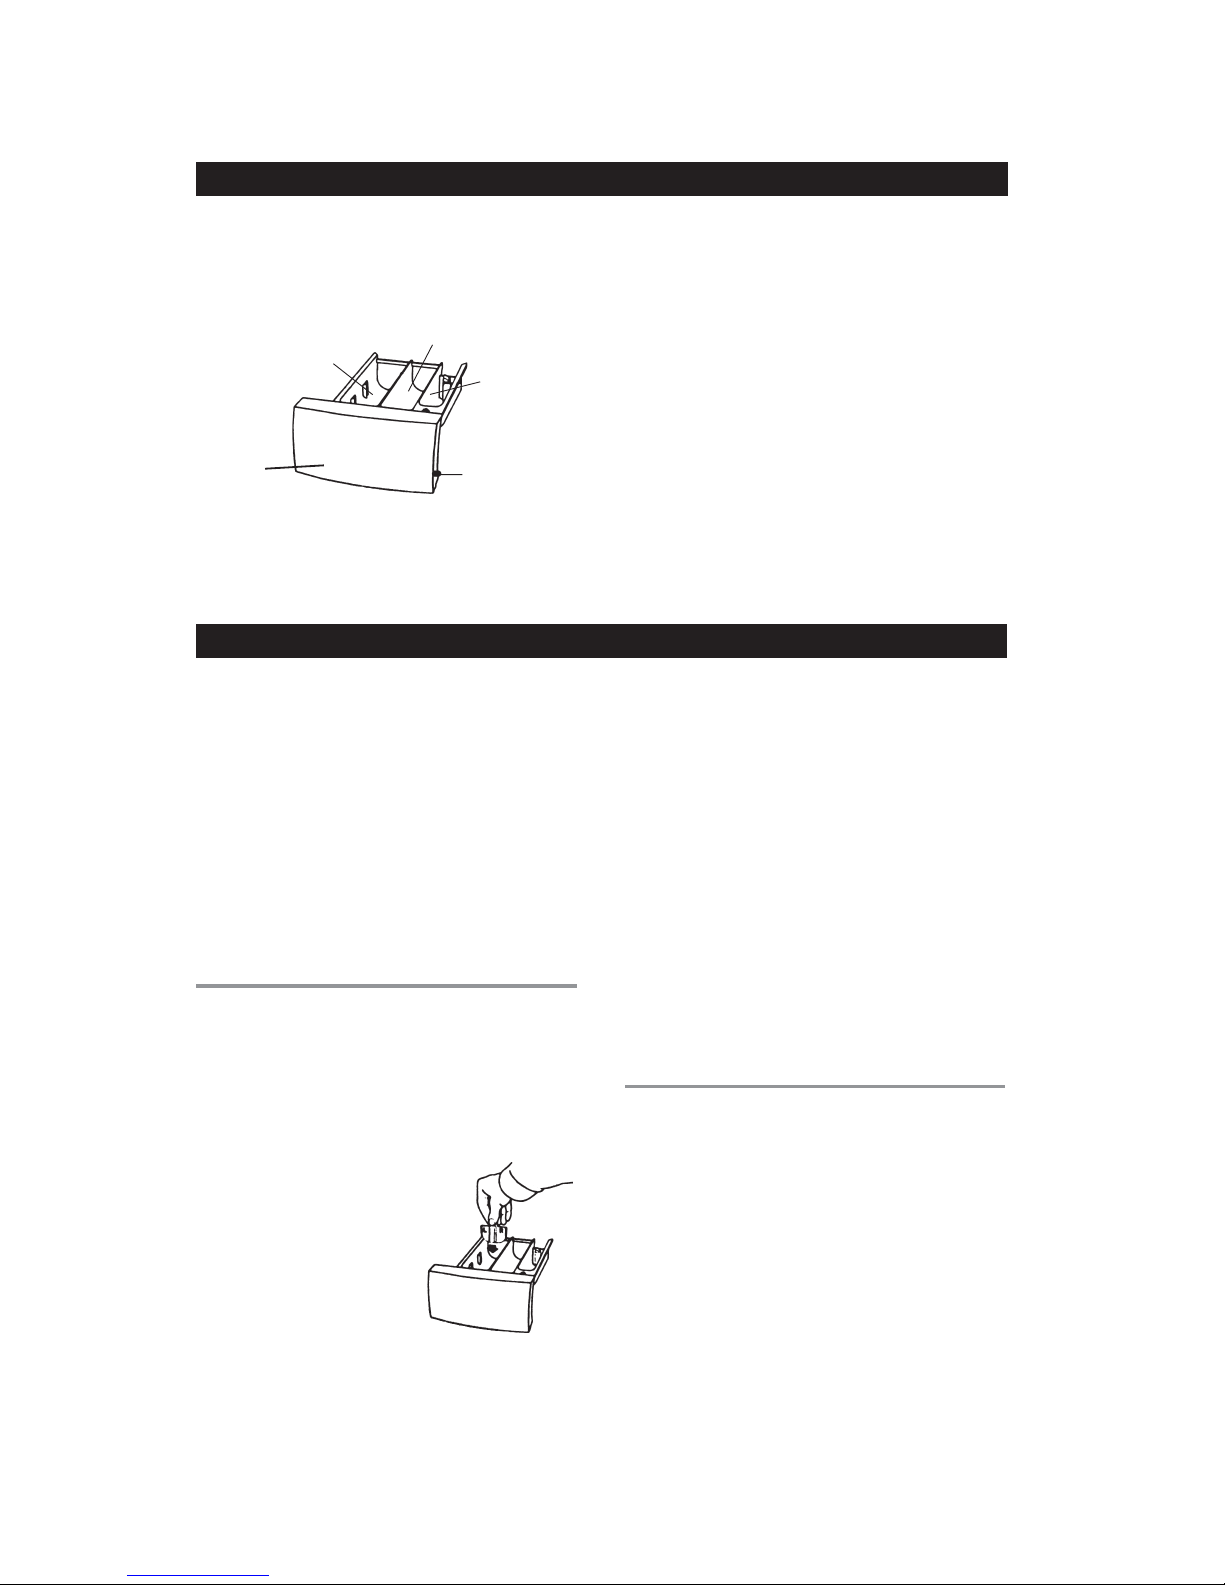
ASKOwashershavea child-safety catch onthedetergent
drawer that can be engaged to prevent a child from
opening the drawer and possibly coming into contact with
the detergent or fabric softener. Refer to page 8 for
instructions on how to engage the child-safe catch.
CHILD-SAFE STCHILD-SAFE ST
CHILD-SAFE STARAR
ARAR
ART/STT/ST
T/STT/ST
T/STOPOP
OPOP
OP
You can program the washer not to start unless the Start
button is held down for three seconds. This is to prevent
children from inadvertently starting the machine. To
program this function, follow the steps below:
1. Turn the machine off then on again. (00 should show
on the display.)
2. Press the Start button five times in succession then
press the Spin Speed button five times. (This must
be done within 15 seconds.)
3. Within three seconds, press the Spin Speed button
again to select Child-safe start. The LED will display
IMPORIMPOR
IMPORIMPOR
IMPORTT
TT
TANT SAFETY INSTRANT SAFETY INSTR
ANT SAFETY INSTRANT SAFETY INSTR
ANT SAFETY INSTRUCTIONSUCTIONS
UCTIONSUCTIONS
UCTIONS
CHILD SAFETY FEACHILD SAFETY FEA
CHILD SAFETY FEATURESTURES
TURESTURES
TURES
WARNING!
This appliance must be properly grounded.
GROUNDINGINSTRUCTIONS
A) Grounding instructions for a grounded, cord-connected
appliance
In the event of malfunction or breakdown, grounding
will reduce the risk of electric shock by providing a path
of least resistance for electric current. This appliance is
equipped with a cord having an equipment-grounding
conductor and a grounding plug. The plug must be
plugged into an appropriate outlet that is properly
installedand grounded inaccordance withall local codes
and ordinances.
WARNING!
Improper connection of the equipment-grounding
conductor can result in a risk of electric shock.
Check with a qualified electrician or service
representative or personnel if you are in doubt as
to whether the appliance is properly grounded.
Do not modify the plug provided with the appliance. If it
will not fit the outlet, have a proper outlet installed by a
qualified electrician.
B) Grounding instructions for a permanently connected
appliance:
This appliance must be connected to a grounded metal,
permanent wiring system, or an equipment-grounding
terminal or lead on the appliance.
NOTE: This manual does not cover every possible
condition and situation that may occur. Use
common sense and caution when installing,
operating, and maintaining any appliance.
“3” to indicate the Child-safe function is active. (If
the child-safe start has already been activated, “0”
will display after you press the Spin Speed button.)
MORE CHILD-SAFETY TIPSMORE CHILD-SAFETY TIPS
MORE CHILD-SAFETY TIPS
♦Laundry detergents are corrosive, so always keep
them out of reach of children.
♦Shoulda childswallow detergent,give plentyto drink
immediately, i.e., one or two glasses of milk or water.
Do not try to induce vomiting. Seek medical advice
immediately: 1-800-POISON1
♦Always close the door and start the appliance as
soon as you put in the detergent.
♦Always turn the power off to the machine when it is
not in use.
♦Always keep small children away from the machine
when it is open. There may be some detergent
residue left inside the machine.
♦If laundry detergent gets in someone’s eyes, rinse
them with plenty of water for at least 15 minutes.
SAVE THESE INSTRUCTIONS FOR FUTURE REFERENCE

Page 3
E
2
2h
2h
Your new energy-efficient ASKO washer is designed to
give you maximum cleaning performance using less
water, energy and detergent. To make the most of the
washer’s functions and features, we recommend that
youread this manualcarefully before usingyourmachine
for the first time. For operating instructions, refer to
pages 10, 11, and 12.
Below is an illustration of the external parts and features
of your ASKO washer.
SENSOR LEVEL CONTRSENSOR LEVEL CONTR
SENSOR LEVEL CONTROLOL
OLOL
OL
ASKO washers do not need high, medium, or low water
level settings to compensate for different sized loads.
ASKO units have a consumption sensor—Sensor Level
Control—that ensures the correct amount of water is
pumped into the machine for any size load. It even
compensates for fabric saturation, letting in more water
ifneeded. This eliminates worry aboutselecting the right
water level setting for each laundry load.
TEMPERATEMPERA
TEMPERATEMPERA
TEMPERATURE CONTRTURE CONTR
TURE CONTRTURE CONTR
TURE CONTROLOL
OLOL
OL
Because wash water temperature is a major factor in
getting laundry clean, ASKOwashers have built-inheating
elements and a sensor that keeps the temperature to
within +/-1° F of the selected program temperature.
ASKO washers are programmed not to advance in a
cycle until the selected water temperature is reached,
so the length of the cycles may vary, depending upon
the household cold water temperature, the amount of
laundryin the washer,and the wash temperature setting.
ASKASK
ASKASK
ASKOO
OO
O WW
WW
WASHER FEAASHER FEA
ASHER FEAASHER FEA
ASHER FEATURESTURES
TURESTURES
TURES
ENZYME STEPENZYME STEP
ENZYME STEP
To successfully remove all dirt and stains from fabric,
the enzymes in your detergent need to work at a
temperature between 105° and 140° F for a longer time
period. This longer wash cycle gives the enzymes in the
detergent ample time to remove stains, eliminating the
need for stain sprays and spot removers.
MORE RINSE CYMORE RINSE CY
MORE RINSE CYCLESCLES
CLESCLES
CLES
Your ASKO washer has three rinses and a Super Rinse
option that adds two more. ASKO washers get the soil
and detergent out of your laundry that most other
washers leave in. That’s why your whites will remain
white and your colored fabrics will remain bright.
SUPER RINSE OPTIONSUPER RINSE OPTION
SUPER RINSE OPTION
This option is designed for people with sensitive skin or
who are allergic to detergents. It can also be used for
large, heavily soiled loads.
SPIN OPTIONSSPIN OPTIONS
SPIN OPTIONS
ASKO washers have faster spin speeds than most other
washers, which decreases the time it takes to dry your
laundry by up to half. The spin speeds range from 400
rpm to 1400 rpm. You can also turn the spin cycle off.
Detergent and Fabric
Softener Dispenser
Control
Panel
Glass
Door
Power
Button
Outer Door
Type Plate
(withType
andSerial
Number)

Page 4
Height 33-1/2”–34-1/2 (850–876 mm)
Width 23-7/16” (595 mm)
Depth 23-7/16" (595 mm)
Weight 167 lbs. (73 kg)
Rated load See data plate
Supply voltage Single-phase 230 V, 60 Hz
Heating element 2000 W
Fuse 15 A (2 internal fuses)
ACCESSORIESACCESSORIES
ACCESSORIES
INSTINST
INSTINST
INSTALLAALLA
ALLAALLA
ALLATION INSTRTION INSTR
TION INSTRTION INSTR
TION INSTRUCTIONSUCTIONS
UCTIONSUCTIONS
UCTIONS
Read these instructions carefully and completely before
you install the machine. The installation should be
carried out by a qualified person who is familiar with all
local codes and ordinances for electrical and plumbing
connections.
IMPORTANT NOTE:
Cosmetic damage must be reported to your dealer
within five days from the date of purchase. After
unpacking the washer, thoroughly check the unit for
cosmetic damage.
SPECIFICASPECIFICA
SPECIFICASPECIFICA
SPECIFICATIONSTIONS
TIONSTIONS
TIONS
Drum and Barrel Stainless steel
Outer casing Stove-enamelled hot-dipped
galvanized steel or stainless steel
Mounting Four adjustable rubber-covered
feet
Inlet supply hose 5 ft. (1.5 m) PEX tubing with
brass ferrules
Supply pressure 15–142 PSI
Outlet hose 5.5 ft. (1.7 m) polypropylene hose,
3/4” ID
REMOREMO
REMOREMO
REMOVINGVING
VINGVING
VING THE SHIPPINGTHE SHIPPING
THE SHIPPINGTHE SHIPPING
THE SHIPPING
SUPPORSUPPOR
SUPPORSUPPOR
SUPPORTSTS
TSTS
TS
Themachine is transported with threeshipping supports,
asillustrated below. These supportshold thetub inplace
during shipment. When you unpack the machine, you
must remove these supports.
To remove the shipping supports, follow the instructions
below: 1. Unscrew the 5/8” (12 mm)
bolts holding the supports in
place and remove the bolts.
2. Push the rubber spacer up
then
pull it
out of
the
slot.
3. Rotate the spacer so that
the extruded end points
toward the machine.
4. Insert it into the slot and
push down to lock it into
position.
LEVELING THELEVELING THE
LEVELING THE
MAMA
MAMA
MACHINECHINE
CHINECHINE
CHINE
It is important that the machine is level so it won’t vibrate
excessively during the spinning cycles. Each foot on
the washer is adjustable, so you can level the washer
on any surface. Once it is level, securely tighten the lock
nuts on the feet to prevent excessive vibration during
the spin cycles.
WAWA
WAWA
WATER SUPPLTER SUPPL
TER SUPPLTER SUPPL
TER SUPPLY CONNECTIONY CONNECTION
Y CONNECTIONY CONNECTION
Y CONNECTION
BecauseASKO washers have their own heatingelement,
you only need to have a cold water inlet. The connection
should be made by someone who is sufficiently skilled.
Use the hose supplied with the washer.
Water pressure must be in the range of 15–146 PSI.
A tap should be fitted on the water supply pipe.
If a new supply pipe has been installed for the washer,
it should be flushed thoroughly to remove any foreign
particles that might clog the strainer in the water inlet.
NOTE: Ifunit is installed on a second story,follow local
building codes. We recommend a drip pan be
installed.
You must remove the shipping
supports before you install the
washer.
2
1
Cold water
supply
Tap
Besure to tighten the
locknutssecurelywhen
youlevelthe machine.

Page 5
ELECTRICAL CONNECTIONSELECTRICAL CONNECTIONS
ELECTRICAL CONNECTIONS
The machine is delivered ready-fitted with a plug and is
intended for connection to an ASKO Dryer, which is
equipped with a matching receptacle. The plug supplied
with the washer can only be used with an ASKO Dryer.
If the washer is used separately or with another dryer, it
must be on a separate 220 V single-phase circuit.
If the machine is to be used in a wet area, the supply
must be protected by a residual current device.
As supplied: 230 V, 60 Hz
2000 W heating element
15 A fuse required
DRAIN OUTLET CONNECTIONDRAIN OUTLET CONNECTION
DRAIN OUTLET CONNECTION
The machine is supplied with the outlet hose already
attached. The hose should be extended over a suitable
sink edge or drain pipe at a height of 24” to 36” (610
mm to 914 mm) above the bottom of the unit. (The lower
height is preferable.) Make sure that the hose is not
kinked.
NOTE: If the hose is extended, the internal diameter
of the coupling must not be less than 1/2”.
WARNING!
Do not extend the drain hose higher than
36” (914 mm) from the bottom of the unit.
FREESTFREEST
FREESTFREEST
FREESTANDING INSTANDING INST
ANDING INSTANDING INST
ANDING INSTALLAALLA
ALLAALLA
ALLATIONTION
TIONTION
TION
Thewasher can beplaced next tothe dryer.Itis essential
that the machine is leveled and the locknuts tight to
prevent excessive vibration during the spin cycles. Also
be sure to leave a minimum of 1/2” (12 mm) of space
between the washer and the dryer.
The height adjustment for the washer is 33-1/2” to
34-1/2” (850 mm to 876 mm). Do not raise it higher
than 34-1/2”.
STST
STST
STAA
AA
ACKED INSTCKED INST
CKED INSTCKED INST
CKED INSTALLAALLA
ALLAALLA
ALLATIONTION
TIONTION
TION
ASKO washers should never be stacked on a counter
or a dryer. You can, however, stack an ASKO dryer on
an ASKO washer. Refer to your Dryer Use and Care
Guide for instructions on how to do this.
BB
BB
BUILUIL
UILUIL
UILTT
TT
T-IN INST-IN INST
-IN INST-IN INST
-IN INSTALLAALLA
ALLAALLA
ALLATIONTION
TIONTION
TION
ASKO washers can be installed beneath a cabinet or
worktop with a height of 34-1/2” ( 876 mm). There must
be a gap of about 1/2” (12 mm) all around the machine,
includingbetween the rearedgeof the machinetop panel
and the back wall. The opening width must be at least
24-1/2” (622 mm).
Space must also be available for the inlet and drain
hoses. See the diagram below for measurements and
positions.
If the drain outlet is higher than 24”, the connections will
need to be recessed.
WARNING!
Connection to a permanently wired
supply point must be made only by a
qualified electrician.
GROUNDING INSTRUCTIONS
This appliance must be grounded. In the event of
malfunction or breakdown, grounding will reduce the risk
of electric shock by providing a path of least resistance
forelectric current. Thisappliance is equippedwith a cord
having an equipment-grounding conductor and a
grounding plug. The plug must be plugged into an
appropriate outlet that is properly installed and grounded
in accordance with all local codes and ordinances.
WARNING! Improper connection of the
equipment-grounding conductor can result in a
risk of electric shock. Check with a qualified
electrician or serviceman if you are in doubt as
to whether the appliance is properly grounded.
Do not modify the plug provided with the
appliance. If it will not fit the outlet, have a proper
outlet installed by a qualified electrician.

Page 6
PREPPREP
PREPPREP
PREPARINGARING
ARINGARING
ARING THE LATHE LA
THE LATHE LA
THE LAUNDRUNDR
UNDRUNDR
UNDRYY
YY
Y
We believe ASKO washers clean better than any other
washer available on the market. With proper attention
to how you prepare your laundry items for washing and
drying, your wardrobe and linens will look like new for
years.
SORSOR
SORSOR
SORTINGTING
TINGTING
TING THE LATHE LA
THE LATHE LA
THE LAUNDRUNDR
UNDRUNDR
UNDRYY
YY
Y
Properly sorting your laundry is a very important factor
in ensuring that your clothing and linens look new for a
long time. Another important factor is properly following
the care label instructions (see next page).
Below are some basic rules for sorting your laundry:
Sort by
1. Fabric color
Whites; pastels and medium colors; bright colors;
dark colors
2.2.
2.2.
2. Amount of soil
Heavily soiled items should be washed separately
from lightly soiled items.
3.3.
3.3.
3. Fabric Type
Delicates should be washed separately. You should
also consider separating fabrics that tend to shed
lint (e.g., cotton, chenille, and terrycloth) from fabrics
that attract lint (e.g., permanent press, corduroy,
velveteen, flannel and synthetics).
IMPORTANT NOTE:
If the care label says "Wash Separately," the fabric is
likely to lose color (excess dye) for the first few washings.
Tominimize the possibility ofthecolor transferring to white
or lighter colored items, wash new colored garments with
items of similar color or separately. Bright reds and
oranges on cottons are the dyes most likely to transfer
colors to the wash load. Fluorescent colors should always
be washed separately.
RECOMMENDED LRECOMMENDED L
RECOMMENDED LOO
OO
OAD SIZESAD SIZES
AD SIZESAD SIZES
AD SIZES
To reduce wrinkling, you should determine the load size
based on the type(s) of fabrics being washed. The chart
below gives recommended load sizes for different fabrics.
Cotton and Linen FCotton and Linen F
Cotton and Linen Faa
aa
abricsbrics
bricsbrics
brics
These items should be washed in full loads because
thetumble actionof thetub alongwith the gentle rubbing
and lifting and falling movement of the clothes gives the
best cleaning result.
PP
PP
Perer
erer
ermanent Prmanent Pr
manent Prmanent Pr
manent Press Fess F
ess Fess F
ess Faa
aa
abricsbrics
bricsbrics
brics
These items need more room to move freely during
washing for the most wrinkle-free results. Therefore, fill
the machine only half full for permanent press loads.
These items should have only a brief spin cycle and
they should be removed promptly from the washer and
put directly into the dryer or hung to dry.
DelicaDelica
DelicaDelica
Delicate Fte F
te Fte F
te Faa
aa
abricsbrics
bricsbrics
brics
More delicate fabrics, such as machine washable wool
and silk, should only be washed in one-third size loads
for the best results.
GENERAL LAGENERAL LA
GENERAL LAUNDRUNDR
UNDRUNDR
UNDRYY
YY
Y ADAD
ADAD
ADVICEVICE
VICEVICE
VICE
♦Always follow the care label instructions (see page
7).
♦Remove any sharp ornaments, pins or buckles to
prevent snags.
♦Empty pockets and turn them inside out.
♦Close zippers and hooks to prevent snagging.
♦Tie sashes and strings to prevent tangling.
♦Mend any small rips to prevent them from enlarging.
♦Turn colored cotton garments, velvet and finer
knitwear inside out before washing.
♦Turn delicate items, sweaters and T-shirts inside out
to prevent pilling and to protect the prints.
♦Prewash severely soiled items.
♦Wash colored fabrics separately the first time.
♦Thoroughly rinse down items, such as comforters
(Super rinse).
♦Use fabric softener to eliminate static electricity in
synthetic garments and to soften cotton.
Load Size Fabrics
Full Cotton, linen
Half Perma press, synthetics, acrylics
Third Special finish cottons, machine
washable wool, silk, acetates

Page 7
Most clothes and other washable items have permanent
care labels. Read these labels carefully! Care label
instructionsand warnings should be followed for thebest
cleaning results.
The table below defines the symbols used on fabric care
labels. (NOTE: Some manufacturers may use slightly
different symbols.)
CARE LABEL INSTRCARE LABEL INSTR
CARE LABEL INSTRUCTIONSUCTIONS
UCTIONSUCTIONS
UCTIONS
CARE LABEL SYMBOLSCARE LABEL SYMBOLS
CARE LABEL SYMBOLS
As an example, the symbols in the label illustrated below
mean: wash in warm water on permanent press setting.
Use nonchlorine bleach.Dryon permanentpress setting.
Iron on low temperature setting.

Page 8
Laundry detergents are available in low-, normal- and
high-sudsing formulas. A detergent´s ability to clean is
not relative to the amount of suds it produces. Excess
suds in a front-loading washer actually interfere with
the cleaning because they cushion the tumbling action.
Also, high-sudsing detergents are more difficult to
completely rinse out.
Theuse ofanythingotherthan alow-sudsingdetergent
can cause severe oversudsing, which could cause suds
to backup through the detergent compartment and run
down the front of the washer onto the floor. If oversudsing
occurs, run the wash through one or more rinse programs
until all items are thoroughly rinsed. Remove the laundry
then run the washer through a Normal wash program to
get rid of any remaining detergent.
LIQLIQ
LIQLIQ
LIQUID DETERUID DETER
UID DETERUID DETER
UID DETERGENTSGENTS
GENTSGENTS
GENTS
We don’t recommend liquid detergents because they
tendto produce moresuds than powderdetergents when
used in water temperatures of 150° F or higher. If you
should try a liquid detergent, start with a very small
amount, such as 1 to 2 tablespoons. Also, liquid
detergent can be used for all programs without prewash,
so add it into the main wash compartment.
Should you prefer to use a
liquid detergent, we have
provided a partition piece
with the detergent drawer
specificallyfor use with liquid
detergents. Insert the
partition in the slot at the
back of the main wash
compartment before you
pour in the liquid detergent.
NOTE: The partition piece is packaged on the bottom
of the detergent drawer.
DETERDETER
DETERDETER
DETERGENTSGENTS
GENTSGENTS
GENTS
THE DETERTHE DETER
THE DETERTHE DETER
THE DETERGENT DRAGENT DRA
GENT DRAGENT DRA
GENT DRAWERWER
WERWER
WER
The detergent drawer on ASKO washers automatically
dispenses the detergent and fabric softener at the
appropriate times. Simply pour the measured amounts
of detergent and softener into the proper compartments
(as illustrated) and close the drawer.
RECOMMENDED PORECOMMENDED PO
RECOMMENDED POWDERWDER
WDERWDER
WDER
DETERDETER
DETERDETER
DETERGENTSGENTS
GENTSGENTS
GENTS
ASKO washers use 50% to 75% less detergent than
most other washers. This is because of their low water
consumption and the fact that all the wash water is
repeatedly circulated through the laundry, ensuring that
all the detergent is fully utilized. We recommend that
you use powder detergents made specifically for front-
loadingwashers. Theseare sometimescalled HE(High-
Efficiency) detergents. Listed below are some low-
sudsing powder detergents that have been successfully
tested in ASKO washers:
We recommend that you do not use any powder
detergent that doesn’t wash completely out of the
detergent drawer.
AMOUNT OF DETERAMOUNT OF DETER
AMOUNT OF DETERGENTGENT
GENTGENT
GENT TO USETO USE
TO USETO USE
TO USE
The amount of detergent needed varies among the
differentbrands, but for most detergents, you need only
one or two tablespoons. Using too much detergent
can result in detergent residue being left in your clothes,
which can cause them to appear gray or dingy. You
should start with a small amount of detergent and
increase it only if the cleaning results are unsatisfactory.
Additionally, you should never put detergent in the
prewash compartment unless you are using a wash
program that has a prewash cycle. This could cause
excess foaming, which could damage the machine.
The amount of detergent needed can also depend on
thehardness of thewaterin yourarea.Seethe“Detergent
Amounts Based on Water Hardness” section on the next
page for more details.
We recommend that you don’t use bleach in your
ASKO washer. The tumbling wash action, temperature
control options, extended wash times and proper amount
of detergent are sufficient to remove most stains.
Child-SafChild-Saf
Child-SafChild-Saf
Child-Safe Cae Ca
e Cae Ca
e Catctc
tctc
tchh
hh
h
Your ASKO washer has a child-safe catch on the
detergent drawer that can be engaged to prevent a child
from opening the drawer and possibly coming into
contact with the detergent or fabric softener.
The safety catch is the red plastic piece on the back
right side of the pull-out handle. To engage the catch,
open detergent drawer a little then pull the catch forward
and release it. Once the catch is engaged, you must
push it to the left each time you open the detergent
drawer.
To disengage the catch, push it to the left then back.
♦All
♦Tide HE
♦Wisk HE
♦Fab
♦Amway SA8
♦Fresh Start
Prewashdetergent
Main wash
detergent Fabric
softener
Pullout
handle Child-safety
catch
NOTE: To avoid oversudsing, do not put detergent in the
prewashcompartment unless you are using one of
the Heavy wash programs which has a prewash
cycle.
Prewashdetergent

Page 9
SUGGESTEDSUGGESTED
SUGGESTEDSUGGESTED
SUGGESTED WW
WW
WASHASH
ASHASH
ASH TEMPERATEMPERA
TEMPERATEMPERA
TEMPERATURESTURES
TURESTURES
TURES
Different fabrics require different wash temperatures. The
table below gives suggested wash temperatures for
differentfabricsas wellas recommendedprograms, load
Fabric softeners are available in several concentrations.
We recommend that you use only two tablespoons of
FABRIC SOFTENERSFABRIC SOFTENERS
FABRIC SOFTENERS
fabric softener. If more softening is desired, try adding
slightly more the next time.
The amount of detergent needed can vary due to
differences in water hardness. To determine the water
hardness in your area, contact your local water utility or
area water softening company. The harder the water,
the more detergent you may need. Refer to the chart
below for the recommended detergent amounts based
on water hardness. Remember, you should adjust the
amount of detergent you use by small amounts until
you find the correct amount.
Note that 12 grains and higher is extremely hard water
and detergent alone may not be enough. You may need
Wash Wash Load Spin
Fabric Type Temp. Program Size (1) Options (2)
Whitecotton w/out elastic 140–205°F Normal Full Long spin, highrpm
and/ordecorative trim
Whitecotton w/elastic 120–140° F Normal Full Longspin, high rpm
and/ordecorative trim
Coloredcotton 120–140° F Normal Full Longspin, high rpm
Linen(white andcolorfast) 120–140°F Normal Half Shortspin, lowrpm
Cotton/polyesterblends 105–120° F Normal/Permanentpress Half Shortspin, low rpm
Polyester/acrylicblends 105–120° F Normal/Permanentpress Half Shortspin, low rpm
Rayonandacetate 105° F Delicate/Wool Half Shortspin, low rpm
Washablesilkand nylon 85° F (cold) Delicate/Wool Third Shortspin, low rpm
Washablewooland 85–105°F Delicate/Wool Third Short spin,low rpm
wool blends (cold)
Handwash wool& silk (3) 85°F (cold) Delicate/Wool Third Shortspin, low rpm
NOTES:
(1) The load size should be determined by the type of fabric being washed. (See page 6.)
(2) Spin speed options are not available on all models.
(3) Some hand-washable wool and silk items should not go through a spin cycle. These items should be removed
from the washer then pressed out in a terry towel to remove excess water before being hung up or laid flat to dry.
to use a water softener to maximize the performance of
your washer. Also, in areas with extremely hard water
(9+) you may need to wash at lower temperatures to
prevent hard water deposits from forming in the tank
and wash system.
Different brands of detergent have different amounts of
phosphorous for softening water. If you have hard water
and use a detergent with less than 8.7% phosphorous
content, you may need to use more detergent or use a
detergent with a higher phosphorous content.
Recommended Detergent Amounts
Based on Water Hardness
Soft (0-3 grains per gal.) 1 teaspoon 1 to 1-1/2 tablespoons
Medium (4-8 grains per gal.) 1 teaspoon 1 to 2 tablespoons
Hard (9+ grains per gal.) 1 teaspoon 2 to 3 tablespoons
Detergent Amounts
Water Hardness Prewash Main Wash
sizes, and spin options. These are only suggestions.
We recommend that you always refer to the care label
instructions. (See page 7.)
DeterDeter
DeterDeter
Detergg
gg
gentent
entent
ent Amounts Based onAmounts Based on
Amounts Based onAmounts Based on
Amounts Based on WW
WW
Waa
aa
ater Harter Har
ter Harter Har
ter Hardnessdness
dnessdness
dness
To dye fabrics in your washing machine, pour the dye
directly into the drum, not in the detergent compartment.
Select Normal wash with the Super Rinse option and
usethe temperature recommended on the dye package.
If you’re dyeing polyester, select a spin speed of 800
rpm.
FABRIC DFABRIC D
FABRIC DFABRIC D
FABRIC DYEINGYEING
YEINGYEING
YEING
After you have removed the dyed items, be sure to clean
the drum before you wash a load of laundry. Do this by
running the empty machine through a Normal wash
program using the normal amount of detergent.

Page 10
Stain
Programs
Heavy
Normal
Perma
press
Quick
Super quick
Drain
Spin
Rinse
Hand/
Delicate
Wool
THE CONTRTHE CONTR
THE CONTRTHE CONTR
THE CONTROL POL P
OL POL P
OL PANELANEL
ANELANEL
ANEL
OPERAOPERA
OPERAOPERA
OPERATING INSTRTING INSTR
TING INSTRTING INSTR
TING INSTRUCTIONSUCTIONS
UCTIONSUCTIONS
UCTIONS
Door Open Button
Start/Stop Button
Power Button
Program Knob
Power Indicator Light
Option Buttons
PRPR
PRPR
PROGRAMSOGRAMS
OGRAMSOGRAMS
OGRAMS
Your ASKO washer has several programs and options
specifically designed to give you the cleanest laundry
possible. The table below defines each program. The
program and temperature options are defined on the
next page.
CAUTION! Some fabrics may not be able to withstand extremely hot temperatures.
Program Pre-
wash Main
Wash Wash
Action Temp. (° F) #
Rinses Int.
Spin Final
Spin Max Spin
Speed Load
Size
Stain Yes Long Normal Cold, 85 to 205 5 2 Long 1400 Full
Heavy No Long Normal Cold, 85 to 205 5 2 Long 1400 Full
Normal No Short Normal Cold, 85 to 205 5 2 Long 1400 Full
Perma press No Short Normal Cold, 85 to 205 3 No Short 800 Half
Quick No Short Normal Cold, 85 to 205 3 No Long 1400 Full
Super quick No Short Normal Cold, 85 to 205 2 No Long 1400 Half
Wool No Short Gentle Cold, 85 or 105 3 No Short 800 Third
Hand/Delicate No Short Gentle Cold, 85 or 105 3 No Short 800 Third
Rinse n/a n/a n/a n/a 1 n/a Long 1400 Full
Spin n/a n/a n/a n/a n/a n/a Long 1400 Full
Drain n/a n/a n/a n/a n/a n/a n/a n/a Full
POWER BUTTON
The Power button turns the power to the machine on
and off. When the power is on, the power indicator light
glows red. The power must be on before you can open
the door, select program options, or start the machine.
PROGRAM KNOB
Turn this knob to the desired program. The programs
are described in the table below. Please note that the
knob does not move as the program advances.
Stop Position – The Stop position is where the line on
the top of the dial aligns with the line on the panel.
LED WINDOW
The LED window displays the wash temperature for the
selected program, the estimated running time, and the
remaining time. It also displays the available options for
each program. (See ‘Option Buttons” on the next page.)
“00” on the LED indicates no program has been selected.
“End” on the LED indicates the program is complete.
NOTE: See the next page for temperature options. Please note also that program times will increase when you select
higher wash temperatures. (See “Temperature Control” on page 3.)
LED Window
Remaining Time Indication
When you select a program, the LED displays the
estimated program time based on the time the program
ran previously. As the program progresses, the LED
displays the remaining program time. This time will vary
somewhatdue tothe temperatureof the incoming water
and the size of the load. The remaining time is
recalculatedbefore the final rinse andmay beincreased
or decreased on the LED.
The program time and remaining time display as the
hours followed by an “H” and the minutes, as illustrated:
1h12
START/STOP BUTTON
Once you’ve selected the program and options, press
thisbutton to startthe washer.To stopthe washer during
a program, press and hold this button until the indicator
light above it goes off. If you press this button to stop a
program, the program will start again from the
beginning.
WARNING!
To reduce the risk of electric shock or injury to persons, read the ”Important Safety
Instructions” section on page 2 before operating this appliance.

Page 11
DOOR OPEN BUTTON
The power must be on and you must press this button to
open the door. Hold down the button until the indicator light
goes off (approximately 3 seconds).Youwill hear the door
lock release. Please note that the water must be drained
before the door will open.
NOTE: Refer to “The door won’t open” section in the
Troubleshooting chart on page 13 for
instructions on how to open the glass door in
case of a mechanical or power failure.
INTERRUPTING A PROGRAM
If you wish to interrupt a program to add an item to the
wash, press and hold the Door Open button ( ) until
the indicator light next to the button comes on
(approximately 3 seconds). Any water in the machine
will be pumped out before the door will open. Add the
itemto be washedand, if necessary,add more detergent.
Close the door. The unit will start at the point it was
interrupted.
You can also interrupt a program by pressing the Start/
Stop button until the indicator light next to the button
goes off. When you press Start again, the unit will start
at the beginning of the program.
If there is water already in the tub, you will have to turn the
Program knob to Drain to drain the water then press the
Door Open button. The door will open when the water has
drained. Insert the item you wish to wash and close the
door.Add more detergent, if necessary. Turn the Program
knob to the desired program and press Start.
OPTION BUTTONS
The Option buttons allow you to select wash
temperatures, spin speeds, delayed start, extra rinses,
high-water level, and anti-crease. Each of these options
is defined in more detail in the following paragraphs.
NOTE: The unit is programmed to retain the option
selections,except for temperaturesabove 140°
and Delayed Start.
Temperature Button
Select wash temperatures by pressing this button until
the temperature you desire displays on the LED. The
temperature options are 85°, 105°, 120°, 140°, 160°,
175°, and 205° F.
“C” on the LED indicates the wash temperature will be
the same as that of the incoming water (cold).
The wash temperature for the Wool and Hand/Delicate
wash programs can only be set for cold, 85° F, or 105° F.
NOTE: The temperature selection cannot be changed
after the main wash has started.
Spin Speed Button
Select the spin speed by pressing this button until the
spinspeedyoudesire displays. Thespinspeeds advance
in 200 rpm increments. The minimum spin speed is 400
rpm and the maximum is 1400 rpm.
The spin speed for the Perma Press, Wool and Hand/
Delicate programs cannot be set higher than 800 rpm.
You can also select No Spin, which is indicated by a
zero on the LED. The program will not have a spin cycle,
but it will drain.
There is also a No Spin/No Drain option, which is
indicated in the LED by the letters “no d.” When you
select this option, the program will not have a spin cycle
and the unit will stop with water in the machine. You will
have to set the Program knob Drain, to drain the unit
before you can open the door. If you wish to spin the
load before you remove it, set the Program knob to Spin
so it will spin and drain.
NOTE: The spin speed can only be altered before the
main wash water is pumped out.
Delayed Start Button
This button lets you delay starting the program from 1
to 24 hours. This means you can set the washer to start
at the most convenient time for you, such as an hour
before you arrive home from work. This feature is also
useful in areas where utility companies offer discount
rates during off-peak hours.
To select delayed start, press this button untilthe number
of hours you wish to delay starting the program displays
in the LED then press Start.
If you change your mind before you press Start, you
can void delay start by continuing to press the button
until a zero displays in the LED. To void this selection
after you have pressed Start, press and hold the Start
button until the selected temperature displays on the
LED.
Super Rinse Button
Press this button to add two rinses. The indicator light
next to the button stays lit when this option is selected
(on). Press the button again to turn the option off. (This
option cannot be altered after the main wash water is
pumped out.)
High Water Button
The normal water level for an ASKO is just below the
bottom of the glass door. Some users prefer to see the
waterlevel, soASKO addedthis option,which increases
the water level to about an inch above the bottom of the
glass door. It doesn’t necessarily enhance the washer’s
cleaning performance.
The indicator light next to the button stays lit when this
option is on. To cancel this option, hold down the button
until the indicator light goes off. This option cannot be
cancelled after the main wash has started.
NOTE: The Wool and Hand/Delicate wash programs
automatically have a higher water level.
Anti-Crease Button
This option is designed to reduce wrinkling of garments
that are not going to be taken out of the washer right
away. When you select Anti-crease, the drum will rotate
once every minute at the end of the program for two
hours or until you press the Door Open button.
The indicator light will stay lit when this option is on. To
cancelthis option, holddown the buttonuntil the indicator
light goes off. This option cannot be cancelled after you
have started the program.

Page 12
CARECARE
CARECARE
CARE AND MAINTENAND MAINTEN
AND MAINTENAND MAINTEN
AND MAINTENANCE INSTRANCE INSTR
ANCE INSTRANCE INSTR
ANCE INSTRUCTIONSUCTIONS
UCTIONSUCTIONS
UCTIONS
CLEANINGCLEANING
CLEANINGCLEANING
CLEANING THE DETERTHE DETER
THE DETERTHE DETER
THE DETERGENTGENT
GENTGENT
GENT
DRADRA
DRADRA
DRAWERWER
WERWER
WER
1. Pull the drawer out as far
as it goes then lift it up and
pull it out completely, as
illustrated.
2. Clean the drawer with a
soft brush under warm
running water. Do not put
the drawer in a
dishwasher.
3. Replace the drawer by
tilting it into position.
CLEANING THE PIN TRAPCLEANING THE PIN TRAP
CLEANING THE PIN TRAP
Your washing machine has a pin trap designed to trap
pins, hairpins, coins and similar items. This trap should
be cleaned occasionally. To do this, follow the steps
below:
1. Make sure as much water as possible is drained out
of the tub then turn off the power to the machine.
2. Using the flat edge of the
liquid detergent partition
piece, a flathead screw-
driver or similar item, gently
pry open the drain pump
cover, as illustrated.
3. There is always a small amount of water in the drain
pump area. Before you open the drain cover, place a
shallow container, such as a pie pan, on the floor
below the drain to catch the water.
4. Pull the small black drain
hose loose from its position
on the door cover and let
the water drain into the pan.
5. Unscrew the pin trap cover and lift it out.
6. You can now clean out any
grit or small objects. You
should also clean the pump
rotor at the back of the pump
housing.
7. Replace the drain cover and reconnect the drain hose.
You can change the temperature readout on the LED
from Celsius to Fahrenheit and vice versa. To do this,
follow the steps below:
1. Turn the machine off then on again. (00 should show
on the display.)
REMOREMO
REMOREMO
REMOVINGVING
VINGVING
VING AN OBJECT FRAN OBJECT FR
AN OBJECT FRAN OBJECT FR
AN OBJECT FROMOM
OMOM
OM
BETWEENBETWEEN
BETWEENBETWEEN
BETWEEN THE DRTHE DR
THE DRTHE DR
THE DRUMUM
UMUM
UM ANDAND
ANDAND
AND
OUTER CONTOUTER CONT
OUTER CONTAINERAINER
AINERAINER
AINER
Occasionally, a small item may fall between the drum
and the outer container. Such items should be removed
because they could corrode and cause rust stains on
the laundry. To remove the item, follow the instructions
below:
1. Insert a flathead screwdriver in the center hole in the
paddle and carefully push it to the left.
2. Grip the paddle with yourother hand and pull it toward
you.
3. Lift up the paddle and remove
the object.
4. Replace the paddle in its fixing
hole with the F-mark toward
you. Check that the paddle
clips are properly located in the
slots and slide the paddle
toward the back as far as it will
go.
CLEANINGCLEANING
CLEANINGCLEANING
CLEANING THE CONTRTHE CONTR
THE CONTRTHE CONTR
THE CONTROL POL P
OL POL P
OL PANELANEL
ANELANEL
ANEL
To clean the control panel, use only a warm, damp cloth.
To prevent penetration of water into the door lock and
electrical components, never spray water or cleaning
solvents on the control panel.Also,never use abrasive
cleaners or scouring pads on the outer surfaces because
they will scratch the finish and could remove the writing
onthe control panel.Some paper towelsmay also scratch
the finish.
WARNING!
Never spray clean the control panel. You could damage the
electrical components. Also, never use abrasive cleaners,
scouringpads or paper towels on the outer surfaces because
they will scratch the finish and they could remove the writing
on the control panel.
REMOREMO
REMOREMO
REMOVING HARDVING HARD
VING HARDVING HARD
VING HARD WW
WW
WAA
AA
ATER STTER ST
TER STTER ST
TER STAINSAINS
AINSAINS
AINS
FRFR
FRFR
FROMOM
OMOM
OM THE DRTHE DR
THE DRTHE DR
THE DRUMUM
UMUM
UM
If you live in an area with hard water, the washer drum
maybecome coated witha grey-white deposit.Toremove
it, pour about an ounce of citric acid in the drum and run
a Normal wash program at 205° F.
2. Press the Start button five times in succession then
press the Temperature button five times. (This must
be done within 15 seconds.) The LED will display a
C or F, whichever is the current selection.
3. Within three seconds, press the Temperature button
again to change the readout.
CHANGING TEMPERATURE READOUT FROM CELSIUS TO FAHRENHEIT

Page 13
TRTR
TRTR
TROUBLESHOOOUBLESHOO
OUBLESHOOOUBLESHOO
OUBLESHOOTINGTING
TINGTING
TING
If you should experience a problem with your washer,
you should review the following list of frequently
encountered situations. It could save you the cost and
inconvenience of a service call.
Eventhough the productis under warranty, ifthe problem
is not caused by defective workmanship or materials,
you will be charged for a service call. Refer to page 16
to determine what is and is not covered under your
warranty. If you’re still not sure, contact the ASKO
Advisory Center before you call a service technician.
BEFOREBEFORE
BEFOREBEFORE
BEFORE YY
YY
YOU CALLOU CALL
OU CALLOU CALL
OU CALL
Before calling for service or contacting ASKO regarding
a warranty issue, make a note of the model name, type
number and serial number. The model is on the front of
the detergent drawer. The type plate with the type name
andserial numbersis located above the glass door.(See
illustration below.)
Type Name
Type plate
(seebelow)
Model Name
Type: WMxx
000000000000
xxxxxxxxxxxMxxxxxxxW
1234567890123456
1
23456789012345
6
1234567890123456
123456
1
2345
6
1
2345
6
1
2345
6
123456
12-digit
Serial
Number
EMEREMER
EMEREMER
EMERGENCY DRAIN HOSEGENCY DRAIN HOSE
GENCY DRAIN HOSEGENCY DRAIN HOSE
GENCY DRAIN HOSE
Should you ever need to drain the water from the unit in
the event of a power outage, use the drain hose next to
the pin trap, as illustrated below.
1. Using the flat edge of
the liquid detergent
partition piece, a flat-
head screwdriver or
similar item, gently pry
open the drain pump
cover, as illustrated.
2. Before you proceed, place a
shallow container on the floor
near the drain to catch the
water.
3. Pull the small black drain
hose loose from its position
on the door cover and let the
water drain into the container.
4. When the machine is empty,
reconnect the hose securely
to its position on the door before you close the drain
pump cover.
TT
TT
The door whe door w
he door whe door w
he door wonon
onon
on’’
’’
’t open.t open.
t open.t open.
t open.
♦Make sure the power to the unit is on. If the power
is on and the indicator lamp is not lit, there is no
power supply. Check that the machine is properly
plugged into the electrical outlet. If it is, the fuses
may be blown. Call a service technician.
♦Make sure all the water has drained out.
♦If there is no water in the machine and the door won’t
open in the normal manner, you should be able to
open it manually, as follows:
1. Make sure the tub is as empty as possible and
the power is turned off.
2. Using the flat edge of the liquid detergent
partition piece, a flathead screwdriver or similar
item, gently pry open the drain pump cover.
3. Using a T20 or flathead screwdriver, unscrew
the red plastic looped handle.
4. Pull the handle toward you. The door should
open.
TT
TT
The mache mac
he mache mac
he machine whine w
hine whine w
hine wonon
onon
on’’
’’
’t start star
t start star
t start.t.
t.t.
t.
♦Check that the glass door is closed securely.
♦Make sure the power switch is turned on.
♦If the power switch is on and the indicator lamp is not
lit, there is no power supply. Make sure the machine
is properly plugged into the electrical outlet.
♦Check the house breaker switch/fuses.
TT
TT
The mache mac
he mache mac
he machine doesnhine doesn
hine doesnhine doesn
hine doesn’’
’’
’t ft f
t ft f
t fill.ill.
ill.ill.
ill.
♦Make sure the tap to the water supply line is open.
♦Turn off the water supply then disconnect the inlet
hose and check to see if the strainer in the inlet
connection is blocked.
TT
TT
The mache mac
he mache mac
he machine will not spin.hine will not spin.
hine will not spin.hine will not spin.
hine will not spin.
♦Make sure the pin trap or outlet hose isn’t blocked.
Clean if necessary. (See page 12.)
♦Make sure the No Spin option is turned off.
♦If a load is out of balance, the washer will rotate a
few seconds to redistribute the load then attempt to
spin again. It will do this up to ten times at a high
spin speed (1000 rpm or higher). If it still isn’t
balanced, it will advance the timer with no spin.
Emergency
Door Handle

Page 14
ERRERR
ERRERR
ERROR MESSAOR MESSA
OR MESSAOR MESSA
OR MESSAGESGES
GESGES
GES
Error messages will display on the LED if faults occur
while a program is in progress. The table below defines
each possible error message.
MESSAMESSA
MESSAMESSA
MESSAGEGE
GEGE
GE ERRERR
ERRERR
ERROROR
OROR
OR
When this symbol flashes on the LED it merely means the glass door isn’t closed securely.
Close the door and try again.
0000 If this message flashes on the LED, the machine has failed to spin. This could be because the
load is out of balance. Turn the power off then on again. Open the door and redistribute the
washing. Run the Spin program again.
FI This indicates an overflow has occurred. Call a service technician.
F2 This indicates a problem with the motor. Call a service technician.
F3 This indicates a problem with the drain pump. Refer to the Troubleshooting chapter for possible
solutions.
F4 This indicates a problem with the water inlet. Refer to the Troubleshooting chapter for possible
solutions.
F5 This indicates a problem with the thermistor. Call a service technician.
F6 This indicates a temperature stop fault. Call a service technician.
F7 This indicates foaming. Run the Rinse program again. Try using less detergent and softener
and use only low-sudsing detergents. (See page 8.)
F8 This indicates a door opening fault. Call a service technician.
To remove the message, turn the power off or change
the program.
ExtrExtr
ExtrExtr
Extreme vibreme vibr
eme vibreme vibr
eme vibraa
aa
ation during spin ction during spin c
tion during spin ction during spin c
tion during spin cyy
yy
ycc
cc
clele
lele
le..
..
.
♦Makesure the packagingand shipping supportswere
removed properly. (See page 4.)
♦Check that the machine is level.
♦Adjust machine feet and tighten locknuts. (See page 4.)
OvOv
OvOv
Overer
erer
ersudsingsudsing
sudsingsudsing
sudsing..
..
.
♦Too much detergent could cause suds to back up
through the detergent compartment and run down
the front of the washer onto the floor. The suds will
condensate into water and form a small puddle on the
floor. (See page 8 for detergent recommendations.)
WW
WW
Washer stops during casher stops during c
asher stops during casher stops during c
asher stops during cyy
yy
ycc
cc
clele
lele
le..
..
.
♦It is normal for the machine to pause occasionally
during operation, especially between cycles and
during the delicate wash program.
♦Make sure the No Spin option isn’t turned on.
♦If the power switch is on and the indicator lamp is
not lit, there is no power supply. Make sure the
machine is properly plugged into the electrical outlet.
♦Check the house breaker switch/fuses.
FF
FF
Foam in the foam in the f
oam in the foam in the f
oam in the final rinse winal rinse w
inal rinse winal rinse w
inal rinse waa
aa
aterter
terter
ter..
..
.
♦Make sure nothing is blocking the outlet hose.
♦Check for kinks in the outlet hose.
♦Make sure the pin trap isn’t blocked. (See page 12.)
♦Make sure that no part of the hose (including any
joints) is less than 3/4” (19 mm) in diameter.
TRTR
TRTR
TROUBLESHOOOUBLESHOO
OUBLESHOOOUBLESHOO
OUBLESHOOTINGTING
TINGTING
TING (CONTINUED)(CONTINUED)
(CONTINUED)(CONTINUED)
(CONTINUED)
WW
WW
Waa
aa
ater left in the macter left in the mac
ter left in the macter left in the mac
ter left in the machine after fhine after f
hine after fhine after f
hine after finalinal
inalinal
inal
spin.spin.
spin.spin.
spin.
♦Make sure the No Spin option isn’t turned on.
♦Make sure the pin trap isn’t clogged. (See page 12.)
♦Make sure the outlet hose isn’t clogged.
♦Check for kinks in the outlet hose.
♦Make sure that no part of the outlet hose (including
any joints) is less than 3/4” (19 mm) in diameter.
WW
WW
Waa
aa
ater leakster leaks
ter leakster leaks
ter leaks..
..
.
♦All hoses should be inspected at least once a year.
If they show signs of cracking, they should be
replaced.
♦Checkto see if hose connectionsat faucets are tight.
♦Make sure the end of the outlet hose is securely
inserted into the drain receptacle.
♦Makesure nothingis caughtbetween theSmart Seal
and the tank, such as apron strings, small
handkerchiefs, socks, etc.

Page 15
Emptyall pockets andturn inside outbefore laundering.
Fastenall hooks,snaps, and zippersbefore laundering toavoid snags.Remove
sharpbuckles. Turnknitsinside out.
Beforewashing, rinse harsh chemicals(such as battery acid,hair care
chemicals,cleaning solutions, etc.)from towels andother articles toavoid holes
infabrics. Do not allowthese unrinsed items to contactother fabrics.
Mendall garmentsbefore laundering toprevent enlarging ofrips.
Theseitems may fray at edges from normalwear,not the washer.Washonly in
halfloads and don’twash in the sameload with heavy items,such as towels or
jeans.
Rips,snags,
excesswear Sharp objectsin pockets
Hooks,snaps, zippers,
buckles
Harshchemicals
Existingrips and tears
Permanentpress items
Permanentpress items shouldbe washed inhalf-loads to preventwrinkling. If
possible,use a slowerspin speed.
Uselower washtemperature settings.
Excessive
wrinkling Machinetoo full
Watertoo hot
Most items can be safely washed in an ASKO washing
machine. We recommend that you follow the care label
instructions as closely as possible for the best cleaning
results. Should problems occur, some possible causes
and suggested solutions are listed below.
Youmay need to add slightly more detergent if clothes are heavilysoiled, have
oilystains, or if your water is veryhard.
Selecta hotter temperature setting foreach type ofload.
Besure to adda prewash and/orpresoak for heavilysoiled or oilyitems.
Oncewet,the clothesmust haveroom totumble freely,especiallysyntheticsand
permanentpress.
Besure youuse alaundry detergent,not a“soap.” Soapreacts withthe minerals
inhard water to forma soap curd, whichcan be deposited on clothes.
Problem Possible Cause Suggested Solution
Graying Notenoughdetergent
Waternot hot enough
Improperlyprewashedor
presoaked
Washeroverload
Soapused inhard water areas
Separateclothes that shed lint(chenille and terrycloth) fromclothes that attract
lint(synthetics, corduroy, velveteen).
Non-phosphatedetergents can combinewith minerals inhard water andform a
residuewhich can appearto be lint.Use a lowphosphate detergent. If possible,
installa watersoftener.
Readlabels. Most softenersshould only be usedin the final rinse.Add softener
to the softener compartment. If added to the wash cycle, softeners can have a
reactionwith detergents,producing a whiteresidue.
Pilling,which can look like lint, isproduced by normal wear on cotton/polyester
blendfabrics.Toreducepilling,wash thesefabrics insideout. Forthebest results,
washin the delicatecycle.
Lintor residue
lefton clothes Improper sortingof clothes
Non-phosphatedetergent
Fabricsoftener usedimproperly
Pilling
Addslightly moredetergent.
Usethe hottestrecommended temperature foreach type of load.
Ifpossible, install awater filter.Asmallamount of Calgon or other type of water
conditioneradded oncea week isadvisable inhard water areas.
Yellowing Notenough detergent
Waternot hot enough
Ironor manganesein water
Followgarment care label instructionscarefully (see page 7). Some fabrics will
shrinkno matter how they arewashed. Some may be machinewashed but not
machinedried.
Shrinkage Improperwashing or
drying
Knits tend to shrink more than woven fabrics. If a knit has been heat-shaped,
washin cool orwarm water.Drywith thelow setting.
Thiscanoccurwhenspecialstabilizing finishesarereducedfromwearor repeated
washings.Garment maysometimes bereshaped bypressing afterwashing and
drying.
Shrinkage can occur if the knit fabric was not stretched properly by the
manufacturer.Press backinto shape eachtime garment iswashed and dried.
Knitshrinkage Overheating
Delayedor gradual shrinkage
Poorconstruction
Darkclothes, especially cottons,can bleed excessdyes into washwater.White
or light-colored clothes can absorb the dye and discolor. Separate light items
fromdark items.
Alwaysempty allpockets before washing.
Coolor cold water isbest for retaining dark orbright colors.
Fadingand
discoloring Impropersorting
Crayonsor pens inpockets
Watertoo hot Protein stains, such as milk, egg, blood and soy formula should be removed in
coldwater.Oilystains should be washedin the hottest water recommended for
eachfabric type.
The longer a stain remains on a fabric, the harder it is to remove. Treat stains
promptly. Do not set stains by machine drying or ironing fabrics until stains are
completelyremoved.
Stains Incorrectwater temperature
Oldstains
COMMON LACOMMON LA
COMMON LACOMMON LA
COMMON LAUNDRUNDR
UNDRUNDR
UNDRY PRY PR
Y PRY PR
Y PROBLEMSOBLEMS
OBLEMSOBLEMS
OBLEMS
NOTE: ASKO has no control over what is put in our
appliances once installed in a customer’s home. You
are solely responsible for what you wash in your
ASKO washing machine.

Page 16
Some states will not allow the exclusion or limitation of incidental or consequential damages, so this exclusion or
limitation may not apply to you. This warranty gives you specific legal rights and you may also have other rights which
vary from state to state.
For warranty service, contact the dealer from whom you purchased the unit or an authorized ASKO service
agent. Service will be provided during normal business hours. Should you have a service problem that cannot be
resolved locally, contact AM Appliance Group at the numbers listed below. Before calling for service or contacting AM
Appliance Group regarding a warranty issue, make a note of the model, type name, and serial number (see page 21).
IN NO EVENT SHALL AM APPLIANCE GROUP BE RESPONSIBLE
FOR ANY INCIDENTAL OR CONSEQUENTIAL DAMAGES.
ASKO PRODUCT WARRANTY
Be sure to complete the Warranty Registration Card you received with your appliance and mail it to AM
Appliance Group to validate your appliance warranty.
Cosmetic damage must be reported to your dealer within five days from the date of purchase. After unpacking
the washer, thoroughly check the unit for cosmetic damage.
AM APPLIANCE GROUP WILL NOT PAY FOR:
A. Service calls to:
1. Correct the installation of the appliance.
2. Repair damage due to shipment, delivery, installation, misuse or abuse.
3. Instruct how to use the appliance.
4. Replace house fuses or correct house wiring.
5. Correct house plumbing, including drainage problems related to improper installation.
6. Clean or service air device in drain line.
B. Repair and/or replacement parts for failure of product if appliance is used for other than home/residential use.
C. Damage resulting from accident, fire, floods, acts of God, alteration, misuse, abuse, improper installation, or
installation not in accordance with local electrical or plumbing codes.
D. Any shipping costs for parts during the limited warranty period.
E. Replacement parts or repair labor costs for units operated outside the continental United States.
F. Pickup and delivery. ASKO appliances are designed to be repaired in the home.
FOR RESIDENTIAL INSTALLATIONS ONLY
Write to us at:
AM Appliance Group
P. O. Box 851805
Richardson, Texas 75085-1805
Or call our
Customer Service Center at
800-898-1879
or
972-238-0794
FOR NON-RESIDENTIAL INSTALLATIONS
One-year Full Warranty
From date of purchase. ASKO replacement parts and/or repair labor to correct defect
in materials or workmanship. Service must be provided by an
authorized ASKO service agent.
Three-Year Full
From date of purchase.
AM APPLIANCE GROUP WILL PAY FOR:LENGTH OF WARRANTY
Fourth & Fifth Year Limited
Three year full plus fourth and fifth year limited
from date of purchase.
Lifetime
ASKOreplacement parts (laborcostnot included) forany defective
solid-state controls, timers, motors, or pumps. Service must be
provided by an authorized ASKO service agent.
ASKO replacement parts (labor cost not included) of the stainless
steel tank if it fails to hold water due to a manufacturing defect,
such as rusting or cracking. Service must be provided by an
authorized ASKO service agent.
ASKO replacement parts and/or repair labor to correct defect in
materials or workmanship. Service must be provided by an
authorized ASKO service agent.
Model W6441

Page 17
INDEXINDEX
INDEXINDEX
INDEX
AA
AA
A
Anti-creasebutton 11
Automaticwater levelcontrol 3
BB
BB
B
Bleach 8
Built-ininstallation 5
CC
CC
C
Careand cleaning 12
Carelabel instructions 7
Celsius,changing LED readout 12
Childsafety features 2
Child-safecatch 8
Cointrap, cleaning 12
Controlpanel 10, 18
cleaning 12
Cottons 6
Customerservice center 16
DD
DD
D
DelayedStart button 11, 18
Delicatefabrics 6
Detergentdrawer 8
cleaning 12
Detergents 8, 9
DoorOpen button 11
Drainhose, emergency 13
Drainoutlet connection 5
Drum 12
Drumpaddles, removing 12
Dyeingfabric 9
EE
EE
E
Electricalconnections 5
Emergencydoorhandle 13
Emergencydrain hose 13
Enzymestep 3
Errormessages 14
FF
FF
F
Fabricsoftener 9
Fabrics
dyeing 9
recommendedwash temps 9
Fahrenheit,changing LEDreadout 12
Fluorescentcolored fabrics 6
Foamin final rinse 14
Freestandinginstallation 5
GG
GG
G
Glassdoor 3
emergencyopening 13
Groundinginstructions 5
HH
HH
H
Hardwater 9
Hardwater stains,removing 12
HEdetergents 8
Highwater button 11
II
II
I
Installationinstructions 4, 5
Interruptinga program 11
LL
LL
L
Laundrydetergents 8
Laundryproblems 14
Laundrytips 6
LEDwindow 10
Levelingthemachine 4
Linens 6
Lint(Pin) trap 12
Liquiddetergents 8
Loadsizes, recommended 6, 9
Low-sudsingdetergents 8
OO
OO
O
OperatingInstructions 10, 11, 18
Optionbuttons 11
Oversudsing 14
PP
PP
P
Paddles,removing 12
Permanentpress items 6
Pintrap, cleaning 12
Poisonhotline 2
Powderdetergents 8
Powerbutton 10
Pre-soakbutton 11
Preparingthe laundry 6
Problems 14
Productwarranty 16
Programknob 10
Programs 10, 18
RR
RR
R
Recommendeddetergents 8
Remainingtime indication 10
Rinsecycles 3
S
Safetyinstructions 2
SensorLevel Control 3
Serialnumber location 13
Service 16
Shippingsupports, removing 4
Softeners 9
Solutionsto problems 13
Sortingthe laundry 6
Specifications 4
SpinSpeed button 11
Stackedinstallation 5
Start/Stopbutton 10
SuperRinse button 11
SuperRinse option 3
TT
TT
T
Temperature
changingreadout 12
control 3
Temperature button 11, 18
Troubleshooting 13
Type plate locationon unit 13
VV
VV
V
Vibration,extreme 14
WW
WW
W
Warranty 16
Washprograms 9, 10, 18
Washtemperature control 3
Washtemperatures 9
Washerfeatures 3
Washingspecial items 14
Water
hardness 9
levelcontrol 3
supplyconnection 4

Page 18

Page 19

Page 20
THE CONTRTHE CONTR
THE CONTRTHE CONTR
THE CONTROL POL P
OL POL P
OL PANELANEL
ANELANEL
ANEL
QQ
QQ
QUICK STUICK ST
UICK STUICK ST
UICK STARAR
ARAR
ART INSTRT INSTR
T INSTRT INSTR
T INSTRUCTIONSUCTIONS
UCTIONSUCTIONS
UCTIONS
Door Open
Button
Start/Stop
Button
Power Button
Program Knob
Power
Indicator
Light
Option Buttons
LED Window
PRPR
PRPR
PROGRAMSOGRAMS
OGRAMSOGRAMS
OGRAMS
The table below defines each program. The program options are defined on page 11.
CAUTION! Some fabrics may not be able to withstand extremely hot temperatures.
Please refer to the Recommended Wash Temperatures chart on page 9.
NOTE: Program times will increase when you select higher wash temperatures. (See “Temperature Control” on page 3.)
1. Press the Power Button. The Power Indicator Light
will glow to indicate the machine is on and the LED
window will display 00.
2. Press and hold the Door Open button ( ) until the
indicator light next to the button comes on
(approximately 3 seconds).
3. Load the laundry.
4. Put in detergent and fabric softener. (See page 8 for
recommended brands and amounts.)
5. Turn the Program Knob clockwise to the desired
program. (See the table below for program
descriptions.) The LED window will display the
program temperature.
6. Select options (see page 11 for detailed definitions
and operating instructions).
Temperature Button – Press this button until the
temperature you desire displays on the LED.
Spin Speed Button – Press this button until
the spin speed you desire displays.
Delayed Start Button – Press this button until
the number of hours you wish to delay starting
the machine displays (1–24 hours).
Super Rinse Button – Press this button to add
two rinses.
High Water Button – Press this button to
increase the water level.
Anti-crease Button – Press this button for a
two-hour anti-crease cycle at the end of the
program to prevent wrinkling.
7. Press Start/Stop to start the program. The LED will
display the estimated running time.
8. “End” will display when the program is complete.
Press Door Open to remove the laundry.
NOTE: Please read the safety instructions on page 2
before using your washer for the first time.
Below is a brief summary of the operating instructions. Refer to pages 10 and 11 for more details.
NOTE: To get the best performance from your washer, read all operating instructions before using it for the first time.
Program Pre-
wash Main
Wash Wash
Action Temp. (° F) #
Rinses Int.
Spin Final
Spin Max Spin
Speed Load
Size
Stain Yes Long Normal Cold, 85 to 205 5 2 Long 1400 Full
Heavy No Long Normal Cold, 85 to 205 5 2 Long 1400 Full
Normal No Short Normal Cold, 85 to 205 5 2 Long 1400 Full
Perma press No Short Normal Cold, 85 to 205 3 No Short 800 Half
Quick No Short Normal Cold, 85 to 205 3 No Long 1400 Full
Super quick No Short Normal Cold, 85 to 205 2 No Long 1400 Half
Wool No Short Gentle Cold, 85 or 105 3 No Short 800 Third
Hand/Delicate No Short Gentle Cold, 85 or 105 3 No Short 800 Third
Rinse n/a n/a n/a n/a 1 n/a Long 1400 Full
Spin n/a n/a n/a n/a n/a n/a Long 1400 Full
Drain n/a n/a n/a n/a n/a n/a n/a n/a Full
Art. No 80 656 77 Rev 02
Other manuals for W6441
4
Table of contents
Other Asko Washer manuals