10
PURE Aquarium KIT
There is also a demo mode (DEMO), which simulates the complete
daily cycle in a few seconds to highlight the potential off the led
lighting system when controlled by the integrated timer (point F).
IMPORTANT
Turning the light off manually with the button on the Timer and
turning the light off automatically at the set time do not disconnect
the lighting unit from the power supply.
The PURE LED aquarium timer does not need batteries. If there is a
mains power failure, the system maintains the user settings for at
least 12 hours.
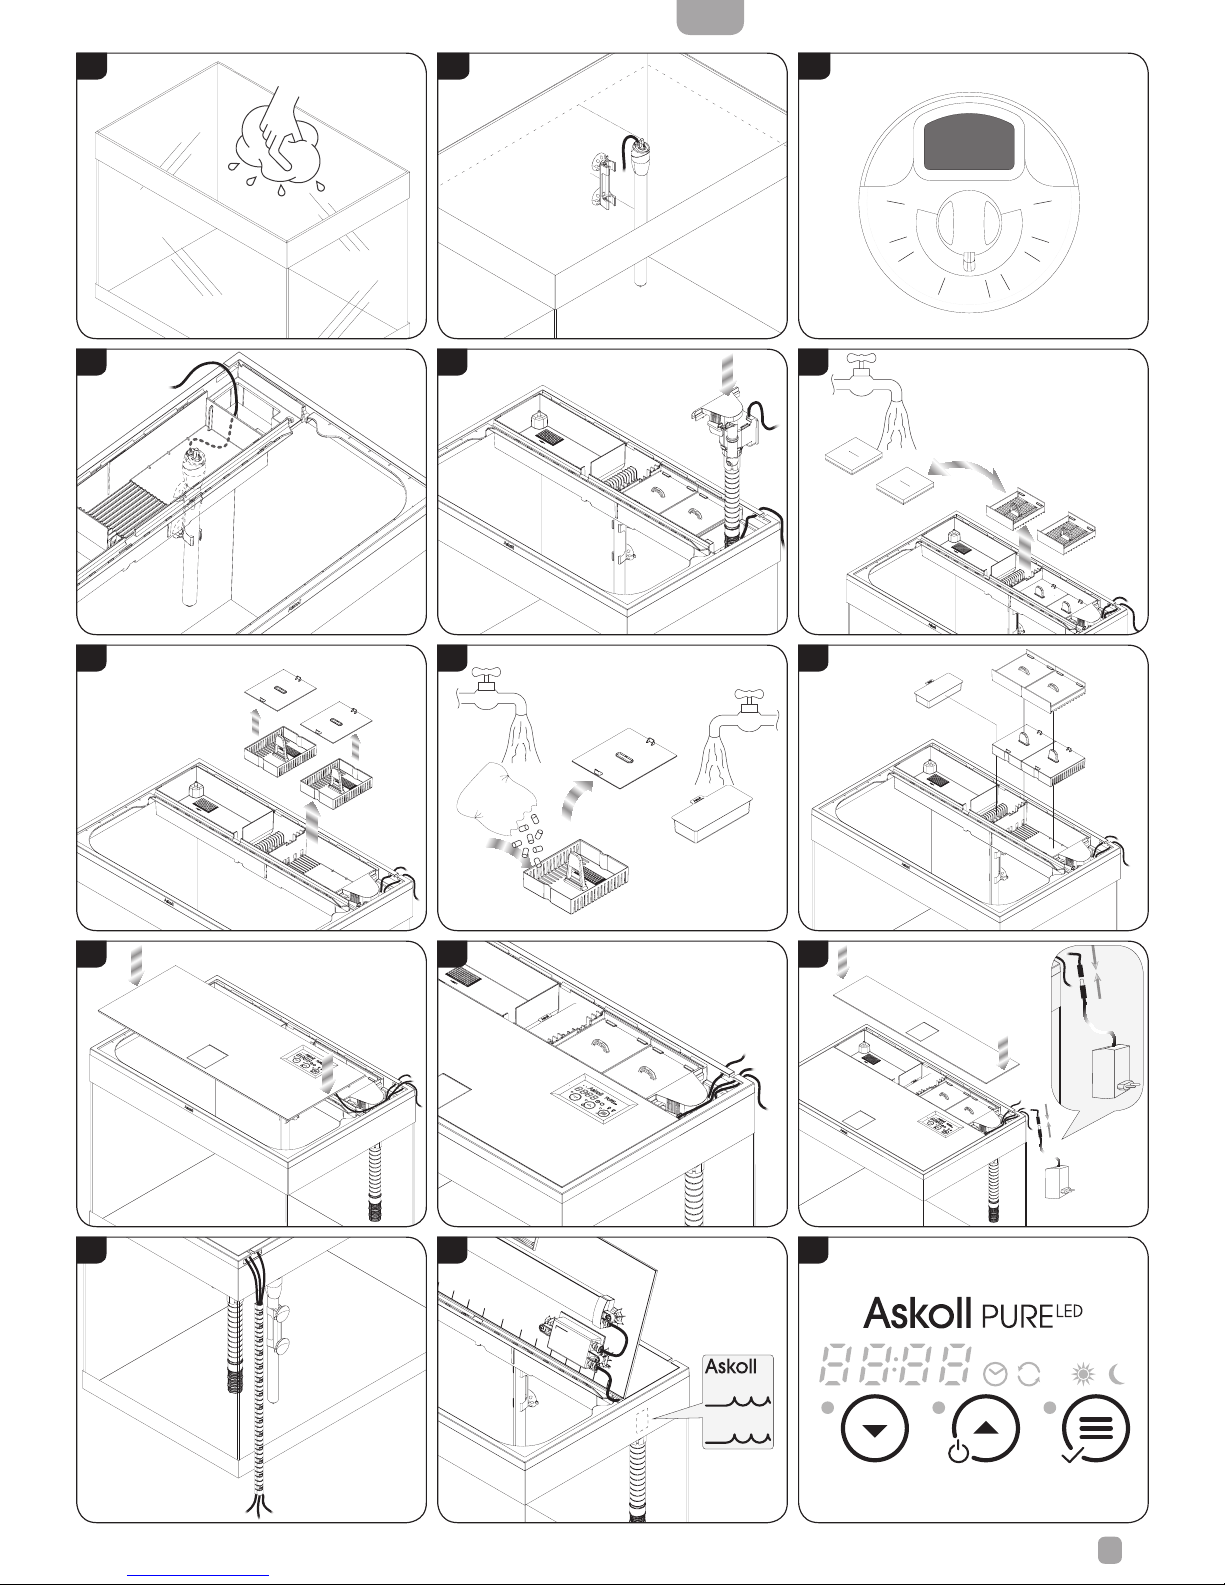
A. Setting the clock time on rst start up (hours and
minutes)
Once the lighting unit is connected to the power supply, the timer
waits for the time to be set (it displays icon and the two hour
digits ash).
1) Set the hour by pressing to increase and to decrease the
setting. Then press to set the minutes.
2) Set the minutes by pressing to increase and to decrease
the setting. Press to conrm. The time has now been set.
If you do nothing, the lighting system is set by default to turn on at
10:00 and turn off at 18:00. To set the on/off times to your preference
or to set the only manual mode, refer to point C.
B. Manual mode
Press to turn on the day light ( icon on), the night light ( icon
on) and turn the light off completely, in that sequence.
C. Programming the automatic light on/off times
1) Hold down button until the text “light” displays (wait for the
countdown 3..2..1 “light” to terminate).
2) The time digits will now display “Auto” and icons and will
ash. To set the only manual mode, press until the text “man”
displays. Conrm by pressing .
3) Once you have set automatic mode “auto”, icon and the hour
digits will ash. Set the on time (hour and minutes) in same way
as for the clock time (points 1 and 2, par. A).
4) Once you have set the on time, icon and the hour digits will
ash. Set the off time (hour and minutes) in same way as for the
clock time (points 1 and 2, par. A).
5) Once you have nished, the timer will display the clock time
again.
6) The timer is now programmed to run the automatic daily light
cycle, as indicated at the start of this chapter.
D. Changing the clock time (hours and minutes)
If you need to change the clock time, proceed as follows:
1) Press and hold down until the clock digits display “time” (you
must wait for 2 countdowns to complete: 3..2..1 “light”
3..2..1 ”time”).
2) The icon and the hour digits will ash: set the clock time
(hours and minutes) as indicated in par. A.
E. Turning the RFT function on and off
The RFT is on by default (On).To turn it on/off, proceed as follows:
1) Press and hold down until the clock digits display “RFT” (you
must wait for 3 countdowns to complete: 3..2..1 “light”
3..2..1 ”time” 3..2..1 ”RFT”).
2) The clock digits display “On” and icon ashes; press to
deactivate (OFF) or activate (ON) the RFT function. Conrm by
pressing .
3) Once you have nished, the timer will display the clock time
again.
When the RFT function is on, the timer will ash every 15 days to
remind you to do scheduled maintenance. To reset the indication,
press .
F. Turning the DEMO function on and off
1) Hold down buttons and simultaneously until the clock dig-
its display “DEMO”(you must wait for the countdown 5..4..3..2..1
“DEMO” to terminate).The DEMO function is now active.
2) To turn DEMO mode off, press . The timer will display clock
time again.
G. Restoring the factory defaults (timer reset)
1) Press and hold down buttons and simultaneously until
the clock digits display “RSET” (you must wait for 2 countdowns
to complete: 5..4..3..2..1 “DEMO” 5..4..3..2..1 ”RSET”).
2) The timer will now restore the factory default settings.
5.1.2. Filtration
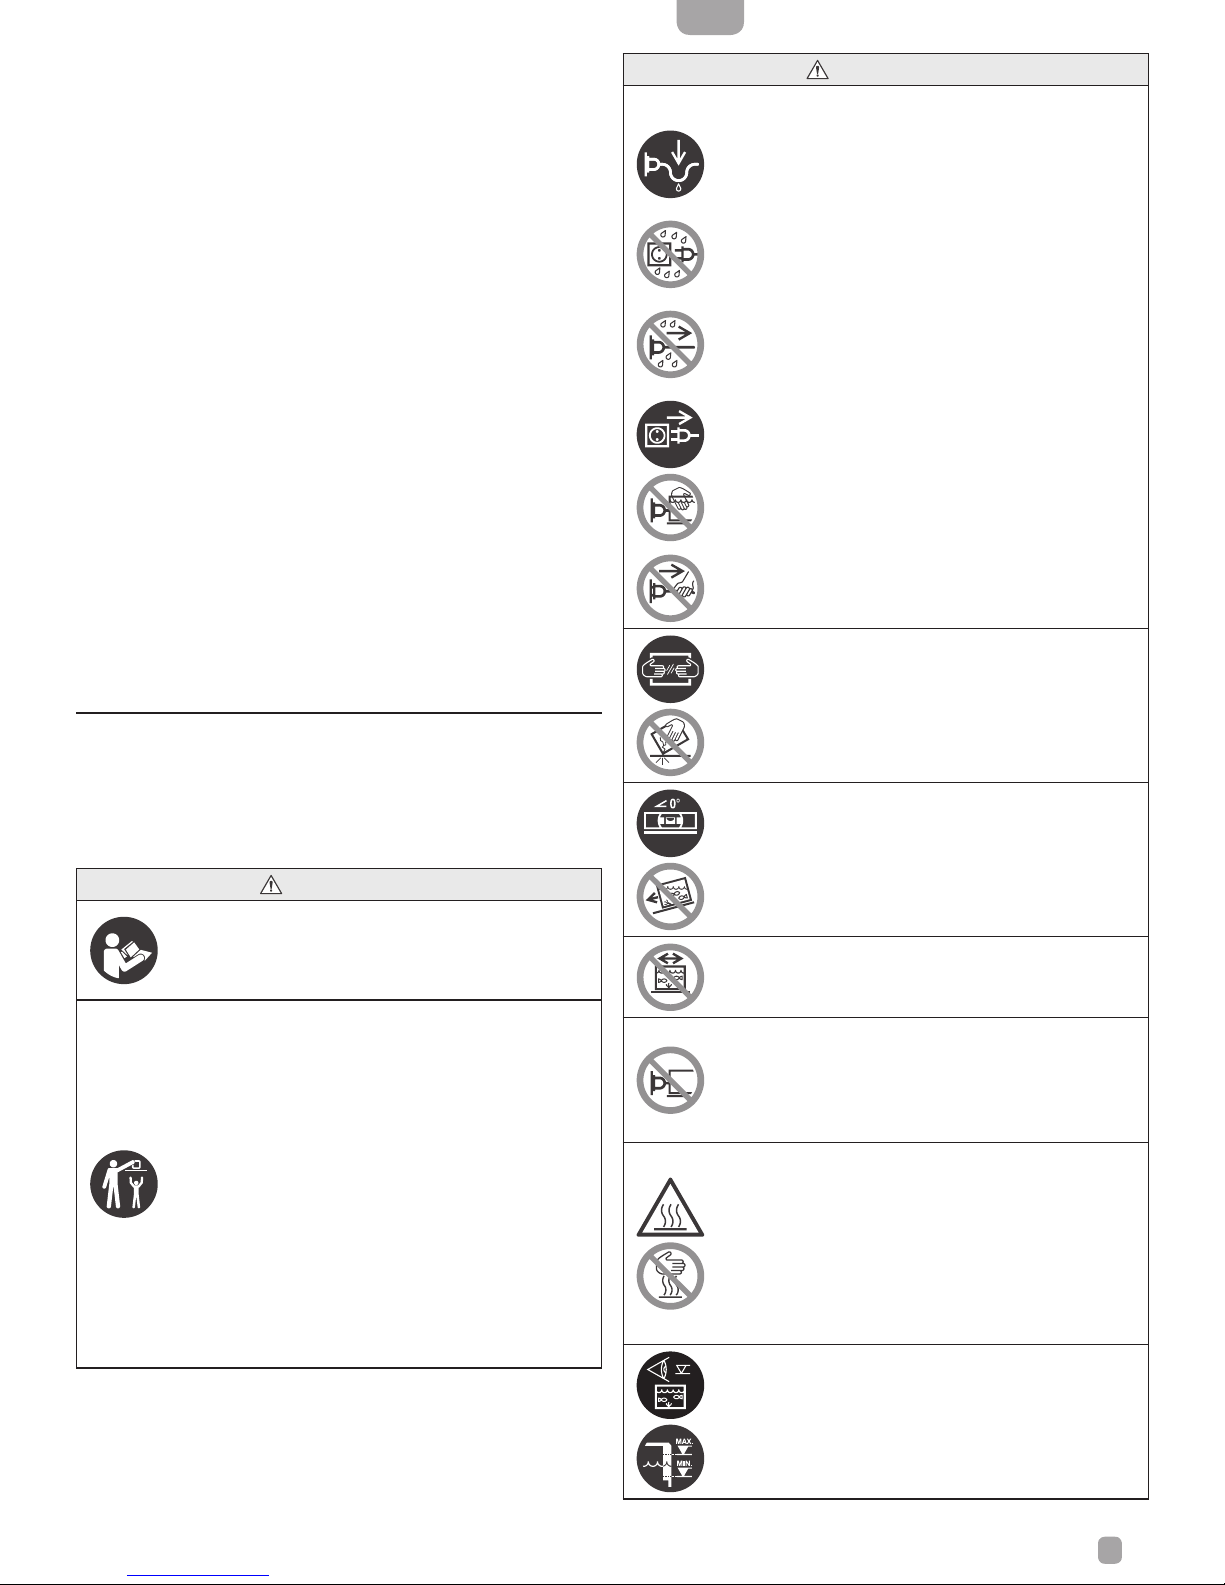
CAUTION
Always close the lter cover after the necessary oper-
ations have been performed, to prevent algae growing
on the lters due to their exposure to direct light.
Aquarium water, to provide the best habitat for sh and plants, must
be ltered continuously with mechanical, biological and chemical
ltration.
Mechanical ltration, which uses double layer sponges, removes
suspended particulates to keep the water clear. You can always
check the degree to which the sponges are soiled by simply opening
the lter cover.
Biological ltration, done by the nitrifying bacteria which grow in
the pores of the ceramic cylinders, minimises the level of toxic chem-
icals in the water, which are harmful for the aquatic fauna, transform-
ing the ammonia produced by the sh into nitrates. It takes around
4 weeks for a sufcient amount of bacteria for effective purication
to develop in the ltration media. This is why the rst month of the
aquarium’s life is critical, and the sh should be added only gradually,
to allow the nitrifying bacteria to take hold and multiply to a suitable
level.
Chemical ltration is done by the 3ACTION cartridge, which con-
tains a special mix of three ingredients:
• Activated carbon for purifying the previously ltered water from
bad odours, colourants, pharmacological residues and other un-
desired compounds.