manuals.online logo
Brands
  1. Home
  2. •
  3. Brands
  4. •
  5. aspenhome
  6. •
  7. Indoor Furnishing
  8. •
  9. aspenhome I222-422 User manual

aspenhome I222-422 User manual

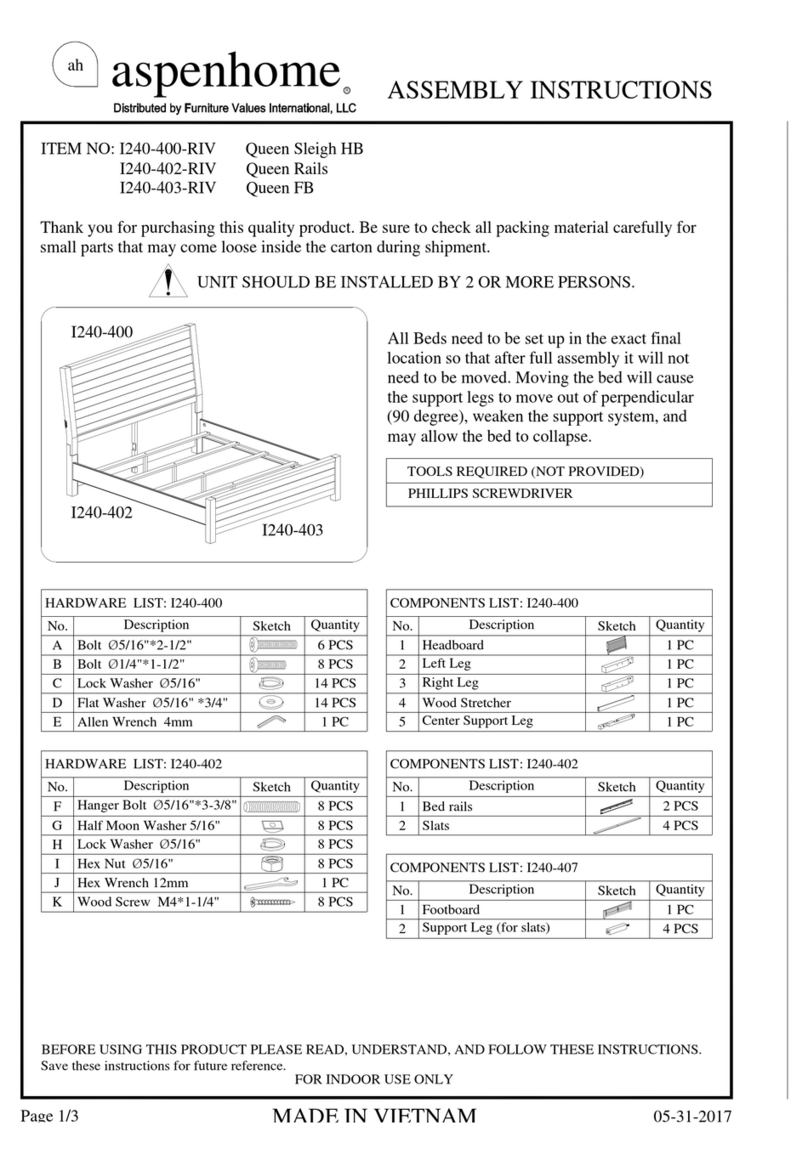
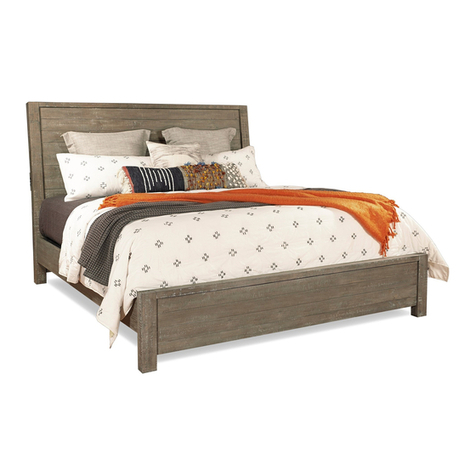
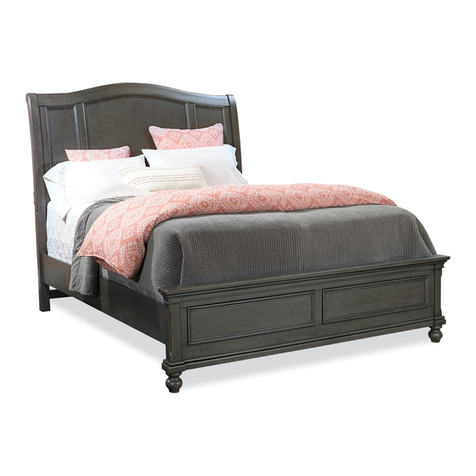
ITEMNO:I222-422Queen Uph HB
I222-402 Queen Railsw/ Decking
I222-403 Queen LowProfileFB
Thankyouforpurchasingthisqualityproduct.Besuretocheckallpacking material carefullyfor
small partsthatmaycomelooseinsidethe cartonduringshipment.
UNIT SHOULDBE INSTALLEDBY2ORMORE PERSONS.
All Bedsneedtobeset upinthe exact final
locationsothatafterfull assemblyit will not
needtobemoved. Moving thebedwill cause
thesupportlegstomoveoutofperpendicular
(90degree),weakenthesupportsystem, and
may allowthebedtocollapse.
aspenhome
RASSEMBLYINSTRUCTIONS
MADEINVIETNAM
ah
BEFORE USING THISPRODUCT PLEASEREAD, UNDERSTAND, AND FOLLOWTHESEINSTRUCTIONS.
Save these instructionsforfuture reference.
FORINDOORUSEONLY
TOOLSREQUIRED (NOTPROVIDED)
PHILLIPSSCREWDRIVER
I222-403
I222-422
COMPONENTSLIST: I222-422
No.
1
2
3
4
Description Sketch Quantity
Headboard
LeftLeg
RightLeg
WoodStretcher 1PC
1PC
1PC
1PC
COMPONENTSLIST: I222-403
No.
1
2
Description Sketch Quantity
Footboard 1PC
I222-402
COMPONENTSLIST: I222-402
No.
1
2
Description Sketch Quantity
Bed rails
Slats 4PCS
2PCS
3Decking 8PCS
HARDWARELIST:I222-422
1PC
No.
A
B
C
D
Description Sketch Quantity
Bolt 5/16" x1-1/2"
Lock Washer5/16"
FlatWasher5/16" x3/4"
Allen Wrench M4
10 PCS
HARDWARELIST:I222-402
8PCS
No.
F
G
Description Sketch Quantity
HangerBolt 5/16" x3"
HexNut5/16"
HexWrench 13mm
8PCS
1PC
Wood Screw #4x1-1/4"
8PCS
HalfMoon Washer 5/16"
10 PCS
H
I
E
10 PCS
8PCS
Wood Screw #4 x3/4" 16 PCS
J
Page1/6
SupportLeg(Long)
SupportLeg(Short)
34PCS
4PCS
05-23-2023
aspenhome
RASSEMBLYINSTRUCTIONS
MADEINVIETNAM
ah
STEP2:Attachthewoodstretchertothelegsbyusing4bolts(A),lock washers(B) and flat
washers(C).
STEP1: Laytheheadboardfacedownonasoftsurface.Attachthe left leg and right leg to
headboardbyusing6bolts(A),lockwashers(B)andflatwashers(C).
LeftLeg
RightLeg
A
B
C
D
A
B
C
D
Slatbearerin
upperposition
Slatbearerin
lowerposition
ITEMNO:I222-422Queen Uph HB
I222-402 Queen Railsw/ Decking
I222-403 Queen LowProfileFB
STEP3: Theside railsmaybeused on eitherside.
Arrangethesiderailssotheslatbearers arein
UPPERPOSITIONpriortoattachmentasOPTION 1
andtheslatbearersareinLOWERPOSITIONprior
toattachmentasOPTION 2.
02-10-2020
Page2/6
aspenhome
RASSEMBLYINSTRUCTIONS
MADEINVIETNAM
ah
SideRail
Headboard
Slatbearer
Side Rail
E
FGH
Makesuretheslatbeareris
inthe UPPER position.
I
ITEMNO:I222-422Queen Uph HB
I222-402 Queen Railsw/ Decking
I222-403 Queen LowProfileFB
STEP4: Screwthebolts(E)intoHB&FB.Makesuretheslatbearerisinthe UPPER position.
Alignthe boltswiththe holesintheendofsiderailsandattach theside railstoHB&FBusing
halfmoonWasher(F)andhexnuts(G).Thenuseahexwrench totightenall thenuts.
OPTION1: Thesiderailsmaybeusedoneitherside.Arrangetheside railssothe slat
bearersareinUPPERPOSITIONpriortoattachment inSTEP 4.
Page3/6
STEP6: Arrangeslatsontheslatbearersand then lay the
deckingontopofthe slats.Make surethe topandbottom
slatsaresituatedunderneaththepre-drilled holesasshownin
STEP7.Remove thedecking andattachslatstothe slat
bearerswithwoodscrews(I).
STEP5: Attachthesupportlegs(long)totheslatsasshown
right.
ThisEndUp
Slat
SupportLeg(Long)
05-23-2023
aspenhome
RASSEMBLYINSTRUCTIONS
MADEINVIETNAM
ah
FUNCTIONALITYINSTRUCTION
I222-403
I222-402
I222-422
ITEMNO:I222-422Queen Uph HB
I222-402 Queen Railsw/ Decking
I222-403 Queen LowProfileFB
SinglePowered USB
PortforCharging on
bothsides
STEP7: Putthedeckingovertheslats, securedeckingtothe slatswithwood
screws(J)throughthepre-drilledholesinthedecking asshownbelow.
Pre-drilledhole
Makesurethatthereisaslat
underthepre-drilled hole.
JDecking
Slat
I222-403
I222-402
I222-422
Page4/6
05-23-2023
aspenhome
RASSEMBLYINSTRUCTIONS
MADEINVIETNAM
ah
ITEMNO:I222-422Queen Uph HB
I222-402 Queen Railsw/ Decking
I222-403 Queen LowProfileFB
SideRail
Headboard
Slatbearer
Side Rail
Makesuretheslatbeareris
inthe LOWER position.
I
STEP4: Screwthebolts(E)intoHB&FB.Makesuretheslatbearerisinthe LOWER position.
Alignthe boltswiththe holesintheendofsiderailsandattach theside railstoHB&FBusing half
moonWasher(F)andhexnuts(G).Thenuseahexwrench totightenall thenuts.
OPTION2: Thesiderailsmaybeusedoneitherside.Arrangetheside railssothe slat
bearersareinLOWERPOSITIONpriortoattachment inSTEP 4.
FGH
E
Page5/6
STEP6: Arrangeslatsontheslatbearersand then lay the
deckingontopofthe slats.Make surethe topandbottomslats
aresituatedunderneaththepre-drilledholesasshowninSTEP
7. Removethedeckingandattach slatstotheslatbearerswith
wood screws (I).
ThisEndUp
Slat
SupportLeg(Short)
STEP5: Attachthesupportlegs(short)totheslatsasshown
right.
05-23-2023
aspenhome
RASSEMBLYINSTRUCTIONS
MADEINVIETNAM
ah
FUNCTIONALITYINSTRUCTION
I222-403
I222-402
I222-422
ITEMNO:I222-422Queen Uph HB
I222-402 Queen Railsw/ Decking
I222-403 Queen LowProfileFB
SinglePowered USB
PortforCharging on
bothsides
STEP7: Putthedeckingovertheslats, securedeckingtothe slatswithwood
screws(J)throughthepre-drilledholesinthedecking asshownbelow.
Decking
Pre-drilledhole
Makesurethatthereisaslat
underthepre-drilled hole.
J
Slat
Page6/6
J
05-23-2023
Page1/6
ITEMNO:I222-425King Uph HB
I222-406 KingRailsw/ Decking
I222-410 CalKing Railsw/ Decking
I222-407 KingLowProfileFB
Thankyouforpurchasingthisqualityproduct.Besuretocheckallpacking material carefullyfor
small partsthatmaycomelooseinsidethe cartonduringshipment.
UNIT SHOULDBE INSTALLEDBY2ORMORE PERSONS.
All Bedsneedtobeset upinthe exact final
locationsothatafterfull assemblyit will not
needtobemoved. Moving thebedwill cause
thesupportlegstomoveoutofperpendicular
(90degree),weakenthesupportsystem, and
may allowthebedtocollapse.
aspenhome
RASSEMBLYINSTRUCTIONS
MADEINVIETNAM
ah
BEFORE USING THISPRODUCT PLEASEREAD, UNDERSTAND, AND FOLLOWTHESEINSTRUCTIONS.
Save these instructionsforfuture reference.
FORINDOORUSEONLY
TOOLSREQUIRED (NOTPROVIDED)
PHILLIPSSCREWDRIVER
I222-407
I222-406
I222-425
HARDWARELIST:I222-425
1PC
No.
A
B
C
D
Description Sketch Quantity
Bolt 5/16" x1-1/2"
Lock Washer5/16"
FlatWasher5/16" x3/4"
Allen Wrench M4
10 PCS
HARDWARELIST:I222-406/410
8PCS
No.
F
G
Description Sketch Quantity
HangerBolt 5/16" x3"
HexNut5/16"
HexWrench 13mm
8PCS
1PC
Wood Screw #4x1-1/4" 10 PCS
8PCS
COMPONENTSLIST: I222-425
No.
1
2
3
4
Description Sketch Quantity
Headboard
LeftLeg
RightLeg
WoodStretcher 1PC
1PC
1PC
1PC
HalfMoon Washer 5/16"
05-23-2023
10 PCS
H
I
J
I222-410
Wood Cap(onlyfor410) 8PCS
E
10 PCS
Wood Screw #4 x3/4"(onlyfor-406) 18 PCS
K
L16 PCS
Wood Screw #4 x3/4"(onlyfor-410)
COMPONENTSLIST: I222-406
No.
1
2
Description Sketch Quantity
Bed rails
Slats 5PCS
2PCS
COMPONENTSLIST: I222-407
No.
1
2
Description Sketch Quantity
Footboard
SupportLeg(Long) 1PC
3Decking 9PCS
COMPONENTSLIST: I222-410
No.
1
2
Description Sketch Quantity
Bed rails
Slats 5PCS
2PCS
3Decking 8PCS
3SupportLeg(Short) 5PCS
5PCS
aspenhome
RASSEMBLYINSTRUCTIONS
MADEINVIETNAM
ah
Page2/6
STEP2:Attachthewoodstretchertothelegsbyusing4bolts(A),lock washers(B) and flat
washers(C).
STEP1: Laytheheadboardfacedownonasoftsurface.Attachthe left leg and right leg to
headboardbyusing6bolts(A),lockwashers(B)andflatwashers(C).
LeftLeg
RightLeg
B
C
D
A
B
C
D
STEP3: Theside railsmaybeused on eitherside.
Arrangethesiderailssotheslatbearers arein
UPPERPOSITIONpriortoattachmentasOPTION 1
andtheslatbearersareinLOWERPOSITIONprior
toattachmentasOPTION 2.
Slatbearerin
upperposition
Slatbearerin
lowerposition
ITEMNO:I222-425King Uph HB
I222-406 KingRailsw/ Decking
I222-410 CalKing Railsw/ Decking
I222-407 KingLowProfileFB
A
02-10-2020
aspenhome
RASSEMBLYINSTRUCTIONS
MADEINVIETNAM
ah
Page3/6
STEP5: Attachthesupportlegs(long)totheslatsasshown
right.
ThisEndUp
Slat
Side Rail
STEP4: Screwthebolts(E)intoHB&FB.Makesuretheslatbearerisinthe UPPER position.
Alignthe boltswiththe holesintheendofsiderailsandattach theside railstoHB&FBusing
halfmoonWasher(F)andhexnuts(G).Thenuseahexwrenchtotighten all the nuts.
The outsideholesmatchto6/6standardkingrails,
the insideholesmatchto6/0Calkingbed rails.
Headboard
Slatbearer
Side Rail
E
FGH
Makesuretheslatbeareris
inthe UPPER position.
I
ITEMNO:I222-425King Uph HB
I222-406 KingRailsw/ Decking
I222-410 CalKing Railsw/ Decking
I222-407 KingLowProfileFB
OPTION1: Thesiderailsmaybeusedoneitherside.Arrangetheside railssothe slat
bearersareinUPPERPOSITIONpriortoattachment inSTEP 4.
STEP6: Arrangeslatsontheslatbearersand then lay the
deckingontopofthe slats.Make surethe topandbottom
slatsaresituatedunderneaththepre-drilled holesasshownin
STEP7.Remove thedecking andattachslatstothe slat
bearerswithwoodscrews(I). SupportLeg(Long)
05-23-2023
aspenhome
RASSEMBLYINSTRUCTIONS
MADEINVIETNAM
ah
Page4/6
ITEMNO:I222-425King Uph HB
I222-406 KingRailsw/ Decking
I222-410 CalKing Railsw/ Decking
I222-407 KingLowProfileFB
STEP7: Putthedeckingovertheslats,securedeckingtotheslatswithwood screws(J &L)
throughthepre-drilledholesinthe deckingasshownbelow.
FUNCTIONALITYINSTRUCTION
I222-407
I222-406
I222-425
I222-410 I222-407
STEP8: ForCal Kingbed,insertwood capsintotheholeson
headboardandfootboard.ForregularKingbed, skipthisstep. WoodCap(K)
Standard kingbed Cal king bed
I222-425
SinglePoweredUSB
Portfor Charging on
bothsides
Decking
Pre-drilledhole
Makesurethatthereisaslat
underthepre-drilled hole.
J&L
I222-407
I222-406
I222-425
I222-410 I222-407
I222-425
L
J
05-23-2023
aspenhome
RASSEMBLYINSTRUCTIONS
MADEINVIETNAM
ah
Page5/6
ITEMNO:I222-425King Uph HB
I222-406 KingRailsw/ Decking
I222-410 CalKing Railsw/ Decking
I222-407 KingLowProfileFB
ThisEndUp
Slat
Side Rail
STEP4: Screwthebolts(E)intoHB&FB.Makesuretheslatbearerisinthe LOWER position.
Alignthe boltswiththe holesintheendofsiderailsandattach theside railstoHB&FBusing half
moonWasher(F)andhexnuts(G).Thenuseahexwrenchtotighten all the nuts.
The outsideholesmatchto6/6standardkingrails,
the insideholesmatchto6/0Calkingbed rails.
Headboard
Slatbearer
Side Rail
EFGH
Makesuretheslatbeareris
inthe LOWER position.
I
SupportLeg(Short)
OPTION2: Thesiderailsmaybeusedoneitherside.Arrangetheside railssothe slat
bearersareinLOWERPOSITIONpriortoattachment inSTEP 4.
STEP6: Arrangeslatsontheslatbearersand then lay the
deckingontopofthe slats.Make surethe topandbottomslats
aresituatedunderneaththepre-drilledholesasshowninSTEP
7. Removethedeckingandattach slatstotheslatbearerswith
wood screws (I).
STEP5: Attachthesupportlegs(short)totheslatsasshown
right.
05-23-2023
aspenhome
RASSEMBLYINSTRUCTIONS
MADEINVIETNAM
ah
Page6/6
ITEMNO:I222-425King Uph HB
I222-406 KingRailsw/ Decking
I222-410 CalKing Railsw/ Decking
I222-407 KingLowProfileFB
Standard kingbed
Cal king bed
I222-407
I222-406
I222-425
I222-410 I222-407
I222-425
SinglePoweredUSB
Portfor Charging on
bothsides
STEP8: ForCal Kingbed,insertwood capsintotheholeson
headboardandfootboard.ForregularKingbed, skipthisstep. WoodCap(K)
FUNCTIONALITYINSTRUCTION
STEP7: Putthedeckingovertheslats,securedeckingtotheslatswithwood screws(J &L)
throughthepre-drilledholesinthe deckingasshownbelow.
Decking
Pre-drilledhole
Makesurethatthereisaslat
underthepre-drilled hole.
J&L
I222-407
I222-406
I222-425
I222-410 I222-407
I222-425
J
L
05-23-2023
ITEMNO:I222-522TwinUph HB
I222-503 TwinLowProfileFB
I222-517 TwinRailsw/ Decking
Thankyouforpurchasingthisqualityproduct.Besuretocheckallpacking material carefullyfor
small partsthatmaycomelooseinsidethe cartonduringshipment.
UNIT SHOULDBE INSTALLEDBY2ORMORE PERSONS.
All Bedsneedtobeset upinthe exact final
locationsothatafterfull assemblyit will not
needtobemoved. Moving thebedwill cause
thesupportlegstomoveoutofperpendicular
(90degree),weakenthesupportsystem, and
may allowthebedtocollapse.
aspenhome
RASSEMBLYINSTRUCTIONS
MADEINVIETNAM
ah
BEFORE USING THISPRODUCT PLEASEREAD, UNDERSTAND, AND FOLLOWTHESEINSTRUCTIONS.
Save these instructionsforfuture reference.
FORINDOORUSEONLY
TOOLSREQUIRED (NOTPROVIDED)
PHILLIPSSCREWDRIVER
I222-503
I222-522
COMPONENTSLIST: I222-522
No.
1
2
3
4
Description Sketch Quantity
Headboard
LeftLeg
RightLeg
WoodStretcher 1PC
1PC
1PC
1PC
COMPONENTSLIST: I222-503
No.
1
2
Description Sketch Quantity
Footboard 1PC
I222-517
COMPONENTSLIST: I222-517
No.
1
2
Description Sketch Quantity
Bed rails
Slats 4PCS
2PCS
3Decking 5PCS
HARDWARELIST:I222-522
1PC
No.
A
B
C
D
Description Sketch Quantity
Bolt 5/16" x1-1/2"
Lock Washer5/16"
FlatWasher5/16" x3/4"
Allen Wrench M4
10 PCS
HARDWARELIST:I222-517
8PCS
No.
F
G
Description Sketch Quantity
HangerBolt 5/16" x3"
HexNut5/16"
HexWrench 13mm
8PCS
1PC
Wood Screw #4x1-1/4"
8PCS
HalfMoon Washer 5/16"
10 PCS
H
I
E
10 PCS
8PCS
Wood Screw #4 x3/4" 10 PCS
J
Page1/6
4PCS
4PCS
3SupportLeg(Long)
SupportLeg(Short)
05-23-2023
aspenhome
RASSEMBLYINSTRUCTIONS
MADEINVIETNAM
ah
STEP2:Attachthewoodstretchertothelegsbyusing4bolts(A),lock washers(B) and flat
washers(C).
STEP1: Laytheheadboardfacedownonasoftsurface.Attachthe left leg and right leg to
headboardbyusing6bolts(A),lockwashers(B)andflatwashers(C).
LeftLeg
RightLeg
A
B
C
D
A
B
C
D
Slatbearerin
upperposition
Slatbearerin
lowerposition
ITEMNO:I222-522TwinUph HB
I222-503 TwinLowProfileFB
I222-517 TwinRailsw/ Decking
STEP3: Theside railsmaybeused on eitherside.
Arrangethesiderailssotheslatbearers arein
UPPERPOSITIONpriortoattachmentasOPTION 1
andtheslatbearersareinLOWERPOSITIONprior
toattachmentasOPTION 2.
02-10-2020
Page2/6
aspenhome
RASSEMBLYINSTRUCTIONS
MADEINVIETNAM
ah
Side Rail
Headboard
Slatbearer
Side Rail
E
FGH
Makesuretheslatbeareris
inthe UPPER position.
I
ITEMNO:I222-522TwinUph HB
I222-503 TwinLowProfileFB
I222-517 TwinRailsw/ Decking
STEP4: Screwthebolts(E)intoHB&FB.Makesuretheslatbearerisinthe UPPER position.
Alignthe boltswiththe holesintheendofsiderailsandattach theside railstoHB&FBusing
halfmoonWasher(F)andhexnuts(G).Thenuseahexwrench totightenall thenuts.
OPTION1: Thesiderailsmaybeusedoneitherside.Arrangetheside railssothe slat
bearersareinUPPERPOSITIONpriortoattachment inSTEP 4.
TheholesareforHollywood
frame
STEP6: Arrangeslatsontheslatbearersand then lay the
deckingontopofthe slats.Make surethe topandbottomslats
aresituatedunderneaththepre-drilledholesasshowninSTEP 7.
Remove thedecking andattachslatstothe slat bearerswith
wood screws (I).
Page3/6
STEP5: Attachthesupportlegs(long)totheslatsasshownright.
ThisEndUp
Slat
SupportLeg(Long)
05-23-2023
aspenhome
RASSEMBLYINSTRUCTIONS
MADEINVIETNAM
ah
FUNCTIONALITYINSTRUCTION
I222-503
I222-517
SinglePowered USB
PortforCharging on
bothsides
ITEMNO:I222-522TwinUph HB
I222-503 TwinLowProfileFB
I222-517 TwinRailsw/ Decking
I222-522
Page4/6
STEP7: Putthedeckingovertheslats, securedeckingtothe slatswithwood
screws(J)throughthepre-drilledholesinthedecking asshownbelow.
Pre-drilledhole
Makesurethatthereisaslat
underthepre-drilled hole.
JDecking
Slat
05-23-2023
I
Headboard
Slatbearer
Side Rail
EFGH
SideRail
Makesuretheslatbeareris
inthe LOWER position.
STEP4: Screwthebolts(E)intoHB&FB.Makesuretheslatbearerisinthe LOWER position.
Alignthe boltswiththe holesintheendofsiderailsandattach theside railstoHB&FBusing half
moonWasher(F)andhexnuts(G).Thenuseahexwrench totightenall thenuts.
OPTION2: Thesiderailsmaybeusedoneitherside.Arrangetheside railssothe slat
bearersareinLOWERPOSITIONpriortoattachment inSTEP 4.
Theholesarefor
Hollywoodframe
aspenhome
RASSEMBLYINSTRUCTIONS
MADEINVIETNAM
ah
ITEMNO:I222-522TwinUph HB
I222-503 TwinLowProfileFB
I222-517 TwinRailsw/ Decking
Page5/6
STEP6: Arrangeslatsontheslatbearersand then lay the
deckingontopofthe slats.Make surethe topandbottom
slatsaresituatedunderneaththepre-drilled holesasshownin
STEP7.Remove thedecking andattachslatstothe slat
bearerswithwoodscrews(I).
ThisEndUp
Slat
SupportLeg(Short)
STEP5: Attachthesupportlegs(short)totheslatsasshown
ritht.
05-23-2023
aspenhome
RASSEMBLYINSTRUCTIONS
MADEINVIETNAM
ah
I222-522
I222-503
I222-517
SinglePowered USB
PortforCharging on
bothsides
ITEMNO:I222-522TwinUph HB
I222-503 TwinLowProfileFB
I222-517 TwinRailsw/ Decking
FUNCTIONALITYINSTRUCTION
Page6/6
STEP7: Putthedeckingovertheslats, securedeckingtothe slatswithwood
screws(J)throughthepre-drilledholesinthedecking asshownbelow.
Pre-drilledhole
Makesurethatthereisaslat
underthepre-drilled hole.
JDecking
Slat
05-23-2023
ITEMNO:I222-525Full Uph HB
I222-507 Full LowProfileFB
I222-514 Full Railsw/ Decking
Thankyouforpurchasingthisqualityproduct.Besuretocheckallpacking material carefullyfor
small partsthatmaycomelooseinsidethe cartonduringshipment.
UNIT SHOULDBE INSTALLEDBY2ORMORE PERSONS.
All Bedsneedtobeset upinthe exact final
locationsothatafterfull assemblyit will not
needtobemoved. Moving thebedwill cause
thesupportlegstomoveoutofperpendicular
(90degree),weakenthesupportsystem, and
may allowthebedtocollapse.
aspenhome
RASSEMBLYINSTRUCTIONS
MADEINVIETNAM
ah
BEFORE USING THISPRODUCT PLEASEREAD, UNDERSTAND, AND FOLLOWTHESEINSTRUCTIONS.
Save these instructionsforfuture reference.
FORINDOORUSEONLY
TOOLSREQUIRED (NOTPROVIDED)
PHILLIPSSCREWDRIVER
I222-507
I222-525
COMPONENTSLIST: I222-525
No.
1
2
3
4
Description Sketch Quantity
Headboard
LeftLeg
RightLeg
WoodStretcher 1PC
1PC
1PC
1PC
COMPONENTSLIST: I222-507
No.
1
2
Description Sketch Quantity
Footboard 1PC
I222-514
COMPONENTSLIST: I222-514
No.
1
2
Description Sketch Quantity
Bed rails
Slats 4PCS
2PCS
3Decking 7PCS
HARDWARELIST:I222-525
1PC
No.
A
B
C
D
Description Sketch Quantity
Bolt 5/16" x1-1/2"
Lock Washer5/16"
FlatWasher5/16" x3/4"
Allen Wrench M4
10 PCS
HARDWARELIST:I222-514
8PCS
No.
F
G
Description Sketch Quantity
HangerBolt 5/16" x3"
HexNut5/16"
HexWrench 13mm
8PCS
1PC
Wood Screw #4x1-1/4"
8PCS
HalfMoon Washer 5/16"
10 PCS
H
I
E
10 PCS
8PCS
Wood Screw #4 x3/4" 14 PCS
J
Page1/6
4PCS
4PCS
3SupportLeg(Long)
SupportLeg(Short)
05-23-2023
aspenhome
RASSEMBLYINSTRUCTIONS
MADEINVIETNAM
ah
STEP2:Attachthewoodstretchertothelegsbyusing4bolts(A),lock washers(B) and flat
washers(C).
STEP1: Laytheheadboardfacedownonasoftsurface.Attachthe left leg and right leg to
headboardbyusing6bolts(A),lockwashers(B)andflatwashers(C).
LeftLeg
RightLeg
A
B
C
D
A
B
C
D
Slatbearerin
upperposition
Slatbearerin
lowerposition
ITEMNO:I222-525Full Uph HB
I222-507 Full LowProfileFB
I222-514 Full Railsw/ Decking
STEP3: Theside railsmaybeused on eitherside.
Arrangethesiderailssotheslatbearers arein
UPPERPOSITIONpriortoattachmentasOPTION 1
andtheslatbearersareinLOWERPOSITIONprior
toattachmentasOPTION 2.
02-10-2020
Page2/6

This manual suits for next models

2

Other aspenhome Indoor Furnishing manuals
aspenhome I256-9130 User manual

aspenhome

aspenhome I256-9130 User manual

aspenhome I240-453-RIV User manual

aspenhome

aspenhome I240-453-RIV User manual

aspenhome I597-225 User manual

aspenhome

aspenhome I597-225 User manual

aspenhome I287-371 User manual

aspenhome

aspenhome I287-371 User manual

aspenhome I215-333 User manual

aspenhome

aspenhome I215-333 User manual

aspenhome Credenza IHP-316-FSL User manual

aspenhome

aspenhome Credenza IHP-316-FSL User manual

aspenhome I206-463 User manual

aspenhome

aspenhome I206-463 User manual

aspenhome I597-462 User manual

aspenhome

aspenhome I597-462 User manual

aspenhome I262-462 User manual

aspenhome

aspenhome I262-462 User manual

aspenhome I349-464-WST User manual

aspenhome

aspenhome I349-464-WST User manual

aspenhome I256-454 User manual

aspenhome

aspenhome I256-454 User manual

aspenhome I256-360T User manual

aspenhome

aspenhome I256-360T User manual

aspenhome I644-9100 User manual

aspenhome

aspenhome I644-9100 User manual

aspenhome I201-449 User manual

aspenhome

aspenhome I201-449 User manual

aspenhome I597-400 User manual

aspenhome

aspenhome I597-400 User manual

aspenhome I91-366A User manual

aspenhome

aspenhome I91-366A User manual

aspenhome I349-6802-WST User manual

aspenhome

aspenhome I349-6802-WST User manual

aspenhome 107-463-WBR User manual

aspenhome

aspenhome 107-463-WBR User manual

aspenhome IML-473-BRN User manual

aspenhome

aspenhome IML-473-BRN User manual

aspenhome I597-412 User manual

aspenhome

aspenhome I597-412 User manual

aspenhome I3048-444P User manual

aspenhome

aspenhome I3048-444P User manual

aspenhome I07-284-WBR User manual

aspenhome

aspenhome I07-284-WBR User manual

aspenhome I644-6000 User manual

aspenhome

aspenhome I644-6000 User manual

aspenhome IHP-316-KHA User manual

aspenhome

aspenhome IHP-316-KHA User manual

Popular Indoor Furnishing manuals by other brands

nurus Uneo Assembly guide

nurus

nurus Uneo Assembly guide

Mocka Hamptons Assembly instructions

Mocka

Mocka Hamptons Assembly instructions

Openplan XPAND REACH Assembly instructions

Openplan

Openplan XPAND REACH Assembly instructions

Furinno STORAGE BENCH FB19113 Assembly instructions

Furinno

Furinno STORAGE BENCH FB19113 Assembly instructions

Muscle Rack CR3618 manual

Muscle Rack

Muscle Rack CR3618 manual

Sunnydaze Decor SIGONELLA CAST ALUMINUM TABLE YUK-267 Assembly instructions

Sunnydaze Decor

Sunnydaze Decor SIGONELLA CAST ALUMINUM TABLE YUK-267 Assembly instructions

JAB campus operating instructions

JAB

JAB campus operating instructions

HULALA HOME KPJY0537 brochure

HULALA HOME

HULALA HOME KPJY0537 brochure

Next T10403 Assembly instructions

Next

Next T10403 Assembly instructions

Ludewig Climber E installation instructions

Ludewig

Ludewig Climber E installation instructions

Furniture of America CM7677EK-VN Assembly instructions

Furniture of America

Furniture of America CM7677EK-VN Assembly instructions

Monarch Specialties I 3190 Assembly instructions

Monarch Specialties

Monarch Specialties I 3190 Assembly instructions

Furniture of America CM3824T Assembly instructions

Furniture of America

Furniture of America CM3824T Assembly instructions

Pollard 144 Assembly instructions

Pollard

Pollard 144 Assembly instructions

comfortel santorini 7410 owner's manual

comfortel

comfortel santorini 7410 owner's manual

Home Decorators Collection KENTWELL PEWTER 082-4PC-Y Use and care guide

Home Decorators Collection

Home Decorators Collection KENTWELL PEWTER 082-4PC-Y Use and care guide

Reece KADO ASPECT Vanity installation instructions

Reece

Reece KADO ASPECT Vanity installation instructions

BUT MAESTRO DS800-1020FT-L2-E2 manual

BUT

BUT MAESTRO DS800-1020FT-L2-E2 manual

manuals.online logo
manuals.online logoBrands
  • About & Mission
  • Contact us
  • Privacy Policy
  • Terms and Conditions

Copyright 2025 Manuals.Online. All Rights Reserved.