manuals.online logo
Brands
  1. Home
  2. •
  3. Brands
  4. •
  5. aspenhome
  6. •
  7. Indoor Furnishing
  8. •
  9. aspenhome I262-412 User manual

aspenhome I262-412 User manual

Page1/6
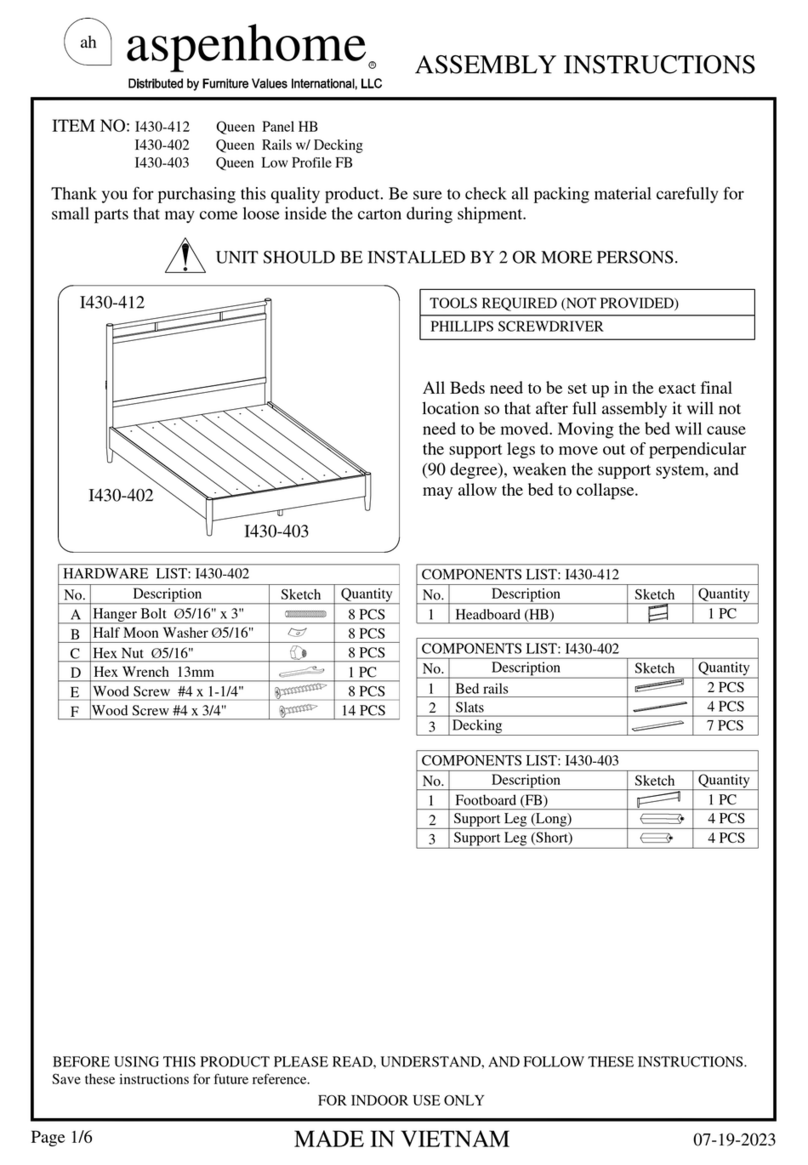
ITEMNO:I262-412Queen Panel HB
I262-402 Queen Rails
I262-403 Queen Panel FB
Thankyouforpurchasingthisqualityproduct.Besuretocheckallpacking material carefullyfor
small partsthatmaycomelooseinsidethe cartonduringshipment.
UNIT SHOULDBE INSTALLEDBY2ORMORE PERSONS.
All Bedsneedtobeset upinthe exact final
locationsothatafterfull assemblyit will not
needtobemoved. Moving thebedwill cause
thesupportlegstomoveoutofperpendicular
(90degree),weakenthesupportsystem, and
may allowthebedtocollapse.
aspenhome
RASSEMBLYINSTRUCTIONS
MADEINVIETNAM
ah
BEFORE USING THISPRODUCT PLEASEREAD, UNDERSTAND, AND FOLLOWTHESEINSTRUCTIONS.
Save these instructionsforfuture reference.
FORINDOORUSEONLY
TOOLSREQUIRED (NOTPROVIDED)
PHILLIPSSCREWDRIVER
HARDWARELIST:I262-412
1PC
No.
A
B
C
D
E
Description Sketch Quantity
Bolt 5/16" x1-3/4"
Lock Washer5/16"
FlatWasher5/16"x3/4"
HARDWARELIST:I262-402
8PCS
No.
F
G
H
I
J
Description Sketch Quantity
HangerBolt 5/16"x3-1/2"
HexNut5/16"
HexWrench 12mm
8PCS
1PC
8PCS
Wood Screw #8 x1" 8PCS
Lock Washer5/16" 8PCS
COMPONENTSLIST: I262-412
No.
1
2
3
4
Description Sketch Quantity
Headboard
LeftLeg
RightLeg
WoodStretcher 1PC
1PC
1PC
1PC
COMPONENTSLIST: I262-402
No.
1
2
Description Sketch Quantity
Bed rails
Slats 4PCS
2PCS
COMPONENTSLIST: I262-403
No.
1
2
Description Sketch Quantity
Footboard
LongSupportLeg(forslats) 4PCS
1PC
HalfMoon Washer 5/16"
Allen Wrench 5mm
01-06-2021
I262-402
I262-403
I262-412
3ShortSupportLeg(forslats) 4PCS
Decking 7PCS
3
Wood Screw #8 x3/4"
K7PCS
8PCS
8PCS
8PCS
aspenhome
RASSEMBLYINSTRUCTIONS
MADEINVIETNAM
ah
Page2/6
LeftLeg
RightLeg
A
B
C
D
STEP1: Laytheheadboardfacedownonasoftsurface.Attachthe left leg and right leg to
headboardbyusing6bolts(A),lockwashers(B)andflatwashers(C). Donot completely
tighten bolts.
STEP2: Attachthewoodstretchertoleftlegandrightlegbyusing2bolts(A), lock washers(B)
andflatwashers(C).Completelytighten all bolts.
A
C
D
B
Slatbearerin
upperposition
Slatbearerin
lowerposition
STEP3: Theside railsmaybeused on eitherside.
Arrangethesiderailssotheslatbearers arein
UPPERPOSITIONpriortoattachmentasOPTION 1
andtheslatbearersareinLOWERPOSITIONprior
toattachmentasOPTION 2.
ITEMNO:I262-412Queen Panel HB
I262-402 Queen Rails
I262-403 Queen Panel FB
11-16-2021
aspenhome
RASSEMBLYINSTRUCTIONS
MADEINVIETNAM
ah
Page3/6
Side Rail
Headboard
Slatbearer
Side Rail
E
FGHI
STEP4: Screwthebolts(E)intoHB&FB.Makesuretheslatbearerisinthe UPPER position.
Alignthe boltswiththe holesintheendofsiderailsandattach theside railstoHB&FBusing
halfmoonWasher(F)lockwashers(G)andhexnuts(H).Thenuseahexwrench totighten all the
nuts.
OPTION1: Thesiderailsmaybeusedoneitherside.Arrangetheside railssothe slat
bearersareinUPPERPOSITIONpriortoattachment inSTEP 4.
Makesuretheslatbeareris
inthe UPPER position.
ITEMNO:I262-412Queen Panel HB
I262-402 Queen Rails
I262-403 Queen Panel FB
01-06-2021
STEP5: Attachthelongsupportlegswithlevelertothe slats.
Adjustthelevelersonbottomoflongsupport legswhen necessary.
Long supportleg
ThisEndUp
Slat
Leveler
STEP6: Arrangeslatsontheslatbearersandthen lay the decking
ontop oftheslats. Makesurethetopand bottomslatsaresituated
underneaththepre-drilledholesasshowninSTEP 7. Remove the
deckingandattachslatstotheslatbearerswithwood screws (J).
J
aspenhome
RASSEMBLYINSTRUCTIONS
MADEINVIETNAM
ah
FUNCTIONALITYINSTRUCTION
Page4/6
ITEMNO:I262-412Queen Panel HB
I262-402 Queen Rails
I262-403 Queen Panel FB
01-06-2021
STEP7: Putthedeckingovertheslats, securedeckingtothe slatswithwood
screws(K)throughthepre-drilledholesinthedecking asshownbelow.
Pre-drilledhole
Makesurethatthereisaslat
underthepre-drilled hole.
KDecking
Slat
I262-402
I262-403
I262-412
DoublePowered USB
PortforCharging on
bothsides
aspenhome
RASSEMBLYINSTRUCTIONS
MADEINVIETNAM
ah
Page5/6
Side Rail
Headboard
Slatbearer
Side Rail
EFGHI
ITEMNO:I262-412Queen Panel HB
I262-402 Queen Rails
I262-403 Queen Panel FB
01-06-2021
STEP5: Attachtheshort supportlegswithlevelertotheslats.
Adjustthelevelersonbottomofshortsupportlegswhen necessary.
Shortsupportleg
ThisEndUp
Slat
Leveler
STEP6: Arrangeslatsontheslatbearersandthen lay the decking
ontop oftheslats. Makesurethetopand bottomslatsaresituated
underneaththepre-drilledholesasshowninSTEP 7. Remove the
deckingandattachslatstotheslatbearerswithwood screws (J).
J
STEP4: Screwthebolts(E)intoHB&FB.Makesuretheslatbearerisinthe LOWER position.
Alignthe boltswiththe holesintheendofsiderailsandattach theside railstoHB&FBusing half
moonWasher(F)andhexnuts(G).Thenuseahexwrench totightenall thenuts.
OPTION2: Thesiderailsmaybeusedoneitherside.Arrangetheside railssothe slat
bearersareinLOWERPOSITIONpriortoattachment inSTEP 4.
Makesuretheslatbeareris
inthe LOWER position.
aspenhome
RASSEMBLYINSTRUCTIONS
MADEINVIETNAM
ah
FUNCTIONALITYINSTRUCTION
Page6/6
ITEMNO:I262-412Queen Panel HB
I262-402 Queen Rails
I262-403 Queen Panel FB
01-06-2021
STEP7: Putthedeckingovertheslats, securedeckingtothe slatswithwood
screws(K)throughthepre-drilledholesinthedecking asshownbelow.
Pre-drilledhole
Makesurethatthereisaslat
underthepre-drilled hole.
KDecking
Slat
I262-402
I262-403
I262-412
DoublePowered USB
PortforCharging on
bothsides
Page1/6
ITEMNO:I262-415King Panel HB
I262-406 King Rails
I262-410 Cal King Rails
I262-407 King Panel FB
Thankyouforpurchasingthisqualityproduct.Besuretocheckallpacking material carefullyfor
small partsthatmaycomelooseinsidethe cartonduringshipment.
UNIT SHOULDBE INSTALLEDBY2ORMORE PERSONS.
All Bedsneedtobeset upinthe exact final
locationsothatafterfull assemblyit will not
needtobemoved. Moving thebedwill cause
thesupportlegstomoveoutofperpendicular
(90degree),weakenthesupportsystem, and
may allowthebedtocollapse.
aspenhome
RASSEMBLYINSTRUCTIONS
MADEINVIETNAM
ah
BEFORE USING THISPRODUCT PLEASEREAD, UNDERSTAND, AND FOLLOWTHESEINSTRUCTIONS.
Save these instructionsforfuture reference.
FORINDOORUSEONLY
TOOLSREQUIRED (NOTPROVIDED)
PHILLIPSSCREWDRIVER
HARDWARELIST:I262-415
1PC
No.
A
B
C
D
E
Description Sketch Quantity
Bolt 5/16" x1-3/4"
Lock Washer5/16"
FlatWasher5/16"x3/4"
HARDWARELIST:I262-406/410
8PCS
No.
F
G
H
I
J
Description Sketch Quantity
HangerBolt 5/16"x3-1/2"
HexNut5/16"
HexWrench 12mm
8PCS
1PC
8PCS
Wood Screw #8 x1"
Lock Washer5/16" 8PCS
COMPONENTSLIST: I262-415
No.
1
2
3
4
Description Sketch Quantity
Headboard
LeftLeg
RightLeg
WoodStretcher 1PC
1PC
1PC
1PC
COMPONENTSLIST: I262-406
No.
1
2
Description Sketch Quantity
Bed rails
Slats 5PCS
2PCS
COMPONENTSLIST: I262-407
No.
1
2
Description Sketch Quantity
Footboard
LongSupportLeg(forslats) 5PCS
1PC
HalfMoon Washer 5/16"
Allen Wrench 5mm
01-06-2021
I262-406
I262-407
I262-415
3ShortSupportLeg(forslats) 5PCS
Decking 9PCS
3
K
I262-410
Wood Cap(onlyfor410) 8PCS
Wood Screw #8 x3/4"(onlyfor-406)
Wood Screw #8 x3/4"(onlyfor-410)
L
M
10 PCS
COMPONENTSLIST: I262-410
No.
1
2
Description Sketch Quantity
Bed rails
Slats 5PCS
2PCS
Decking 8PCS
3
8PCS
9PCS
8PCS
8PCS
8PCS
aspenhome
RASSEMBLYINSTRUCTIONS
MADEINVIETNAM
ah
Page2/6
LeftLeg
RightLeg
STEP1: Laytheheadboardfacedownonasoftsurface.Attachthe left leg and right leg to
headboardbyusing6bolts(A),lockwashers(B)andflatwashers(C). Donot completely
tighten bolts.
STEP2: Attachthewoodstretchertoleftlegandrightlegbyusing2bolts(A), lock washers(B)
andflatwashers(C).Completelytighten all bolts.
A
C
D
B
Slatbearerin
upperposition
Slatbearerin
lowerposition
STEP3: Theside railsmaybeused on eitherside.
Arrangethesiderailssotheslatbearers arein
UPPERPOSITIONpriortoattachmentasOPTION 1
andtheslatbearersareinLOWERPOSITIONprior
toattachmentasOPTION 2.
11-16-2021
A
B
C
D
ITEMNO:I262-415King Panel HB
I262-406 King Rails
I262-410 Cal King Rails
I262-407 King Panel FB
aspenhome
RASSEMBLYINSTRUCTIONS
MADEINVIETNAM
ah
Page3/6
Side Rail
Headboard
Slatbearer
Side Rail
E
FGHI
STEP4: Screwthebolts(E)intoHB&FB.Makesuretheslatbearerisinthe UPPER position.
Alignthe boltswiththe holesintheendofsiderailsandattach theside railstoHB&FBusing
halfmoonWasher(F)lockwashers(G)andhexnuts(H).Thenuseahexwrench totighten all the
nuts.
OPTION1: Thesiderailsmaybeusedoneitherside.Arrangetheside railssothe slat
bearersareinUPPERPOSITIONpriortoattachment inSTEP 4.
Makesuretheslatbeareris
inthe UPPER position.
01-06-2021
STEP5: Attachthelongsupportlegswithlevelertothe slats.
Adjustthelevelersonbottomoflongsupport legswhen necessary.
Long supportleg
ThisEndUp
Slat
Leveler
STEP6: Arrangeslatsontheslatbearersandthen lay the decking
ontop oftheslats. Makesurethetopand bottomslatsaresituated
underneaththepre-drilledholesasshowninSTEP 7. Remove the
deckingandattachslatstotheslatbearerswithwood screws (J).
J
ITEMNO:I262-415King Panel HB
I262-406 King Rails
I262-410 Cal King Rails
I262-407 King Panel FB
aspenhome
RASSEMBLYINSTRUCTIONS
MADEINVIETNAM
ah
FUNCTIONALITYINSTRUCTION
Page4/6
01-06-2021
STEP7: Putthedeckingovertheslats, securedeckingtothe slatswithwood
screws(K&M)throughthepre-drilledholesinthedecking asshownbelow.
ITEMNO:I262-415King Panel HB
I262-406 King Rails
I262-410 Cal King Rails
I262-407 King Panel FB
StandardKing Bed
I262-406
I262-407
I262-415
Double Powered USB
PortforCharging
on bothsides
I262-415
I262-407
I262-410
CalKingBed
STEP8: ForCal Kingbed,insertwood capsintotheholeson
headboardandfootboard.ForregularKingbed, skipthisstep. Wood Cap (L)
Pre-drilledhole
Makesurethatthereisaslat
underthepre-drilled hole.
K&M
Decking
Slat
StandardKing Bed
CalKingBed
aspenhome
RASSEMBLYINSTRUCTIONS
MADEINVIETNAM
ah
Page5/6
Side Rail
Headboard
Slatbearer
Side Rail
EFGHI
01-06-2021
STEP5: Attachtheshort supportlegswithlevelertotheslats.
Adjustthelevelersonbottomofshortsupportlegswhen necessary.
Shortsupportleg
ThisEndUp
Slat
Leveler
STEP6: Arrangeslatsontheslatbearersandthen lay the decking
ontop oftheslats. Makesurethetopand bottomslatsaresituated
underneaththepre-drilledholesasshowninSTEP 7. Remove the
deckingandattachslatstotheslatbearerswithwood screws (J).
STEP4: Screwthebolts(E)intoHB&FB.Makesuretheslatbearerisinthe LOWER position.
Alignthe boltswiththe holesintheendofsiderailsandattach theside railstoHB&FBusing half
moonWasher(F)andhexnuts(G).Thenuseahexwrench totightenall thenuts.
OPTION2: Thesiderailsmaybeusedoneitherside.Arrangetheside railssothe slat
bearersareinLOWERPOSITIONpriortoattachment inSTEP 4.
Makesuretheslatbeareris
inthe LOWER position.
ITEMNO:I262-415King Panel HB
I262-406 King Rails
I262-410 Cal King Rails
I262-407 King Panel FB
J
aspenhome
RASSEMBLYINSTRUCTIONS
MADEINVIETNAM
ah
FUNCTIONALITYINSTRUCTION
Page6/6
01-06-2021
STEP7: Putthedeckingovertheslats, securedeckingtothe slatswithwood
screws(K&M)throughthepre-drilledholesinthedecking asshownbelow.
Pre-drilledhole
Makesurethatthereisaslat
underthepre-drilled hole.
K&M
Decking
Slat
ITEMNO:I262-415King Panel HB
I262-406 King Rails
I262-410 Cal King Rails
I262-407 King Panel FB
StandardKing Bed CalKingBed
Double Powered USB
PortforCharging
on bothsides
STEP8: ForCal Kingbed,insertwood capsintotheholeson
headboardandfootboard.ForregularKingbed, skipthisstep. Wood Cap (L)
I262-406
I262-407
I262-415
I262-410
I262-415
I262-407
CalKingBed
StandardKing Bed

This manual suits for next models

2

Other aspenhome Indoor Furnishing manuals

aspenhome ICB-492-BCH-KD-1 User manual

aspenhome

aspenhome ICB-492-BCH-KD-1 User manual

aspenhome I215-333 User manual

aspenhome

aspenhome I215-333 User manual

aspenhome IKJ-400-KD User manual

aspenhome

aspenhome IKJ-400-KD User manual

aspenhome I206-451 User manual

aspenhome

aspenhome I206-451 User manual

aspenhome Trellis I287-360T User manual

aspenhome

aspenhome Trellis I287-360T User manual

aspenhome Liv360 1215-9150 User manual

aspenhome

aspenhome Liv360 1215-9150 User manual

aspenhome I256-272 User manual

aspenhome

aspenhome I256-272 User manual

aspenhome I631-9130 User manual

aspenhome

aspenhome I631-9130 User manual

aspenhome I3048-444P User manual

aspenhome

aspenhome I3048-444P User manual

aspenhome I39-366A User manual

aspenhome

aspenhome I39-366A User manual

aspenhome I256-296 User manual

aspenhome

aspenhome I256-296 User manual

aspenhome I227-462 User manual

aspenhome

aspenhome I227-462 User manual

aspenhome I07-415-WBR User manual

aspenhome

aspenhome I07-415-WBR User manual

aspenhome I91-332 User manual

aspenhome

aspenhome I91-332 User manual

aspenhome I218-422-WHT User manual

aspenhome

aspenhome I218-422-WHT User manual

aspenhome I631-9150 User manual

aspenhome

aspenhome I631-9150 User manual

aspenhome I644-378 User manual

aspenhome

aspenhome I644-378 User manual

aspenhome I221-9140 User manual

aspenhome

aspenhome I221-9140 User manual

aspenhome I248-307-1 User manual

aspenhome

aspenhome I248-307-1 User manual

aspenhome Liv360 I206-449 User manual

aspenhome

aspenhome Liv360 I206-449 User manual

aspenhome ICF-303 User manual

aspenhome

aspenhome ICF-303 User manual
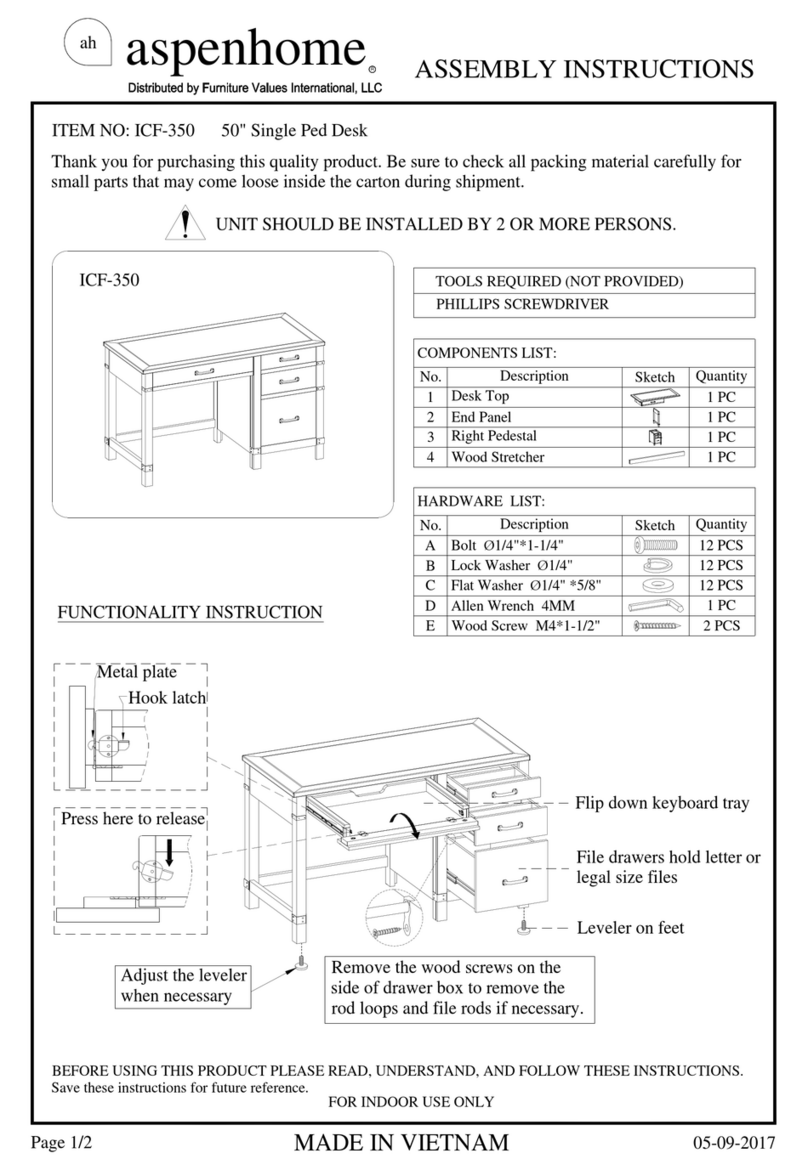
aspenhome I540-6050 User manual

aspenhome

aspenhome I540-6050 User manual

aspenhome I256-450 User manual

aspenhome

aspenhome I256-450 User manual

aspenhome Liv360 I644-449 User manual

aspenhome

aspenhome Liv360 I644-449 User manual

Popular Indoor Furnishing manuals by other brands

Robern VP30H3D21A11N76 Important safety instructions

Robern

Robern VP30H3D21A11N76 Important safety instructions

Living Spaces CLUB SVEN ACCENT CHAIR 5081 Assembly instructions

Living Spaces

Living Spaces CLUB SVEN ACCENT CHAIR 5081 Assembly instructions

INK+IVY Rebecca Queen and King Headboard ii116-0471 Assembly instructions

INK+IVY

INK+IVY Rebecca Queen and King Headboard ii116-0471 Assembly instructions

Global Industrial 695429BK Assembly instructions

Global Industrial

Global Industrial 695429BK Assembly instructions

Multistore EXC-750 Assembly instruction

Multistore

Multistore EXC-750 Assembly instruction

Triarch 31123 Assembly instructions

Triarch

Triarch 31123 Assembly instructions

Ergomotion Rio 5.0 owner's manual

Ergomotion

Ergomotion Rio 5.0 owner's manual

Axor High Spout 38030XX1 installation instructions

Axor

Axor High Spout 38030XX1 installation instructions

DIR Monoco 3405 instruction manual

DIR

DIR Monoco 3405 instruction manual

modway EEI-2268 quick start guide

modway

modway EEI-2268 quick start guide

Hailey Home CT1565 Assembly instructions

Hailey Home

Hailey Home CT1565 Assembly instructions

Armadillo AR6DR28BB Assembly instructions

Armadillo

Armadillo AR6DR28BB Assembly instructions

Sprout SFS30 quick start guide

Sprout

Sprout SFS30 quick start guide

Compel Pivit Open Frame Desk installation guide

Compel

Compel Pivit Open Frame Desk installation guide

2K Furniture Designs BK1730 Assembly instructions

2K Furniture Designs

2K Furniture Designs BK1730 Assembly instructions

Coaster 207040Q Assembly instructions

Coaster

Coaster 207040Q Assembly instructions

Movelar TUOZI PLAN 60 F manual

Movelar

Movelar TUOZI PLAN 60 F manual

calligaris BAHIA CS/1814 manual

calligaris

calligaris BAHIA CS/1814 manual

manuals.online logo
manuals.online logoBrands
  • About & Mission
  • Contact us
  • Privacy Policy
  • Terms and Conditions

Copyright 2025 Manuals.Online. All Rights Reserved.