manuals.online logo
Brands
  1. Home
  2. •
  3. Brands
  4. •
  5. aspenhome
  6. •
  7. Indoor Furnishing
  8. •
  9. aspenhome I349-412-WST User manual

aspenhome I349-412-WST User manual

ITEMNO:I349-412-WSTQueenPanel HBw/ 2Lamps
I349-402-WSTQueen Rails
I349-403D-WSTQueenStorage FB
Page1/7
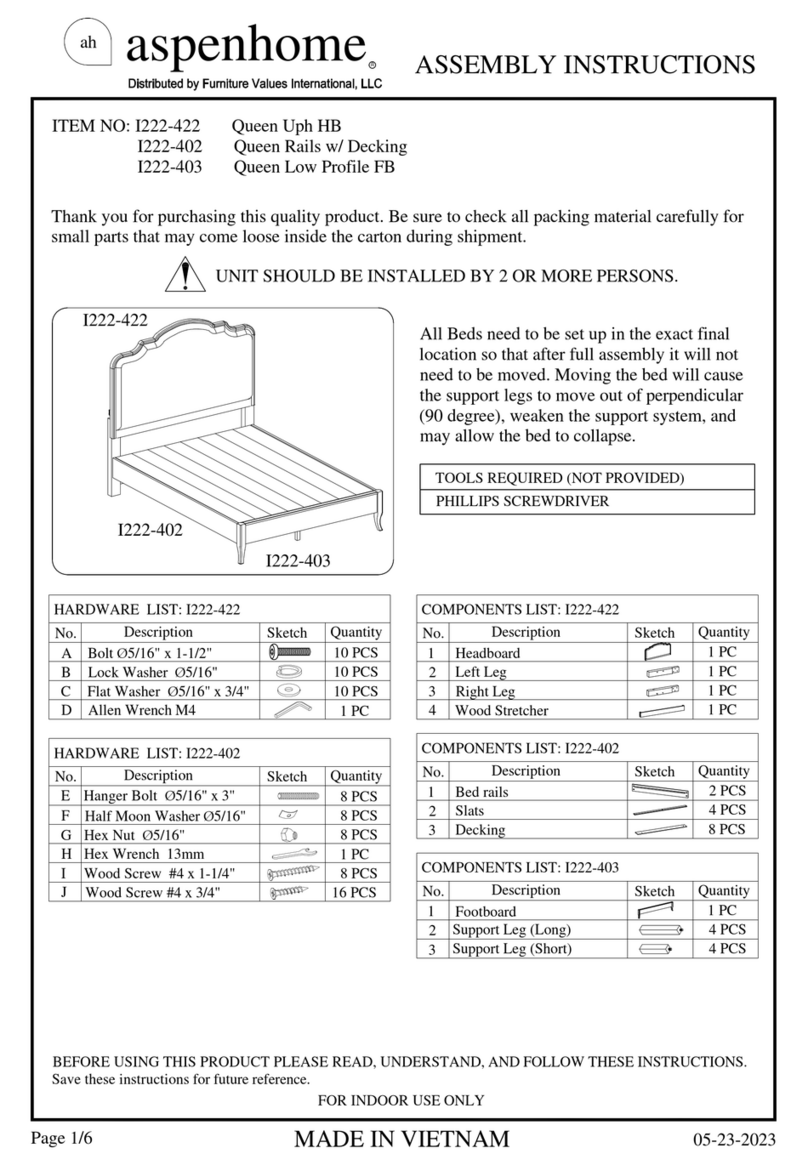
Thankyouforpurchasingthisqualityproduct.Besuretocheckallpacking material carefullyfor
small partsthatmaycomelooseinsidethe cartonduringshipment.
UNIT SHOULDBE INSTALLEDBY2ORMORE PERSONS.
All Bedsneedtobeset upinthe exact final
locationsothatafterfull assemblyit will not
needtobemoved. Moving thebedwill cause
thesupportlegstomoveoutofperpendicular
(90degree),weakenthesupportsystem, and
may allowthebedtocollapse.
aspenhome
RASSEMBLYINSTRUCTIONS
MADEINVIETNAM
ah
BEFORE USING THISPRODUCT PLEASEREAD, UNDERSTAND, AND FOLLOWTHESEINSTRUCTIONS.
Save these instructionsforfuture reference.
FORINDOORUSEONLY
TOOLSREQUIRED (NOTPROVIDED)
PHILLIPSSCREWDRIVER
I349-403D
I349-402
I349-412
SwingLamp
AssemblyinstructionsfortheSwing Lamps
areintheLamppackage.Followthe below
instructionswhenattaching theswinglamps
tothisheadboard.
06-06-2022
HARDWARELIST:I349-412
5PCS
1PC
No.
A
B
C
D
E
Description Sketch Quantity
Lock Washer5/16"
FlatWasher5/16"x3/4"
Allen Wrench 4mm
6PCS
HARDWARELIST:I349-402
8PCS
No.
F
G
H
Description Sketch Quantity
HexNut5/16"
HexWrench 12mm
8PCS
1PC
I
Wood Screw #4x1-1/4"
8PCS
COMPONENTSLIST: I349-412
1PC
No.
1
2
3
4
5
Description Sketch Quantity
Headboard
LeftLeg
RightLeg
WoodStretcher
CenterSupportLeg 1PC
1PC
1PC
1PC
COMPONENTSLIST: I349-402
No.
1
2
Description Sketch Quantity
Bed rails
Slats 4PCS
2PCS
HalfMoon Washer 5/16"
J
K
Lock Washer5/16" 8PCS
L
M
HARDWARE LIST:I349-403D
No.
O
P
Description Sketch Quantity
Allen Wrench 4mm 1PC
8PCS
Wood Screw #4 x1"
Lock Washer1/4"
FlatWasher1/4" x3/4" 8PCS
8PCS
COMPONENTSLIST: I349-403D
No.
1
2
Description Sketch Quantity
31PC
Footboard
SupportLeg(forcenterrail)
Decking
Centerrail
1PC
2PCS
4PCS
4
6Lamp 2Sets
N
8PCS
8PCS
STEP1: Laytheheadboardfacedownonasoftsurface.Attach the left leg and
rightlegtoheadboardbyusing6bolts(B),lockwashers(C)and flat washers(D).
Donotcompletelytighten bolts.
HBBackside
LeftLeg
RightLeg
B
C
D
E
Bolt 5/16"x1-3/4"(18)
Bolt 5/16" x2"(18)
Bolt 1/4"x1-3/8"(20)
HangerBolt 5/16"x3-1/8"(18)
Page2/7
aspenhome
RASSEMBLYINSTRUCTIONS
MADEINVIETNAM
ah
ITEMNO:I349-412-WSTQueenPanel HBw/ 2Lamps
I349-402-WSTQueen Rails
I349-403D-WSTQueenStorage FB
11 PCS
11 PCS
5SupportLeg (forfootboard) 3PCS
09-20-2022
Page3/7
aspenhome
RASSEMBLYINSTRUCTIONS
MADEINVIETNAM
ah
STEP3:Attachthecentersupportlegtoheadboardandwoodstretcherby using 3bolts(A),
lockwashers(C)andflatwashers(D).
STEP2:Attachthewoodstretchertothelegsbyusing2bolts(A), lock washers(C)
and flat washers(D). Completelytighten allbolts.
WoodStretcher
A
C
D
E
A
C
D
E
ITEMNO:I349-412-WSTQueenPanel HBw/ 2Lamps
I349-402-WSTQueen Rails
I349-403D-WSTQueenStorage FB
STEP4:Putthefootboardfacedownonasoftsurface.Attach the support legs (for
footboard) tothefootboardasshownbelow.
SupportLeg
(forfootboard)
09-20-2022
Headboard
Slatbearer
Side Rail
F
HIJ
Makesuretheslatbeareris
inthe UPPER position.
G
STEP7: Attach2supportlegs(forcenterrail)tothe
centerrailusing4bolts(L),lockwashers(M)and flat
washers(N).UsetheAllenWrench(O)totighten all
ofthebolts. Leveler
CenterRail
SupportLeg
(forcenterrail)
STEP6:Attachthecenterrailtothefootboardandcentersupport leg ofheadboardusing 4
bolts(L),lockwashers(M)andflatwashers(N).
ON
Centerrail
M
Centerrail
STEP5: Screwthebolts(F)intoHB&FB.Makesuretheslatbearerisinthe UPPER position.
Alignthe boltswiththe holesintheendofsiderailsandattach theside railstoHB&FBusing
halfmoonWashers(G), Lock Washers(H) andhexnuts(I).Thenuseahexwrench totighten all
the nuts.
L
ON
M
L
Page4/7
aspenhome
RASSEMBLYINSTRUCTIONS
MADEINVIETNAM
ah
ITEMNO:I349-412-WSTQueenPanel HBw/ 2Lamps
I349-402-WSTQueen Rails
I349-403D-WSTQueenStorage FB
09-16-2022
WoodScrews(K)
STEP8: Arrangeslatsontheslatbearersandthenlaythedeckingon top ofthe slats. Make sure
the topandbottomslatsaresituatedunderneaththepre-drilledholesasshownbelowinSTEP 9.
Removethedeckingandattachslatstotheslatbearers withwood screws (K).
STEP9: Putthedeckingovertheslats,securedeckingtotheslatswithwood screws (P)
throughthepre-drilledholesinthe deckingasshownbelow.
P
Decking
Pre-drilledhole
Makesurethatthereisaslat
underthepre-drilled hole.
Slat
Decking
Decking
Theslatshouldsupport
bothpiecesofdecking.
Page5/7
aspenhome
RASSEMBLYINSTRUCTIONS
MADEINVIETNAM
ah
ITEMNO:I349-412-WSTQueenPanel HBw/ 2Lamps
I349-402-WSTQueen Rails
I349-403D-WSTQueenStorage FB
09-16-2022
Page6/7
aspenhome
RASSEMBLYINSTRUCTIONS
MADEINVIETNAM
ah
ITEMNO:I349-412-WSTQueenPanel HBw/ 2Lamps
I349-402-WSTQueen Rails
I349-403D-WSTQueenStorage FB
STEP1: Attacheach oftheswinglamp("1"onthe componentlistforswinglamp)
tothebackoftheheadboardwith4flatheadwoodscrews("A" on the hardwarebag
forswinglamp)asshownbelow.
STEP2: Attacheachofthecontrolboxw/wires("2"onthe component list for
swinglamp)tothebackofhaeadboardwith4panheadwood screws ("B" on the
hardwarebagforswinglamp)asshownbelow.
STEP3: Plugthe maleconnectorsintothefemale
connectorsasshownbelow.
SwingLamp
"A"
ControlBoxw/Wires
"B"
FemaleConnector
MaleConnector
FOR SWING LAMPASSEMBLY:
STEP4:Unscrewthepre-installedmalebolt and femalebolt in
eachoftheheadboardpostbyanallenwrench. Insert each ofthe
flatwasherfirstlyandthebrassringsecondlytothe bolt male,
presseachbolt female/touchswitchbyfingerintothe holeon
headboardpost, thencompletelytighten the2malebolts.
FemaleBolt/TouchSwitch
Brass Ring
MaleBolt
HeadboardPost
SwingLamp
FlatWahser
Plug
06-06-2022
Page7/7
aspenhome
RASSEMBLYINSTRUCTIONS
MADEINVIETNAM
ah
ITEMNO:I349-412-WSTQueenPanel HBw/ 2Lamps
I349-402-WSTQueen Rails
I349-403D-WSTQueenStorage FB
FUNCTIONALITYINSTRUCTION
I349-403D
Cedar-lined
Storage Drawers
I349-412
I349-402
Pushthe touch switch to
turnon/offoradjustthe
lighting on bothsides.
"D"
SwingableMetal Arm
SmallBolt
STEP5:Inserttheplugstothesocket,lift(do not pushordrag)
the bedassemblytothedesiredlocationandrotatetheswing
lampstothe desiredangle.
Note: adjustthesmallboltsusingtheallenwrench ("D"onthe
hardwarebagforswinglamp) asshownrightwhenthe swingable
metal armistooloose/ tight.
Screw
Handle Handle
09-16-2022
Reverseeachhandlebyremovingthe screws
whileeachdrawerisopenandattach all handles
tothefrontofthedrawerswithscrews asshown.
aspenhome
RASSEMBLYINSTRUCTIONS
MADEINVIETNAM
ah
ITEMNO:I349-412-WSTQueenPanel HBw/ 2Lamps
I349-402-WSTQueen Rails
I349-403-WSTQueenLowProfileFB
Page1/7
Thankyouforpurchasingthisqualityproduct.Besuretocheckallpacking material carefullyfor
small partsthatmaycomelooseinsidethe cartonduringshipment.
UNIT SHOULDBE INSTALLEDBY2ORMORE PERSONS.
All Bedsneedtobeset upinthe exact final
locationsothatafterfull assemblyit will not
needtobemoved. Moving thebedwill cause
thesupportlegstomoveoutofperpendicular
(90degree),weakenthesupportsystem, and
may allowthebedtocollapse.
BEFORE USING THISPRODUCT PLEASEREAD, UNDERSTAND, AND FOLLOWTHESEINSTRUCTIONS.
Save these instructionsforfuture reference.
FORINDOORUSEONLY
TOOLSREQUIRED (NOTPROVIDED)
PHILLIPSSCREWDRIVER
I349-403
I349-402
I349-412
I349-403
I349-402
I349-412
Option 1
Option 2
SwingLamp
AssemblyinstructionsfortheSwing Lamps
areintheLamppackage.Followthe below
instructionswhenattaching theswinglamps
tothisheadboard.
04-25-2022
HARDWARELIST:I349-412
5PCS
1PC
No.
A
B
C
D
E
Description Sketch Quantity
Bolt 5/16"x1-3/4"(18)
Bolt 5/16" x2"(18)
Lock Washer5/16"
FlatWasher5/16"x3/4"
Allen Wrench 4mm
6PCS
11 PCS
HARDWARELIST:I349-402
8PCS
No.
F
G
H
Description Sketch Quantity
HexNut5/16"
HexWrench 12mm
8PCS
1PC
I
Wood Screw #4x1-1/4"
8PCS
COMPONENTSLIST: I349-412
1PC
No.
1
2
3
4
5
Description Sketch Quantity
Headboard
LeftLeg
RightLeg
WoodStretcher
CenterSupportLeg 1PC
1PC
1PC
1PC
COMPONENTSLIST: I349-402
No.
1
2
Description Sketch Quantity
Bed rails
Slats 4PCS
2PCS
HalfMoon Washer 5/16"
11 PCS
J
K
Lock Washer5/16" 8PCS
6Swing Lamp 2Sets
8PCS
COMPONENTSLIST: I349-403
No.
1
2
Description Sketch Quantity
Footboard 1PC
SupportLeg 4Set
aspenhome
RASSEMBLYINSTRUCTIONS
MADEINVIETNAM
ah
STEP2:Attachthewoodstretchertothelegsbyusing2bolts(A), lock washers(C)
and flat washers(D). Completelytighten allbolts.
STEP1: Laytheheadboardfacedownonasoftsurface.Attach the left leg and
rightlegtoheadboardbyusing6bolts(B),lockwashers(C)and flat washers(D).
Donotcompletelytighten bolts.
HBBackside
LeftLeg
RightLeg
B
C
D
E
WoodStretcher
A
C
D
E
ITEMNO:I349-412-WSTQueenPanel HBw/ 2Lamps
I349-402-WSTQueen Rails
I349-403-WSTQueenLowProfileFB
HangerBolt 5/16"x3-1/8"(18)
Page2/7
09-20-2022
STEP3:Attachthecentersupportlegtoheadboardandwoodstretcherby using 3bolts(A),
lockwashers(C)andflatwashers(D).
A
C
D
E
aspenhome
RASSEMBLYINSTRUCTIONS
MADEINVIETNAM
ah
ITEMNO:I349-412-WSTQueenPanel HBw/ 2Lamps
I349-402-WSTQueen Rails
I349-403-WSTQueenLowProfileFB
FOROPTION1:
STEP4: Screwthebolts(F)intoHB&FB.Makesuretheslatbearerisinthe position (b).
Alignthe boltswiththe holesintheendofsiderailsandattach theside railstoHB&FB
using halfmoonWashers(G), Lock Washers(H) andhexnuts(I).Thenuseahex wrench to
tighten all the nuts.
Headboard
Slatbearer
Side Rail
F
HIJ
G
Makesuretheslat bearer
isinthe position (b).
Position a
Position b
Page3/7
09-20-2022
aspenhome
RASSEMBLYINSTRUCTIONS
MADEINVIETNAM
ah
ITEMNO:I349-412-WSTQueenPanel HBw/ 2Lamps
I349-402-WSTQueen Rails
I349-403-WSTQueenLowProfileFB
STEP5: Attachthesupportlegswithlevelertotheslats.
Adjustthelevelersonbottomofsupportlegswhen necessary.
SupportLeg
Leveler
ThisEndUp
Slat
STEP6: Arrangetheslatsontheslatbearers equallyand
attachtotheslatbearerswithwoodscrews (K).
WoodScrews(K)
FOROPTION2:
STEP4:Theslatbearershavebeenattachedinposition (b) approximately 2 fromthetop of the side
railsforusewithastoragefootboard.Theslatbearersmustbemovedintoposition (a)based on
thisbedconfiguration.Removetheboltsfromtheslatbearersandside railsasshownbelow. Then
re-attachtheslatbearerstothesiderailsindesiredposition(a)withbolts, lock washers, flat
washers. Caution:Donotovertightenboltsasthismayloosenthethreadedinsertsin the
siderails.
Page4/7
09-22-2022
b
a
Headboard
Slatbearer
Side Rail
FHIJ
G
STEP6: Removethesupportlegs(top) asshown in thepicture
to theright.Attachthe support legswithlevelertothe slats.
Adjustthelevelersonbottomofsupportlegswhen necessary.
SupportLeg
Leveler
ThisEndUp
Slat
Remove
SupportLeg(top)
STEP5: Screwthebolts(F)intoHB&FB.Makesuretheslatbearerisinthe position (a).
Alignthe boltswiththe holesintheendofsiderailsandattach theside railstoHB&FB
using halfmoonWashers(G), Lock Washers(H) andhexnuts(I).Thenuseahex wrench to
tighten all the nuts.
Makesuretheslat bearer
isinthe position (a).
Position a
Position b
STEP7: Arrangetheslatsontheslat bearers
equallyandattach totheslatbearerswith
woodscrews(K).
WoodScrews(K)
aspenhome
RASSEMBLYINSTRUCTIONS
MADEINVIETNAM
ah
ITEMNO:I349-412-WSTQueenPanel HBw/ 2Lamps
I349-402-WSTQueen Rails
I349-403-WSTQueenLowProfileFB
Page5/7
04-25-2022
aspenhome
RASSEMBLYINSTRUCTIONS
MADEINVIETNAM
ah
ITEMNO:I349-412-WSTQueenPanel HBw/ 2Lamps
I349-402-WSTQueen Rails
I349-403-WSTQueenLowProfileFB
STEP4:Unscrewthepre-installedmalebolt and female
boltineach oftheheadboardpostbyanallenwrench.Insert
eachoftheflatwasherfirstlyandthebrass ring secondlyto
the bolt male, presseachbolt female/touchswitchbyfinger
intotheholeonheadboardpost, thencompletelytighten the
2malebolts.
FemaleBolt/TouchSwitch
Brass Ring
MaleBolt
HeadboardPost
Page6/7
SwingLamp
STEP1: Attacheach oftheswinglamp("1"onthe componentlistforswinglamp)
tothebackoftheheadboardwith4flatheadwoodscrews("A" on the hardwarebag
forswinglamp)asshownbelow.
STEP2: Attacheachofthecontrolboxw/wires("2"onthe component list for
swinglamp)tothebackofhaeadboardwith4panheadwood screws ("B" on the
hardwarebagforswinglamp)asshownbelow.
STEP3: Plugthe maleconnectorsintothefemale
connectorsasshownbelow.
SwingLamp
"A"
ControlBoxw/Wires
"B"
FemaleConnector
MaleConnector
FOR SWING LAMPASSEMBLY:
FlatWahser
Plug
06-06-2022
I349-403
I349-412
I349-402
aspenhome
RASSEMBLYINSTRUCTIONS
MADEINVIETNAM
ah
ITEMNO:I349-412-WSTQueenPanel HBw/ 2Lamps
I349-402-WSTQueen Rails
I349-403-WSTQueenLowProfileFB
FUNCTIONALITYINSTRUCTION
Pushthetouchswitchesto
turnon/offoradjustthe
lightingonbothsides.
I349-403
I349-402
Page7/7
OPTION1:
OPTION2:
Pushthetouchswitchesto
turnon/offoradjustthe
lightingonbothsides.
STEP5: Inserttheplugstothesocket,lift(do not pushordrag)
the bedassemblytothedesiredlocationandrotatetheswing
lampstothe desiredangle.
I349-412
04-25-2022
Note: adjustthesmallboltsusingtheallenwrench ("D"onthe
hardwarebagforswinglamp) asshownrightwhenthe swingable
metal armistooloose/ tight. "D"
SwingableMetal Arm
SmallBolt
Page1/7
ITEMNO:I349-415-WSTKingPanel HBw/ 2Lamps
I349-407-WSTKing LowProfileFB
I349-406-WSTKing Rails
I349-410-WSTCal King Rails
Thankyouforpurchasingthisqualityproduct.Besuretocheckallpacking material carefullyfor
small partsthatmaycomelooseinsidethe cartonduringshipment.
UNIT SHOULDBE INSTALLEDBY2ORMORE PERSONS.
aspenhome
RASSEMBLYINSTRUCTIONS
MADEINVIETNAM
ah
BEFORE USING THISPRODUCT PLEASEREAD, UNDERSTAND, AND FOLLOWTHESEINSTRUCTIONS.
Save these instructionsforfuture reference.
FORINDOORUSEONLY
All Bedsneedtobeset upinthe exact final
locationsothatafterfull assemblyit will not
needtobemoved. Moving thebedwill cause
thesupportlegstomoveoutofperpendicular
(90degree),weakenthesupportsystem, and
may allowthebedtocollapse.
TOOLSREQUIRED (NOTPROVIDED)
PHILLIPSSCREWDRIVER
I349-407
I349-406
I349-415
I349-410
I349-407
I349-406
I349-415
I349-410
Option 1
Option 2
SwingLamp
AssemblyinstructionsfortheSwing Lamps
areintheLamppackage.Followthe below
instructionswhenattaching theswinglamps
tothisheadboard.
04-25-2022
HARDWARELIST:I349-415
5PCS
1PC
No.
A
B
C
D
E
Description Sketch Quantity
Lock Washer5/16"
FlatWasher5/16"x3/4"
Allen Wrench 4mm
6PCS
11 PCS
F
COMPONENTSLIST: I349-415
1PC
No.
1
2
3
4
5
Description Sketch Quantity
Headboard
LeftLeg
RightLeg
WoodStretcher
CenterSupportLeg 1PC
1PC
1PC
1PC
COMPONENTSLIST: I349-406
No.
1
2
Description Sketch Quantity
Bed rails
Slats 5PCS
2PCS
11 PCS
COMPONENTSLIST: I349-410
No.
1
2
Description Sketch Quantity
Bed rails
Slats 5PCS
2PCS
3Centerrail(Long) 1PC
6Lamp 2Sets
HARDWARELIST:I349-406/410
8PCS
No.
G
H
Description Sketch Quantity
HexNut5/16"
HexWrench 12mm
8PCS
1PC
I
Wood Screw #4x1-1/4" 10 PCS
8PCS
HalfMoon Washer 5/16"
J
K
Lock Washer5/16" 8PCS
LWood Cap(onlyfor410) 8PCS
COMPONENTSLIST: I349-407
No.
1
2
Description Sketch Quantity
Footboard 1PC
SupportLeg 5Set
Bolt 15/16"x1-3/4"(18)
Bolt 5/16" x2"(18)
Page2/7
aspenhome
RASSEMBLYINSTRUCTIONS
MADEINVIETNAM
ah
STEP1: Laytheheadboardfacedownonasoftsurface.Attach the left leg and
rightlegtoheadboardbyusing6bolts(B),lockwashers(C)and flat washers(D).
Donotcompletelytighten bolts.
HBBackside
LeftLeg
RightLeg
B
C
D
E
ITEMNO:I349-415-WSTKingPanel HBw/ 2Lamps
I349-407-WSTKing LowProfileFB
I349-406-WSTKing Rails
I349-410-WSTCal King Rails
HangerBolt 5/16"x3-1/8"(18)
09-20-2022
Page3/7
aspenhome
RASSEMBLYINSTRUCTIONS
MADEINVIETNAM
ah
STEP3:Attachthecentersupportlegtoheadboardandwoodstretcherby using 3bolts(A),
lockwashers(C)andflatwashers(D).
STEP2:Attachthewoodstretchertothelegsbyusing2bolts(A), lock washers(C)
and flat washers(D). Completelytighten allbolts.
A
C
D
E
A
C
D
E
The outsideholesmatchto6/6standardkingrails,
the insideholesmatchto6/0Calkingbed rails.
Headboard
Slatbearer
Side Rail
F
HIJ
G
ITEMNO:I349-415-WSTKingPanel HBw/ 2Lamps
I349-407-WSTKing LowProfileFB
I349-406-WSTKing Rails
I349-410-WSTCal King Rails
FOROPTION1:
STEP4: Screwthebolts(F)intoHB&FB.Makesuretheslatbearerisinthe position (b).
Alignthe boltswiththe holesintheendofsiderailsandattach theside railstoHB&FB
using halfmoonWashers(G), Lock Washers(H) andhexnuts(I).Thenuseahex wrench to
tighten all the nuts.
Makesuretheslat bearer
isinthe position (b).
Position a
Position b
09-20-2022
STEP5: Attachthesupportlegswithlevelertotheslats.
Adjustthelevelersonbottomofsupportlegswhen necessary.
SupportLeg
Leveler
ThisEndUp
Slat
WoodScrews(K)
STEP6: Arrangetheslatsontheslatbearers equallyand
attachtotheslatbearerswithwoodscrews (K).
aspenhome
RASSEMBLYINSTRUCTIONS
MADEINVIETNAM
ah
ITEMNO:I349-415-WSTKingPanel HBw/ 2Lamps
I349-407-WSTKing LowProfileFB
I349-406-WSTKing Rails
I349-410-WSTCal King Rails
Page4/7
FOROPTION2:
b
a
STEP7: ForCal Kingbed,insertwood capsintotheholeson
headboardandfootboard.ForregularKingbed, skipthisstep.
Wood Cap (L)
09-22-2022
STEP4:Theslatbearershavebeenattachedinposition (b) approximately 2 fromthetop of the side
railsforusewithastoragefootboard.Theslatbearersmustbemovedintoposition (a)based on
thisbedconfiguration.Removetheboltsfromtheslatbearersandside railsasshownbelow. Then
re-attachtheslatbearerstothesiderailsindesiredposition(a)withbolts, lock washers, flat
washers. Caution:Donotovertightenboltsasthismayloosenthethreadedinsertsin the
siderails.
The outsideholesmatchto6/6standardkingrails,
the insideholesmatchto6/0Calkingbed rails.
Headboard
Slatbearer
Side Rail
FHIJ
G
STEP6: Removethesupportlegs(top) asshown in thepicture
to theright.Attachthe support legswithlevelertothe slats.
Adjustthelevelersonbottomofsupportlegswhen necessary.
SupportLeg
Leveler
ThisEndUp
Slat
Remove
SupportLeg(top)
STEP5: Screwthebolts(F)intoHB&FB.Makesuretheslatbearerisinthe position (a).
Alignthe boltswiththe holesintheendofsiderailsandattach theside railstoHB&FB
using halfmoonWashers(G), Lock Washers(H) andhexnuts(I).Thenuseahex wrench to
tighten all the nuts.
Makesuretheslat bearer
isinthe position (a).
Position a
Position b
aspenhome
RASSEMBLYINSTRUCTIONS
MADEINVIETNAM
ah
ITEMNO:I349-415-WSTKingPanel HBw/ 2Lamps
I349-407-WSTKing LowProfileFB
I349-406-WSTKing Rails
I349-410-WSTCal King Rails
Page5/7
WoodScrews(K)
STEP7: Arrangetheslatsontheslatbearers equallyand
attachtotheslatbearerswithwoodscrews (K).
STEP8: ForCal Kingbed,insertwood capsintotheholeson
headboardandfootboard.ForregularKingbed, skipthisstep.
Wood Cap (L)
04-25-2022
aspenhome
RASSEMBLYINSTRUCTIONS
MADEINVIETNAM
ah
ITEMNO:I349-415-WSTKingPanel HBw/ 2Lamps
I349-407-WSTKing LowProfileFB
I349-406-WSTKing Rails
I349-410-WSTCal King Rails
Page6/7
STEP4:Unscrewthepre-installedmalebolt and female
boltineach oftheheadboardpostbyanallenwrench.Insert
eachoftheflatwasherfirstlyandthebrass ring secondlyto
the bolt male, presseachbolt female/touchswitchbyfinger
intotheholeonheadboardpost, thencompletelytighten the
2malebolts.
STEP1: Attacheach oftheswinglamp("1"onthe componentlistforswinglamp)tothebackofthe
headboardwith4flatheadwoodscrews("A"onthehardwarebagforswing lamp)asshownbelow.
STEP2: Attacheachofthecontrolboxw/wires("2"onthe component list for
swinglamp)tothebackofhaeadboardwith4panheadwood screws ("B" on the
hardwarebagforswinglamp)asshownbelow.
STEP3: Plugthe maleconnectorsintothefemale
connectorsasshownbelow.
FOR SWING LAMPASSEMBLY:
Lamp
Swing Lamp
"A"
ControlBoxw/Wires
"B"
FemaleConnector
MaleConnector
Plug
FemaleBolt/TouchSwitch
Brass Ring
MaleBolt
HeadboardPost
FlatWahser
06-06-2022

This manual suits for next models

2

Other aspenhome Indoor Furnishing manuals
aspenhome I256-303 User manual

aspenhome

aspenhome I256-303 User manual

aspenhome I540-6050 User manual

aspenhome

aspenhome I540-6050 User manual

aspenhome ICB-492-BCH-KD-1 User manual

aspenhome

aspenhome ICB-492-BCH-KD-1 User manual

aspenhome I3048-462 User manual

aspenhome

aspenhome I3048-462 User manual

aspenhome I07-415-WBR User manual

aspenhome

aspenhome I07-415-WBR User manual

aspenhome I540-6600S User manual

aspenhome

aspenhome I540-6600S User manual

aspenhome I07-366-PEP/WBR User manual

aspenhome

aspenhome I07-366-PEP/WBR User manual

aspenhome I227-471 User manual

aspenhome

aspenhome I227-471 User manual

aspenhome I249-412-TAL User manual

aspenhome

aspenhome I249-412-TAL User manual

aspenhome I287-462 User manual

aspenhome

aspenhome I287-462 User manual

aspenhome ICF-350 User manual

aspenhome

aspenhome ICF-350 User manual

aspenhome I224-307 User manual

aspenhome

aspenhome I224-307 User manual

aspenhome Credenza IML-318-GRY User manual

aspenhome

aspenhome Credenza IML-318-GRY User manual

aspenhome Queen Estate Panel HB I201-412 User manual

aspenhome

aspenhome Queen Estate Panel HB I201-412 User manual

aspenhome I644-6640S User manual

aspenhome

aspenhome I644-6640S User manual

aspenhome I240-404-RIV User manual

aspenhome

aspenhome I240-404-RIV User manual

aspenhome I256-3064 User manual

aspenhome

aspenhome I256-3064 User manual

aspenhome Queen Panel HB I07-412-WBR/PEP/BLK User manual

aspenhome

aspenhome Queen Panel HB I07-412-WBR/PEP/BLK User manual

aspenhome I430-412 User manual

aspenhome

aspenhome I430-412 User manual

aspenhome Liv360 I206-449 User manual

aspenhome

aspenhome Liv360 I206-449 User manual

aspenhome IHP-360T-FSL User manual

aspenhome

aspenhome IHP-360T-FSL User manual

aspenhome I3002-412 User manual

aspenhome

aspenhome I3002-412 User manual

aspenhome Queen Panel HB I34-412-SNA User manual

aspenhome

aspenhome Queen Panel HB I34-412-SNA User manual

aspenhome I631-9140 User manual

aspenhome

aspenhome I631-9140 User manual

Popular Indoor Furnishing manuals by other brands

DREAMS VALENCIA Assembly instructions

DREAMS

DREAMS VALENCIA Assembly instructions

Songmics VASAGLE LWS28 quick start guide

Songmics

Songmics VASAGLE LWS28 quick start guide

Global 607269A Assembly instructions

Global

Global 607269A Assembly instructions

Cosmopolitan COSMOLiving DA8187 manual

Cosmopolitan

Cosmopolitan COSMOLiving DA8187 manual

Seconique Furniture Marley Assembly instructions

Seconique Furniture

Seconique Furniture Marley Assembly instructions

Barton 98106 Owner's manual and safety instructions

Barton

Barton 98106 Owner's manual and safety instructions

Sanus Systems WFA37 Assembly instructions

Sanus Systems

Sanus Systems WFA37 Assembly instructions

Furniture of America CM4265DK-E Assembly instructions

Furniture of America

Furniture of America CM4265DK-E Assembly instructions

Winco 557 Series instructions

Winco

Winco 557 Series instructions

Shockwave S2 Operation & service manual

Shockwave

Shockwave S2 Operation & service manual

Livarno Living Z30614A manual

Livarno Living

Livarno Living Z30614A manual

PATIOJOY HW68244-12 manual

PATIOJOY

PATIOJOY HW68244-12 manual

Ameriwood HOME 3863013COM Assembly instructions

Ameriwood HOME

Ameriwood HOME 3863013COM Assembly instructions

Noble House Home Furnishings Loveseat Assembly instructions

Noble House Home Furnishings

Noble House Home Furnishings Loveseat Assembly instructions

Universal Furniture Explore Home 637639-RTA instruction sheet

Universal Furniture

Universal Furniture Explore Home 637639-RTA instruction sheet

Regency ONCSSP7124 instructions

Regency

Regency ONCSSP7124 instructions

Rauch M2668 Assembly instructions

Rauch

Rauch M2668 Assembly instructions

IKEA LILLANGEN 098.939.82 manual

IKEA

IKEA LILLANGEN 098.939.82 manual

manuals.online logo
manuals.online logoBrands
  • About & Mission
  • Contact us
  • Privacy Policy
  • Terms and Conditions

Copyright 2025 Manuals.Online. All Rights Reserved.