Aspero IMPOS 4012 User manual

1
MANUAL
www.dejedamachine.com

SICHERHEITSZEICHEN
BEDEUTUNG
DER
SYMBOLE
SAFETY
SIGNS
DEFINITION
OF
SYMBOLS
@
(
DE
)
WARlNUNG
!
Beachten
Sie
die
Sicherheitssymbole
!
Die
Nichtbeachtung
der
Vorschriften
und
Hinweise
zum
Einsatz
des
Erdbohrers
kann
zu
schweren
Personenschaden
und
todfiche
Gefahren
mit
sich
bringen
.
(
EIN
)
ATTENTION
*
Ignoring
the
safety
signs
and
warnings
applied
on
the
ma
-
chine
as
well
as
ignoring
the
security
and
operating
instructions
can
cause
serious
injuries
and
even
lead
to
death
.
©
©
^
Dlj
)
ANLEITUNG
LESEN
*
Lesen
Sie
die
Betriebs
-
und
Wartungsan
/
eitung
Ihrer
Maschine
aufmerksam
durch
und
machen
Sie
sich
mit
den
Bedienelementen
der
Maschine
gut
vertraut
urn
die
Maschine
ordnungsgemaB
zu
bedienen
und
so
Schaden
an
Mensch
und
Maschine
vorzubeugen
.
READ
THE
MANUAL
*
Read
the
user
and
maintenance
manual
carefully
and
get
familiar
with
the
controls
n
order
to
use
the
machine
correctly
and
to
avoid
injuries
and
machine
defects
.
©
©
(
DE
)
SCHUTZAUSRUSTUNG
!
Das
Tragen
sowie
Sicherheitsschuhen
ist
Pflicht
.
CEN
^
PROTECTIVE
CLOTHING
*
The
operator
is
obligated
to
wear
proper
ear
protection
,
safety
goggles
and
safety
shoes
0
von
Gehorschutz
,
Schutzbrille
©
©
m
2
www.dejedamachine.com

CpEp
VERBRENNUNGSGEFAHR
!
-
HeiBe
Abgase
.
Motorabdeckung
sowie
Vergaser
werden
wahrend
dem
Betrieb
he
/
B
.
BURN
HAZARD
!
-
Hot
exhaust
fumes
.
Engine
parts
and
muffler
become
hot
during
operation
.
(
pi
)
LEICHT
ENTFLAMMBAR
!
-
Offenes
Feuer
,
Rauchen
und
offenes
Licht
sind
strengstens
verboten
!
QENQ
HIGHLY
FLAMMABLE
!
-
Smoking
,
fire
and
open
light
are
forbidden
!
ES
FR
CE
-
KONFORM
?
-
Dieses
Produkt
entspricht
den
EG
-
Richtlinien
.
CE
-
Conformal
!
-
This
product
complies
with
the
EC
-
directives
.
<
ES
)
©
3
%
www.dejedamachine.com

4
www.dejedamachine.com

5
www.dejedamachine.com

6
www.dejedamachine.com

7
www.dejedamachine.com

8
www.dejedamachine.com

9
www.dejedamachine.com

-
2.1
Components
(
Fig
.
A
)
1
Engine
USER
MANUAL
2
Extension
pole
3
Hedge
trimmer
Dear
Customer
!
This
manual
contains
important
information
and
advice
for
the
correct
and
safe
use
and
maintenance
of
the
IMPOS
garden
maintenance
set
4012
.
The
manual
is
part
of
the
machine
and
.
may
not
be
stored
separately
.
Read
it
profoundly
before
first
use
of
the
machine
and
keep
it
for
later
reference
.
When
the
machine
is
handed
to
other
persons
always
put
the
manual
to
the
ma
-
chine
.
4
Twig
saw
5
Brush
cutter
6
Trimmer
7
Scythe
blade
i
8
Safety
cover
9
Angle
adjustment
hedge
trimmer
10
Belt
11
Pole
with
control
panel
Please
follow
the
security
instructions
!
Due
to
continuous
development
of
our
products
illustrations
,
pictures
might
differ
slightly
.
2.2
Technical
Details
Engine
type
2
-
stroke
engine
Displacement
25
,
4
cm
3
Attention
!
Technical
changes
reserved
!
0
,
7
kW
Engine
power
10300
rpm
Maximum
engine
speed
i
Copyright
©
2010
This
manual
is
protected
by
copyright
law
-
all
rights
reserved
.
Especially
the
reprinting
as
well
as
the
translation
and
depiction
of
pictures
will
be
prosecuted
by
law
.
Court
of
jurisdiction
is
WELS
,
Austria
.
2800
rpm
Idle
speed
Starter
Reverse
starter
CDI
Ignition
Fuel
capacity
0
,
7
Litres
25
:
1
Ratio
fuel
:
oil
5
/
7
kg
Weight
Trimmer
:
2
-
thread
head
Customer
Support
:
Maximum
cutting
width
455
mm
Thread
length
2
,
5
m
Thread
thickness
02
,
4
mm
T
:
Leaf
scythe
:
3
-
tooth
blade
0255
x
025
,
4
x
1
,
5
Blade
dimensions
Twig
saw
:
Carlton
sword
10
www.dejedamachine.com
Lagos, Nigeria
Ojo Alaba, Ojo
G76 Alaba International Market,
Tel: +234 803 577 9094
DE JEDA MACHINE AND TOOLS LIMITED
www.dejedamachine.com
1500
mm
Length
fern
25
,
4
cm
Hedge
trimmer
:
180
°
adjustable
Maximum
cutting
length
400
mm
SworcJ
length
Do
not
wear
loose
clothing
,
long
hair
openly
or
loose
jewellery
like
necklaces
etc
.
when
operating
the
machine
They
might
be
catched
by
rotating
parts
and
cause
serious
injuries
.
Technical
changes
reserved
.
2.3
Included
in
delivery
Unpack
the
IMPOS
garden
maintenance
set
4012
and
check
the
machine
for
any
transport
damage
and
for
completeness
of
delivery
.
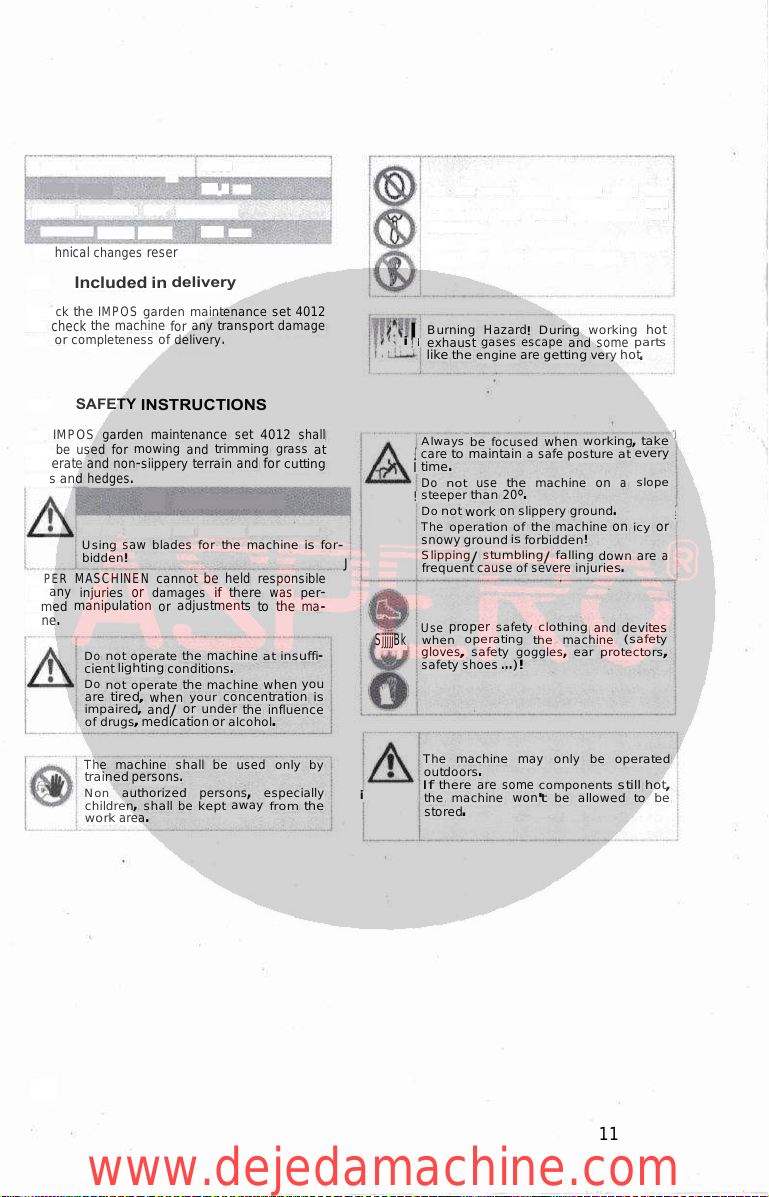
|
Burning
Hazard
!
During
working
hot
i
?
i
exhaust
gases
escape
and
some
parts
like
the
engine
are
getting
very
hot
.
2.4
SAFETY
INSTRUCTIONS
The
IMPOS
garden
maintenance
set
4012
shall
only
be
used
for
mowing
and
trimming
grass
at
moderate
and
non
-
siippery
terrain
and
for
cutting
twigs
and
hedges
.
-
j
Always
be
focused
when
working
,
take
{
care
to
maintain
a
safe
posture
at
every
i
time
.
Do
not
use
the
machine
on
a
slope
!
steeper
than
20
°
.
Do
not
work
on
slippery
ground
.
The
operation
of
the
machine
on
icy
or
snowy
ground
is
forbidden
!
Slipping
/
stumbling
/
falling
down
are
a
frequent
cause
of
severe
injuries
.
:
:
Using
saw
blades
for
the
machine
is
for
-
bidden
!
ZIPPER
MASCHINEN
cannot
be
held
responsible
for
any
injuries
or
damages
if
there
was
per
-
formed
manipulation
or
adjustments
to
the
ma
-
chine
.
J
Use
proper
safety
clothing
and
devites
SjjjjjBk
when
operating
the
machine
(
safety
gloves
,
safety
goggles
,
ear
protectors
,
safety
shoes
.
..
)
!
Do
not
operate
the
machine
at
insuffi
-
cient
lighting
conditions
.
Do
not
operate
the
machine
when
you
are
tired
,
when
your
concentration
is
impaired
,
and
/
or
under
the
influence
of
drugs
,
medication
or
alcohol
.
The
machine
may
only
be
operated
outdoors
.
If
there
are
some
components
still
hot
,
the
machine
won
'
t
be
allowed
to
be
stored
.
The
machine
shall
be
used
only
by
trained
persons
.
Non
authorized
persons
,
especially
children
,
shall
be
kept
away
from
the
work
area
.
i
11
Do
not
change
the
mowing
attachment
.
W
A
R
N
I
N
G
www.dejedamachine.com

2.4
.
1
Remaining
risks
•
Danger
by
sound
:
Working
without
ear
protectors
can
damage
the
hearing
.
•
Danger
by
the
working
area
:
Take
care
of
stones
and
other
things
that
can
fly
around
and
of
failing
down
twigs
.
•
Danger
for
the
hands
(
fingers
)
:
Never
touch
the
mowing
attachment
,
the
hedge
trimmer
or
the
twig
saw
during
the
operation
.
After
operation
the
machine
has
to
get
cold
.
Otherwise
,
there
'
s
a
high
burning
hazard
!
During
refuelling
open
light
,
fire
or
smoking
is
forbidden
.
Don
'
t
refuel
when
the
engine
'
s
running
or
some
components
are
still
hot
.
Only
refuel
outdoors
or
in
good
ventilated
rooms
.
Always
wipe
off
spilt
fuel
immediately
.
Fuel
is
flammable
very
easily
!
doesn
'
t
start
you
'
ll
have
to
push
the
but
-
ton
some
times
more
.
•
When
the
engine
'
s
running
,
you
have
to
turn
the
choker
17
off
again
(
Fig
.
I
)
.
2.6
.
2
Warm
starting
•
Turn
on
the
ignition
16
(
Fig
.
H
)
.
•
Let
the
choker
17
turned
off
(
Fig
.
F
)
.
•
Do
the
next
steps
like
cold
starting
.
2.63
Stopping
•
Turn
the
ignition
16
to
the
position
0
(
Fig
.
:
J
2.5
Assembly
•
Mount
the
pole
with
the
control
panel
11
on
the
engine
(
Fig
.
B
)
.
•
Then
you
have
to
fit
the
handle
28
on
the
extension
pole
2
(
Fig
.
C
)
.
•
Now
fix
the
safety
cover
8
on
the
brush
cut
-
ter
like
shown
in
Fig
.
D
.
•
Then
the
slot
for
the
attachments
29
has
to
be
fitted
on
the
pole
(
Fig
.
D
)
.
•
Then
mount
the
twig
saw
4
like
shown
in
Fig
E
.
on
the
related
pole
.
•
Then
you
have
to
fit
the
belt
10
into
the
re
-
lated
hole
(
Fig
.
A
)
.
H
)
•
Wait
till
the
engine
stands
still
and
all
components
are
cold
again
.
2.6
.
4
Regulating
the
engine
speed
•
For
this
you
have
to
use
the
throttle
handle
shown
in
Fig
.
L
.
•
At
first
you
have
to
push
the
lock
handle
18
.
2.6
Operation
Instructions
Now
the
throttle
handle
19
can
be
pushed
.
IMPORTANT
2.7
Operation
Do
not
operate
the
engine
at
i
maximum
speed
right
from
the
start
.
The
engine
itself
reaches
its
maximum
capacity
after
the
first
10
hours
of
operation
.
Non
-
compliance
j
with
this
instruction
reduces
your
I
engine
lifespan
substantially
.
2.6
.
1
Cold
starting
•
Turn
the
ignition
16
to
the
position
I
(
Fig
.
For
operation
all
safety
devices
and
the
belt
must
be
used
!
2.7
.
1
Mounting
the
operation
attachments
For
this
work
the
engine
has
to
stand
still
!
Loosen
the
hand
screw
12
.
Then
push
the
safety
cover
13
to
the
outside
.
Push
the
handle
being
under
the
safety
cover
and
remove
the
pole
with
the
engine
.
Put
the
new
pole
with
the
attachment
into
the
hole
.
Push
the
handle
again
and
take
care
that
the
hook
at
the
inside
of
the
pole
fits
into
the
hole
.
H
)
.
•
Turn
the
choker
17
into
the
position
like
shown
in
Fig
.
3
.
•
Now
push
the
button
28
3
to
5
times
(
Fig
.
K
)
.
•
Pul
!
at
the
cable
control
20
powerfully
to
start
the
engine
(
Fig
.
M
)
.
When
the
engine
12
www.dejedamachine.com
•
Push
the
cover
13
to
the
pole
and
fasten
the
hand
screw
12
again
.
2.7
.
2
Operation
brush
cutter
•
Changing
the
mowing
attachment
For
the
blade
you
have
to
use
the
nut
.
The
trimmer
is
fitted
by
the
threaded
hole
.
•
Operation
with
the
blade
(
Fig
.
U
)
Start
the
machine
.
Now
hang
the
belt
round
your
neck
.
Operate
the
throttle
handle
and
start
mowing
like
shown
on
the
picture
.
•
Operation
with
the
trimmer
Do
that
like
mowing
with
the
blade
.
2.7
.
3
Operation
twig
saw
(
Fig
.
V
)
•
Take
care
that
you
aren
'
t
standing
under
the
twig
you
want
to
cut
.
•
Remove
the
safety
cover
.
•
Start
the
engine
.
•
Hang
the
belt
around
your
neck
.
«
Position
the
saw
where
you
want
to
cut
.
•
Operate
the
throttle
handle
and
cut
the
twig
carefully
from
the
upper
to
the
lower
side
.
No
cleaning
,
upkeep
,
checks
or
maintenance
when
machine
is
run
-
ning
Be
safe
:
Shut
off
the
machine
,
let
it
cool
down
,
disconnect
spark
plug
cap
from
spark
plug
.
The
machine
does
not
require
intense
mainten
-
ance
.
However
,
to
ensure
a
long
lifespan
,
we
strongly
recommend
following
the
upkeep
and
maintenance
plan
.
Repairs
must
be
carried
out
by
specialists
!
Use
original
ZIPPER
parts
only
!
2.8
.
1
Maintenance
plan
Controls
for
the
maintenance
of
the
machine
Regularly
prior
to
each
operation
Loose
or
lost
screws
,
nuts
,
bolts
Regularly
prior
to
each
operation
Damage
of
any
part
of
the
machine
Machine
cleaning
Regularly
after
operation
Every
25
working
hours
Cleaning
spark
plug
Cleaning
air
filter
Every
20
-
30
working
hours
2.7
.
4
Operation
hedge
trimmer
•
Adjustment
of
the
cutting
angle
(
Fig
.
G
)
Push
the
lock
handle
14
.
Then
operate
the
handle
15
.
Now
turn
the
hedge
trimmer
to
the
required
position
.
Stop
pushing
the
handles
.
Take
care
that
both
latch
into
position
.
•
Horizontal
cuts
(
Fig
.
W
)
Adjust
the
required
cutting
angle
.
Remove
the
safety
covers
.
Start
the
machine
and
hang
the
belt
round
your
neck
.
Now
cut
the
hedge
like
shown
on
the
picture
.
•
Vertical
cuts
(
Fig
.
X
)
Do
this
like
cutting
horizontal
cuts
.
Cut
the
hedge
like
shown
on
the
picture
.
2.8
.
2
Cleaning
Clean
'
the
machine
and
the
working
attachment
from
soil
,
dust
,
grass
,
chips
,
and
small
twigs
,
etc
.
Clean
the
machine
housing
with
a
wet
cloth
and
a
mild
cleaning
solution
.
Put
on
all
coatless
flats
a
thin
coat
of
oil
.
IMPORTANT
The
usage
of
solvents
,
aggressive
chemicals
or
scouring
agents
damages
the
machine
housing
.
2.8
.
3
Refuelling
The
machine
is
run
by
a
gasoline
-
oii
mixture
.
You
need
for
the
2
-
Stroke
engine
a
fuel
mixture
of
25
:
1
(
gasoline
:
oil
)
.
Ensure
yourself
that
no
particles
get
into
the
fuel
tank
21
when
refuelling
(
Fig
.
M
)
.
Use
a
filter
.
2.8
13
I
*
WARNING
Maintenance
www.dejedamachine.com
ZIPPER
MASCHINEN
strongly
recommends
the
usage
of
HQ
premixed
fuels
especially
recommended
for
2
-
stroke
motors
.
Many
of
them
keep
their
consistency
even
after
long
periods
of
storage
.
If
you
prefer
to
mix
your
own
fuel
please
use
HQ
Synthetic
Oil
for
2
-
stroke
engines
.
Synthetic
oil
reduces
accumulation
of
soot
on
the
spark
plug
,
cylinder
,
engine
cock
and
exhaust
pipe
.
This
increases
the
degree
of
lubrication
and
prolongs
the
engines
lifespan
.
Use
self
-
mixed
fuel
up
within
4
weeks
.
2.8
.
7
Changing
the
chain
•
Loosen
the
nut
32
and
remove
the
cover
33
(
Fig
.
V
)
.
a
Loosen
the
chain
.
©
Remove
the
chain
,
*
At
fitting
the
new
chain
you
have
to
take
care
that
all
the
guides
slide
in
the
grooves
34
(
Fig
.
Z
)
.
2.8
.
8
Changing
the
shears
©
At
first
you
have
to
loosen
the
nuts
35
and
36
(
Fig
.
a
)
.
Mow
remove
the
nuts
37
(
Fig
.
b
)
.
Then
dismantle
the
guiding
bar
38
(
Fig
.
IMPORTANT
Shake
fuel
tank
prior
to
every
;
usage
!
During
storage
oil
descents
slowly
in
the
fuel
tank
.
If
you
start
the
engine
under
this
j
condition
,
it
has
barely
any
j
lubrication
which
would
lead
to
I
severe
engine
damage
,
J
2.8
.
4
Cleaning
the
air
filter
A
clogged
air
filter
reduces
the
engines
power
output
drastically
and
causes
engine
disfunction
.
Furthermore
it
reduces
the
engines
lifespan
!
Loosen
the
nut
22
and
remove
the
cover
of
the
air
filter
23
(
Fig
.
0
)
.
Take
out
the
air
filter
(
Fig
.
P
)
and
clean
the
air
filter
(
Fig
.
Q
)
with
water
.
Wring
it
out
strongly
.
Let
it
dry
.
Drip
some
drops
of
oil
onto
the
filter
.
Mount
the
filter
back
and
fix
the
cover
again
.
2.8
.
5
Cleaning
the
spark
plug
Take
off
the
spark
plug
cap
26
(
Fig
.
S
)
.
Loosen
and
remove
the
spark
plug
27
(
Fig
.
T
)
carefully
.
Clean
it
with
a
small
brush
from
soot
debris
.
The
contact
distance
shall
account
approx
.
0
,
5
mm
or
~
credit
card
thickness
.
c
)
.
Mow
loosen
and
remove
the
screws
39
(
Fig
.
d
)
.
Loosen
the
socket
screws
40
and
remove
the
cap
41
(
Fig
.
e
)
.
Then
you
have
to
disassemble
the
gasket
42
and
the
safety
cover
43
(
Fig
,
f
)
.
Now
lift
the
connecting
rod
44
out
of
the
cam
gear
.
Take
care
that
you
do
not
lose
the
spacer
45
(
Fig
.
g
)
.
Now
you
can
change
the
shears
(
Fig
.
h
)
.
For
fitting
the
new
shears
you
have
to
do
these
steps
backwards
.
2.8
.
9
Lubrication
After
cleaning
you
have
to
lubricate
all
the
moving
parts
.
Spray
the
chain
with
a
chain
spray
.
Every
15
working
hours
you
must
squeeze
some
grease
into
the
grease
nipples
of
the
twig
saw
31
(
Fig
.
E
)
and
of
the
hedge
trimmer
32
(
Fig
.
G
)
.
2.8
.
10
Storage
2.8
.
6
Tensioning
the
chain
(
Fig
.
R
)
Adjust
the
chain
tension
that
it
isn
'
t
able
to
spring
out
of
the
guides
and
that
it
doesn
'
t
sit
too
fast
.
Turn
the
adjusting
screw
25
clockwise
to
tension
the
chain
and
anti
-
clockwise
to
loosen
When
the
machine
is
stored
longer
than
30
days
:
*
Drain
the
fuel
out
of
the
fuel
tank
.
•
Take
off
the
spark
plug
and
pour
some
drops
of
oil
into
the
cylinder
.
Turn
the
engine
some
times
using
the
cable
control
so
the
oil
in
the
cylinder
gets
evenly
it
.
14
www.dejedamachine.com
distributed
.
Clean
the
spark
plug
and
fit
it
again
.
*
Cover
the
machine
and
store
it
at
a
dry
and
clean
place
.
2.8
.
11
Controlling
the
oil
level
Before
using
the
twig
saw
you
have
to
control
the
oil
level
of
the
oil
tank
30
for
the
twig
saw
(
Fig
.
E
)
.
Refill
it
when
there
'
s
too
less
oil
in
it
.
2.8
.
12
Disposal
Do
not
dispose
your
IMPOS
4012
in
the
residual
waste
!
Contact
your
local
authorities
for
information
about
best
available
disposal
possibilities
in
your
area
.
Drain
fuel
from
the
fuel
tank
completely
before
disposing
the
2.10
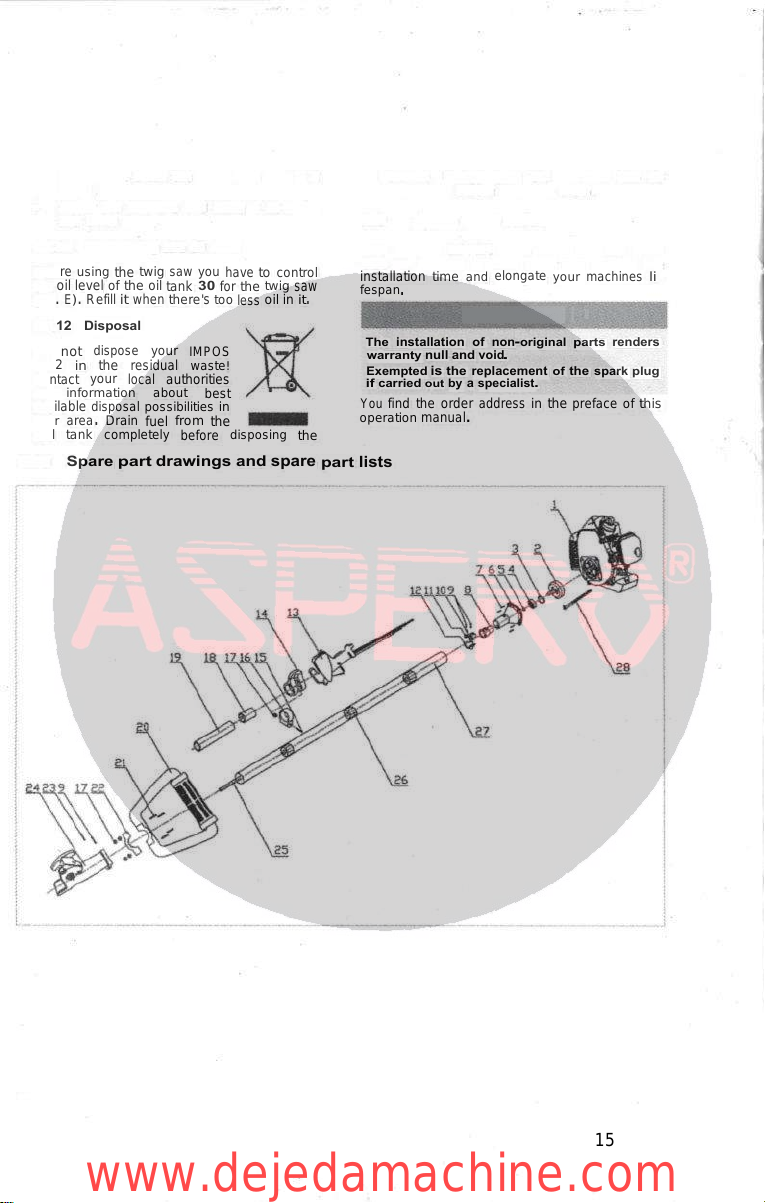
Spare
part
drawings
and
spare
part
lists
machine
.
Disaggregate
the
machine
into
its
components
before
disposing
them
.
2.9
Spare
part
order
With
original
ZIPPER
spare
parts
you
use
parts
that
are
attuned
to
each
other
and
shorten
the
installation
time
and
elongate
your
machines
li
-
fespan
.
The
installation
of
non
-
original
parts
renders
warranty
null
and
void
.
Exempted
is
the
replacement
of
the
spark
plug
if
carried
out
by
a
specialist
.
You
find
the
order
address
in
the
preface
of
this
operation
manual
.
15
WARNING
www.dejedamachine.com
•
»
Pos
.
Name
NMRM
(
WttMlMHHi
HPI
.
»
.
v
i
w
.
-
.
-
v
,
n
.
-
v
-
_
-
2
,
-
,
.
.
-
i
ip
<
:
-
—
-
.
i
Pcs
.
i
1
14
!
Belt
ring
r
is
!
16
17
i
Nut
M
5
Screw
M
5
x
25
1
1
Engine
34
F
2
Clutch
3
Flat
washer
032
x
038
x
1
,
5
4
Bearing
6202
Spring
washer
013
x
017
x
1
Clutch
rim
Screw
M
6
x
20
!
1
1
i
1
i
1
5
H
!
:
1
!
18
Rubber
cover
!
1
T
:
i
19
|
Handle
pole
20
i
Handle
bar
1
5
1
1
6
7
21
|
Screw
M
5
x
30
4
4
Fixing
plate
1
Rubber
cover
1
22
8
4
23
9
j
Screw
M
5
x
25
3
Screw
M
5
xl
6
1
!
1
Shaft
connection
1
10
;
Screw
M
5
xl
2
11
|
Fixing
plate
I
Fixing
plate
II
13
!
Hand
bar
with
switch
24
r
i
25
Gear
shaft
1
1
1
1
12
1
3
26
Bearing
I
.
27
Aluminium
pipe
1
1
j
.
T
*
*
..
i
I
Pcs
-
1
i
Pos
,
;
Name
1
[
Safety
2
|
Bearing
3
Aluminium
pipe
i
1
hr
Gear
shaft
1
1
;
1
cover
I
-
5
Nut
M
5
2
±
L
,
„
16
I
i
t
i
www.dejedamachine.com
Fixing
plate
Screw
M
5
x
20
6
22
Screw
M
6
xl
2
1
1
7
23
4
Upper
safety
cover
1
8
Screw
M
5
x
25
3
24
Screw
M
5
xl
0
3
9
Rubber
cover
2
25
Cone
gear
1
26
|
Cone
gear
Plastic
protection
10
1
1
Protection
blade
11
27
Bearing
6002
1
1
12
Screw
ST
4
xl
6
28
Washer
030
x
034
x
1
1
1
I
—
13
Nut
M
5
Oil
seal
020
x
032
x
6
5
29
1
14
Connecting
plate
1
Washer
30
1
Washer
010
15
1
31
Upper
fixing
plate
1
.
Washer
026
16
32
Blade
:
1
1
17
Bearing
6000
3
33
Lower
Fixing
plate
1
Cone
gear
18
34
;
1
Lower
Safety
cover
Flange
M
10
xl
,
25
1
19
Gear
housing
:
1
35
1
20
Screw
M
5
x
35
1
36
Trimmer
1
21
Screw
M
6
xl
8
1
!
17
r
i
r
r
www.dejedamachine.com
r
Pos
.
Name
Pcs
.
28
Nut
M
6
:
3
2
1
Rubber
cover
1
29
Blade
protection
2
j
Bearing
3
;
30
Upper
blade
31
Lower
blade
1
I
'
'
!
3
Aluminium
pipe
4
i
Gear
shaft
1
1
:
H
32
I
Flat
washer
06
,
5
x
018
x
2
33
Screw
M
6
x
20
34
Screw
N
4
xl
0
3
1
:
I
r
5
;
Washer
09
6
Washer
022
x
026
x
1
7
Bearing
609
-
2
RS
8
Cone
gear
3
1
1
7
i
2
35
Cover
1
1
36
Cover
plate
37
i
Gasket
j
38
[
Washer
012
;
39
Washer
026
x
031
x
1
40
;
Bearing
6001
RS
41
i
Piston
rod
1
9
Screw
M
5
x
25
1 1
4
*
~
~
-
-
i
10
Screw
M
5
xl
6
1
.
11
Cotter
1
1
2
12
Nut
M
6
1
13
Flat
washer
06
,
5
x
013
x
1
14
Wave
washer
06
,
5
x
013
x
1
15
|
Gear
housing
16
Gear
wheel
5
2
L
1
42
Cover
1
;
43
j
Cam
gear
1
1
r
l
44
|
Gear
1
17
Screw
M
5
xl
6
2
45
;
Fixing
plate
46
Cam
shaft
1
{
18
j
O
-
Ring
19
!
Flat
washer
010
x
016
x
2
1
1
2
Gear
shaft
47
1
20
Neddie
bearing
2
48
Butter
mouth
2
21
Double
cone
gear
Gear
housing
49
Screw
M
6
xl
8
2
1
22
Handle
1
50
1
23
Flange
M
24
Connecting
plate
2
Trigger
spring
1
51
Trigger
lock
1
52
1
25
Wool
gasket
1
53
Adjuster
1
Screw
M
5
x
20
Blade
fixing
plate
2
Screw
2
26
54
27
1
18
www.dejedamachine.com

Pcs
.
Pos
.
Name
Rubber
cover
1
1
3
2
Bearing
3
Blade
fixing
plate
4
Aluminium
pipe
1
I
3
5
Chain
saw
assembly
1
:
6
|
Safety
cover
1
19
www.dejedamachine.com
Table of contents


