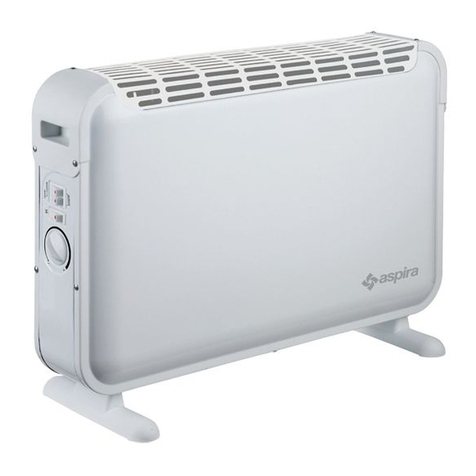
Aspira KALOREASY User manual

KALOREASY
RISCALDATORE ELETTRICO A RAGGI INFRAROSSI
MANUALE D’USO E DI INSTALLAZIONE
INFRARED HEATER
USER INSTRUCTIONS
PAG. 3
PAG. 8

KALOREASY
2

3
KALOREASY
ITALIANO
GRAZIE PER AVER ACQUISTATO IL NOSTRO PRODOTTO. PRIMA DI USARLO, LEGGERE IL MANUALE
D’USO ACCURATAMENTE E CONSERVARLO BENE PER CONSULTARLO IN FUTURO.
CARATTERISTICHE TECNICHE
Riscaldatore elettrico a raggi infrarossi
Modello: KALOREASY
Potenza nominale: 1000-2000W
Tensione nominale: 230V~ 50Hz
Grado di protezione: IP 24
1. AVVERTENZE GENERALI
ATTENZIONE!
Leggere attentamente le istruzioni contenute in questo manuale, onde evitare il rischio di
scosse elettriche, incendi e lesioni personali.
• KALOREASY per patio e terrazze può essere collegato esclusivamente ad una presa elettrica
messa a terra da 220-240V / 50Hz. Il collegamento ad una presa con tensione diversa è
pericoloso ed invalida la garanzia!
• KALOREASY deve essere utilizzato esclusivamente per la funzione per la quale è stato concepito
(per riscaldare un patio, una terrazza o aree simili). Non deve in nessun caso essere utilizzato per
asciugare tessuti e prodotti tessili! Questo riscaldatore non è previsto per l’uso commerciale e
non deve essere utilizzato per il riscaldamento di edifici, serre, capannoni, ecc.
• Le lampade riscaldanti al quarzo sono fragili, maneggiare il riscaldatore con cura ed evitare urti,
cadute, ecc.
• KALOREASY deve essere installato secondo le istruzioni riportate al successivo paragrafo
‘Installazione del riscaldatore per patio e terrazze.
• KALOREASY è molto potente ed emette un calore molto intenso, si raccomanda pertanto di evitare
l’esposizione diretta sia di persone (specialmente anziani, bimbi e invalidi/malati) che di animali.
• Non installare o utilizzare il riscaldatore nelle immediate vicinanze di oggetti infiammabili quali
ad esempio: tende, mobili, ecc. Non posizionare il riscaldatore troppo vicino ad una presa e non
utilizzarlo in ambienti umidi quali ad esempio: bagni, docce, piscine, ecc.
• Non far passare il cavo di alimentazione sotto moquette o tappeti, né coprirlo con essi o con
oggetti simili o guide. Non coprirlo con mobili. Sistemare il cavo lontano da zone dove può essere
calpestato, non farlo passare su spigoli vivi e non riavvolgerlo troppo strettamente dopo l’uso!
• Non utilizzare il riscaldatore all’aperto se il tempo è umido!
• Non utilizzare il riscaldatore con dispositivi di programmazione, timer o altri dispositivi simili
in grado di accendere automaticamente il riscaldatore, in quanto vi è il rischio di incendio se il
riscaldatore viene coperto o posizionato non correttamente.
• Mai coprire il riscaldatore!
• Evitare il contatto del cavo con le parti calde del riscaldatore.
• Ove possibile, evitare l’uso di un cavo di prolunga. Tuttavia qualora fosse necessario, svolgerlo
completamente ed accertare che sia di capacità di almeno 10A e 2000W.

4
KALOREASY
ITALIANO
• Non immergere il riscaldatore in acqua o altri liquidi.
• Alcune parti di questo prodotto possono diventare molto calde e causare ustioni. Prestare
particolare attenzione in presenza di bambini o persone vulnerabili. Evitare assolutamente il
contatto della pelle con le superfici calde.
• Non infilare mai dita, penne o qualunque altro oggetto nella griglia del radiatore.
• L’unità riscaldante (ed in particolare la griglia) diventa molto calda durante l’utilizzo, evitare
assolutamente il contatto con questa parte finché il riscaldatore non si è raffreddato!
• Lastretta vigilanza è necessariaquandoilprodottovieneutilizzatoinpresenza di bambini o disabili.
Tenere a distanza i bimbi di età inferiore ai 3 anni se non costantemente sorvegliati. I bambini di
età compresa fra 3 e meno di 8 anni possono soltanto accendere/spegnere l’apparecchio posto
che quest’ultimo sia stato collocato o installato nella posizione operativa prevista e che i bambini
siano sorvegliati o abbiano ricevuto istruzioni in merito all’utilizzo dell’apparecchio in sicurezza
e ne abbiano compreso i pericoli connessi. I bambini di età compresa fra 3 e meno di 8 anni non
possono collegare l’apparecchio, regolarlo, pulirlo o eseguirne la manutenzione.
• L’utilizzo del presente apparecchio è consentito ai bambini dagli 8 anni in poi e alle persone
con ridotte capacità fisiche, sensoriali o mentali o inesperte qualora siano sorvegliati o abbiano
ricevuto istruzioni in merito all’utilizzo dell’apparecchio in sicurezza e ne abbiano compreso i
pericoli connessi. Impedire ai bambini di giocare con l’apparecchio. Non è consentito effettuare la
pulizia o la manutenzione dell’apparecchio da parte dei bambini senza sorveglianza.
• Spegnere e scollegare sempre il riscaldatore prima di spostarlo o pulirlo.
• Mai tentare di riparare il riscaldatore da soli.
• Qualora occorra far riparare il riscaldatore, il cavo di alimentazione o la spina, portare
l’apparecchio presso un centro di assistenza autorizzato. Riparazioni effettuate da persone non
autorizzate o eventuali modifiche dell’apparecchio invalidano la garanzia. Contattare il fornitore
per le riparazioni riconosciute in garanzia.
ATTENZIONE!
KALOREASY non è dotato di dispositivo di controllo della temperatura ambiente.
Non utilizzare il riscaldatore in ambienti ristretti in presenza di persone non in grado di
allontanarsi da sole, se non costantemente sorvegliate
2. COMPONENTI
UNITÀ RISCALDANTE - PARTE ANTERIORE:
1. Corpo del riscaldatore
2. Griglia
3. Interruttore On/Off
4. Piantana
5. Vite di montaggio

5
KALOREASY
ITALIANO
UNITÀ RISCALDANTE - PARTE POSTERIORE:
6. Basamento
7. Sostegno, sezione inferiore
8. Sostegno, sezione centrale
9. Sostegno, sezione superiore
10. Sostegno, sezione telescopica
Non mostrati a disegno: 3 bulloni - 3 viti
Per l’installazione a parete vengono forniti una staffa a muro, tasselli e viti (non mostrati a disegno).
3. INSTALLAZIONE
MONTAGGIO A PARETE:
• Il corpo del riscaldatore (1) deve essere posto ad almeno 30 cm dal soffitto,
a 50 cm dalle pareti laterali e ad una distanza di 1.80 m dal pavimento.
• Installare il riscaldatore su di una parete solida e resistente in pietra o
cemento, MAI su pareti in legno o in altro materiale infiammabile!
• Utilizzare esclusivamente la staffa fornita in dotazione; non utilizzare
altri tipi di supporti o attacchi!
• Praticare quattro fori in corrispondenza dei punti corretti per i tasselli
e fissare il supporto alla parete utilizzando le viti in dotazione. La parte
curva deve trovarsi in cima mentre ‘l’incavo’ deve trovarsi nella parte
inferiore del supporto. Il supporto a parete deve essere in posizione
orizzontale.
• Appendere il riscaldatore al supporto a parete. La staffa sul lato
posteriore del riscaldatore deve inserirsi nella parte curva del supporto a parete mentre la vite
di montaggio (5) deve essere inserita nell’apposito alloggiamento sferico dell’‘incavo’ posto sul
supporto a parete, a questo punto esercitare una leggera pressione verso il basso fino a che il
riscaldatore è fissato perfettamente.
• Prima di utilizzare il riscaldatore, verificare che sia perfettamente fissato ed in posizione
orizzontale.
MONTAGGIO DELLA PIANTANA
• Inserire la sezione inferiore del sostegno (7, con la piastra di fissaggio) nel basamento (6), in
modo che i fori per le viti risultino allineati. Inserire i 3 bulloni nei doppi fori e serrarli. Inserire
la copertura di protezione sul collegamento a vite (a questo scopo, rimuovere temporaneamente
il porta-cavo).
• Inserire la sezione centrale del sostegno (8) nella sezione inferiore (7) e fissarla con una delle
viti in dotazione. Quindi, inserire la sezione superiore del sostegno (9, con l’accoppiamento a
compressione) nella sezione centrale e fissarla allo stesso modo con una vite.
• Inserire la sezione telescopica (quella più sottile) del sostegno (10), di quanto desiderato nella

6
KALOREASY
ITALIANO
parte in grigio dell’accoppiamento a compressione in cima al sostegno. Far scorrere la ghiera di
bloccaggio sulla sezione sottile del sostegno e serrarla sulla parte in grigio dell’accoppiamento
a compressione.
• Svitare quasi completamente la vite di montaggio (5) dalla staffa di montaggio. Inserire la testata
del riscaldatore in cima alla sezione telescopica del sostegno in modo che la vite si inserisca
perfettamente nel foro sul sostegno. A questo punto serrare la vite (la vite deve scomparire
all’interno della sezione sottile del sostegno, non deve sporgere!). La sezione sottile del sostegno
è in grado di ruotare di 360°, in modo da poter dirigere la testata del riscaldatore in qualsiasi
direzione. Fissare il cavo elettrico nel porta-cavo sul sostegno.
ATTENZIONE!
• Prima di utilizzare il riscaldatore, verificare
che sia posizionato saldamente e che tutti
i collegamenti siano perfettamente fissati.
• Il riscaldatore deve essere posizionato
saldamente su una superficie totalmente
in piano e regolare ad una distanza di
almeno 1 m dalla parete più vicina,
mentre il blocco interruttori deve trovarsi
ad almeno 30 cm dal soffitto e ad una
distanza da terra di 1.80 m.
4. FUNZIONAMENTO
• Dirigere la testata del riscaldatore nella direzione desiderata.
• Inserire la spina nella presa elettrica (220-240V / 50Hz).
• Utilizzare l’interruttore ON/OFF (3) per accendere e spegnere il riscaldatore.
• Con l’interruttore si seleziona inoltre la potenza desiderata:
• O = 0 Watt
• Sinistra: = potenza min. 1000Watt
• Sinistra+Destra= potenza max. 2000 Watt
• KALOREASY non è dotato di termostato e continua ad emettere calore finché non viene spento.
Tenere sempre d’occhio il riscaldatore quando è acceso!
• Estrarre la spina dalla presa quando non in uso.
5. PROTEZIONE ANTI-CADUTA
• KALOREASY è dotato di protezione anticaduta che spegne automaticamente il riscaldatore
qualora, nonostante tutte le misure precauzionali adottate, dovesse cadere.
• In questo caso, staccare immediatamente il riscaldatore dalla presa.
• Verificare accuratamente l’assenza di danni, quindi risollevarlo. Non utilizzare l’apparecchio se
risulta danneggiato, bensì portarlo al rivenditore/concessionario di fiducia o presso un centro di
assistenza autorizzato per farlo revisionare e/o riparare.
• Se invece non vengono riscontrati danni, impostare il riscaldatore a 0, collegarlo alla presa di

7
KALOREASY
ITALIANO
6. PULIZIA
• Spegnere KALOREASY e staccarlo dalla presa di corrente prima di qualsiasi intervento di
pulizia. Utilizzare un panno umido e, se necessario, un poco di liquido detergente. Non utilizzare
detergenti corrosivi o abrasivi!
• Col tempo polvere e sporcizia si accumulano dietro la griglia (2), per rimuovere la griglia allentare
le quattro viti a lato dell’unità riscaldante e sollevarla dolcemente. Rimuovere con cautela polvere
e sporcizia accumulate utilizzando un pennellino morbido, non utilizzare mai un compressore in
quanto potrebbe danneggiare le lampade o il riflettore, quindi riposizionare la griglia e fissarla.
corrente e accenderlo tirando l’apposito cordoncino. Monitorare attentamente il riscaldatore per i
primi quindici minuti; qualora si riscontrassero anomalie, staccarlo immediatamente dalla presa
e portarlo al rivenditore/concessionario di fiducia o presso un centro di assistenza autorizzato
per farlo riparare.
7. SMALTIMENTO
Il simbolo del cassonetto barrato riportato sull’apparecchiatura indica che il prodotto alla fine della propria
vita utile deve essere raccolto separatamente dagli altri rifiuti.
L’utente dovrà, pertanto, conferire l’apparecchiatura giunta a fine vita agli idonei centri di raccolta
differenziata dei rifiuti elettronici ed elettrotecnici, oppure riconsegnarla al rivenditore al momento
dell’acquisto di una nuova apparecchiatura di tipo equivalente, in ragione di uno a uno. L’adeguata raccolta
differenziata per l’avvio successivo dell’apparecchiatura dismessa al riciclaggio, al trattamento e allo
smaltimento ambientalmente compatibile contribuisce ad evitare possibili effetti negativi sull’ambiente e
sulla salute e favorisce il riciclo dei materiali di cui è composta l’apparecchiatura. Lo smaltimento abusivo
del prodotto da parte dell’utente comporta l’applicazione delle sanzioni amministrative di cui al D.Lgs. n.
22/1997” (articolo 50 e seguenti del D.Lgs. n. 22/1997).
ATTENZIONE:
Informazione importante per lo smaltimento ecosostenibile dell’apparecchio

8
KALOREASY
ENGLISH
1. IMPORTANT SAFETY WARNINGS
WARNING!
Read these instruction carefully in order to avoid shock hazard, fire or personal damage.
• KALOREASY may only be connected to a 220-240V / 50Hz, earthed socket. Connection to the
incorrect voltage is hazardous and will invalidate the guarantee!
• KALOREASY must be exclusively used for the function for which it is designed, i.e. heating a
patio or a similar location. Do not use it to dry textiles! The patio heater is not meant to be used
commercially and is not to be used to heat buildings, greenhouses, sheds, etc.
• The quartz heating lamps are fragile so handle the patio heater with care. Avoid knocking the
device, letting it fall etc.
• KALOREASY must be installed according to the instructions set out under ‘installing the heater’
(see later).
• KALOREASY is powerful and emits intense heat. We recommend that people (particularly the
elderly, babies and the infirm) and animals are not exposed to direct heat.
• KALOREASY may not be installed or used in the immediate vicinity of flammable objects such as
curtains, furniture etc. It may not be located too close to a socket and should not be used in a
damp area such as a bath/shower room, by a swimming pool etc.
• Do not run the cord underneath carpeting; do not cover it with mats, carpet strips, or similar and
make sure it is not placed in any passageways. Make sure the cord cannot be stepped on and that
no furniture is placed on top of it. Do not lead the cord around sharp corners and do not roll it up
too tightly after use!
• Do not use the patio heater outdoors during wet weather!
• Do not use this heater with a programmer, timer or any other device that switches the heater on
automatically, since a fire risk exists if the heater is covered or positioned incorrectly.Decken Sie
den Terrassenstrahler niemals ab!
• Never cover the patio heater!
• Prevent the cable coming into contact with the hot elements of the patio heater.
• If possible, avoid the use of an extension cable. If an extension cable has to be used, it must have
a capacity of at least 10A and 2000W. If you use an extension cable, it must be unrolled completely.
• Never immerse the patio heater in any fluids.
THANK YOU FOR CHOOSING OUR CONVECTORS. BEFORE USING IT, READ THE MANUAL
CAREFULLY AND KEEP IT WELL FOR FUTURE REFERENCE
TECHNICAL CHARACTERISTICS
Infrared heater
Models: KALOREASY
Rated power: 1000-2000W
Rated voltage: AC 230V 50Hz
Protection Rating: IP 24

9
KALOREASY
ENGLISH
• Some parts of this product can become very hot and cause burns. Particular attention has to be
given where children and vulnerable people are present. do not let bare skin come into contact
with hot surfaces.
• Never stick your fingers, pencils or any other object into the patio heater grille.
• The heating element (and particularly the grille) gets hot during use. Do not touch this part of the
device until the patio heater has cooled down!
• Close supervision is necessary if the product is used near children or incapacitated persons.
Close supervision is necessary if the product is used near children or incapacitated persons.
Children of less than 3 years should be kept away unless continuously supervised. Children
aged from 3 years and less than 8 years shall only switch on/off the appliance provided that it
has been placed or installed in its intended normal operating position and they have been given
supervision or instruction concerning use of the appliance in a safe way and understand the
hazards involved. Children aged from 3 years and less than 8 years shall not plug in, regulate and
clean the appliance or perform user maintenance.
• This appliance can be used by children aged from 8 years and above and persons with reduced
physical, sensory or mental capabilities or lack of experience and knowledge if they have been
given supervision or instruction concerning use of the appliance in a safe way and understand the
hazards involved. Children shall not play with the appliance. Cleaning and user maintenance shall
not be made by children without supervision.
• Switch the patio heater off and unplug before moving or cleaning.
• Never try to repair the patio heater yourself.
• If the patio heater, the electricity cable or the plug needs to be repaired, take the device to a
recognised service point. Repairs by unauthorised individuals or modifications made to the device
will invalidate the guarantee. Contact your supplier for repairs under guarantee.
WARNING!
KALOREASY is not equipped with a device to control the room temperature.
Do not use this heater in small rooms when they are occupied by persons not capable of
leaving the room on their own, unless constant supervision is provided.
2. PARTS
FRONT HEATING ELEMENT:
1. Heater housing
2. Grille
3. On/Off switch
4. Standard (only 18-type)
5. Mounting screw

10
KALOREASY
ENGLISH
BACK OF HEATING ELEMENT:
6. Base
7. Stand, bottom section
8. Stand, middle section
9. Stand, top section
10. Stand, adjustable section
Not illustrated: 3 bolts - 3 screws
A wall bracket, plugs and screws (not illustrated) are supplied for wall mounting.
3. INSTALLATION
WALL MOUNTING:
• The housing of the heater (1) must be at least 30 cm from the ceiling, 50
cm from side-walls and 1.80 m above the floor.
• The patio heater must be affixed to a sturdy wall made of stone or cement.
Never attach to walls made of wood or other flammable material!
Attach using the bracket supplied; do not use any other supports or
attachments!
• Drill four holes in the correct places for the plugs and attach the wall
support to the wall using the screws. The curved part of the plate must
be uppermost and the ‘keyhole’ must be located at the bottom of the
support. The wall support must be horizontal.
• Hang the heater onto the wall support. The bracket at the back of
the heater unit must fall into the curved part of the wall support; the
attachment screw (5)must be placed into the round part of the ‘keyhole’ on the wall support and
then pushed gently downwards until the patio heater is firmly affixed.
• Check that the patio heater is attached firmly and fully horizontally before use.
ASSEMBLING THE STAND
• Place the bottom section of the stand (7, with the fastening plate) on the base (6), in such a way
that the screw holes are aligned. Insert the 3 bolts through the double holes and tighten them
firmly. Place the protective cover over the screw connection (for that reason, remove the cable
holder for a moment)..
• Push the central section of the stand (8) over the bottom part (7) and fasten it in place with one
of the screws. You then attach the top part of the stand (9, with the compression coupling) to the
middle section in the same manner with a screw.
• Insert the thinner, adjustable section of the stand (10) as far as you wish into the grey part of the
compression coupling on top of the stand. Slide the locking ring down over the thin section of the
stand and screw it firmly to the grey compression coupling.
• Unscrew the mounting screw (5) almost completely out of the mounting bracket. Place the head

KALOREASY
11
of the terrace heater over the top of the adjustable stand section in such a way that the screw
falls precisely into the hole in the stand. Now tighten the screw firmly (the screw must disappear
into the thin section of the stand and may not protrude!). The thin section of the stand can rotate
360°, enabling the head of the terrace heater to point in any direction. The electrical cable can be
secured in the cable holders on the stand.
WARNING!
• Check that all connections are completely
secure and that the terrace heater is securely
positioned before using it.
• The terrace heater must be placed at a
distance of at least 1 metre from the nearest
wall. The box with the switch must be at
least 30 cm from a ceiling and 1.80 metres
above the ground. The terrace heater must
be placed firmly on an even and completely
horizontal surface.
4. OPERATION
• Point the head of the terrace heater in the correct direction.
• Insert the plug into the socket (220-240V / 50Hz).
• The patio heater is switched on and off by the On/Off switch (3). You also select the power output
with the switch.
• O = 0 Watt
• Left: = low power 1000Watt
• Left+Right = high power 2000 Watt
• The patio heater does not have a thermostat and continues to give out heat until it is switched off.
Always keep a close eye on the patio heater when it is switched on!
• Remove the plug from the socket when the patio heater is not in use.
5. FALL PROTECTION
• KALOREASY is equipped a fall safeguard. It will automatically switch off if, despite the
precautionary measures you have taken, the device falls over.
• In this event, unplug the device immediately.
• Always check the patio heater carefully for damage, then put it upright again. Never use a
damaged device but take it to your dealer or a recognised service point to be checked and/or
repaired.
• If you cannot find any damage, set the patio heater to the 0 setting, plug in and operate via the
pull-cord. Monitor the patio heater closely for the first fifteen minutes; if any defects occur,
unplug immediately and take it to your dealer/service point to be repaired.

KALOREASY
12
7. DISPOSAL
WARNING:
Important information concerning the environment friendly disposal of the appliance
This product conforms to EU Directive 2002/96/EC. The symbol of the barred waste bin indicates
that, at the end of its useful life, the product has to be collected separately from the domestic waste.
The user will have to take the product to a collection centre for waste electrical and electronic
equipment, or return it to a retailer on purchase of a replacement. Failure to do so may incur the
penalties established by laws governing waste disposal.
Proper differential collection and the subsequent recycling, processing and environmentally
compatible disposal of waste equipments avoids unnecessary damage to the environment and
possible related health risk and promotes also recycling of the materials used in the appliance.
6. CLEANING
• Always switch the KALOREASY off and unplug before cleaning. Clean using a damp cloth and, if
necessary, a little cleaning fluid. Never use corrosive or abrasive cleaning agents!
• After a while, dust and debris may gather behind the grille (2). The grille can be removed by
unscrewing the four small screws at the side of the heating element and gently lifting off. Use a
soft brush to carefully remove dust and debris. Never use a compressor as this could damage the
lamps or the reflector. Replace the grille and secure.

KALOREASY
13

KALOREASY
14

Modello: ............................
Codice:...............................
Data di acquito:
...........................................
QUESTO TAGLIANDO
DEVE ESSERE
RESTITUITO IN CASO
DI RECLAMO.
Causa del difetto:
...........................................
...........................................
...........................................
...........................................
...........................................
...........................................
...........................................
GARANZIA 2ANNI
Data di spedizione Nome e indirizzo del Rivenditore
Data di acquisto
Nome C.A.P.
Cognome Città
Via Provincia
PER FAVORE SCRIVERE IN STAMPATELLO
Dichiaro di aver preso atto delle condizioni di garanzia specificate sul certificato in mio possesso
e autorizzo l’uso dei miei dati personali.
Firma
Fantini Cosmi S.p.A.
Via Dell’Osio, 6 - 20090 Caleppio di Settala, Milano, Italia
Da spedire entro 7 gg. dalla data d’acquisto
CONDIZIONI DI GARANZIA
Il periodo di copertura della garanzia decorre dalla data di acquisto indicata dal rivenditore.
La durata della garanzia, è di 24 mesi di tutti i nostri prodotti e dovrà essere spedita entro e non oltre 15 giorni dalla data di acquisto. Il presente
certificato deve sempre essere esibito in caso di utilizzo della garanzia.
La garanzia è valida solamente sul territorio italiano. Gli utenti che hanno acquistato i nostri prodotti all’estero dovranno rivolgersi al rivenditore
che ha effettuato la vendita.
La garanzia si limita alla riparazione o sostituzione gratuita dei componenti risultanti difettosi per cause di fabbricazione accertate dalla ditta
Aspira. Non sono coperti da garanzia i prodotti usati in modo non conforme alle indicazioni della Casa o manomessi da personale non autorizzato
Aspira, nonché gli interventi per servizi o verifiche di comodo. Vengono altresì escluse dalla copertura le rottue accidentali intervenute nel
trasporto e i difetti provocati dall’allacciamento a tensione diversa da quella prevista per l’apparecchio, ovvero diversa dal limite stabilito dalle
norme CEI. L’apparecchio dovrà essere imballato attentamente e restituito la nostro Rivenditore. Le spese di trasporto, comprese quelle di
ritorno, sono a carico dell’acquirente. Gli apparecchi viaggiano a rischio e pericolo del mittente.
Questa garanzia è valida unicamente per l’utente finale del prodotto e solo se tutti i dettagli sono correttamente compilati in tutte le loro parti.
In caso di controversia sarà l’unico competente il Foro Giudiziario di Milano.
VALIDA UNICAMENTE PER IL TERRITORIO ITALIANO
QUESTA GARANZIA È DA CONSERVARE E DEVE
ACCOMPAGNARE IL PRODOTTO IN CASO DI RESO
Nome e indirizzo del Rivenditore
Data del reso Data di acquisto
GARANZIA
Fantini Cosmi S.p.A.
Via Dell’Osio, 6 - 20090 Caleppio di Settala, Milano, Italia
2ANNI

Model: ...............................
Code:.................................
Date of purchase:
.............................................
IN CASE OF
COMPLAINTS
RETURN THIS TALLY.
Cause of defect:
.............................................
.............................................
.............................................
.............................................
.............................................
.............................................
.............................................
CONDITIONS OF GUARANTEE
All electrical appliances produced by Aspira are guaranteed by the Company for 2 YEARS against faulty materials or
workmanship. If any part is found to be defective for the above mentioned reasons within the period of the guarantee from
the date of purchase, we or our authorised service agents, will replace or, at our evaluation, repair that part without any
charge of materials or labour or transportation, provided that the appliance has been used only in accordance with the
instructions provided with each appliance and has been not connected to an unsuitable electricity supply, or subject to
misuse, neglect or damage or modified or repaired by any person not authorised by us.
The correct electricity supply voltage is shown on the rating label attached to the appliance.
This guarantee is valid only to the original purchase of the appliance
Should any defect arise in any of our products and a claim under guarantee become necessary, the appliance should be
carefully packaged and returned to your local service agent.
This portion of guarantee should be attached to the appliance.
The guarantee is valid only if all the details are fully and correctly indicated.
THIS GUARANTEE IS NOT EFFECTIVE IN THE EXTRA EUROPEAN COUNTRIES.
THIS GUARANTEE MUST BE ATTACHED TO THE APPLIANCE IN
CASE SHOULD BE RETURNED FOR SERVICING
Name and Address of supplier
Date of return Date of purchase
GUARANTEE
Fantini Cosmi S.p.A.
Via Dell’Osio, 6 - 20090 Caleppio di Settala, Milano, Italia
2YEARS
To be retained
GUARANTEE 2YEARS
Mailing date Name and Address of supplier
Date of purchase
Name Postal Code
Surname Town
Street Country
PLEASE USE BLOCK LETTERS
I have read and understood the terms and conditions of this guarantee
and i authorise the processing of my personal details.
Signature
Fantini Cosmi S.p.A.
Via Dell’Osio, 6 - 20090 Caleppio di Settala, Milano, Italia
To be forwarded within 7 days from the date of purchase
FANTINI COSMI S.p.A.
Via Dell’Osio, 6 - 20090 Caleppio di Settala, Milano, Italia
Tel. +39 02 956821 | Fax +39 02 95307006 | info@aspira.it
www.aspira.it
Table of contents
Languages:
Other Aspira Heater manuals

Aspira
Aspira CH 6000 Series User manual

Aspira
Aspira ECOCOMFORT 2.0 SMART Series User manual

Aspira
Aspira TEPORPLUS User manual

Aspira
Aspira ASPIRCOMFORT H User manual

Aspira
Aspira ASPIRCOMFORT CLASS 620H User manual

Aspira
Aspira TEPORSPLIT User manual
Aspira
Aspira CH 7000 Series User manual
Aspira
Aspira TEPORSPLIT User manual