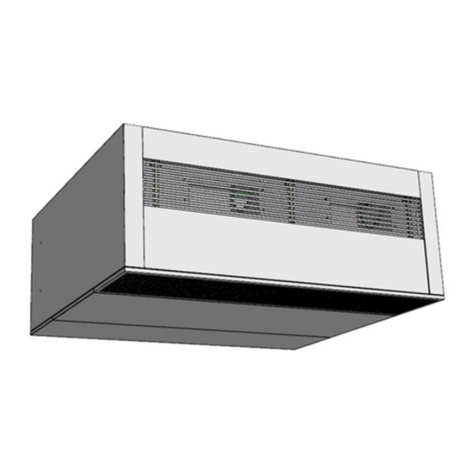
Aspira TEPORSPLIT User manual

TEPORSPLIT
TERMOVENTILATORE
MANUALE D’USO E DI INSTALLAZIONE
FAN HEATER
USER INSTRUCTIONS
PAG. 3
PAG. 8

2
ITALIANO
TEPORSPLIT
LEGGERE ATTENTAMENTE QUESTA GUIDA PRIMA DELL’USO E CONSERVARLA PER USI FUTURI.
CARATTERISTICHE TECNICHE
Termoventilatori elettrici da parete
Modello: TEPORSPLIT
Potenza nominale: 2000W
Tensione nominale: 230V~ 50Hz
• Involucro esterno in ABS ad alta resistenza;
• Riscaldatore ceramico PTC ad alta efficienza, alta velocità di riscaldamento, silenzioso,
inodore, non inquinante;
• 2 potenze di riscaldamento selezionabili 1000 - 2000 W;
• Fusibile termico di sicurezza in caso di sovratemperatura del ceramico e del motore.
Spegnimento automatico in caso di bocchetta d’aria ostruita e ripristino automatico in caso
di disostruzione.
• E’ possibile disabilitare l’elemento scaldante in estate, in modo da utilizzare l’apparecchio
come ventilatore.
1. AVVERTENZE GENERALI
AVVERTENZA!
Leggere attentamente le istruzioni contenute in questo manuale, onde evitare il rischio di
scosse elettriche, incendi e lesioni personali.
• Il riscaldatore deve essere appeso al muro per permettere all’aria di circolare e deve essere
posizionato con cura.
• Non usare il riscaldatore presso combustibili o gas esplosivi. Non coprire la bocchetta d’uscita
dell’aria.
• In caso di cavo di alimentazione danneggiato rivolgersi al costruttore o a un installatore qualificato.
• Il riscaldatore non deve essere posizionato immediatamente sotto la presa di alimentazione. La presa
di alimentazione deve avere il contatto di messa a terra e tensione 220-240V, 50/60Hz. Assicurarsi che
presa e spina siano correttamente collegate.
• Durante la manutenzione o riparazione dell’apparecchio o in caso di assenza dall’abitazione,
assicurarsi di disconnettere la spina.
• Non toccare il riscaldatore con mani umide o con qualsiasi tipo di conduttore elettrico.
• In caso di guasto del motore, spegnere e disconnettere dall’alimentazione l’apparecchio.
• Durante la fase di riscaldamento, per non limitarne l’efficacia non lasciare porte o finestre della
stanza aperte.
• In caso si voglia disconnettere l’apparecchio, premere il tasto OFF. L’apparecchio manterrà la ventola
accesa per 30 secondi finché non uscirà aria fredda. A questo punto l’apparecchio smetterà di
funzionare è sarà possibile disconnetterlo dalla rete elettrica.
• Non installare il termoventilatore in bagno nella zona 0 e zona 1.

3
ITALIANO
TEPORSPLIT
3. INSTALLAZIONE
• Realizzare due fori di fissaggio nel muro a distanza di 2,30 metri dal pavimento. Il diametro dei
fori deve essere dimensionato per tasselli di diametro 6mm. Inseriti i tasselli, posizionare ed
avvitare la staffa come indicato in figura.
• Assicurarsi che la parete sia in grado di sostenere il prodotto.
A T T E N Z I O N E : Al fine di evitare un pericolo causato dal reset involontario della protezione
termica, questo apparecchio non deve essere collegato ad un dispositivo di commutazione
esterno, come un timer, oppure collegato ad un circuito che è regolarmente acceso e
spento dall’utilizzatore.
• La distanza tra l’apparecchio ed il soffitto e
tra l’apparecchio e la parete deve essere di
almeno 30 cm.
• Riferirsi alla figura per le misure di
installazione.
• Nota: quando il prodotto è installato, la
testa della vite è allineata col foro “A” sul
prodotto. Una volta agganciato deve essere
posizionato sul foro “B” per fissarlo. Per
rimuovere il prodotto, riallinearsi al foro “A”.
• Per il telecomando ad infrarossi sono necessarie due batterie AA 1,5V.
• Le batterie devono essere rimosse dall’apparecchio prima che questo venga rottamato.
• Le batterie usate devono essere smaltite in modo appropriato
• Il riscaldatore deve essere installato ad almeno 2.0 m dal pavimento.
• In caso di guasto, rivolgersi al costruttore o a un installatore qualificato.
• Occorre prestare particolare attenzione quando il termoventilatore è situato in zone occupate da
bambini o invalidi.
• I bambini devono essere sorvegliati per assicurare che non giochino con l’apparecchio.
• Questo apparecchio non è destinato ad essere utilizzato da persone (bambini inclusi) con ridotte
capacità fisiche, sensoriali o mentali, o con mancanza di esperienza e conoscenza, a meno che non
siano controllati o istruiti all’uso dell’apparecchio da una persona responsabile della loro sicurezza.
2,30

4
ITALIANO
TEPORSPLIT
3. FUNZIONAMENTO
Assicurarsi che la tensione di rete sia compatibile con quanto dichiarato nelle caratteristiche
tecniche.
1. Inserire la spina nella presa di alimentazione
2. Azionare l’apparecchio tramite i tasti sul pannello di controllo o il telecomando infrarosso
Accendere tramite il tasto d’accensione. L’indicatore segnala la
temperatura ambiente. L’apparecchio è in stand-by (fig. 4.1)
4.2 Premere per ottenere in sequenza: Acceso solo ventilatore,
bassa temperatura, alta temperatura, alta temperatura e deflettore in
funzione, spento (figg. 4.2.1-4.2.4)
4.2.1 Premere per 3 secondi per settare la temperatura (tra 18°c e
45°C). (figg. 4.5.1-4.5.2)
4.2.2 La temperature di default dell’apparecchio è 25°C. Quando la
temperatura ambiente è superiore, il riscaldatore ceramico si spegne.
4.3 Premere per incrementare il timer a passi di mezz’ora, da 0.5H
a 7.5H (4.3.1-4.3.4).
4.4 Il ventilatore continua a girare per 30 secondi dopo lo spegnimento (se
con riscaldatore acceso).
Nota: L’indicazione luminosa corrisponde alla funzionalità attiva.

5
ITALIANO
TEPORSPLIT
4.1
4.3.1
4.2.1
4.3.2
4.2.2
4.3.3
4.2.3
4.3.4
4.2.4
4.2.4

6
ITALIANO
TEPORSPLIT
IMPOSTAZIONE TEMPERATURE:
4.5 Intervalli di temperatura: 18°C – 45°C (figg. 4.5.1-
4.5.2)
4.6 Per esempio, la temperature ambiente è di 20°C (fig.
4.6)
4.7 Premere “TEMP”. Se la temperature impostata è
uguale o minore di quella ambiente, l’apparecchio smette
di riscaldare (4.7.1-4.7.3).
Se la temperatura impostata è 1°C superiore a quella
ambiente, l’apparecchio smette di riscaldare (4.7.4-
4.7.5).
Se la temperatura impostata è 2°C superiore a quella
ambiente, l’apparecchio inizia a riscaldare (4.7.6).
4.8 Premere per accendere l’apparecchio (solo ventilatore) e per spegnerlo (il ventilatore
girerà per 30 secondi dopo lo spegnimento se con riscaldatore acceso)
4.9. Premere “HEAT” per ottenere in sequenza: bassa temperatura, alta temperatura, solo
ventilatore
4.10 Premere “SWING”per accendere e spegnere il deflettore
4.11 Premere “TIMER” per incrementare il timer a passi di mezz’ora, da 0.5H a 7.5H
4.12 Premere “TEMP” per impostare la temperature. Intervallo di temperatura da 18°C a 45°C.
Nota: L’indicazione luminosa corrisponde alla funzionalità attiva
4.5.1 4.5.2 4.6 4.7.1 4.7.2

7
ITALIANO
TEPORSPLIT
4. PULIZIA E MANUTENZIONE
Scollegare sempre il termoventilatore dalla presa di corrente elettrica e lasciarlo raffreddare prima
di pulirlo.
Pulire l’esterno del termoventilatore strofinando con un panno umido e non abrasivo. Lucidare con
un panno asciutto.
Non utilizzare alcun tipo di detergenti, abrasivi o sostanze chimiche che potrebbero danneggiare il
corpo dell’apparecchio. Non far entrare acqua nell’unità.
Prima di riaccenderlo, verificare che la bocchetta d’aria sia l’ibera da ostacoli.
Attenzione: non toccare l’apparecchio e non coprire le bocchette d’aria
4.7.3 4.7.4 4.7.5 4.7.6
5. SMALTIMENTO
Il simbolo del cassonetto barrato riportato sull’apparecchiatura indica che il prodotto alla fine della propria
vita utile deve essere raccolto separatamente dagli altri rifiuti.
L’utente dovrà, pertanto, conferire l’apparecchiatura giunta a fine vita agli idonei centri di raccolta
differenziata dei rifiuti elettronici ed elettrotecnici, oppure riconsegnarla al rivenditore al momento
dell’acquisto di una nuova apparecchiatura di tipo equivalente, in ragione di uno a uno. L’adeguata raccolta
differenziata per l’avvio successivo dell’apparecchiatura dismessa al riciclaggio, al trattamento e allo
smaltimento ambientalmente compatibile contribuisce ad evitare possibili effetti negativi sull’ambiente e
sulla salute e favorisce il riciclo dei materiali di cui è composta l’apparecchiatura. Lo smaltimento abusivo
del prodotto da parte dell’utente comporta l’applicazione delle sanzioni amministrative di cui al D.Lgs. n.
22/1997” (articolo 50 e seguenti del D.Lgs. n. 22/1997).
ATTENZIONE:
Informazione importante per lo smaltimento ecosostenibile dell’apparecchio

8
ENGLISH
TEPORSPLIT
PLEASE READ THIS GUIDANCE CAREFULLY BEFORE USING THIS HEATER AND KEEP WELL THIS
GUIDANCE.
TECHNICAL CHARACTERISTICS
Wall convector heaters
Model: TEPORSPLIT
Rated power: 2000W
Rated voltage: ac230V 50Hz
• Cover in heat-resistant, shock-proof ABS.
• PTC ceramic heater elements, high efficiency heating, quickly heating, noiseless, odor-free
and non-polluting
• 2 power rates 1000 - 2000 W;
• Temperature fuse for fear of overheating and motor overheat protection.
• Automatically turn off when the wind outlet is blocked and turn on again when the sundries
are cleared away
• You could close the heat element in summer; the heater could blow cool wind.
1. SAFETY INSTRUCTIONS
WARNING!
Read these instruction carefully in order to avoid shock hazard, fire or personal damage.
• The heater should be hung on the wall and make the wind outlet down. You must not place it
precipitantly or tipsily
• Please do not use the heater in the place where full of combustible or explosive gas. Don’t cover the
wind outlet.
• If the supply cord is damaged contact the manufacturer or a qualified installer.
• The heater must not be located immediately below a socket-outlet. The electrical-outlet must be
equipped with installment of earth whose capacity should be 220-240V, 50/60Hz.Make sure the socket
and plug contact well.
• If nobody is in or you are repairing the heater, please put off the plug-in.
• Please don’t touch the heater by the wet hand or other conductor.
• Motor is out of order, please make it stop immediately.
• During using the heater, please do not open the door or window continually otherwise it will influence
the heating effect.
• If want to close the machine, press the on/off switch to off, then the machine will keep the fan working
30 seconds until it blowing our cool wind, then the machine will stop working, and you may put off
the plug-in.
• Do not use this heater in bathroom.
• Infrared controller, please use 2 battery AA 1,5V.

9
ENGLISH
TEPORSPLIT
3. INSTALLATION
• Drill two holes in wall and have a distance of above 2.0m from the ground, the diameter of the
hole just contained the expansion bolt, which the diameter is 6mm. After tucked the expansion
bolt, fixed pothook on the expansion bolt with screw. See the drawing as following for a better
understanding. (see the picture)
• Make sure the wall is able to support the product.
A T T E N T I O N : In order to avoid a hazard due to inadvertent resetting of the thermal cut-out this
appliance must not be supplied through an external switching device such as a timer or
connected to a circuit that is regularly switched on and off by the utility
• The distance between the product and the
ceiling (and the side) should be >30cm.
• Product installation size see Figure
• Note: when the product is installed, The hook
(screw) is aligned with the hole “A” on the
product. After hanging, must be moved to the
“B”, in order to firmly fix. When to remove the
product, must be moved from “B” to “A” then
take out.
• The battery must be removed from the appliance before it is scrapped
• The battery is to be disposed of safely
• The heater must be installed at least 2,0 m above the floor.
• If the product needs repair, please contact the manufacturer or a qualified installer.
• The heater must not be located immediately below a socket-outlet.
• Particular care should be taken when the heater is situated in areas occupied by children or invalids.
• Young children should be supervised to ensure that they do not play with the appliance.
• This appliance is not intended for use by person (including children) with reduced physical, sensory or
mental capabilities, or lack of experience and knowledge, unless they have been given supervision or
instruction concerning use of the appliance by a person responsible for their safety.

10
ENGLISH
TEPORSPLIT
3. OPERATION
Please make sure the capacity should be as indicate in TECHNICAL CHARACTERISTICS
1. Put the plug in the wall socket.
2. Please operate the machine according the control keys on the control panel or the infrared
controller.
Turn on the power switch, LED display Environment temperature, the
appliance is standby; see picture 4.1
4.2 Press as follows: ON(only Fan working), Low heat, High heat,
High heat and Swing, OFF, see picture 4.2.1-4.2.4.
4.2.1 1Press over 3S, then can set temperature. Temperature range
18-45°C, see picture4.5.1-4.5.2.
4.2.2The machine default set temperature is 25°C, when Environment
temperature over 25°C,heating function will not working.
4.3 Press to set timer as follows: 0.5H,1H,1.5H.....7.5H; see picture
4.3.1-4.3.4.
4.4 Fan keep working for 30 seconds when shutdown the appliance(after
heating)
Note: The indicator lights corresponding function is working

11
ENGLISH
TEPORSPLIT
4.1
4.3.1
4.2.1
4.3.2
4.2.2
4.3.3
4.2.3
4.3.4
4.2.4
4.2.4

12
ENGLISH
TEPORSPLIT
TEMPERATURE ADJUST:
4.5 Temperature range :18-45 °C, see picture 4.5.1-4.5.2
4.6 For example, Environment temperature is 20, See
picture 4.6
4.7 Press “TEMP”
Set temperature is equal to or lower than Environment
temperature, appliance will stop heating. See picture
4.7.1-4.7.3.
Set temperature is 1°C higher than Environment
temperature, appliance will stop heating. See figure
4.7.4-4.7.5.
Set temperature is higher or equal to Environment
temperature+2°C, appliance will start heating. See
picture 4.7.6.
4.8 Press as follows: ON(only Fan working), OFF(Fan keep working for 30 seconds when
shutdown the appliance after heating)
4.9. Press “HEAT” Low heat, High heat, FAN working.
4.10 Press “SWING” as follows:, SWING ON, SWING OFF
4.11 Press “TIMER” to set timer as follows: 0.5H,1H,1.5H.....7.5H;
4.12 Press “TEMP”to set temperature, Temperature range :18-45 °C
Note: The indicator lights corresponding function is working
4.5.1 4.5.2 4.6 4.7.1 4.7.2

13
ENGLISH
TEPORSPLIT
4. CLEANING AND STORING THE HEATER
Always unplug the heater from the wall socket and allow it to cool down before cleaning.
Clean the outside of the heater by wiping with a damp cloth and buff with a dry cloth.
Do not use any detergents or abrasives and do not allow any water to enter the heater.
Before use it again, please check it and make sure the wind outlet have no sundries
Warning: Don’t touch the working machine and don’t cover the wind outlet and inlet.
4.7.3 4.7.4 4.7.5 4.7.6
5. DISPOSAL
WARNING:
Important information concerning the environment friendly disposal of the appliance
This product conforms to EU Directive 2002/96/EC. The symbol of the barred waste bin indicates
that, at the end of its useful life, the product has to be collected separately from the domestic waste.
The user will have to take the product to a collection centre for waste electrical and electronic
equipment, or return it to a retailer on purchase of a replacement. Failure to do so may incur the
penalties established by laws governing waste disposal.
Proper differential collection and the subsequent recycling, processing and environmentally
compatible disposal of waste equipments avoids unnecessary damage to the environment and
possible related health risk and promotes also recycling of the materials used in the appliance.

14
ENGLISH
TEPORSPLIT

15
ITALIANO
TEPORSPLIT

FANTINI COSMI S.p.A.
Via Dell’Osio, 6 - 20090 Caleppio di Settala, Milano, Italia
SUPPORTO TECNICO
www.aspira.it
Other manuals for TEPORSPLIT
1
Table of contents
Languages:
Other Aspira Heater manuals

Aspira
Aspira TEPORSPLIT User manual

Aspira
Aspira ECOCOMFORT 2.0 SMART Series User manual

Aspira
Aspira KALOREASY User manual

Aspira
Aspira CH 6000 Series User manual
Aspira
Aspira ASPIRCOMFORT H User manual
Aspira
Aspira CH 7000 Series User manual

Aspira
Aspira ASPIRCOMFORT CLASS 620H User manual
Aspira
Aspira TEPORPLUS User manual
Popular Heater manuals by other brands

Dimplex
Dimplex HAW1000N Installation and operating instructions

Webasto
Webasto Air Top 2000 ST B installation instructions

ThermoUp
ThermoUp WALL operating manual

OFFCAR
OFFCAR 700s Series Instructions use and maintenance handbook

Trisa
Trisa 9333.42 Instructions for use

Klarstein
Klarstein HEATPAL MARBLE manual